manuals.online logo
Brands
  1. Home
  2. •
  3. Brands
  4. •
  5. Parker
  6. •
  7. Control Unit
  8. •
  9. Parker S5A-DN Operating and installation instructions

Parker S5A-DN Operating and installation instructions

1
Refrigerating Specialties Division
SOLENOID VALVE
Type S5A-DN (S5AE-DN)
Port Size 32-75mm (1¼”-3”)
FOR AMMONIA, R12, R22, R502
AND OTHER COMMON REFRIGERANTS
FEATURES
• Standard Coil Housing Meets NEMA 3R and
NEMA 4 - RainTight
• Coil Housing Surpasses NEMA Salt SprayTest
• Plunger-Needle Assembly Same for S4A, S5A,
S6N, S6A, S8F
• Replaceable Piston Plug Assembly
• Molded Class “B” Coil Construction
• Pilot Light Available
• Stainless Steel Needle
• Manual Opening Stem
• DesignPressure(PS):28bar(406PSIG)
• ComplieswithPressureEquipmentDirective97/23/EC
BULLETIN DN30-93B
Type S5A-DN
January 2007
Installation and Service Information
ISO 9001 CERTIFIED
Description
This heavy duty solenoid valve is suitable for Ammonia, R-12, R-22,
and R-502, other refrigerants, certain oils and other fluids approved
for use in refrigeration.The S5A is a pilot operated semi-steel bodied
valve. The valve may be opened by means of the manual opening
stem for servicing or in case of electrical power failure.
The Type S5A Solenoid Valve is furnished with FPT: Internal NPT
(U.S. Standard Taper Pipe Thread), Socket Weld, Weld Neck or ODS
(solders over copper tubing of given diameter) connections.The valve
may be easily removed from between the flanges for servicing.
It is advisable to install a strainer upstream of each valve to prevent
entrance of foreign material into the valves and the rest of the system.
Refrigerating Specialtiesstrainers areavailableto close-couple to valve
inlets.
Purpose
Type S5A is recommended for use in refrigerant liquid or suction lines.
It is not recommended for hot gas lines and other applications where
high pressure drops will exist when the valve is open.
Principles of Operation
The Type S5A is a pilot operated solenoid. Operation is as follows:
The valve, in its closed position, with the solenoid coil de-energized
and the plunger-needle in its seated position, is shown in Figure 1.
Before the valve is opened, the pressure above the piston-main valve
assembly is equalized through the bleed hole and is the same as the
inlet pressure. Electrical energization of the solenoid coil forms a
magnetic field, pulling up the plunger which strikes the needle, lifting
it off its seat.This permits the refrigerant trapped above the piston-main
valve assembly to flow through the pilot and through Port N to the
downstream side of the valve. The pressure above the piston-main
valve is reduced and the higher inlet pressure against the underside
of the piston-main valve assembly forces it upward.This puts the valve
in the open position permitting flow of the refrigerant. The minimum
pressure drop to hold the valve wide open is 0.07 bar (1.0 PSI).
De-energization of the solenoid coil permits the spring-assisted needle
to drop back into its seat, stopping the flow through the pilot port, and
the pressure above and below the piston-main valve is equalized.The
weight of the piston-main valve then causes it to drop to its seat,
stopping the flow of the refrigerant. The pressure difference across
the valve, acting upon the area of the valve seat, holds the piston-main
valve in a tightly closed position.
Manual Opening Stem (See Fig. 1)
The manual opening stem on the Type S5A is for the purpose of
opening the valve without energizing the solenoid coil. For access to
the stem the seal cap on the bottom of the valve must be removed.
This must be done with caution as refrigerant may have been trapped
inside the seal cap. Manual opening is accomplished by turning the
stem clockwise until only the flats on the end of the stem protrude
from the packing nut. To reset for automatic operation turn the stem
counterclockwise as far as it goes.
Fig. 1
310225
Refrigerating Specialties Division 2
DIMENSIONS
PORT SIZE
32mm 40 & 50mm 65mm 75mm
Dimension (1-1/4”) (15/8 & 2”) (2-1/2”) (3”)
A mm 348 411 437 511
inch 13.7 16.2 17.2 20.1
B mm 117 127 137 198
inch 4.6 5.0 5.4 7.8
C mm 203 251 251 311
inch 8.0 9.9 9.9 12.2
D mm 256 307 331 289
(FPT,SW) inch 10.1 12.1 13.0 15.3
1-1/4 1-1/2 1-1/2 2
E mm 300 304 364 371 401 478
(WN) inch 11.8 12.0 14.3 14.6 15.8 18.8
1-3/8 1-5/8 2-1/8 1-5/8 2-1/8 2-5/8 2-5/8 3-1/8 3-1/8 3-5/8
F mm 269 279 304 358 338 358 348 389 414 432
(ODS) inch 10.6 11.0 12.0 14.1 13.3 14.1 13.7 15.3 16.3 17.0
G mm 178 251 314 314
inch 7.0 9.9 12.4 12.4
H mm 117 140 159 176
inch 4.6 5.5 6.2 7.0
J mm 231 284 300 312
inch 9.1 11.2 11.8 12.3
1-3/8 1-5/8 2-1/8 1-5/8 2-1/8 2-5/8 2-5/8 3-1/8 3-1/8 3-5/8
N mm2528 332833 38 38 43 43 48
(ODS) inch 1.0 1.1 1.3 1.1 1.3 1.5 1.5 1.7 1.7 1.9
1-1/4 1-1/2 1-1/2 2
Pmm1515 1515 25 29
(SW) inch 0.6 0.6 0.6 0.6 1.0 1.1 Allow 100mm (4”) above valve for removal of coil housing assembly.
Allow 25mm (1”) below valve to operate manual opening stem.
J
A
B
C
D
SW
FPT
G
N
F
H
MAX.
P
F.P.T.
OR S.W.
O.D.S. SOLDER
FLANGES
WELD NECK
FLANGES
E
BETWEEN
TUBE
STOPS
ADD FOR
STRAINER
S5A- DN
PRESSURE BEARING COMPONENTS
Size COMPONENT DESCRIPTION MATERIAL
1-1/4" TO 3" BODY, 1-1/4 S5A DN DUCTILE IRON GGG 40.3
32 mm TO 75 mm SEAL CAP,A4A/S4A #380 ASTMSC84B ALUMINUM
ADAPTER, 1-1/4 S5A DN DUCTILE IRON GGG 40.3
SLEEVE, SOLENOID TUBE AISI 1117 CRS BARSTOCK
TUBE SOLENOID, S6 SS TUBING 304
3
Refrigerating Specialties Division
3
2
Item Description
1 Knob
2 O-Ring
3 Coil Asm
7 Tube Assembly
8 Gasket
9 Plunge Needle Assembly
10 Seat Assembly
11 Adapter Assembly
12 Gasket
15 Bolt
22 Washer, Flat
23 Packing,Stem
24 Nut,Packing
25 Gasket
27 Seal Cap
28 Gasket
31 Piston Plug
32 Manual Opening Stem
For replacement parts and prices, consult
PARTS KITS LIST PRICE SCHEDULE INDUSTRIAL
AND FLO-CON (PK)
4
Parker Hannifin Corporation • Refrigerating Specialties Division
2445 South 25th Avenue • Broadview, IL 60155-3891
Telephone: (708) 681-6300 • Fax (708) 681-6306 USA
Installation
Protect inside of valve from dirt, chips and moisture during installation.
Mount only in horizontal pipe line with solenoid coil at the top; this valve
will work properly only in this position. In a liquid line the Solenoid Valve
should be near the expansion valve inlet. It is advisable to install the S5A
close coupled companion strainer ahead of the valve for protection against
dirt and chips.
The S5A solenoid valve must be installed with the arrow on the valve
body in the direction of flow through the valve. If the valve is backwards,
the flow will not be stopped when the valve is electrically de-energized.
Like all Solenoid Valves, the S5A can stop flow only in the direction from
normal inlet to normal outlet (as shown by the arrow on the body).If reversal
of pressure occurs in the system so the outlet pressure exceeds the inlet
pressure the piston will be blown away from its seat and reverse flow will
occur. If a system has this type of pressure reversal (as encountered
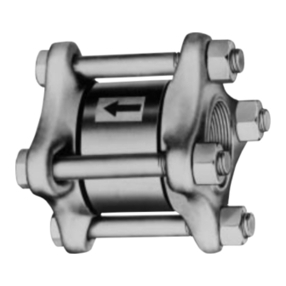
during hot gas defrost with liquid recirculation systems), a check valve
such as Refrigerating Specialties Division Type CK4A in series with the
solenoid valve will prevent flow reversal. (CK4A must be installed
downstream to avoid trapping liquid.)
Electrical
The Refrigerating Specialties Division molded water resistant Class “B”
solenoid coil is designed for long life and powerful opening force. The
standard coil housing meets NEMA 3R and 4 requirements. This sealed
construction can withstand direct contact with moisture and ice. The coil
housing far exceeds the requirements of NEMA Standard ICS, 1-110.57
salt spray test for rust resistance.
By definition, Class “B” coil construction will permit coil temperatures, as
measured by resistance method, as high as 130°C (266°F). Final coil
temperatures are a function of both fluid and ambient temperatures.The
higher fluid temperatures require lower ambient temperatures so the
maximum coil temperature is not exceeded. Conversely, low fluid
temperatures permit higher ambient temperatures.
The molded Class “B” coil is available from stock with most standard
voltages. However, coils are available for other voltages and frequencies,
as well as for direct current. Coils are also available as transformer type
with a 6 volt secondary winding for use with the Refrigerating Specialties
Division Pilot Light Assembly (see current copy of Bulletin 60-10, “Pilot
Light Assembly and Solenoid Transformer Coil”).
The solenoid coil must be connected to electrical lines with volts and
Hertz same as stamped on coil.The supply circuits must be properly sized
to give adequate voltage at the coil leads even when other electrical
equipment is operating. The coil is designed to operate with line voltage
from 85% to 110% of rated coil voltage. Operating with a line voltage
above or below these limits may result in coil burnout. Also, operating
with line voltage below the limit will definitely result in lowering the valve
opening pressure differential.Power consumption during normal operation
will be 33 watts or less.
Inrush and running current is listed below:Inrush Running Fuse
Standard Coil Current Current Size
Volts/Hertz (Amps) (Amps) (Amps)
120/60 (Blue leads) 1.18 0.46 1
208/60 (Blue & Red leads) 0.63 0.26 1
240/60 (Red leads) 0.60 0.23 1
440/60 (Yellow & Red leads) 0.39 0.13 1
115/50 (Yellow & Blue leads) 1.22 0.21 1
230/50 (Yellow leads) 0.65 0.26 1
Other (Consult Factory)
On transformer coil the 6 volt leads are always black.
Service Pointers
The S5A Solenoid Valve and Strainer are easily removable for cleaning or
repairing. To remove valve and strainer, merely unscrew the flange bolts
and spread the flanges slightly apart.
1. Failure to Open: (a) Coil is of incorrectly high voltage, See “Electrical.”
Check voltage printed on the coil. (b) Line voltage is abnormally low. See
“Electrical.” Check line voltage at coil leads with a voltmeter. (c) Failure to
electrically energize. Check control circuit. (d) Pressure difference across
valve is too high.The S5A will open against a maximum pressure difference
across the valve of 20.7 Bar (300 psig). (e) Solenoid Coil is burned out.
See “Electrical,” and replace with proper coil.(f) Plunger/Needle Assembly
is sticking.To disassemble the valve for inspection of internal parts (after
pumping out the system as required): disconnect power source to #4
Solenoid Coil, remove #7 Tube Assembly, lift out #9 Plunger Assembly,
then remove #11 Adapter Assembly and #31 piston plug. Remove every
trace of dirt from the piston and cylinder using fine emery cloth to remove
burrs if necessary. Thoroughly clean all parts and reassemble using a
light film of refrigeration oil on the Piston.
2. Failure to Close: (a) Electrical control circuit is not opening properly.
Check wiring and controls. (b) There are chips or dirt on the Pilot Seat or
the Main Valve Seat, preventing proper seating. Disassemble and clean
Valve as outlined in (1f) above. (c) Main Valve Seat, Pilot Seat, or Valve
Needle may be worn or damaged and therefore leaking.Disassemble and
cleanValve as outlined in (1f) above. If any of these parts need replacing,
it is advisable to replace using the proper replacement kit. (d) #31 Piston
is sticking. See (1f) above. (e) #32 Manual Opening Stem is turned all or
partly in holding #31 Piston Plug Assembly open and permitting flow
through the valve. (f) #5 Coil Housing Screw (made of non-magnetic
stainless steel) has been replaced with a screw made of magnetic material
and residual magnetism is holding #9 Plunger Needle Assembly in the
open position. Consequently, the Main Valve is not closing. Replace with
screw of correct material.
3. Leakage Through Valve: See (2) above.
4. Overheating: The Solenoid Coil is designed to operate hot and is
constructed of high temperature materials accordingly. Unless troubled
with actual Coil burnouts, high coil temperature should be ignored.
Persistent burnouts indicate improper line or coil voltage.See (1e) above.
Warranty
All Refrigerating Specialties Products are warranted against defect in
workmanship and materials for a period of one year from date of shipment
from factory. This warranty is in force only when products are properly
installed, field assembled, maintained and operated in use and service as
specifically stated in Refrigerating Specialties Catalogs or Bulletins for
normal refrigeration applications, unless otherwise approved in writing by
Refrigerating Specialties Division. Defective products, or parts thereof,
returned to the factory with transportation charges prepaid and found to
be defective by factory inspection will be replaced or repaired at
Refrigerating Specialties option, free of charge, F.O.B. factory. Warranty
does not cover products which have been altered or repaired in the field,
damaged in transit, or have suffered accidents, misuse, or abuse.Products
disabled by dirt or other foreign substances will not be considered defective.
THE EXPRESS WARRANTY SET FORTH ABOVE CONSTITUTES THE
ONLY WARRANTY APPLICABLE TO REFRIGERATING SPECIALTIES
PRODUCTS, AND IS IN LIEU OF ALL OTHER WARRANTIES.EXPRESS
OR IMPLIED, WRITTEN OR ORAL, INCLUDING ANY WARRANTY OF
MERCHANTABILITY, OR FITNESS FOR A PARTICULAR PURPOSE. No
employee,agent, dealerorother personis authorized togiveany warranties
on behalf of Refrigerating Specialties, nor to assume, for Refrigerating
Specialties, any other liability in connection with any of its products.
Safe Operation
(see also Bulletin RSBCV)
People doing any work on a refrigeration system must be qualified and
completely familiar with the system and the Refrigerating Specialties
Division valves involved, or all other precautions will be meaningless.This
includes reading and understanding pertinent Refrigerating Specialties
Division Product Bulletins, and Safety Bulletin RSBCV prior to installation
or servicing work.
Where cold refrigerant liquid lines are used, it is necessary that certain
precautions be taken to avoid damage which could result from liquid
expansion.Temperature increase in a piping section full of solid liquid will
cause high pressure due to the expanding liquid which can possibly rupture
a gasket, pipe or valve. All hand valves isolating such sections should be
marked, warning against accidental closing, and must not be closed until
the liquid is removed. Check valves must never be installed upstream of
solenoid valves, or regulators with electric shut-off, nor should hand valves
upstream of solenoid valves or downstream of check valves be closed
until the liquid has been removed. It is advisable to properly install relief
devices in any section where liquid expansion could take place.
Avoid all piping or control arrangements which might produce thermal or
pressure shock.
For the protection of people and products, all refrigerant must be removed
from the section to be worked on before a valve, strainer, or other device
is opened or removed.
Flanges with ODS connections are not suitable for ammonia service.
This manual suits for next models

4

Other Parker Control Unit manuals

Parker TDC Series User manual

Parker

Parker TDC Series User manual

Parker B5 User manual

Parker

Parker B5 User manual

Parker 20K User manual

Parker

Parker 20K User manual

Parker GC Series User guide

Parker

Parker GC Series User guide

Parker CM0504 User manual

Parker

Parker CM0504 User manual

Parker PA Series Assembly instructions

Parker

Parker PA Series Assembly instructions

Parker Sporlan B5D Series User guide

Parker

Parker Sporlan B5D Series User guide

Parker SS1500 Series Installation and maintenance instructions

Parker

Parker SS1500 Series Installation and maintenance instructions

Parker Vansco VMM1210 User manual

Parker

Parker Vansco VMM1210 User manual

Parker HASV08R User manual

Parker

Parker HASV08R User manual

Parker CK-6D Guide

Parker

Parker CK-6D Guide

Parker PSSTACM12A Installation and maintenance instructions

Parker

Parker PSSTACM12A Installation and maintenance instructions

Parker S5A Guide

Parker

Parker S5A Guide

Parker P6 Technical specifications

Parker

Parker P6 Technical specifications

Parker TPQ Series User manual

Parker

Parker TPQ Series User manual

Parker PID00A-40 Series User manual

Parker

Parker PID00A-40 Series User manual

Parker DN80 User manual

Parker

Parker DN80 User manual

Parker S6N-DN User manual

Parker

Parker S6N-DN User manual

Parker S7A Service manual

Parker

Parker S7A Service manual

Parker TDP Series User manual

Parker

Parker TDP Series User manual

Parker S4AD User manual

Parker

Parker S4AD User manual

Parker TPQ Series User manual

Parker

Parker TPQ Series User manual

Parker SC Series Reference manual

Parker

Parker SC Series Reference manual

Parker Sporlan SD-114 User guide

Parker

Parker Sporlan SD-114 User guide

Popular Control Unit manuals by other brands

Sanhua SBV Series instructions

Sanhua

Sanhua SBV Series instructions

Watlow RMA PLUS user guide

Watlow

Watlow RMA PLUS user guide

CEBEK R-50 manual

CEBEK

CEBEK R-50 manual

Omnitron iConverter TM3 quick start guide

Omnitron

Omnitron iConverter TM3 quick start guide

ICMA TAS001 manual

ICMA

ICMA TAS001 manual

handtmann 33501 manual

handtmann

handtmann 33501 manual

Telit Wireless Solutions LE910C1-NA Hardware user's guide

Telit Wireless Solutions

Telit Wireless Solutions LE910C1-NA Hardware user's guide

Texas Instruments INA260 user guide

Texas Instruments

Texas Instruments INA260 user guide

Carrier Infinity SYSTXCCSAM01 installation instructions

Carrier

Carrier Infinity SYSTXCCSAM01 installation instructions

Sawo SAU-B-V2 manual

Sawo

Sawo SAU-B-V2 manual

Spirax Sarco 25P Installation and maintenance instructions

Spirax Sarco

Spirax Sarco 25P Installation and maintenance instructions

Sony HDCU-950 Installation and maintenance manual

Sony

Sony HDCU-950 Installation and maintenance manual

DEI INTEGRATION MANUAL Operation manual

DEI

DEI INTEGRATION MANUAL Operation manual

Honeywell VR8405 manual

Honeywell

Honeywell VR8405 manual

Cisco CSS 11500 Reference

Cisco

Cisco CSS 11500 Reference

MSH BRAIN FLYBARLESS instruction manual

MSH

MSH BRAIN FLYBARLESS instruction manual

Aumuller M-COM Click Assembly and commissioning instructions

Aumuller

Aumuller M-COM Click Assembly and commissioning instructions

HF HF-LPC3X0 Series user manual

HF

HF HF-LPC3X0 Series user manual

manuals.online logo
manuals.online logoBrands
  • About & Mission
  • Contact us
  • Privacy Policy
  • Terms and Conditions

Copyright 2025 Manuals.Online. All Rights Reserved.