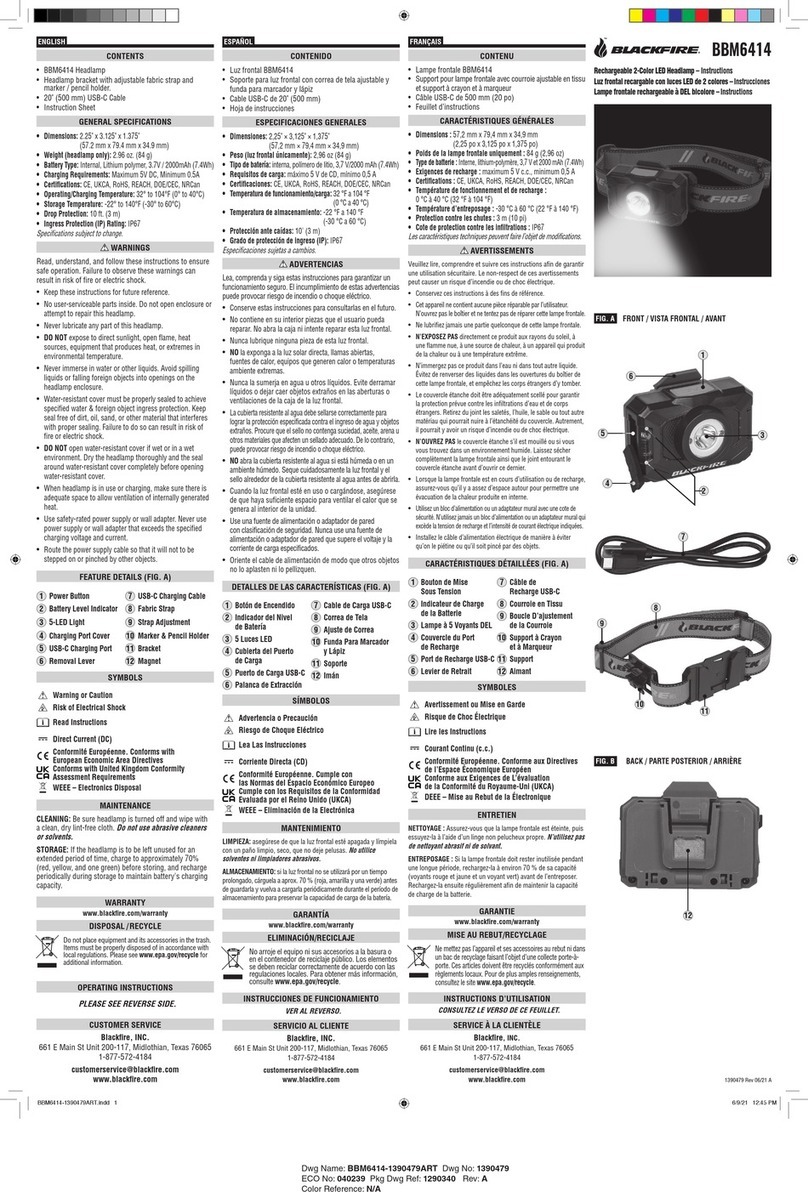
Petzl UNIVERSAL 5 User manual

1Notice DUOLED 5-8 E69-E71 / ref. : E60600-H (041203)
made in France
INDIVIDUAL FUNCTIONING TEST
3 YEAR GUARANTEE
DUO LED 5
DUO LED 8
1
2
3
4
halogen
1A - Lock
1B - Unlock
LED
Zoom
halogen
7
8
9
6
+ 60°C maxi
+ 146°F maxi
(EN) Storage
(FR) Stockage
(DE) Lagerung
(IT) Conservazione
(ES) Almacenamiento
(EN) Temperature
(FR)Température
(DE) Temperatur
(IT) Temperatura
(ES) Temperatura
(EN) Drying
(FR) Séchage
(DE) Trocknen
(IT) Asciugamento
(ES) Secado
E71
E69
4 x LR6
200 g
+ 100 g
= 300 g
-
5 m
water proof
IP X8
5
4 x LR6 (AA) ACCU DUO
Rechargeable
battery
E65100 2
(option)

2Notice DUOLED 5-8 E69-E71 / ref. : E60600-H (041203)
FR0500 BLI
Halogen bulb
Ampoule halogène 6 V
MODU'LED5
DUO
E60220
E60100
Glass / Vitre
E60150
Reflector / Réflecteur
E60200
Flexible bezel / Bague chenille
EO4999
E60650
Elastic
Battery box
Elastique
Tiroir piles
E60655
Battery box latches
Fermoirs tiroir piles
E60750 Maintenance kit (8 doses of silicone grease)
Kit entretien (8 doses de graisse silicone)
(EN) Spare parts
(FR) Pièces de rechange
(DE) Ersatzteile
(IT) Pezzi di ricambio
(ES) Piezas de recambio
MODU'LED8
DUO
E60900
Attention, la graisse
à base de silicone
peut causer une
irritation des yeux.
En cas de contact
avec les yeux, rincer
à l’eau pendant
15 mn et consulter
un médecin. Mettre
hors de portée des
enfants.
Atención, la grasa a
base de silicona
puede causar una
irritación en los
ojos. En caso de
contacto con los
ojos, enjuáguelos
con agua durante
15 minutos y
consulte a un
médico. Manténgalo
lejos del alcance de
los niños.
Achtung! Fett auf
Silikonbasis kann
Augenreizungen
hervorrufen. Bei
Augenkontakt
15 min mit Wasser
ausspülen und
einen Arzt
aufsuchen.
Außerhalb der
Reichweite von
Kindern
aufbewahren.
Attenzione, il grasso
a base di silicone
può causare
irritazione agli
occhi. In caso di
contatto con gli
occhi, sciacquare
bene con acqua per
15 minuti e
consultare un
medico. Tenere
fuori dalla portata
dei bambini.
Warning, the
silicone-based
grease may cause
irritation of the
eyes. In case of
contact with the
eyes, rinse with
water for
15 minutes, and
consult a doctor.
Keep out of the
reach of children.
(EN) Car charger
(delivered without rechargeable battery)
FR) Chargeur voiture
(livré sans accumulateur)
(DE) Autoladekabel
(geliefert ohne auflabare Batterie)
(IT) Caricatore auto
(consegnato senza acumulatore)
(ES) Cargator coche
(enviado sin acumulador)
E65200 2
Europe : 100/240 V~
50/60 Hz
(EN) DUO mains charger
Time for complete recharge: 3 h 30
(FR) Chargeur secteur DUO
Durée de la recharge complète : 3 h 30
(DE) DUO Netzladegerät
Zeit für vollständiges Aufladen : 3 St 30
(IT) DUO caricatore rete
Durata della ricarica completa : 3 O 30
(ES) DUO cargador red
Duración de la carga completa : 3 O 30
(EN) DUO rechargeable battery 2700 mAh
(must be charged before first use)
(FR) Accumulateur DUO 2700 mAh
(doit être chargé avant la première utilisation)
(DE) DUO Aufladbare Batterie 2700 mAh
(muß vor der ersten Verwendung
aufgeladen werden)
(IT) Accumulatore DUO 2700 mAh
(deve essere caricato prima della messa
in funzione)
(ES) Acumulator DUO 2700 mAh
(debe cargarse antes de la primera
utilizacion) E65100 2
Options
E65300 2
12 V
Halogen
Halogen
5 LED
8 LED
DUO LED 5
DUO LED 8
5 m 15 m 20 m10 m 30 m 50 m 100 m LR6 ACCU DUO
2700mAh
OPTIMALMAXIMALECONOMIC
65 h 90 h
5 h 50 h
15 h 55 h
4 h 30
160 h
4 h 30
(b)(a)
(b)(a)
(a) (b)
(b)(a)
(b)(a)
(a) (b)
44 h 59 h
7 h 17 h
15 h 32 h
5 h 30
100 h
5 h 30
ON
ON
ON
ON
ON
OFF
OFF
ON
test 20
0
C
100 m
100 m
20 m
15 m
17 m
8 m
1
2
3
(a)
(b)
(EN) Regulated LED
Constant light
(FR) LED régulé
Eclairage constant
(DE) LED mit Helligkeitsregelung
Gleichbleibende Leuchtstärke
(IT) LED con regolazione
Luce costante
(ES) LED regulado
Luz constante
(EN) Non-regulated LED
(FR) LED non régulé
(DE) LED ohne Helligkeitsregelung
(IT) LED senza regolazione
(ES) LED no regulado

3Notice DUOLED 5-8 E69-E71 / ref. : E60600-H (041203)
(EN) ENGLISH
The DUO headlamps conform to the requirements
of the 89/336/CEE directive on electromagnetic
compatibility
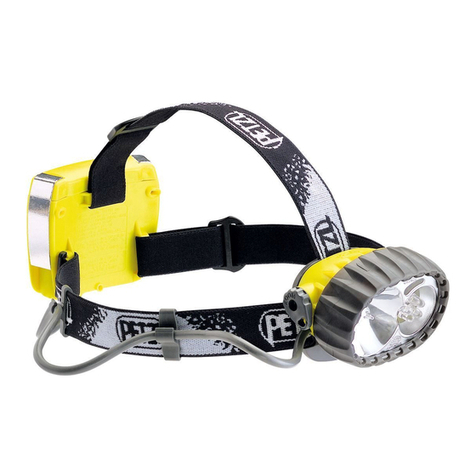
The DUO lamps are ideal for use in wet
environments, but are not designed for prolonged
submersion (i.e. diving).
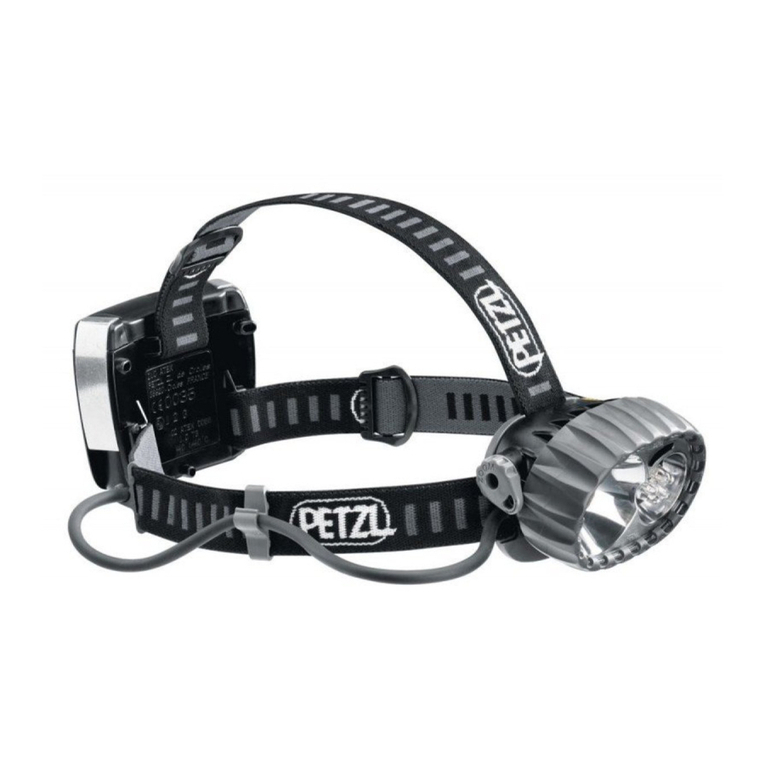
DUO LED 5
Waterproof with dual light source: focusable
halogen bulb and an unregulated 5 LED module.
DUO LED 8
Waterproof with dual light source: focusable
halogen bulb and a regulated 8 LED module.
Switching on, switching off, selecting
and focusing
Move the switch up to select the powerful halogen
beam - high energy consumption (2).
Move the switch down to select the LEDs - low
energy consumption (3).
The zoom knob allows you to adjust the halogen
beam as desired: turn it down for a narrow
spotlight,
or up for a wider beam (4).
The DUO allows you to optimize the power and
duration of the lighting according to your needs.
Simultaneous use of both light sources is not
possible.
DUO LED 5
The 5 LED light source is unregulated, offering one
very economical lighting level. The light gradually
diminishes in brightness as the batteries are
depleted.
DUO LED 8
The 8 LED module is electronically regulated,
maintaining a constant lighting level until the
batteries are nearly spent.
It also offers 3 different lighting levels:
- OPTIMUM: best balance between power and light
duration.
- MAXIMUM: maximum power.
- ECONOMICAL: long light duration.
You choose the lighting level best suited to your
activity.
Move the switch down (on).
The light always starts at the OPTIMUM level.
To select the next lighting level (MAXIMUM), turn
the switch off, then immediately back on.
Consecutive off-on movements of the switch will
cycle the light through levels 2 and 3, then back
to level 1 again.
If the movement of the switch is not quick enough,
the lamp will light up at level 1.
When the batteries are nearly spent, the light
automatically switches to Reserve Power Mode,
providing low-level lighting for an extended period
of time.
Warning
The DUO LED 8 may interfere with the functioning
of an avalanche beacon. This can happen only when
the 8 LED module is turned on, and the lamp is near
a beacon in receive (search) mode.
In case of interference (indicated by static noise
from the beacon), move the beacon away from the
lamp until the noise stops, or switch off the 8 LED
module and switch on the halogen bulb.
The locking system
Remember to lock the switch during transportation
and storage by pressing the red button (1A).
To unlock the switch, press on the opposite end
of the red button (1B). If your headlamp is left
switched on in a pack (or other closed space), the
heat emitted by the halogen bulb can damage the
reflector.
Batteries
To open the battery case, unlock the two clips (5).
Use alkaline batteries. Do not mix different brands
of batteries, or new batteries with used batteries.
Respect the polarity of the batteries when installing
them in the lamp. If this is not done, explosions
may result due to gaseous emissions from leaking
batteries.
WARNING: Defective or fully discharged batteries,
or water in the battery case can damage the
headlamp (oxidation of the contacts…).
The life of alkaline batteries is considerably reduced
in low temperatures. In cold environments or when
the batteries are low, the LEDs will give better light
than the halogen bulb.
WARNING: never remove the gasket from the
battery case lid. Take care to keep it clean, using
water and a cotton swab.
After each cleaning, lubricate
the gasket with silicone grease.
Precaution: for prolonged storage, remove the
batteries
and leave the battery case open.
Changing a bulb or
LED module
Open the head piece using your left hand to
unscrew the bezel (6) and remove it completely.
If the bezel is jammed, try a penetrating lubricant or
heat the bezel with a hair dryer.
Halogen bulb: unscrew the old bulb and screw the
new one in tightly.
LED module: pull the unit straight out (it’s OK to
touch the LEDs). Install the new unit, being careful
not to bend the contacts or LEDs. Check the
alignment of the LEDs. Test the light by operating
the switch. If the module does not light, remove it
and re-install it
with the contacts reversed
(give it a half twist)
To close the head piece:
- position the reflector, lens,
and bezel correctly over the head piece (7),
- using your right hand, screw the bezel onto the
head piece until the mark on the bezel is situated
between the two marks on the head piece (8 & 9).
In case of malfunction
Check the batteries and their polarities. If the
polarity is simply reversed in the battery case, the
halogen bulb will work but the LEDs will not. In this
case, remove and re-install the batteries according
to the polarity indicators shown on the case.
Test the lamp with a replacement bulb. Check for
corrosion on the contacts. In case of corrosion,
scrape the contacts lightly without damaging them.
Work the switch several times.
If your lamp still does not work contact PETZL.
Care
Water in the headpiece or battery case can cause a
malfunction. Whenever the lamp has been used or
opened in poor conditions (moisture, mud, dust…),
remove the batteries, bulb, and LEDs. Allow the
lamp to dry completely with the headpiece and
battery case open. Clean the seals with water and
lubricate them with silicone grease.
Cleaning
Wash the lamp using clean water, with the
headpiece and battery case closed. Use soap for
the elastic headband. Do not rub with an abrasive
product, especially on the lens. Do not wash with a
high pressure hose.
The PETZL Guarantee
This product is guaranteed for 3 years against all
faults in materials or manufacture. Exclusions from
the guarantee: normal wear and tear, modifications
or alterations, incorrect storage, damage caused by
accidents, by negligence, or by use for which this
product is not intended.
Responsibility
PETZL is not responsible for the consequences,
whether direct, indirect or accidental, or for any
other type of damage arising or resulting from the
use of this product.

4Notice DUOLED 5-8 E69-E71 / ref. : E60600-H (041203)
(FR) FRANCAIS
Les lampes DUO sont conformes aux exigences de
la directive 89/336/CEE concernant la compatibilité
électromagnétique.
Idéales en milieu humide, attention elles ne sont pas
conçues comme des lampes de plongée.
DUO LED 5
Etanche à double foyer:
zoom halogène et module 5 LED non régulées.
DUO LED 8
Etanche à double foyer: zoom halogène et module
8 LED régulées.
Allumer, éteindre,
sélectionner, zoomer
Interrupteur vers le haut pour sélectionner le foyer
halogène puissant, mais grand consommateur
d’énergie (2).
Interrupteur vers le bas pour sélectionner le foyer
LED utilisant peu d’énergie (3).
Le bouton zoom permet de régler le foyer halogène
en fonction de l’utilisation: position basse, faisceau
« spot » éloigné, position haute, faisceau large (4).
Les DUO permettent d’optimiser votre éclairage
(distance, durée) en fonction de vos besoins.
Il est impossible d’allumer les 2 foyers
simultanément.
DUO LED 5
Le foyer 5 LED est « non régulé ». Il offre un seul
niveau d’éclairage très économique qui diminue au
fur et à mesure de la décharge des piles.
DUO LED 8
Le foyer 8 LED est régulé.
Le dispositif électronique de régulation maintient
un niveau de lumière constant. Lorsque les piles
sont presque déchargées, la lumière diminue
brusquement vers un niveau d’éclairage minimum
de survie.
D’autre part, ce foyer 8 LED offre 3 puissances
différentes d’éclairage au choix dans un ordre de
priorité d’usage.
- OPTIMAL: meilleur rapport puissance/autonomie.
- MAXIMAL: puissance maximale.
- ECONOMIQUE: grande autonomie.
Vous choisissez la puissance d’éclairage adaptée à
votre activité.
Basculez l’interrupteur de la DUO vers le bas (on).
L’éclairage commence toujours par le niveau
OPTIMAL.
Pour sélectionner le niveau d’éclairage suivant
(MAXIMAL), effectuez rapidement le mouvement de
bascule de l’interrupteur (on-off-on).
On passe ainsi au niveau 2 puis au niveau 3, à
nouveau au niveau 1 et ainsi de suite.
Si le mouvement de bascule n’est pas assez rapide,
le module s’allume au niveau 1.
Lorsque les piles sont usées, le module offre un
mode unique d’éclairage faible.
Attention
Votre A.R.V.A. (Appareil de recherche de victimes
sous avalanche) en réception (recherche) peut être
perturbé par la proximité de la lampe DUO LED 8
lorsque le module 8 LED est en fonctionnement.
En cas d’interférences (bruit parasite), éloignez
l’ARVA de la lampe ou éteignez le foyer LED et
passez sur le foyer halogène.
Verrouillage (Lock)
Prenez soin de verrouiller l’interrupteur pour
le transport et le stockage en appuyant sur le
bouton rouge (1A). Le déverrouillage est réalisé
en appuyant sur l’autre extrémité du bouton rouge
(1B). Si votre lampe reste accidentellement allumée
dans un sac de transport, la chaleur dégagée par
l’ampoule Halogène peut endommager le réflecteur.
Piles
Pour ouvrir le boîtier piles, déverrouillez les
2 crochets (5).
Utilisez des piles alcalines. Ne mélangez pas des
piles de marques différentes, des piles neuves avec
des piles usagées.
Respectez la polarité des piles, sinon elles risquent
de couler, provoquant des émanations de gaz
pouvant générer des explosions.
Attention, des piles défectueuses, fortement
déchargées ou de l’eau dans le boîtier peuvent
endommager la lampe (oxydation des contacts…).
L’autonomie des piles alcalines baisse
considérablement à basse température. Au froid
ou lorsque les piles sont usées, le foyer LED peut
éclairer plus que le foyer Halogène.
ATTENTION, ne jamais démonter le joint solidaire
du couvercle. Veiller à ce qu’il reste toujours propre
(nettoyage avec de l’eau et un coton-tige).
Graisser le joint avec une graisse à base de silicone.
Précautions, enlevez les piles lors d’un stockage
prolongé.
Changement d’ampoule
ou de module
Ouvrez le boîtier en se servant de la main
gauche pour dévisser la chenille (6). Enlevez le
complètement. En cas de blocage, utilisez un
dégrippant pour filetage ou chauffez la chenille avec
un sèche-cheveux.
Ampoule halogène: dévissez l’ampoule défectueuse
et revissez la nouvelle en la serrant fort.
Module LED: tirez vers l’avant (on peut toucher
les LED avec les doigts). Installez le nouveau en
faisant attention à ne pas plier les LED. Vérifiez leur
alignement. Tester le fonctionnement en actionnant
l’interrupteur. Si le module ne s’allume pas, le
retirer et recommencer l’opération en inversant les
contacts (le tourner d’un demi tour).
Pour fermer le boîtier:
- Placez l’ensemqble réflecteur/vitre/chenille dans le
bon sens (7),
- Vissez la chenille avec la main droite jusqu’à ce
que le repère gravé sur la chenille se trouve entre
les deux repères situés sur le boîtier (8 & 9).
En cas de dysfonctionnement
Vérifiez les piles et le respect de leur polarité.
Si la polarité est simplement inversée dans le boîtier
piles, l’ampoule Halogène fonctionne mais les LED
ne fonctionnent pas.
Suivez l’ordre indiqué sur le boîtier.
Testez avec l’ampoule de rechange.
Vérifiez l’absence de corrosion sur les contacts.
En cas de corrosion, grattez légèrement les contacts
sans les déformer.
Manœuvrez plusieurs fois l’interrupteur.
Si votre lampe ne fonctionne toujours pas,
contactez PETZL.
Entretien
De l’eau dans la bague optique ou le boîtier à
piles peut créer un dysfonctionnement. Après
utilisation ou changement d’ampoules et piles
dans de mauvaises conditions (humidité, boue,
poussière…), retirez les piles, la bague optique et
l’ampoule. Séchez intégralement (bague optique et
boîtiers ouverts). Nettoyez les joints avec de l’eau,
graissez-les avec une graisse à base de silicone.
Nettoyage
Lavez la lampe, boîtiers fermés, à l’eau claire.
Utilisez du savon pour les élastiques. Ne frottez pas
avec un produit abrasif en particulier sur la vitre.
Ne lavez pas avec un nettoyeur haute pression.
Garantie PETZL
Ce produit est garanti pendant 3 ans contre tout
défaut de matière ou de fabrication. Limite de la
garantie: l’usure normale, les modifications ou
retouches, le mauvais stockage, les dommages
dus aux accidents, aux négligences, aux piles qui
coulent, aux utilisations pour lesquelles ce produit
n’est pas destiné.
Responsabilité
PETZL n’est pas responsable des conséquences
directes, indirectes, accidentelles ou de tout autre
type de dommages survenus ou résultant de
l’utilisation de ce produit.

5Notice DUOLED 5-8 E69-E71 / ref. : E60600-H (041203)
(DE) DEUTSCH
Die DUO-Stirnlampen entsprechen der Richtlinie
89/336/CEE für elektromagnetische Störfreiheit
o. Verträglichkeit.
Die DUO-Lampen sind ideal für die Verwendung in
feuchten Umgebungen geeignet. Sie sind jedoch
nicht für ein längeres Untertauchen konzipiert
(z. B. Tauchen).
DUO LED 5
Wasserfest mit doppelter Lichtquelle: Eine
fokussierbare Halogenbirne und ein 5-LED-Modul
(nicht regulierbar).
Lange Brenndauer; hervorragend für die
Verwendung in kalten Temperaturen geeignet.
DUO LED 8
Wasserfest mit doppelter Lichtquelle: Eine
fokussierbare Halogenbirne und ein 8-LED-Modul
(reguliert).
Lange Brenndauer; hervorragend für die
Verwendung in kalten Temperaturen geeignet.
Einschalten, Ausschalten,
Einstellungen und Fokussieren
Bewegen Sie den Schalter nach oben, um die
intensive Halogenbeleuchtung mit höherem
Stromverbrauch (2) einzuschalten.
Zum Einschalten der LEDs mit geringem
Stromverbrauch (3) bewegen Sie den Schalter nach
unten.
Mit dem Zoomknopf können Sie den
Halogenlichtkegel je nach Bedarf einstellen: Die
untere Position stellt den Lichtkegel auf eine
schmale Spotbeleuchtung ein, mit der oberen
Position erhalten Sie einen breiteren Lichtkegel (4).
Mit der DUO können Sie Energieverbrauch und
Leuchtdauer an Ihre individuellen Bedürfnisse
anpassen.
Der gleichzeitige Betrieb beider Lichtquellen ist nicht
möglich.
DUO LED 5
Die 5-LED-Lichtquelle ist nicht regulierbar und
bietet eine sehr ökonomische Leuchtstärke. Die
Lichtintensität nimmt beständig ab, während die
Batterien verbraucht werden.
DUO LED 8
Die 8-LED-Lichtquelle wird elektronisch reguliert
und bietet eine gleichbleibende Leuchtstärke.
Wenn die Batterien fast verbraucht sind, wird die
Lichtintensität auf eine minimale „Überlebensstufe
“eingestellt.
Außerdem bietet das 8-LED-Modul drei
verschiedene Leuchtstärken.
- OPTIMAL: Bestes Verhältnis zwischen
Stromverbrauch und Leuchtdauer.
- MAXIMAL: Maximale Leuchtstärke.
- ECONOMIC: Lange Leuchtdauer.
Sie können die für Ihre Aktivität am besten
geeignete Leuchtstärke auswählen.
Bewegen Sie den Schalter nach unten (ein). Die
Lampe wird stets mit der Einstellung OPTIMAL
eingeschaltet.
Um die nächste Leuchtstärke auszuwählen
(MAXIMAL), schalten Sie die Lampe aus und sofort
wieder ein.
Weiteres Hin- und Herschalten zwischen Ein und
Aus wechselt durch die Einstellungen 2, 3 und
anschließend wieder zu 1.
Wird der Schalter nicht schnell genug betätigt,
wechselt die Lampe in den OPTIMAL-Modus.
Wenn die Batterien fast verbraucht sind, wird
das LED-Modul auf die minimale Leuchtstärke
eingestellt.
Achtung
Ihr VS Gerät (Verschütteten-Suchgerät) kann
durch die Nähe der DUO LED 8, beeinträchtigt
werden, wenn diese eingeschaltet ist. Im Fall von
Interferenzen (Nebengeräusche) vergrößern Sie die
Entfernung zwischen VS-Gerät und Lampe, oder
schalten Sie die Lampe vorübergehend aus.
Verriegelungssystem
Vergessen Sie nicht, den Schalter während des
Transports und der Aufbewahrung zu verriegeln,
indem Sie den roten Knopf (1A) drücken. Zum
Entriegeln des Schalters drücken Sie auf das
andere Ende des roten Knopfs (1B). Wird die
Lampe in einem Rucksack oder einem anderen
abgeschlossenen Raum versehentlich eingeschaltet,
kann die durch die Halogenbirne erzeugte Wärme
(Hitzestau) den Reflektor beschädigen.
Batterien
Zum Öffnen des Batteriegehäuses entsperren Sie die
beiden Riegel (5).
Verwenden Sie Alkalibatterien. Verwenden Sie nicht
gleichzeitig Batterien unterschiedlicher Hersteller
oder neue und alte Batterien.
Beachten Sie die Polung der Batterien, wenn Sie sie
in die Lampe einsetzen. Bei einer Vernachlässigung
der vorangehend beschriebenen Punkte können aus
den Batterien Gase austreten, die schlimmstenfalls
zu Explosionen führen.
Warnung: Defekte oder vollständig entladene
Batterien sowie Wasser im Batteriegehäuse
können die Stirnlampe beschädigen (Oxidation der
Kontakte…).
WARNUNG: Entfernen Sie bei längerer
Aufbewahrung die Batterien und lassen Sie das
Gehäuse geöffnet.
Die Lebensdauer von Alkalibatterien wird durch
niedrige Temperaturen beträchtlich herabgesetzt.
Bei kalten Temperaturen oder fast verbrauchten
Batterien erzeugen LEDs ein besseres Licht als eine
Halogenbirne.
Wechseln einer Birne oder eines LED-
Moduls
Öffnen Sie das Lampengehäuse, indem Sie den
flexiblen Ring (6) aufdrehen und vollständig
entfernen. Ist der Ring verklemmt, versuchen Sie
es mit einem Schmiermittel oder erwärmen Sie den
Ring mit einem Föhn.
Halogenbirne: Drehen Sie die alte Birne heraus und
drehen Sie die neue hinein. Achten Sie dabei auf
einen festen Sitz.
LED-Modul: Ziehen Sie das Element gerade heraus
(Sie können die LEDs bedenkenlos anfassen).
Installieren Sie das neue Element, ohne die LEDs
dabei zu verbiegen. Überprüfen Sie die Ausrichtung.
Überprüfen Sie die Funktion durch Betätigung des
Einschalthebels. Falls das Modul nicht aufleuchtet,
bauen Sie es wieder aus und wiederholen Sie den
Vorgang, indem Sie die Kontakte vertauschen
(drehen um eine halbe Umdrehung).
So schließen Sie das Lampengehäuse:
- Positionieren Sie den Reflektor,
die Linse und den Ring richtig über dem Kopfstück
(7).
- Schrauben Sie den Ring wieder auf das Kopfstück,
bis sich die Markierung am Ring genau zwischen
den beiden Markierungen am Kopfstück befindet
(8 & 9).
Im Falle einer Fehlfunktion
Überprüfen Sie die Batterien und deren Polung.
Wenn die Polung im Batteriegehäuse nicht mit
den Batterien übereinstimmt, funktioniert die
Halogenbirne zwar, die LEDs jedoch nicht. Entfernen
Sie in diesem Fall die Batterien und setzen Sie sie
erneut ein, wobei Sie die Polungsindikatoren im
Gehäuse beachten.
Testen Sie die Lampe mit einer Ersatzbirne.
Überprüfen Sie die Kontakte auf Korrosion. Kratzen
Sie korrodierte Kontakte sauber, ohne
sie dabei zu beschädigen.
Betätigen Sie den Schalter mehrere Male hin und
her.
Wenn die Lampe immer noch nicht funktioniert,
wenden Sie sich an Petzl.
Pflege
Wasser im Kopfstück oder im Batteriegehäuse kann
eine Fehlfunktion verursachen. Wenn die Lampe bei
ungünstigen Bedingungen (Feuchtigkeit, Schlamm,
Staub…) verwendet oder geöffnet wurde, entfernen
Sie die Batterien, die Lampe und die LEDs. Lassen
Sie die Lampe mit geöffnetem Kopfstück und
Batteriegehäuse vollständig trocknen. Reinigen Sie
die Dichtungen mit Wasser und schmieren Sie sie
mit einem silikonbasierten Schmiermittel.
Reinigung
Waschen Sie die Lampe mit sauberem Wasser,
wobei Kopfstück und Batteriegehäuse geschlossen
bleiben. Verwenden Sie für das elastische Stirnband
eine milde Seife. Verwenden Sie kein Scheuermittel,
vor allem nicht für die Linse. Waschen Sie die
Lampe nicht unter einem Hochdruckschlauch.
PETZL-Garantie
Dieses Produkt hat für Material- und
Herstellungsfehler eine Garantie von drei Jahren.
Ausgeschlossen von der Garantie sind: Normale
Abnutzung, Modifizierungen oder Änderungen,
unsachgemäße Aufbewahrung sowie durch Unfälle,
Vernachlässigung und Verwendung zu einem nicht
produktspezifischen Zweck entstandene Schäden.
Verantwortlichkeit
PETZL ist nicht verantwortlich für jegliche
Konsequenzen, direkt, indirekt oder unfallbedingt,
sowie jegliche andere Art von Schäden,
die aus der Verwendung seiner Produkte entstehen.
6Notice DUOLED 5-8 E69-E71 / ref. : E60600-H (041203)
(IT) ITALIANO
Le lampade DUO sono conformi ai requisiti della
direttiva 89/336/CEE
relativa alla compatibilità elettro-magnetica.
Ideali in ambiente umido, non sono tuttavia
concepite come lampade
da immersione.
DUO LED 5
Impermeabile a doppio faro:
zoom alogeno e modulo 5 LED
senza regolazione.
DUO LED 8
Impermeabile a doppio faro:
zoom alogeno e modulo 8 LED
con regolazione.
Accensione, spegnimento,
selezione, zoom
Interruttore verso l’alto per selezionare il faro
alogeno potente, con elevato consumo di energia
(2).
Interruttore verso il basso per selezionare il faro
LED a basso consumo di energia (3).
L’interruttore zoom permette di regolare il faro
alogeno in funzione dell’utilizzo: posizione bassa,
fascio luminoso profondo, posizione alta, fascio
luminoso ampio (4).
Le DUO permettono di ottimizzare le caratteristiche
d’illuminazione (distanza, durata) a seconda delle
vostre esigenze.
È impossibile accendere i due fari
contemporaneamente.
DUO LED 5
Il faro 5 LED è senza regolazione. Offre un solo
livello d’illuminazione, di grande risparmio
energetico, che diminuisce progressivamente man
mano che le pile si scaricano.
DUO LED 8
Il faro 8 LED è con regolazione.
Il dispositivo elettronico di regolazione mantiene
un livello di luce costante. Quando le pile sono
quasi scariche, l’intensità luminosa passa
immediatamente al livello minimo d’illuminazione
di sopravvivenza.
Inoltre, questo faro 8 LED offre 3 diverse potenze
d’illuminazione da selezionare secondo un ordine
di priorità di utilizzo.
- Livello OTTIMALE: miglior rapporto potenza/
autonomia.
- Livello MASSIMO: massima potenza.
- Livello RISPARMIO: grande autonomia.
Selezionare la potenza d’illuminazione adatta alla
propria attività.
Spingere l’interruttore della DUO verso il basso
(on). L’illuminazione comincia sempre dal livello
OTTIMALE.
Per selezionare il livello d’illuminazione successivo
(MASSIMO), effettuare rapidamente il movimento di
spostamento dell’interruttore (on-off-on).
Si passa quindi al livello 2, poi al livello 3, di nuovo
al livello 1e così di seguito.
Se il movimento di spostamento non è eseguito con
rapidità, il modulo si accende al livello 1.
Quando le pile sono consumate, il modulo presenta
un’unica modalità d’illuminazione debole.
Attenzione
Il vostro A.R.V.A. (Apparecchio di Ricerca in
Valanga) in ricezione (ricerca) può essere disturbato
dalla vicinanza della lampada
DUO LED 8 quando il modulo 8 LED è in funzione.
In caso di interferenze (rumore parassita),
allontanare l’ARVA dalla lampada o spegnere il faro
LED e passare al faro alogeno.
Bloccaggio (Lock)
Ricordarsi di bloccare l’interruttore per il trasporto e
lo stoccaggio, premendo il pulsante rosso (1A).
Lo sbloccaggio avviene premendo l’altra estremità
del pulsante rosso (1B). Se la lampada resta
accidentalmente accesa nello zaino, il calore
generato dalla lampadina alogena può danneggiare
il riflettore.
Pile
Per aprire il portapile, sbloccare i 2 ganci (5).
Utilizzare pile alcaline. Non mischiare pile di marche
differenti o pile nuove con pile usate.
Rispettare la polarità delle pile, che altrimenti
rischiano di perdere l’elettrolita, determinando
concentrazioni di gas esplosive.
Attenzione, pile difettose, molto scariche o acqua
nel portapile possono danneggiare la lampada
(ossidazione dei contatti…).
L’autonomia delle pile alcaline diminuisce
considerevolmente alle basse temperature.
In condizioni di freddo o quando le pile sono
consumate, il faro LED può garantire più luce del
faro alogeno.
ATTENZIONE, non smontare mai la guarnizione
solidale con il coperchio. Fare attenzione a che
rimanga sempre pulita (pulire con acqua ed un
bastoncino di cotone). Lubrificare la guarnizione
con grasso al silicone.
Precauzioni, togliere le pile in caso di stoccaggio
prolungato.
Sostituzione lampadina
o modulo
Aprire il corpo lampada servendosi della mano
sinistra per svitare la ghiera (6). Toglierla del
tutto. In caso di blocco, utilizzare un liquido per
sbloccare i filetti oppure riscaldare la ghiera con un
asciugacapelli.
Lampadina alogena: svitare la lampadina difettosa e
serrare bene quella nuova.
Modulo LED: tirare in avanti (si possono toccare i
LED con le dita). Installare il nuovo modulo facendo
attenzione a non piegare i LED. Verificare il loro
allineamento. Testare il funzionamento azionando
l’interruttore. Se il modulo non si accende, toglierlo
e ripetere l’operazione, invertendo i contatti (ruotare
il modulo di mezzo giro).
Per richiudere il corpo lampada:
- collocare l’insieme riflettore/vetro/ghiera nel giusto
senso (7),
- avvitare la ghiera con la mano destra facendola
ruotare fono a che il punto di riferimento segnato
sulla ghiera non si trovi tra i due segni marcati sul
corpo lampada (8 & 9).
Se la lampada non funziona
Controllare le pile e rispettarne la polarità. Se nel
portapile la polarità è semplicemente invertita,
funziona solo la lampadina alogena, mentre i LED
non funzionano. Seguire l’ordine indicato sul
portapile.
Provare con la lampadina di ricambio. Verificare
l’assenza di corrosione sui contatti. In caso di
corrosione, raschiare leggermente i contatti senza
deformarli.
Azionare più volte l’interruttore.
Se la lampada non funziona ancora, rivolgersi al
Servizio Post Vendita.
Manutenzione
Infiltrazione d’acqua nella ghiera ottica o nel
portapile può causare
il non funzionamento della lampada. Dopo l’utilizzo
o la sostituzione di lampadine e pile in cattive
condizioni (umidità, fango, polvere…), togliere
le pile, la ghiera ottica e la lampadina. Asciugare
completamente (ghiera ottica e portapile aperti).
Pulire con acqua le guarnizioni e lubrificarle
con grasso al silicone.
Pulizia
Lavare la lampada con acqua pulita, assicurandosi
che l’unità frontale e il portapile siano chiusi. Per gli
elastici utilizzare sapone neutro. Non sfregare con
prodotti abrasivi. Particolare attenzione alla plastica
trasparente. Non lavare con getto a pressione.
Garanzia PETZL
Questo prodotto ha una garanzia di 3 anni contro
ogni difetto del materiale o di fabbricazione.
Limitazione della garanzia: non sono coperti dalla
garanzia l’usura normale, le modifiche o i ritocchi, la
cattiva conservazione, i danni dovuti agli incidenti,
alle negligenze, alle pile che perdono elettrolita e agli
utilizzi ai quali questo prodotto non è destinato.
Responsabilità
PETZL non è responsabile delle conseguenze
dirette, indirette, accidentali o di ogni altro tipo di
danno verificatosi o causato dall’utilizzo dei suoi
prodotti.

7Notice DUOLED 5-8 E69-E71 / ref. : E60600-H (041203)
(ES) ESPAÑOL
Las linternas DUO cumplen con las exigencias
de la directiva 89/336/CEE sobre compatibilidad
electromagnética.
Ideales para medios húmedos; atención: no han
sido diseñadas como linternas de inmersión.
DUO LED 5
Estanca de doble foco:
zoom halógeno y módulo de 5 LED no regulados.
DUO LED 8
Estanca de doble foco:
zoom halógeno y módulo de 8 LED regulados.
Encender, apagar,
seleccionar, aplicar zoom
Interruptor posicionado hacia arriba: para
seleccionar el foco halógeno potente pero con gran
consumo de energía (2).
Interruptor posicionado hacia abajo: para
seleccionar el foco LED de poco consumo
energético (3).
El botón zoom permite regular la iluminación
halógena en función del uso: en posición hacia
abajo, el haz de luz es estrecho y alejado; en
posición hacia arriba, el haz luminoso es amplio (4).
Las DUO permiten optimizar la iluminación
(distancia, duración) según sus necesidades.
Es imposible encender los dos focos a la vez.
DUO LED 5
El foco de 5 LED es « no regulado ». Ofrece un
único nivel de iluminación muy económico que
disminuye progresivamente al descargarse las pilas.
DUO LED 8
El foco de 8 LED es regulado. El dispositivo
electrónico de regulación mantiene un nivel de
luz constante. Cuando las pilas están a punto de
agotarse, la luz disminuye bruscamente hasta un
nivel de iluminación mínimo de supervivencia.
Por otra parte, el foco de 8 LED ofrece tres niveles
de iluminación diferentes a escoger por un orden de
prioridad de uso.
- ÓPTIMO: mejor relación potencia/autonomía.
- MÁXIMO: potencia máxima.
- ECONÓMICO: gran autonomía.
Usted escoge el nivel de iluminación que mejor se
adapte a su actividad.
Gire el interruptor de la DUO hacia abajo (on). La
iluminación empieza siempre por el nivel ÓPTIMO.
Para seleccionar el nivel de iluminación siguiente
(MÁXIMO), realice rápidamente el movimiento de
giro del interruptor (on-off-on).
Se pasa del mismo modo al nivel 2, después, al
nivel 3 y de nuevo al nivel 1, y así sucesivamente.
Si el movimiento de giro no es lo suficientemente
rápido, el módulo se enciende en el nivel 1.
Cuando las pilas están gastadas, el módulo ofrece
un único nivel de iluminación mínima.
Atención
Su ARVA (aparato de búsqueda de víctimas de
aludes) en recepción (búsqueda) puede ser objeto
de interferencias por la proximidad de la linterna
DUO LED 8 cuando el módulo de 8 LED está en
funcionamiento. En caso de interferencias (ruidos
parásitos), aleje el ARVA de la linterna o apague el
foco LED y pase al foco halógeno.
Bloqueo (Lock)
Asegúrese de bloquear el interruptor para el
transporte y el almacenamiento presionando
el botón rojo (1A). El desbloqueo se realiza
presionando sobre el otro extremo del botón rojo
(1B).
Si la linterna queda accidentalmente encendida
dentro una bolsa, el calor desprendido por la
bombilla halógena puede deteriorar el reflector.
Pilas
Para abrir la caja portapilas, desbloquee los dos
ganchos (5).
Utilice pilas alcalinas. No mezcle pilas de marcas
diferentes ni pilas nuevas con pilas usadas.
Respete la polaridad de las pilas, de lo contrario, las
pilas pueden derramar componentes y desprender
emanaciones de gas que pueden provocar
explosiones.
Atención: las pilas defectuosas, muy descargadas
o la presencia de agua en la caja portapilas pueden
estropear la linterna (oxidación de los contactos…).
La autonomía de las pilas alcalinas desciende
considerablemente a bajas temperaturas. Con el frío
o cuando las pilas están a punto de agotarse, el foco
LED puede iluminar más que el foco halógeno.
ATENCIÓN: no desmonte nunca la junta solidaria de
la tapa. Procure que siempre esté limpia (límpiela
con agua y un bastoncillo de algodón). Lubrique la
junta con lubricante a base de silicona.
Precauciones: retire las pilas durante un
almacenamiento prolongado.
Cambio de bombilla
o de módulo
Abra el foco con la mano izquierda para desenroscar
el aro flexible (6). Retírelo completamente. En caso
de bloqueo, utilice un aflojador para rosca o caliente
el aro flexible con un secador de pelo.
Bombilla halógena: desenrosque la bombilla
defectuosa y enrosque fuerte la nueva.
Módulo LED: tire hacia delante (los LED se pueden
tocar con los dedos). Instale el módulo nuevo con
cuidado de no doblar los LED. Compruebe que
estén bien alineados. Compruebe el funcionamiento
accionando el interruptor. Si el módulo no se
enciende, retírelo y vuelva a comenzar la operación
pero invirtiendo los contactos (gírelos media
vuelta).
Para cerrar el foco:
- Sitúe el conjunto reflector/cristal/aro flexible en el
sentido
correcto (7),
- Enrosque el aro flexible con la mano derecha hasta
que la señal grabada sobre el mismo se encuentre
entre las dos señales situadas en la caja del foco
(8 y 9).
En caso de mal funcionamiento
Compruebe las pilas y que la polaridad sea la
correcta. Si la polaridad simplemente está invertida
en la caja portapilas, la bombilla halógena funciona
pero los LED no funcionarán. Siga el orden indicado
en la caja.
Compruebe con la bombilla de recambio. Verifique
la ausencia de corrosión en los contactos. En caso
de corrosión, rasque ligeramente los contactos sin
deformarlos.
Accione varias veces el interruptor.Si su linterna
frontal aún no funciona, póngase en contacto con
PETZL.
Mantenimiento
La presencia de agua en el bloque óptico o
en la caja portapilas, puede provocar un mal
funcionamiento. Después de su uso o del cambio de
bombillas y pilas en malas condiciones (humedad,
barro, polvo…), retire las pilas, el anillo óptico y
la bombilla. Seque completamente (bloque óptico
y caja portapilas abiertos). Limpie las juntas con
agua, engráselas con una grasa a base de silicona.
Limpieza
Lave la linterna con agua dulce y con las cajas
cerradas. Utilice jabón para las cintas elásticas. No
la frote con un producto abrasivo, especialmente el
cristal. No la lave con un limpiador de alta presión.
Garantía PETZL
Este producto está garantizado durante tres
años contra todo defecto en los materiales o de
fabricación. Se excluye de la garantía: el desgaste
normal, las modificaciones o retoques, la mala
conservación, los daños debidos a los accidentes,
a las negligencias, a las pilas que pierden
componentes y a las utilizaciones para las cuales
este producto no
está destinado.
Responsabilidad
PETZL no es responsable de las consecuencias
directas, indirectas, accidentales o de cualquier otro
tipo de daño surgido o resultante de la utilización de
este productos.
This manual suits for next models
3
Table of contents
Languages:
Other Petzl Headlamp manuals

Petzl
Petzl NAO User manual

Petzl
Petzl Duo S User manual

Petzl
Petzl ULTRA RUSH BELT User manual

Petzl
Petzl NAO Plus User manual

Petzl
Petzl REACTIK+ User manual

Petzl
Petzl PIXA 1 User manual

Petzl
Petzl ultra vario User manual

Petzl
Petzl BINDI User manual

Petzl
Petzl PIXA 3R User manual

Petzl
Petzl PIXA 2 User manual

Petzl
Petzl Duo Led 5 E69P User manual

Petzl
Petzl TIKKA User manual

Petzl
Petzl IKO User manual

Petzl
Petzl TIKKA2 User manual

Petzl
Petzl ULTRA VARIO Series User manual

Petzl
Petzl E785000A User manual

Petzl
Petzl DUO ATEX LED 5 User manual

Petzl
Petzl REACTIK+ User manual

Petzl
Petzl TIKKA-XP User manual

Petzl
Petzl Tikka Plus 2 User manual