manuals.online logo
Brands
  1. Home
  2. •
  3. Brands
  4. •
  5. Phonocar
  6. •
  7. Automobile Accessories
  8. •
  9. Phonocar VM334 User manual

Phonocar VM334 User manual

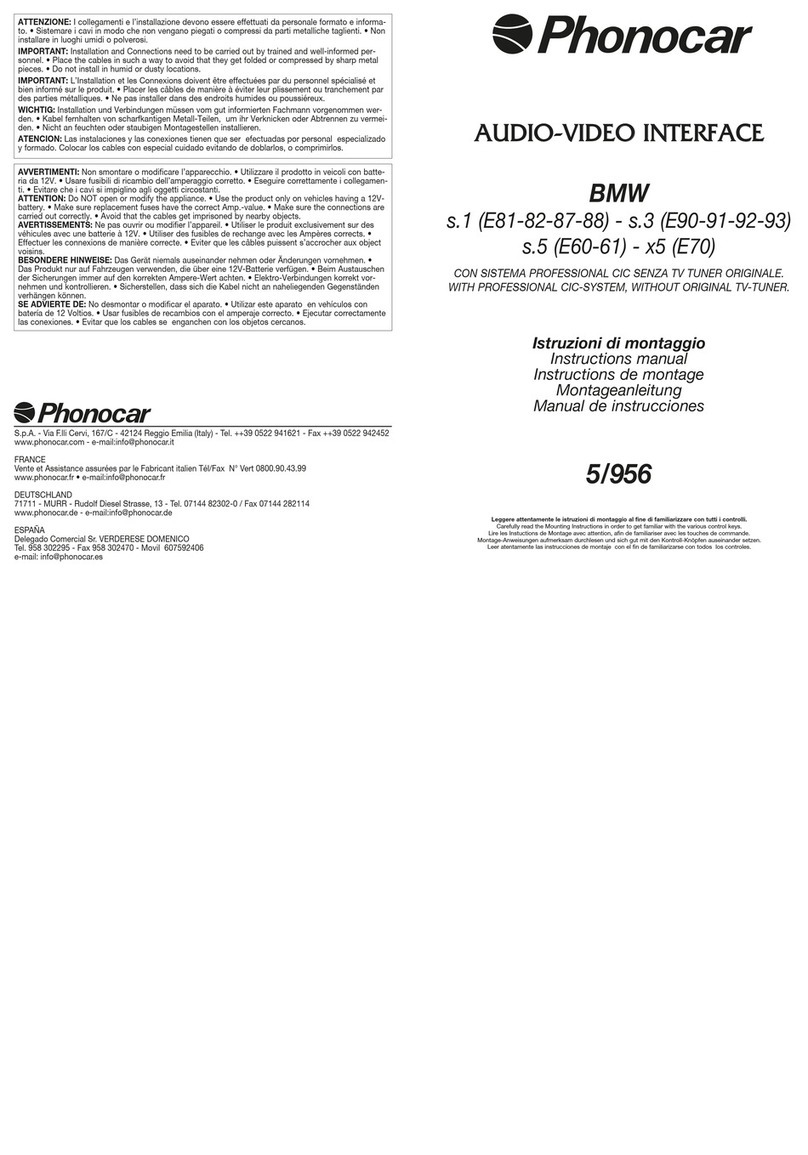
AUDIO / AUX-IN INTERFACE
BMW
s. 3 (E46) >’06 - s. 5 (E39) >’04 - X5 (E53) >’07
con/with 16:9 NAVIGATOR
ISTRUZIONI DI MONTAGGIO
MOUNTING INSTRUCTIONS • INSTRUCTIONS DE MONTAGE
MONTAGEANLEITUNG • INSTRUCCIONES PARA EL MONTAJE
VM334 - 5/934

Carefully read the Mounting Instructions in order to get familiar with the various control keys.
Lire les Instuctions de Montage avec attention, an de familiariser avec les touches de commande.
Montage-Anweisungen aufmerksam durchlesen und sich gut mit den Kontroll-Knöpfen auseinander setzen.
Leer atentamente las instrucciones de montaje con el n de familiarizarse con todos los controles.
ATTENZIONE: I collegamenti e l’installazione devono essere effettuati da personale formato e informato. • Sistemare i cavi in modo
che non vengano piegati o compressi da parti metalliche taglienti. • Non installare in luoghi umidi o polverosi.
IMPORTANT: Installation and Connections need to be carried out by trained and well-informed personnel. • Place the cables in such
a way to avoid that they get folded or compressed by sharp metal pieces. • Do not install in humid or dusty locations.
IMPORTANT: L’Installation et les Connexions doivent être effectuées par du personnel spécialisé et bien informé sur le produit. • Placer
les câbles de manière à éviter leur plissement ou tranchement par des parties métalliques. • Ne pas installer dans des endroits humides ou
poussiéreux.
WICHTIG: Installation und Verbindungen müssen vom gut informierten Fachmann vorgenommen werden. • Kabel fernhalten von scharfkan-
tigen Metall-Teilen, um ihr Verknicken oder Abtrennen zu vermeiden. • Nicht an feuchten oder staubigen Montagestellen installieren.
ATENCION: Las instalaciones y las conexiones tienen que ser efectuadas por personal especializado y formado. Colocar los cables con
especial cuidado evitando de doblarlos, o comprimirlos.
 Non smontare o modicare l’apparecchio. Utilizzare il prodotto in veicoli con batteria da 12V. Usare fusibili di
ricambio dell’amperaggio corretto. Eseguire correttamente i collegamenti. Evitare che i cavi si impiglino agli oggetti circostanti.
 Do NOT open or modify the appliance. Use the product only on vehicles having a 12V-battery. Make sure repla-
cement fuses have the correct Amp.-value. Make sure the connections are carried out correctly. Avoid that the cables get imprisoned by
nearby objects.
 Ne pas ouvrir ou modier l’appareil. Utiliser le produit exclusivement sur des véhicules avec une batterie à 12V.
Utiliser des fusibles de rechange avec les Ampères corrects. Effectuer les connexions de manière correcte. Eviter que les câbles puissent
s’accrocher aux object voisins.
 Das Gerät niemals auseinander nehmen oder Änderungen vornehmen. Das Produkt nur auf Fahrzeugen verwen-
den, die über eine 12V-Batterie verfügen. Beim Austauschen der Sicherungen immer auf den korrekten Ampere-Wert achten. Elektro-Verbin-
dungen korrekt vornehmen und kontrollieren. Sicherstellen, dass sich die Kabel nicht an naheliegenden Gegenständen verhängen können.
 No desmontar o modicar el aparato. Utilizar este aparato en vehículos con batería de 12 Voltios. Usar fusibles de re-
cambios con el amperaje correcto. Ejecutar correctamente las conexiones. Evitar que los cables se enganchen con los objetos cercanos.
!
!
e11
020808
Phonocar S.p.A. - Via F.lli Cervi, 167/C - 42100 Reggio Emilia (Italy) - Tel.
++
39 0522 941621 - Fax
++
39 0522 942452
www.phonocar.com - e-mail:info@phonocar.it
FRANCE - Tél/Fax N° Vert 0800.90.43.99 • www.phonocar.fr
 Tel. 07144 82302-0 / Fax 07144 282114 - www.phonocar.de - e-mail:info@phonocar.de
 Tel. 958 302295 - Fax 958 302470 - Movil 607592406 - e-mail: info@phonocar.es

 
 

-



I - Inserire nella sorgente un nastro e premere il tasto “MODE” .
La selezione della sorgente NTSC o PAL avviene automaticamente.
Funzioni del tasto OROLOGIO in modalità ingresso audio /video.
Pressione lunga Attivazione/disattivazione funzione video in movimento.
Pressione breve selezione formato immagine 16:9/16:9 ZOOM /4:3.
 Insert a music-cassette and press MODE-key.
NTSC or PAL source-selection is made automatically.
 when Audio/Video-Input mode is activated:
By pressing for a longer time: Activation/De-activation of Video-function with running car.
By pressing briey: Selection of Picture-format 16:9/16:9 ZOOM /4:3
F - Introduire une cassette audio et appuyer sur la touché MODE.
La sélection de la source NTSC ou PAL se fait automatiquement.
 en modalité Entrée Audio/Vidéo :
En appuyant longtemps : Activation/désactivation de la Fonction Vidéo avec voiture en marche
En appuyant rapidement : Sélection format d’images 16 :9/16 :9 ZOOM/4 :3
 Musik-Cassette eingeben und MODE-Taste drücken.
Die Wahl der NTSC- oder PAL-Quelle erfolgt automatisch.
 im Modus Eingang Audio/Video:
Langer Tastendruck: Aktivierung/Deaktivierung der Video-Funktion bei fahrendem Wagen.
Kurzer Tastendruck: Wahl des Bild-Formats 16:9/16:9 ZOOM/4:3
E - Insertar en el reproductor una cinta y presionar la tecla “Mode”
La selección de la fuente NTSC o PAL es automática.
en modalidad entrada audio/video,
Presión larga Activación /desactivación función video en movimiento.
Presión breve selección formato imagen 16:9/16:9 ZOOM /4:3.
COLLEGAMENTI • CONNECTIONS • CONNEXIONS • ANSCHLÜSSE • CONEXIONES
I - Note il sintonizzatore e il navigatore sono collocati nel bagagliaio.
1) Togliere la chiave di accensione.
2) Sganciare il connettore FAKRA dietro al sintonizzatore.
3) Sganciare il connettore a 12 poli di colore nero dal connettore FAKRA.
4) Inserire il connettore femmina a 12 poli nero presente nella confezione.
5) Inserire il connettore maschio 12 poli del cablaggio presente nella confezione al connettore 12 poli originale
precedentemente sganciato.
6) Inserire il restante connettore nero 12 poli nella centralina.
7) Sganciare il connettore blu a 18 poli dal navigatore originale e inserirlo nella presa blu della centralina.
8) Collegare il cavo prolunga presente nella confezione fra la centralina e il navigatore rispettando i colori del
connettore.
9) Inserire il segnale audio /video alla centralina.
 TV-Tuner and Navigator are installed in the booth.
1) Take ignition-key off.
2) Take FAKTRA-pin away from the TV-Tuner (on rear).
3) Separate the 12-pin-connector (black) from the FAKRA-connector.
4) Insert the 12-pin female connector (black) supplied with the package.
5) Insert the 12-pin male connector of the supplied cable, into 12-pin original connector previously seaparated.
6) Insert the remaining 12-pin connector (black) into the central box.
7) Separate the 18-pin connector (blue) from the original navigator and insert the connector into the blue socket
of the central unit.
8) Connect the supplied cable-extension between the central-unit and the navigator, in due accordance with the
given colours.
9) Insert the audio/video-signal into the central-unit.
F - Note: Le TV-Tuner et le Navigateur se trouvent dans le coffre.
1) Lever la clé de démarrage
2) Débrancher le connecteur FAKRA sur le dos du TV-Tuner
3) Séparer le connecteur à 12 pôles (noir) du connecteur FAKRA
4) Introduire le connecteur femelle à 12 pôles (noir) fournit dans la confection
5) Brancher le connecteur mâle à 12 pôles (du câble fournit dans la confection) au connecteur d’origine à 12
pôles précédemment séparé
6) Introduire le reste du connecteur (noir à 12 pôles) dans l’unité centrale
7) Débrancher le connecteur (bleu à 18 pôles) du navigateur d’origine et l’introduire dans la prise bleue de l’unité
centrale.
8) Connecter le câble rallonge (fournit dans la confection) entre l’unité centrale et le navigateur, en respectant la
couleur du connecteur.
9) Introduire le signal audio/vidéo dans l’unité centrale.
 Hinweis: TV-Tuner und Navigator sind im Kofferraum untergebracht.
1) Zündschlüssel abziehen.
2) FAKRA-Stecker vom TV-Tuner herausziehen.
3) 12-Pol-Verbinder (schwarz) vom FAKRA-Stecker entfernen.
4) Mitgelieferte 12-Pol-Buchse (schwarz) eingeben.
5) 12-Pol-Stecker (des mitgelieferten Kabels) in den vorher abgetrennten 12-Pol Original-Verbinder eingeben.
6) Den Rest des Verbinders (12-pol. schwarz) in die Zentraleinheit einstecken.
7) Original-Verbinder des Navigators (18-pol. blau) abnehmen und in die blaue Buchse der Zentraleinheit einste-
cken.
8) Mitgeliefertes Verlängerungskabel zwischen Zentraleinheit und Navigator anschließen. Dabei die Verbinder-
Farben beachten.
9) Audio/Video-Signal in die Zentraleinheit eingeben.
E - NOTA el sintonizador y el navegador se encuentran ubicados en el maletero.
1) Quitar la llave de encendido.
2) Desenganchar el conector FAKRA detrás del sintonizador.
3) Desenganchar el conector de 12 polos de color negro del conector FAKRA.
4) Insertar el conector hembra de 12 polos negro presente en el envase.
5) Insertar el conector macho de 12 polos del cableado presente en el envase al conector de 12 polos de origen
precedentemente desenganchado.
6) Insertar el restante conector negro de 12 polos en la centralita.
7) Desenganchar el conector azul de 18 polos del navegador de origen e insertarlo en la centralita en la toma de
color azul.
8) Conectar el cable de prolongación presente en el envase entre la centralita y el navegador respetando los
colores del conector.
9) Insertar la señal audio/video a la centralita.
 INSTALLATION INSTALLATION INSTALLATION INSTALACION
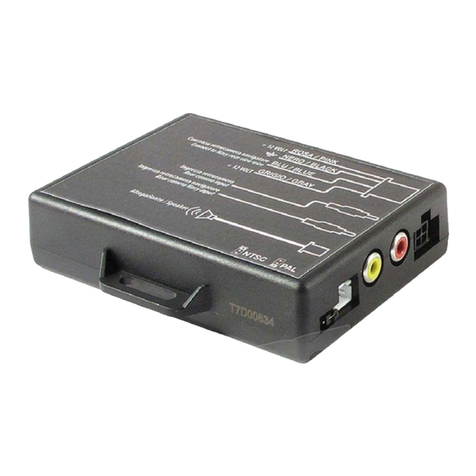
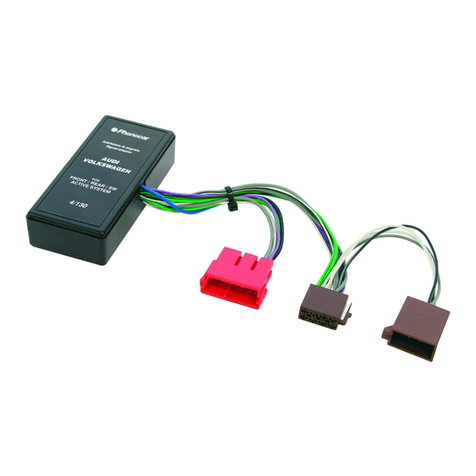
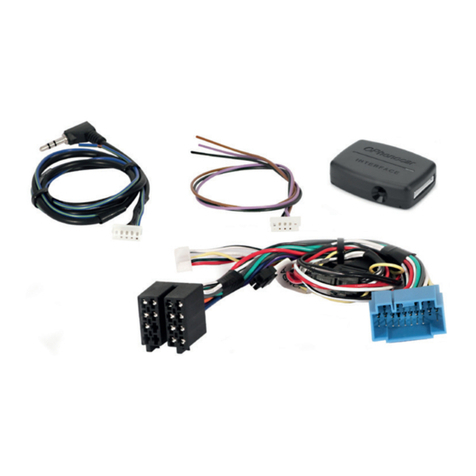
I - L’interfaccia VM334 è un dispositivo elettronico che dà la possibilità di collegare una sorgente audio /video PAL o
NTSC utilizzando il monitor originale della vettura dotate di navigatore, senza tv tuner originale.
Il dispositivo è compatibile con le seguenti autovetture:
 …s. 3 (E46) s. 5 (E39 ) s. X5 (E53) >06/07 con 16:9 NAVIGATION
 The Interface VM334 is an electronic device allowing you to connect a PAL or NTSC audio/video-source, by
making use of the original monitor of the car, tted with navigator but without original TV-Tuner.
The Interface is compatible with the following Car-models:
 …s. 3 (E46) s. 5 (E39 ) s. X5 (E53) >06/07 with 16:9 NAVIGATION
F - L’Interface VM334 est un dispositif électronique vous permettant de brancher une source audio/vidéo PAL ou
NTSC en utilisant l’écran d’origine de la voiture dotée de navigateur, sans Tuner-TV d’origine.
L’Interface est compatible avec les modèles de voiture suivants :
 …s. 3 (E46) s. 5 (E39 ) s. X5 (E53) >06/07 avec 16:9 NAVIGATION
 Mit Hilfe der elektronischen Interface VM334 besteht die Möglichkeit, eine PAL oder NTSC Audio/Video-Quelle
anzuschließen, unter Verwendung des Original-Monitors, bei Wagenmodellen mit Navigationsgerät, jedoch ohne
Original TV-Tuner.
Die Interface ist mit folgenden Wagenmodellen kompatibel
 …s. 3 (E46) s. 5 (E39 ) s. X5 (E53) >06/07 mit 16:9 NAVIGATION
E - El interfaz VM334 es un dispositivo electrónico que da la posibilidad de conectar un reproductor audio/ video PAL
o NTSC utilizando el monitor de origen de los automóviles dotados de navegador, sin sintonizador de TV original.
El dispositivo es compatible con los siguientes modelos.
 …s. 3 (E46) s. 5 (E39) s. X5 (E53) >06/07 con NAVIGATION SYSTEM PROFESSIONAL

Other Phonocar Automobile Accessories manuals

Phonocar VM341 User manual

Phonocar

Phonocar VM341 User manual

Phonocar VM549 User manual

Phonocar

Phonocar VM549 User manual

Phonocar 5/855 User manual

Phonocar

Phonocar 5/855 User manual

Phonocar 06890 User manual

Phonocar

Phonocar 06890 User manual

Phonocar VM548 User manual

Phonocar

Phonocar VM548 User manual

Phonocar 5/951 User manual

Phonocar

Phonocar 5/951 User manual

Phonocar 5/928 User manual

Phonocar

Phonocar 5/928 User manual

Phonocar 4/031 User manual

Phonocar

Phonocar 4/031 User manual

Phonocar VM248 User manual

Phonocar

Phonocar VM248 User manual

Phonocar 4/008 User manual

Phonocar

Phonocar 4/008 User manual

Phonocar 06940 User manual

Phonocar

Phonocar 06940 User manual

Phonocar 4/130 User manual

Phonocar

Phonocar 4/130 User manual

Phonocar VM257 User manual

Phonocar

Phonocar VM257 User manual

Phonocar 5/946 User manual

Phonocar

Phonocar 5/946 User manual

Phonocar 05929 User manual

Phonocar

Phonocar 05929 User manual

Phonocar 4/125 User manual

Phonocar

Phonocar 4/125 User manual

Phonocar DREAM PH2000 User manual

Phonocar

Phonocar DREAM PH2000 User manual

Phonocar 05971 User manual

Phonocar

Phonocar 05971 User manual

Phonocar VM268 User manual

Phonocar

Phonocar VM268 User manual

Phonocar 05730 User manual

Phonocar

Phonocar 05730 User manual

Phonocar 4/503 User manual

Phonocar

Phonocar 4/503 User manual

Phonocar VM102 User manual

Phonocar

Phonocar VM102 User manual

Phonocar 5/991 User manual

Phonocar

Phonocar 5/991 User manual

Phonocar 03750 User manual

Phonocar

Phonocar 03750 User manual

Popular Automobile Accessories manuals by other brands

bosal 028011 Fitting instructions

bosal

bosal 028011 Fitting instructions

GU Electronic PEUGEOT2017 RCC TD instruction manual

GU Electronic

GU Electronic PEUGEOT2017 RCC TD instruction manual

attica ATTJL01A108-BX installation manual

attica

attica ATTJL01A108-BX installation manual

dirna Bergstrom Bycool Green Line Compact 3.0 Mounting instructions

dirna Bergstrom

dirna Bergstrom Bycool Green Line Compact 3.0 Mounting instructions

Front Runner LAMG002 manual

Front Runner

Front Runner LAMG002 manual

Enustech BHF-500 user manual

Enustech

Enustech BHF-500 user manual

Lippert Components 432223 installation manual

Lippert Components

Lippert Components 432223 installation manual

Prorack K611 manual

Prorack

Prorack K611 manual

Mercedes-Benz New Alustyle installation instructions

Mercedes-Benz

Mercedes-Benz New Alustyle installation instructions

Thule VeloCompact 924 instructions

Thule

Thule VeloCompact 924 instructions

ARKSEN 002-AU-19CC owner's manual

ARKSEN

ARKSEN 002-AU-19CC owner's manual

Havis-Shields C-VS-1200-EXPD-1 Install instructions

Havis-Shields

Havis-Shields C-VS-1200-EXPD-1 Install instructions

Warn 101694 installation instructions

Warn

Warn 101694 installation instructions

Whispbar K457W Fitting instructions

Whispbar

Whispbar K457W Fitting instructions

Barricade J123325-JL quick start guide

Barricade

Barricade J123325-JL quick start guide

Viessmann 3570 Operation manual

Viessmann

Viessmann 3570 Operation manual

Whelen Engineering Company SA122DB installation guide

Whelen Engineering Company

Whelen Engineering Company SA122DB installation guide

SpeedTech Lights K-FORCE TOW 65 instruction manual

SpeedTech Lights

SpeedTech Lights K-FORCE TOW 65 instruction manual

manuals.online logo
manuals.online logoBrands
  • About & Mission
  • Contact us
  • Privacy Policy
  • Terms and Conditions

Copyright 2025 Manuals.Online. All Rights Reserved.