7
FR-DEFonctions • Funktionen
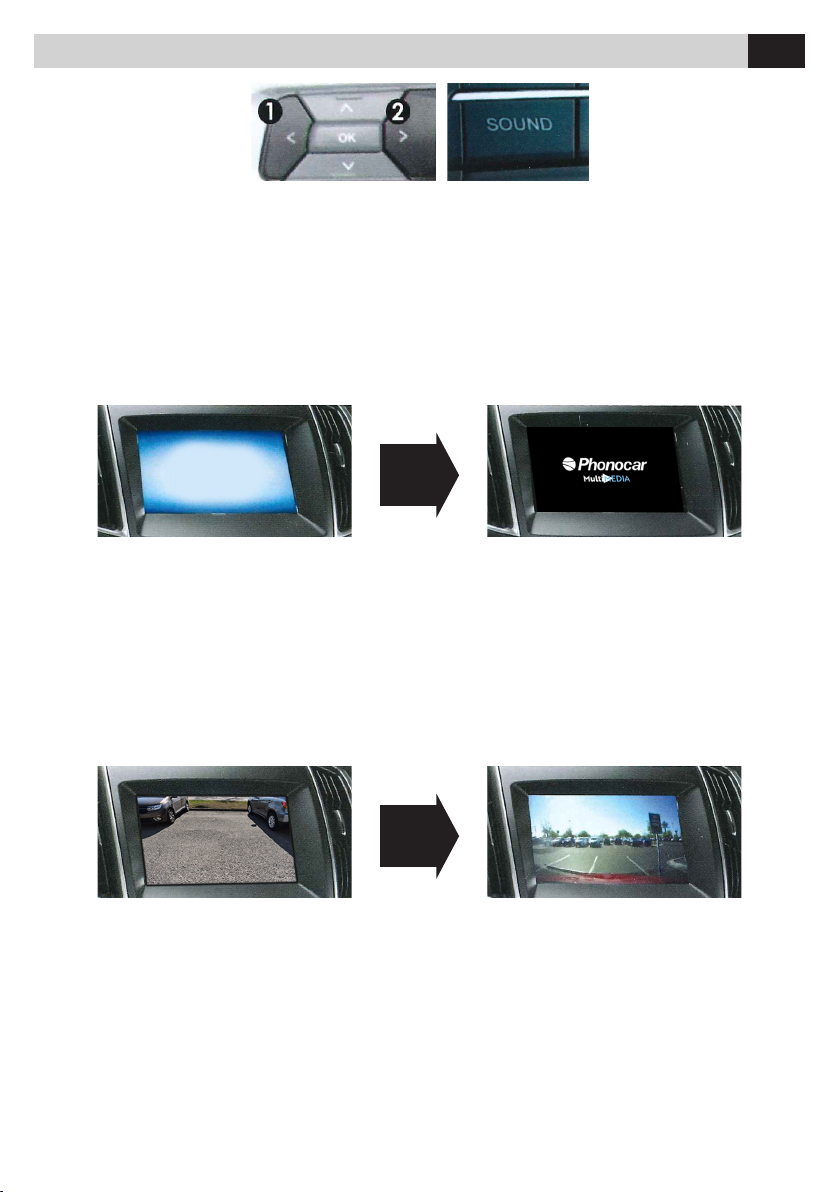
PULSANTE DI CONFIGURAZIONE
Pulsante 1 - Freccia sinistra (volante) o pulsante SOUND
sulla centralina OEM.
Pulsante 2 - Freccia destra (volante).
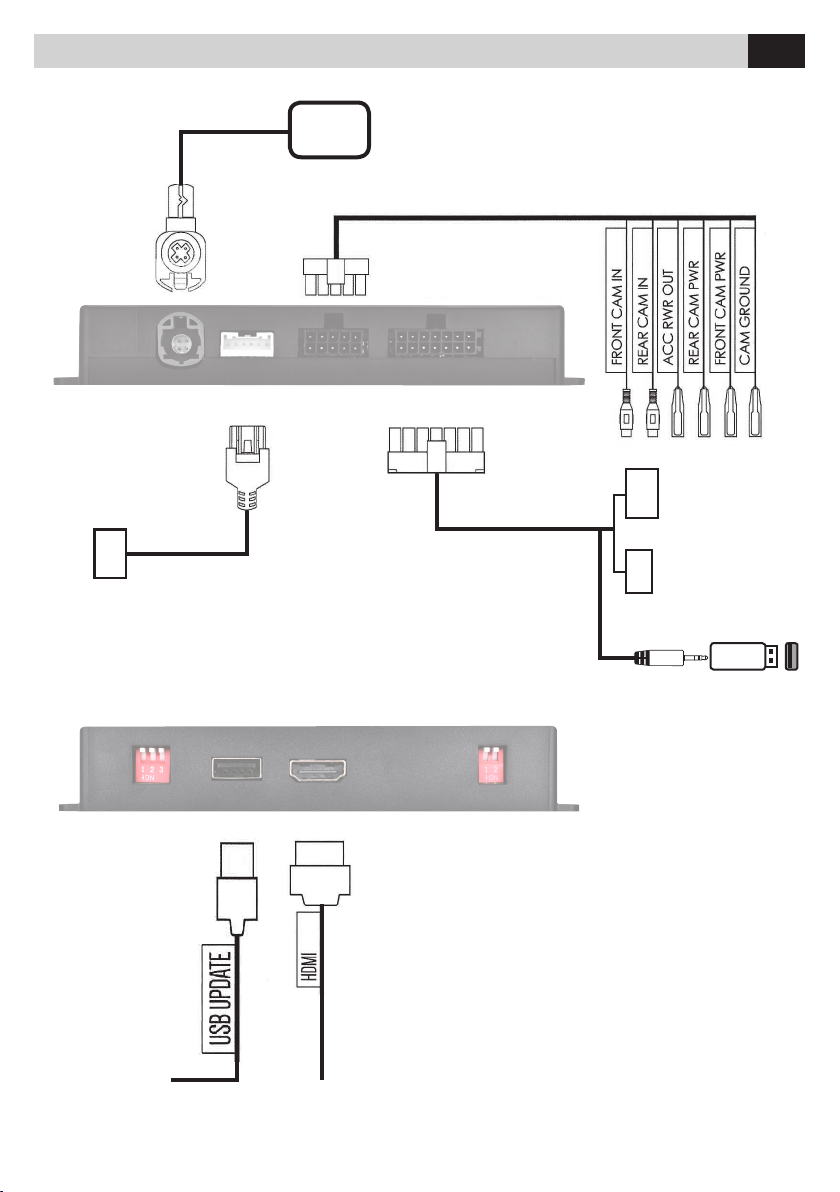
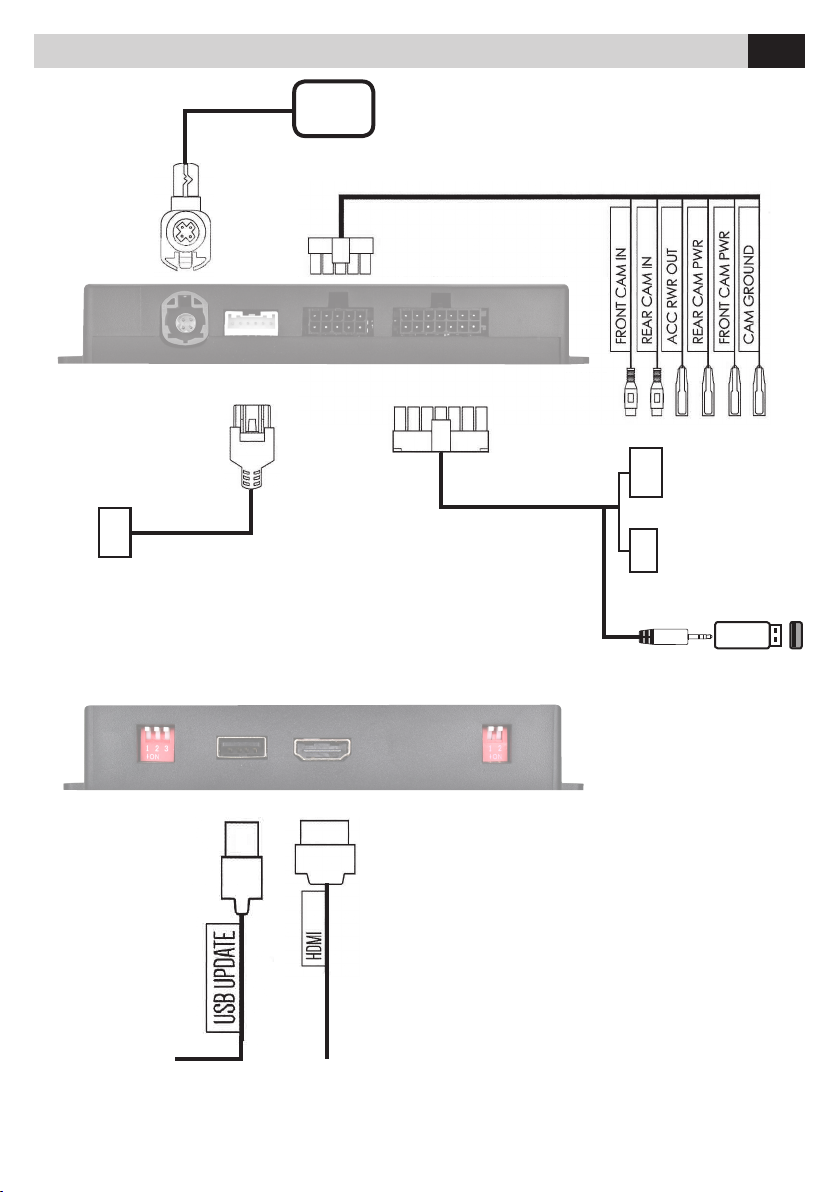
ACCESSO HDMI
Collegare il dongle USB in dotazione all’ingresso USB Sync
**. Selezionare la sorgente USB dalle sorgenti del menu
OEM, Il dongle verrà visualizzato come‘USB AUX’.
Tenere premuto Pulsante 1 per 2 secondi per passare dalla
schermata OEM alla schermata Phonocar Multimedia HDMI.
Avviso video in movimento - 16 km/h
Tenere premuto Pulsante 2 (o premere l’angolo superiore
destro del touch screen) per disabilitare il messaggio di
avviso video in movimento
ACCESSO TELECAMERA POSTERIORE E ANTERIORE
Da entrambe le modalità HDMI o OEM
1. Selezionare la retromarcia per attivare la retrocamera.
2. Deselezionare la retromarcia per passare alla telecamera
anteriore after market (se il DIP 2 è su ON) Premere l’angolo
superiore destro dello schermo per disattivare la telecame-
ra anteriore o guidare sopra i 16 km/h.
Accesso telecamera anteriore
Tenere premuto PULSANTE 2 per 2 secondi per accedere
alla visualizzazione della telecamera anteriore (se il DIP 2 è
su ON) o premere due volte il tasto SOUND sulla centralina
OEM.
Visualizza il numero di versione
Tenere premuto il Pulsante 1 per 8 secondi per accedere
alla schermata delle informazioni del firmware.
**N.B potrebbe esserci un leggero ritardo di sincronizzazione audio lip
sync a livello HDMI, dovuto al tempo tampone per l’attivazione audio
USB del sistema OEM. Questo fattore dipende dalle speciche tecniche
dell’allestimento originale del costruttore.
TOUCHE DE CONFIGURATION
Touche 1 - Flèche gauche (volant) ou touche SOUND sur le
boîtier de control OEM.
Touche 2 - Flèche droite (volant)
ACCÈS HDMI
Branchez le dongle USB fourni à l’entrée Sync USB du véhi-
cule**. Sélectionnez la source USB dans le menu OEM. Le
dongle sera affiché comme ‘USB AUX’. Faire pression sur la
touche 1 pendant 2 secondes pour passer de la visualisa-
tion OEM à la visualisation HDMI Phonocar Multimédia
Message vidéo en mouvement - 16 km/h
Appuyez quelques secondes sur Touche 2 (ou appuyez sur
le coin supérieur droit de l’écran tactile) pour désactiver le
message d’avertissement vidéo en mouvement.
ACCÈS CAMÉRAS AVANT ET DE RECUL
A partir du mode HDMI ou du mode OEM
1. Sélectionnez la marche arrière pour la caméra de recul.
2. Désélectionnez la marche arrière pour passer à la caméra
avant deuxième monte (si le DIP 2 est sur ON). Pour désac-
tiver la caméra avant, appuyez sur le coin supérieur droit de
l’écran ou conduire à une vitesse supérieure à 16 km/h.
Accès camera avant
Appuyez pendant 2 secondes sur la touche 2 pour accéder
à la visualisation de la caméra avant ( si le DIP 2 est sur ON )
ou appuyez deux fois sur la touche SOUND sur le boîtier de
control OEM.
Afficher le nr. de version
Faire pression sur la touche 1 pendant 8 secondes pour
accéder à la page des informations du logiciel.
**N.B : il pourrait y avoir un léger retard dans la synchronisation audio
lip sync sur le HDMI, celui-ci est dû au temps nécessaire pour l’activation
audio USB du système OEM. Ce facteur dépend des caractéristiques
techniques de l’équipement d’origine du fabricant.
FR DE