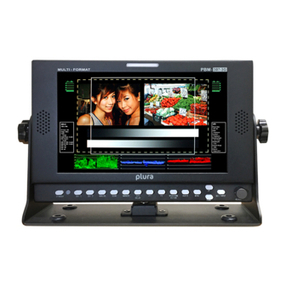
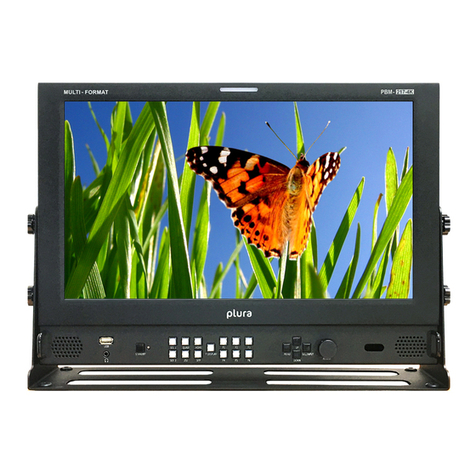
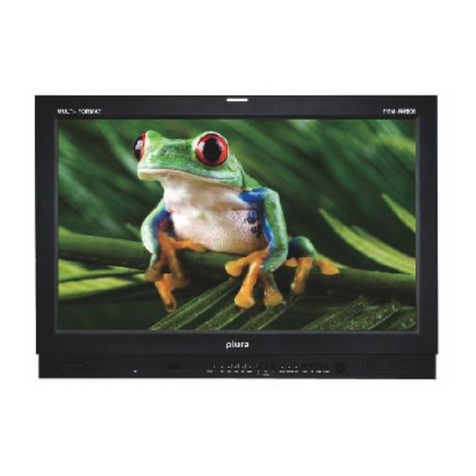
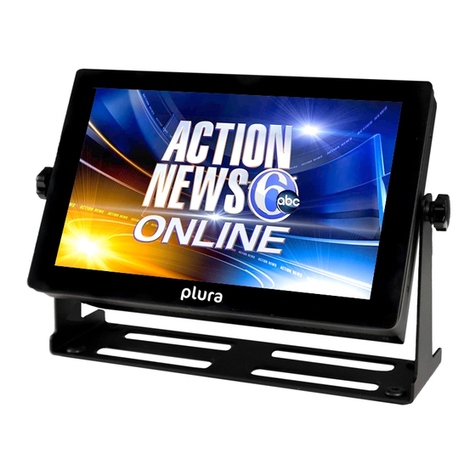
Plura PRM-317-3G User manual

Re-imagine Beyond Technology sales@plurainc.com
Operating Instructions
PRM-317-3G
"17” Reference Monitor
PRM-317-3G

Re-imagine Beyond Technology sales@plurainc.com
•PRECAUTION ------------------------------------------------------------------------------------------------------- 5
•OVERVIEW---------------------------------------------------------------------------------------------------------- 8
•ADVANCED FEATURES -------------------------------------------------------------------------------------------- 8
•FUNCTIONAL EXPLANATION OF EACH PART------------------------------------------------------------------- 10
1. FRONT PANEL ------------------------------------------------------------------------------------------------------- 10
•
PRM-317-3G----------------------------------------------------------------------------------------------------
10
•
Front Keys Arrangements
-------------------------------------------------------------------------------------
10
•
Front Keys Operations -----------------------------------------------------------------------------------------
11
•
Front panel LED Operations-----------------------------------------------------------------------------------
11
•
Speaker Out----------------------------------------------------------------------------------------------------
11
2. REAR PANEL -------------------------------------------------------------------------------------------------------- 12
•
I/O Details------------------------------------------------------------------------------------------------------
12
•
DC Battery IN
--------------------------------------------------------------------------------------------------
12
•
RJ-45 Connections ---------------------------------------------------------------------------------------------
12
•
Interface description-------------------------------------------------------------------------------------------
13
•MENU OVERVIEW ------------------------------------------------------------------------------------------------- 14
1. TO SHOW AND REMOVE THE MENU ---------------------------------------------------------------------------------- 14
2. TO GO TO THE NEXT LEVEL ------------------------------------------------------------------------------------------- 14
3. TO GO BACK TO THE PREVIOUS LEVEL --------------------------------------------------------------------------------- 14
4. TYPICAL MENU OPERATION ------------------------------------------------------------------------------------------ 14
•BASIC OPERATION------------------------------------------------------------------------------------------------- 15
1. TURNING ON THE MONITOR ----------------------------------------------------------------------------------------- 15
2. VOLUME ADJUSTMENT----------------------------------------------------------------------------------------------- 15
•ON SCREEN MENUS SELECTION AND ADJUSTMENT---------------------------------------------------------- 16
1. HOW TO ADJUST THE OSD SCREEN ---------------------------------------------------------------------------------- 16
•SELECT VIDEO INPUT --------------------------------------------------------------------------------------------- 17
1. HOW TO SELECT VIDEO SOURCE BY OSD----------------------------------------------------------------------------- 17
•VIDEO MENU OPTIONS ------------------------------------------------------------------------------------------ 18
Operating Instructions
PRM-317-3G
2

Re-imagine Beyond Technology sales@plurainc.com
1. ADJUST ------------------------------------------------------------------------------------------------------------- 18
2. COLOR TEMPERATURE CONTROL------------------------------------------------------------------------------------- 18
3. ASPECT RATIO ------------------------------------------------------------------------------------------------------ 19
4. MONO/BLUE ONLY ------------------------------------------------------------------------------------------------- 19
5. PEAKING FILTER ----------------------------------------------------------------------------------------------------- 20
6. FALSE COLOR ------------------------------------------------------------------------------------------------------- 20
7. HDR MODE -------------------------------------------------------------------------------------------------------- 20
8. OUTPUT RANGE----------------------------------------------------------------------------------------------------- 21
•AUDIO MENU OPTIONS ---------------------------------------------------------------------------------------- 21
1. SDI OUTPUT-------------------------------------------------------------------------------------------------------- 21
2. LEVEL METER ------------------------------------------------------------------------------------------------------- 22
3. VOLUME ------------------------------------------------------------------------------------------------------------ 23
•MARKER MENU OPTIONS -------------------------------------------------------------------------------------- 24
1. MARKER & USER MARKER------------------------------------------------------------------------------------------- 24
2. SAFETY AREA ------------------------------------------------------------------------------------------------------- 24
3. CENTER MAKER ----------------------------------------------------------------------------------------------------- 25
4. MARKER WIDTH----------------------------------------------------------------------------------------------------- 25
5. MARKER COLOR----------------------------------------------------------------------------------------------------- 25
6. PRESET1 & PRESET2 ------------------------------------------------------------------------------------------------ 25
•GPI MENU OPTIONS -------------------------------------------------------------------------------------------- 26
1. GPI CONTROL & GPI PORTS ---------------------------------------------------------------------------------------- 26
•SETUP MENU OPTIONS ----------------------------------------------------------------------------------------- 27
1. FACTORY DEFAULT ----------------------------------------------------------------------------------------------------- 27
2. FUNCTION 1 ~6 ------------------------------------------------------------------------------------------------------ 28
3. ON SCREEN DISPLAY -------------------------------------------------------------------------------------------------- 29
a.
OSD Option
----------------------------------------------------------------------------------------------------
29
b.
Time code ------------------------------------------------------------------------------------------------------
29
c.
Under Monitor Display (color: Tally R/G mode action )
-----------------------------------------------------
29
4. ADVANCED ----------------------------------------------------------------------------------------------------------- 30
a.
Information-----------------------------------------------------------------------------------------------------
30
b.
Control
---------------------------------------------------------------------------------------------------------
30
c.
Screen Control
-------------------------------------------------------------------------------------------------
30
d.
Network Configuration
----------------------------------------------------------------------------------------
31
Operating Instructions
PRM-317-3G
3

Re-imagine Beyond Technology sales@plurainc.com
5. CAPTION FOR NORTH AMERICAN MARKET---------------------------------------------------------------------------- 31
6. SET ID ------------------------------------------------------------------------------------------------------------- 32
7. VIDEO RANGE------------------------------------------------------------------------------------------------------- 32
•OSD TREE ---------------------------------------------------------------------------------------------------------- 33
1. VIDEO --------------------------------------------------------------------------------------------------------------- 34
2. AUDIO--------------------------------------------------------------------------------------------------------------- 35
3. MARKER ------------------------------------------------------------------------------------------------------------- 36
4. GPI ----------------------------------------------------------------------------------------------------------------- 37
5. SETUP --------------------------------------------------------------------------------------------------------------- 38
Operating Instructions
PRM-317-3G
4

Re-imagine Beyond Technology sales@plurainc.com
•PRECAUTION
Before operating this unit, please read this manual carefully.
WARNING:
To reduce the risk of any electric shock, please do not remove the back cover. No user serviceable parts inside. Refer any service matters to
qualified service personnel. To prevent fire or shock hazard, do not expose the rear of the set to rain or moisture. Do not rub, clean or hit the
Active Matrix LCD with object that may scratch, mark, or damage the Active Matrix LCD permanently.
CAUTION:
Unauthorized tampering with the inside of the monitor invalidates the warranty.
The manufacturer shall not warrant for any damage caused by improper maintenance and/or repair or work by third parties.
Important safeguards for you and your new product:
Your product has been manufactured and tested with your safety in mind. However, improper use can result in potential electrical shock or
fire hazards. Please read and observe the following safety points when installing and using your new product and save them for future
reference.
1. Read Instructions
2. Follow Instructions
All operating and use instructions should be followed.
3. Retain Instructions
The safety and operating instructions should be retained for future reference.
4. Notice Warnings
All warnings on the product and in the operating instructions should be adhered to.
5. Cleaning
Disconnect the unit from the mains before cleaning the unit. Do not use abrasive cleaners. Use a damp
cloth ONLY for cleaning.
6. Water and Moisture
Operating Instructions
PRM-317-3G
5

Re-imagine Beyond Technology sales@plurainc.com
Do not use this product near water surface.
7. Transporting Product
This product should be moved with care. Quick stops, excessive force and uneven surfaces may cause the
product damages.
8. Accessories
Do not use accessories not recommended by PLURA Inc. as they may cause hazards.
9. Ventilation
Do not block any of the ventilation openings.
Install in accordance with the manufacturer’s instructions.
10. Power Sources
This product should be operated only from the type of power source indicated on the marking label. If you
are not sure of the type of power supply, consult your power supply company.
11. Power Lead Polarization
This product is equipped with a three-wire grounding-type cord. This is a safety feature. Do not use any
other type power cord.
12. Power Cord Protection
Power-supply cords should be dressed so that they are not likely to be pulled or pinched by items placed
upon or against them.
13. Lightning
For added protection for this product during a lightning storm, or when it is left unattended and unused
for long periods of time, unplug it from the wall outlet. This will prevent possible damage to the product
due to lightning and power-line surges.
14. Grounding the product
This product must be grounded properly to comply with the safety regulations in the country of use. If you
are unsure of these regulations, please consult a qualified electrician.
15. Servicing
Do not attempt to service this product by yourself as opening or removing covers may expose you to
dangerous voltages or other hazards. Refer all servicing to qualified service personnel.
16. Damage Service Required
Isolate this product from the mains and refer to qualified service personnel under the following conditions:
A. If the power-supply cord or plug is damaged.
B. If the front LCD front has been damaged.
C. If the product does not operate correctly by following the operating instructions. Use only the user
control buttons any improper adjustment of other controls may result in damage and will often require
extensive work by a qualified technician to restore the product to its normal operation.
D. If the product has been dropped.
Operating Instructions
PRM-317-3G
6

Re-imagine Beyond Technology sales@plurainc.com
E. If the product exhibits a distinct change in performance.
17. Safety Check
Upon completion of any service or repairs to this product, ask the service technician to perform safety
checks to determine that the product is in proper operating condition and the warranty seal is provided.
18. Mounting
The product should be mounted on a wall as recommended in the instructions.
19. Power
This set operates on an AC supply; the voltage is as indicated on the label on the Manual. This appliance
must be earthed at all times through the chassis as well as through the power lead.
Operating Instructions
PRM-317-3G
7

Re-imagine Beyond Technology sales@plurainc.com
•OVERVIEW
PRM-317-3G is a 17" – Reference Broadcast Monitor equipped with UHD 10 bit panel
(3840x2160). supports up to 3G 1080P resolutions, 3D LUT, with waveform and vector scope.
The monitor is field up-gradable to PBM-217-4K with option "PRM-217-3GFW4K" and/or
SFP-217-25G with option "PRM-217-3GFW25G".
It was designed in alignment with increased industry demand for affordable, reliable and future
proof reference monitor . Plura PRM-317-3G, PBM-217-4K and SFP-217-25G bring the
exceptional built-in features Plura monitors are known for, maintaining quality and
performance to give production facilities an edge in FHD, UHD(1,2) and 25G IP-2110(1)
monitoring respectively.
Plura PRM-317-3G, PBM-217-4K and SFP-217-25G focuses on delivering the highly detailed,
accurate color representation and stunning picture consistency that high-end production
applications require. Ember+ control capabilities are included, i.e. can be controlled by Lawo-
VSM, BFE-Core or any other Ember+ compliant control system.
•ADVANCED FEATURES
The new PRM-317-3G has the following advanced features:-
Operating Instructions
8
(1) PRM-317-3G + "PRM-217-3GFW25G" license = SFP-217-25G. Refer to SFP-25G data sheet for more specifications. (2) PRM-317-3G + "PRM-217-3GFW4K" license = PBM-217-4K. Refer to PBM-4K data sheet for more specifications.
•
TRUE 10 bit panel color depth with 178° Viewing Angle Display
•
RGB 12 Bit Digital Signal Processing
•
2 x 25 GbE SFP28 ports supporting ST 2110, ST 2022-7(1)
•
1 x HDMI 2.0 HDCP 2.2 port
•
2 x 12G(1,2), 6G(1,2), 3G, 1.5G ports
•
Quad 3G SQ(1,2) and 2SI(1,2) support
•
1 x SFP-SDI Slot supporting Multiple I/O Standards
•
Supports up to 4096 x 2160 resolutions
•
HDR (High Dynamic Range) capabilities
•
PQ (SMPTE ST 2084) & HLG (Hybrid Log Gamma)
•
Gamma Selectable (0.8 – 3.0)
•
3D LUT (ITU-R BT 2020, Native, BT.709, SMPTE-C, EBU, NTSC, D-Cinema)
•
Color Temperature – User, VAR, Adjustable (9300K TO 3200K)
•
(ICAC) - Plura Intelligent Connection for Alignment & Calibration
•
ColourSpace PRO tool integration, license is required
•
S-Log LUT curves integration included
Operating Instructions
PRM-317-3G
8

Re-imagine Beyond Technology sales@plurainc.com
•
NMOS, JT-NM Interoperability(1)
•
Ember+ Compliant, Ethernet & RS232 Remote Control
•
TSL 4.0, 5.0 and Internal Monitor Display (IMD) support
•
Cutting edge De-interlacing and Scaling Technology
•
Display Advanced Waveform & Vector Scope with line select
•
Programmable 6 User Front Pushbutton Controls & GPI
•
Various and User defined Markers Display Safe Area in HD and SD
•
Closed Caption (608/708) – North American Market
•
Teletext 801 & Subtitle OP-47- Australia & N.Z. Market
•
Fast Response Time for high motion video
•
Zeroscan / Pixel to Pixel Mode / Tally / DC Operation
•
False Color and Peaking Filter / Focus Assist
•
Video Range test with adjustable Y & C values
•
Display LTC & DVITC time code with line select
•
Embedded Audio Input, Digital Audio Decoding
•
Internal Pattern Generator and Wall Control System
(1) PRM-317-3G + "PRM-217-3GFW25G" license = SFP-217-25G. Refer to SFP-25G data sheet for more specifications. (2) PRM-317-3G + "PRM-217-3GFW4K" license = PBM-217-4K. Refer to PBM-4K data sheet for more specifications.
Operating Instructions
PRM-317-3G
9

Re-imagine Beyond Technology sales@plurainc.com
•Functional explanation of each part
1. Front Panel
•PRM-317-3G
•Front Keys Arrangements
Speaker
Front Key
LED
Tally LED
Headphone
Operating Instructions
PRM-317-3G
10

Re-imagine Beyond Technology sales@plurainc.com
•Front Keys Operations
Key Name Operation
STANDBY ►Power ON/ OFF Button.
SDI 1 ► Select SDI 1.
SDI 2 ► Select SDI 2.
QUAD ► Select QUAD.
2SI ► Select 2SI .
HDMI ► Select HDMI .
SFP ► Select SFP.
F DI SPLAY ► Display Functions settings.
F1 ~ F6
► Executes user defined functions i.e.
Undefined, Aspect, Audio LV Meter, Audio Group, Audio Channel, H/ V Delay,
Mono/ Blue only, Gamma select, Marker size, Safety Maker Size, Marker Preset1,
Marker Preset2.
MENU
►Activates main OSD menu.
►Navigates higher menu levels in main OSD menu.
►►Exit OSD menu.
UP
►Increases speaker volume.
►Increases values for certain menu functions.
►Executes function (by OSD help commands) in main OSD menu.
DOWN
►Decreases speaker volume.
►Decreases values for certain menu functions.
►Executes function (by OSD help commands) in main OSD menu.
SEL/ I NPUT
►Activates and select input source.
►Changes input source.
►Executes functions (by OSD help commands) in main OSD menu.
Adjust
► Adjust Menu parameters (Volume -> Brightness -> Contrast -> Color -> Sharpness-> &
Tint)
► Turn Right = to UP button
► Turn Left = to DOWN button
•Front panel LED Operations
- Stand-by mode = LED is Red
•Speaker Out
I nterface Description
Speaker R out
8 ohm± 15% , Max 2W + 2W
Speaker L out
Operating Instructions
PRM-317-3G
11

Re-imagine Beyond Technology sales@plurainc.com
2. Rear Panel
•I/O Details
•DC Battery IN
PI N NO Description
1 GND
2 , 3
4 12-24V
•RJ-45 Connections
1
23
4
DC IN 12V PRM-37-3G / PBM-217-4K ONLY
DC IN 24V PBM-224-4K & PBM-324-4K ONLY
GPI CONTROL LAN 1 RJ 45 Jack FaceCONTROL LAN 2
Ember+
Operating Instructions
PRM-317-3G
12

Re-imagine Beyond Technology sales@plurainc.com
- Firmware Upgrade/ System Controller / Ember+ (Ethernet) & GPI
Remote PI N Assignment
8 PI N COMMON(GND) 4 PI N GPI 4 PORT
7 PI N GPI 7 PORT
(STAND BY/ POWER ON/ OFF) 3 PI N GPI 3 PORT
6 PI N GPI 6 PORT 2 PIN GPI 2 PORT
5 PI N GPI 5 PORT 1 PIN GPI 1 PORT
•Interface description
I nterface Description
SDI 1 I N 12G/ QUAD 3G/ 2SI / 3G/ HD SDI I nput 1
SDI 2 I N 12G/ QUAD 3G/ 2SI / 3G/ HD SDI I nput 2
SDI 3 I N QUAD 3G/ 2SI SDI I nput 3
SDI 4 I N QUAD 3G/ 2SI SDI I nput 4
SDI 1 OUT 12G/ QUAD 3G/ 2SI / 3G/ HD SDI Out put 1
SDI 2 OUT 12G/ QUAD 3G/ 2SI / 3G/ HD SDI Out put 2
SDI 3 OUT QUAD 3G/ 2SI SDI Output 3
SDI 4 OUT QUAD 3G/ 2SI SDI Output 4
SFP SFP Module x 1( SFP 12G I nput)
HDMI High Definit ion Multimedia I nput
RS232C Auto color calibration
USB Firmware Upgrade
GPI GPI 1 ~ 7 Control Port
CONTROL LAN1 Network System Control
CONTROL LAN2 Network System Control (EMBER+ )
AC I N AC90V ~ 240V, 50Hz/ 60Hz
DC I N DC 12V PRM-317-3G, PBM-217-4K, DC 24V PBM-224-4K, PBM-324-4K
Control Terminal: 1 ~ 7 Pin
GND Terminal: 8 Pin of RJ-45
Contact Point
Switch
It is possible to attach
Operating Instructions
PRM-317-3G
13

Re-imagine Beyond Technology sales@plurainc.com
•MENU OVERVIEW
In this system menu, there are several ways to maneuver the menu settings.
Most menus consist of three levels to select the necessary option, but some settings require greater
depth. I f you press the MENU button, the first and second level of the menu system will appear on the
monitor screen. The third level can be displayed by pressing SEL/ I NPUT. If a menu has more than three
levels, the pop-up dialogue box will be displayed as the fourth or fifth level.
1. To show and remove the Menu
Press the MENU button to display the menu. Press the MENU button again to hide the menu.
2. To go to the next level
Press SEL/ I NPUT button.
3. To go back to the previous level
Press MENU button
4. Typical Menu Operation
1. Press MENU button: The main menu will be displayed.
2. Use UP/ DOWN button to select the desired menu option (icon).
3. While the desired menu option is selected, press SEL/ I NPUT to move to the second level.
4. Use UP/ DOWN button to select the second menu option.
5. Press SEL/ I NPUT to move to the third level: Some menu options require additional steps.
6. Press MENU to return to the previous menu to return to monitor viewing.
Operating Instructions
PRM-317-3G
14

Re-imagine Beyond Technology sales@plurainc.com
•BASIC OPERATION
1. Turning On the Monitor
1. Firstly, make sure you have connected the AC power cord or DC XLR connector. The monitor will switch to
standby or power on mode. I f the monitor is in standby mode, press the ST-BY button to turn on the monitor.
2. Select the source by using SEL/ I NPUT button on Keypad in front of monitor
2. Volume Adjustment
1. Press the ADJUST button on Keypad.
2. Press the MENU button on Keypad.
- OSD Audio menu -> Volume menu.
Operating Instructions
PRM-317-3G
15

Re-imagine Beyond Technology sales@plurainc.com
•On Screen Menus Selection and Adjustment
1. How to adjust the OSD screen
1. Press the MENU button and then UP/ DOWN button to select each menu.
2. Press the SEL/ I NPUT button and then use UP/ DOWN ( SEL/ I NPUT) / MENU button to display the
available menu.
• The monitor's OSD (On Screen Display) may differ slightly from what is shown in this manual.
Operating Instructions
PRM-317-3G
16

Re-imagine Beyond Technology sales@plurainc.com
•SELECT VIDEO INPUT
1. How to Select Video Source by OSD
1. Press the SET/ I NPUT button and then UP/ DOWN button to select the required video source.
2. Press the SET/ I NPUT button to select the desired video source.
3. I f Input Name is enabled, The SET/ I NPUT button will show the input name previously programmed
instead of the source name.
Operating Instructions
PRM-317-3G
17

Re-imagine Beyond Technology sales@plurainc.com
•VIDEO MENU OPTIONS
1. Adjust
- Adjust the values of Brightness, Contrast, Color, Tint and
Sharpness range from -50 to 50
2. Color Temperature Control
- For Setting the Color temperature or adjusting RGB gain value
- User (User setting RGB gain value), VAR(3200K ~ 9300K), Most common value ( 9300K, 6500K, 5400K,3200K) and
3D LUT Calibration value(D65 – 6504K/ C-6774K/ D-Cinema 6302K)
- Color Space: Native/ BT.709/ SMPTE-C/ EBU/ NTSC/ D-Cinema/ BT.2020
Operating Instructions
PRM-317-3G
18

Re-imagine Beyond Technology sales@plurainc.com
3. Aspect Ratio
- For setting the aspect ratio.
- Pixel to Pixel: Video input will match the video display resolution (NO Scaling). I f input resolution is
higher than panel resolution, the video will be downscaled to match the panel resolution.
- Full Screen: The video input will be scaled to the max panel resolution.
- Pixel to Pixel, Full Screen, 16:9, 4:3, 14:9, 13:9, 1.85:1, 2.35:1: The video will displayed with based on
the selected aspect ratio.
- Function key can be assigned to the aspect ratio and will be rotating through this sequence, Pixel to
Pixel, Full Screen, 16:9, 4:3, 14:9, 13:9, 1.85:1, 2.35:1
- AFD (Auto Format Direct) function can be turned ON or OFF
4. Mono/Blue Only
- Mono color: For selecting monochrome images.
- Blue Only: Blue Video channel is enabled
Operating Instructions
PRM-317-3G
19

Re-imagine Beyond Technology sales@plurainc.com
5. Peaking Filter
-Peaking Filter: Peaking Filter On/ Off.
-Peaking Color: Red/ Blue/ White/ Violet.
-Peaking Level: 0~ 100.
6. False Color
- False Color on/ off
7. HDR Mode
- ST 2084-300 / ST 2084-1000 / ST 2084-10000 /
HLG
Operating Instructions
PRM-317-3G
20
Table of contents
Other Plura Monitor manuals

Plura
Plura MVM-124 User manual

Plura
Plura DBM-124 User manual

Plura
Plura UD Series User manual

Plura
Plura PBM-070 User manual

Plura
Plura PBM-3G Series User manual

Plura
Plura DBM-124 User manual

Plura
Plura SFP-3G Series User manual

Plura
Plura PBM-224-4K User manual

Plura
Plura 3G Series User manual

Plura
Plura UNB-4K Series User manual

Plura
Plura SFP-217-3G User manual

Plura
Plura PBM-4K-H Series User manual

Plura
Plura PBM-217S User manual

Plura
Plura LCM-119-3G User manual

Plura
Plura LCM-3G User manual

Plura
Plura PBM-4K-H Series User manual

Plura
Plura PRM-3G Series User manual

Plura
Plura SFP-H Series User manual

Plura
Plura PBM-070 User manual

Plura
Plura MTD-ID User manual