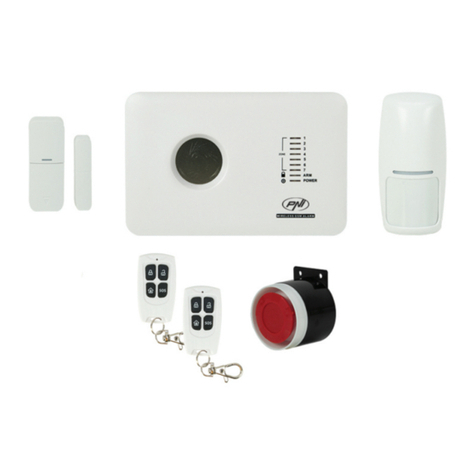
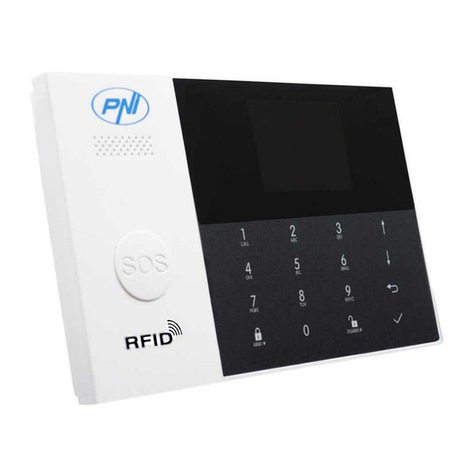
PNI SafeHome PT700 User manual

PNI SafeHome PT700
Wireless alarm system / Безжична алармена система / Drahtloses
Alarmsystem / Sistema de alarma inalámbrico / Système d’alarme sans fil / Vezeték
nélküli riasztórendszer / Sistema di allarme senza fili / Draadloos alarmsysteem /
Bezprzewodowy system alarmowy / Sistem de alarma wireless
EN User manual ......................................................... 3
BG Ръководство за употреба ............................. 29
DE Benutzerhandbuch .............................................. 59
ES Manual de usuario ............................................... 87
FR Manuel utilisateur ............................................... 114
HU Használati utasítás .............................................. 141
IT Manuale utente .................................................. 168
NL Handleiding ........................................................ 195
PL Instrukcja obsługi ............................................... 222
RO Manual de utilizare ............................................. 249


3
English
Warnings
Before using this product, please read the user manual carefully.
The installation and configuration of this alarm system requires basic technical
knowledge to allow a correct understanding of the technical terms and
procedures described in this manual.
Follow the step by step instructions and start with simple settings. After
making the settings, test the correct operation of the product.
Main functions
• Remote control via Tuya Smart application (Android/iOS)
• 2.4 inch color TFT screen
• Menu and voice prompts in 9 languages
• Built-in siren,wiredindoor siren included inthepackage and thepossibility
of pairing a wireless outdoor siren
• Up to 99 wireless zones (sensors) and 3 wired zones (EOLR)
• Up to 8 smart sockets or relays
• Supports renaming areas, for example: door, bedroom, window, balcony,
living room, smoke sensor, gas sensor, CO sensor, etc.
• Low battery warning for sensors
• Event log
• Alarm alert sent by phone call or SMS on preset phone numbers (up to 5
phone numbers can be set)
• Direct phone call via GSM
• Built-in tamper
• GSM 4G and WiFi communication
• Automatic time synchronization via GSM and WiFi
• System configuration via SMS
• Recorded alarm messages (up to 20 seconds/message)
• Remote arming/disarming via Tuya Smart application
• Scheduled arming/disarming

4
English
Burglary protection
Your alarm system has two modes of protection against burglary: Home
arming and Total arming.
Home arming (perimeter arming) only protects the perimeter, allowing you to
move freely inside the house.
Total arming protects the entire building.
Zones
The sensors paired to your alarm system will be assigned to dierent “zones”
(maximum 99 for wireless sensors and maximum 3 for wired sensors). For
example, the sensor on the front door of the house can be assigned to zone 01,
the sensor on the window in the master bedroom in zone 02 and so on. The
zone number is displayed on the screen when an alarm or problem occurs on
a specific area.
Entry and Exit Delay
Your alarm system has been programmed with adjustable delay time that
allows you to leave the house after arming the system and disarm the system
at the entrance into the house, without triggering an alarm.
If you leave the house too late after arming the system or disarm the system
too late after entering the house, the system will trigger an alarm. Disarm the
system immediately.
The alarm and the event notifications on the phone
When an alarm is triggered, the built-in and the external siren will sound until
the system is disarmed or until the preset time interval for the siren expires. A
message will show up on the control panel screen with the area or areas where
the alarm was triggered. If set, the alarm system will call or send SMS via the
4G GSM network to the preset phone numbers (maximum 5) or will send
notification via the mobile application (Tuya Smart).

5
English
Alarm system control via Tuya Smart application
Download the Tuya Smart app via Google Play or App Store or scanning the
QR codes below:
Android iOS
• Open the application, create an account and log in.
• Add your device by clicking the +icon in the upper right corner of the
screen or by clicking the Add device button (this button only appears
when you do not have any devices added to the application).
• Select the Sensors option on the left side of the screen.
• From the list of devices on the right side of the screen, select Alarm (Wi-
Fi)
• Select the WiFi network you want to connect to and add the password.
• In the next interface, select the option EZ Mode from the upper right
corner.
• Access the alarm system control panel menu WiFi->Smartlink Configure
• Then tick Confirm the indicator is blinking rapidly. Click Next.
• The application will start scanning the nearby devices.

6
English
• After it identifies your device, you will receive the confirmation Added
Successfully.
• To finish, click the button Done.

7
English
The application allows you to add accessories (remote controls and sensors), to
configure the system, to arm and disarm, to view the history log.
For details about the menu in the application, please read the explanations of
the alarm menu (page 12).
Main unit
Package contents:
• 1 x control unit
• 1 x wireless motion sensor
• 1 x wireless magnetic sensor
• 1 x wired indoor siren
• 2 x remote controls
• 2 x RFID TAGs
• 230V- 5V power adapter with USB
• USB- microUSB power cable
• Mounting accessories
Index Item Description
1Screen
2.4 inch TFT screen.
It displays time, menu, system status and
alarm status information (the area the
alarm was triggered).

8
English
2Speaker It emits alarm sound and confirmation
sounds.
3Panic button (SOS) Press to generate a panic alarm in case of
fire or personal emergency.
4Arming/Home arming
button
Press to arm the entire alarm system,
perimeter + interior.
Press twice to arm only the sensors
programmed for “Home arming”. Interior
protection is not activated, which allows
movement through the house without
triggering alarms.
5Disarming
Press to disarm the system and turn o the
audible alarm.
Double-click to clear warnings about
accessory operation.
6 Up button Scroll up to the desired function or menu.
7Down button Scroll down to the desired function or
menu.
8Cancel/Back Back to the previous screen.
9Enter Select the option or go to the next
interface
10 RFID reader Bring the TAG closer to this area to arm/
disarm the system

9
English
Connections panel
Index Description
1 Power connector
2Battery power button
3 GSM SIM card slot
4 Connections for 3 wired zones. See Connecting wired accessories
5 Tamper switch
6Microphone
Connecting wired accessories
Zone 1, Zone 2 and Zone 3 are the EOLR wired zones that support devices
(sensors) with NO (open circuit) and NC (closed circuit) signal with a response
time of 300 ms. Maximum resistance of the area: 11000 Ohms + EOLR
Connect the NC (Normally Closed) devices in series at the top of the loop.
The EOLR resistor must be connected in series with the devices to the last
device.
Connect the NO (open circuit) devices in parallel, in the loop.

10
English
Wiring diagram
Note: EOLR (End of Line Resistor): If the EOLR resistor is not at the end of the
loop, the area will not be properly monitored and the system may not respond to an
open circuit in the area.
Home screen
16:23
2019-08-16 Friday
16:23:52
12 3 4 5 6
7
8
9

11
English
1GSM status
Missing SIM card or defective SIM card
GPRS- connected to server
RSSI signal level
The signal level is displayed by bars from
1 to 5 (weak to strong), and the bars are
gray if the system is not registered in the
GSM network
2WiFi status
The system is connected to WiFi. The
number of bars indicates the signal
strength.
The system is connected to the server, if
the point is displayed.
3GSM Outgoing SMS
Outgoing phone call
4Keyboard status Keys locked
5Power supply
The system is powered to 230V
0~3 bars
The system is powered by the built-in
battery. The icon is red when the battery
is discharged.
6Time 15:44 Real time
7 Date and day of the week
8Alarm status
The system is fully armed
The system is partially armed
The system is disarmed
9Time 15:44 Real time
9Display system
status messages
Exit delay
Message “Please exit” + Countdown
You have xx seconds to leave the house. When the
time has expired, the alarm system is armed.

12
English
9Display system
status messages
Entry delay
Message “Please disarm” + Countdown
You must disarm the system before the entry time
expires. If the time has expired and you have not
disarmed, the alarm will sound.
9Display system
status messages
Pairing mode (Snier)
Message “Synchronizing” + Countdown
You must activate the wireless accessory before the
pairing time expires.
9Display system
status messages
Message “Alarm” or “Panic Alarm“ is displayed
together with the Zone where the alarm was
triggered.
Menu
To enter the menu, when you are in the initial interface, press the key √.
Settings
Delay
Exit Delay Set the exit delay
Between 0 ~ 65535 sec.
Default:
40 sec.
Entry Delay Set the entry delay
Between 0 ~ 65535 sec.
Default:
30 sec.
Siren Duration Set siren duration
Between 0 ~ 65535 sec.
Default:
3 minutes
Switch
Arm Beep
Enable/Disable the beep
when arming/disarming
(1)
Default:
Enabled
Siren
Enable/Disable the siren
sound when an alarm
occurs
Default:
Enabled

13
English
Switch
Arm SMS
Enable/Disable SMS
notification on arming/
disarming
Default:
Disabled
Keypad lock Enable/Disable the key
lock function (2)
Default:
Disabled
Backlight Enable/Disable
illuminated keys(3)
Default:
Enabled
Keypad tone Enable/Disable key
sound
Default:
Enabled
Delay tick
Enable/Disable
countdown sound at
entry or exit
Default:
Enabled
Door/Window
open warning
Enable/Disable open
window/door warning
after arming (4)
Default:
Enabled
Human Voice Enable/Disable voice
prompts
Default:
Enabled
Sensor low
battery
Enable / Disable sensor
low battery warning
Default:
Enabled
Password
System Change the system
password(5)
Default:
8888
User Change the user
password(6)
Default:
1234
Language
Chinese, English, German, Russian, Spanish,
Polish, Italian, French, Portuguese, Greek,
Romanian (7)
Default:
English
Initialization Return to factory settings. All accessories and parameters
will be deleted.

14
English
Phone
1st Phone,
2nd Phone,
3rd Phone,
4th Phone,
5th Phone
Input the phone number and enable or
disable calling or sending an SMS in case of
alarm on the respective number
Default:
null
Log
Alarm log Displays the alarm history log
Arm log Displays the history log of arming/disarming the system
Parts
Remote
Add
Pair or delete all remote controlsDelete
Delete All
Detector
Add
Pair, edit or delete all sensorsEdit
Delete All
RFID
Add
Pair or delete all RFID TAGsDelete
Delete All
Siren Learn Send a pairing signal towards the wireless siren
Alarm Socket Wireless socket activation on alarm
Socket Not available for this model
Decoder Displays the alarm system ID

15
English
EOL Zone
EOL Zone 1 Define a name and number of EOLR
zones (wired zones)
EOL Zone 2
EOL Zone 3
Smart pairing Pairing with an accessory. Default time: 20 sec.
WiFi
Smartlink
Configure WiFi setup (Requires smartphone app)
Unbind Disconnect the CPU from the server
MAC/IP Not available for this model
SoftAP
Configure WiFi hotspot connection
Record
Record Audio message recording (sent by calling the preset phone
numbers in case of alarm)
Play Message playback
Delete Delete message
Duration Set message duration, between 0-20 sec. Default:
20 sec.
Timer
Arm Timer Set a daily time for automatic arming
Disarm Timer Set a daily time for automatic disarming
Zone&Sync Set the time zone
Date&Time Set time and date

16
English
Wi-Fi- Sync Turn on/o time synchronization using WiFi
network information
Default:
On
2G/3G Sync Turn on/o time synchronization using the
GSM network information
Default:
On
Version
Displays the firmware version and MAC address of the WiFi module, the
firmware version and IMEI of the GSM module and the serial number of
the central unit.
Footnotes
1. Arming beep: When the function is enabled, the system will announce by a
sound the arming or disarming operation.
2. Key lock: If this function has been enabled, the system will automatically
lock the keyboard if no operation is performed for 30 seconds. To activate the
keyboard, you must enter the user password.
3. Keys backlight: If the function is deactivated, the key backlights turn o
after 30 seconds if no operation is performed.
4. Open door/window warning: If the function is enabled, the system will
generate an warning notification when you open a door or window after the
exit time has elapsed.
5. System password: used to unlock the keypad and make remote settings via
SMS.
6. User password: used to unlock the keypad, as a prefix for remote settings
via SMS and notification for alarm text.
7. Language: the voice prompts and the notification will be in the selected
language. After selecting the desired language, the panel will restart.
8. Initialization: All customized parameters will return to factory defaults and
all paired sensors will be deleted.

17
English
Configuration
Power the control unit
Connect the power adapter in the package to the 5V micro USB port and
move the backup battery switch to the “ON” position.
WiFi communication through the integrated module
If your system is configured to report alarms and accept remote control via
the mobile application, the wireless router the alarm system is connected to
must always be on and connected to the Internet.
GSM/4G WiFi communication through the integrated module
If your system is set up to report alarms, receive settings via SMS, or make
voice calls, make sure a SIM card is installed (see image below) and the control
panel is connected to the GSM/4G network. Disable the PIN to the SIM card
before adding it into the unit.
Add and configure phone numbers
You can set up to 5 phone numbers that will receive alarm notifications via
SMS or voice call.
• In the menu go to: Phone -> 1st Phone, 2nd Phone, 3rd Phone, 4th
Phone, 5th Phone
• Press the key ↑ to select the first option where you can input the phone
number (maximum 18 digits) using the numeric keypad

18
English
• Press again the key ↑to select the second option. Press the key ↓to
choose between On and O. If you select On, in case of alarm, a voice
message will be sent to the respective phone number.
• Press again the key ↑to select the third option. Press the key ↓to choose
between On and O. If you select On, in case of alarm, an SMS will be
sent to the respective phone number.
• Press √ to confirm.
Add/Delete remote controls
Add new remote control
• In the main menu, select: Parts-> Remote-> Add.
• On the screen, the message Synchronising will show up. The system
enters the pairing mode and counts the remaining pairing time (maximum
20 sec.).
• Press a button on the remote control to send a signal to the control panel.
• On the screen, the message Device code has been learnt will show up if
the remote control was successfully paired.
Delete remote control
• In the main menu, select: Parts-> Remote->Delete
• Use the keys ↑and ↓to reach the remote control that need to be deleted.
• Press √ to confirm.
Delete all remote controls
• In the main menu, select: Parts-> Remote->Delete all
• The total number of learned remote controls is displayed.
• Press √ to confirm.
Add/Delete wireless sensors
Add sensor
• In the main menu, select: Parts->Detector->Add
• Press the key ↑ to select the first option, Name, where you will select the
sensor name using the key ↓

19
English
• Press again ↑to select the second option, Mode. Press the key ↓to
choose between:
Active when perimeter arming- usually assigned to sensors or magnetic
contacts on exterior (perimeter) doors and windows. The sensor is active when
the system is fully armed or partially armed.
Inactive when perimeter arming- usually assigned to a sensor (eg motion
sensor) in an interior area (eg living room, hall, bedroom). The sensor remains
inactive if the system is partially armed.
24 hours active- usually assigned to an area that contains an emergency
button, smoke sensor, CO sensors, flood sensors and gas sensors.
To use the sensor as a doorbell, select Doorbell.
To deactivate the sensor, select Close.
• Press again ↑to select the third option, where you will select using the key
↓the number of the zone where the respective sensor will be assigned.
0-89 numbers are available. The zone number must be unique.
• Press the key √. The message Synchronising appears on the screen.
The system enters pairing mode and counts the remaining pairing time
(maximum 20 sec.)
• Trigger the sensor to send a pairing signal towards the control panel.
• After pairing, the message Learning OK will be displayed.
Edit/Delete a sensor
• In the main menu, select: Parts->Detector->Edit
• Press the key ↑to select the first option that contains the position on
which the sensor to be edited was saved. Press the button ↓to reach the
desired position.
• Press again ↑to switch between options and the ↓key to change the
values of an option.
Delete all sensors
• In the main menu, select: Parts->Detector->Delete all
• Press the key √to confirm.

20
English
Add/Delete RFID TAGs
Add new TAG
• In the main menu, select: Parts-> RFID-> Add.
• The message Synchronising appears on the screen. The system enters
pairing mode and counts down the remaining pairing time (maximum 20
sec.).
• Move the TAG closer to the RFID area marked on the control panel.
• The screen will display Device code has been learnt if the TAG was
successfully paired.
Delete TAG
• In the main menu, select: Parts-> RFID->Delete
• Use the keys ↑and ↓to reach the position where the TAG to be deleted
was saved.
• Press √to confirm.
Delete all TAGs
• In the main menu, select: Parts-> RFID->Delete all
• The total number of TAGs learned is displayed.
• Press √to confirm.
Pairing a wireless siren
• Switch the siren to pairing mode (see the siren user manual). Note:
The wireless siren is not included in this package. Compatible product:
Wireless outdoor siren PNI SafeHouse HS007LR
• In the main menu, select: Parts->Siren Learn
• The system sends a signal to the siren. The message Learn signal sent
appears on the screen.
• The wireless siren will confirm pairing with an audible or visual signal (see
the siren user manual).
Table of contents
Languages:
Other PNI Security System manuals

PNI
PNI PNI S004 User manual

PNI
PNI SafeHouse HS007 User manual

PNI
PNI A014 User manual

PNI
PNI House WiFi550 User manual

PNI
PNI IPMAX POE FIVE User manual

PNI
PNI SafeHouse HS008 User manual

PNI
PNI SmartHome SM400 User manual

PNI
PNI SAFE HOUSE PG600 User manual

PNI
PNI HOUSE AHD808 User manual

PNI
PNI SafeHouse HS650 User manual

PNI
PNI House PTZ1350 User manual

PNI
PNI House WiFi 400 User manual

PNI
PNI S004 User manual

PNI
PNI House PTZ1500 User manual

PNI
PNI HOUSE PTZ1300 User manual

PNI
PNI SafeHouse HS600 User manual

PNI
PNI PG2710 User manual
PNI
PNI HOUSE IP516 User manual

PNI
PNI HOUSE WiFi650 User manual

PNI
PNI SafeHouse HS007LR User manual