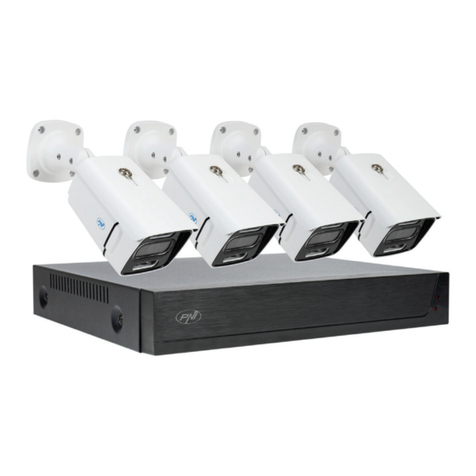
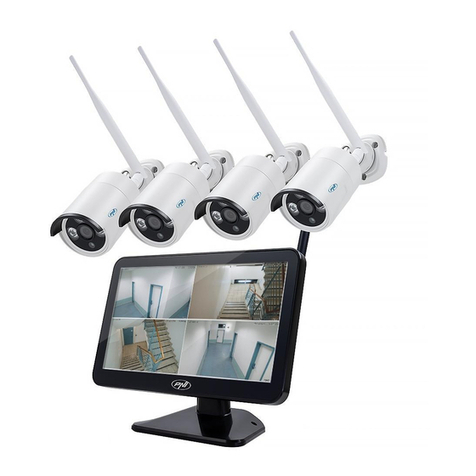
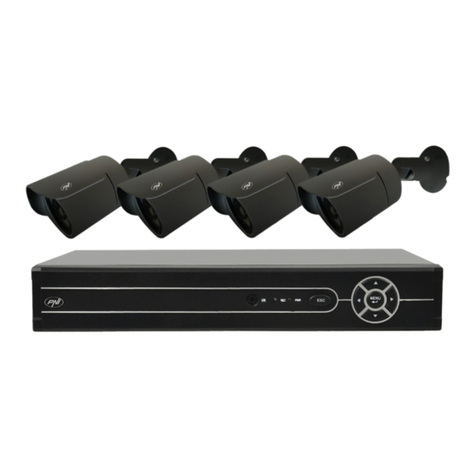
PNI House WiFi550 User manual

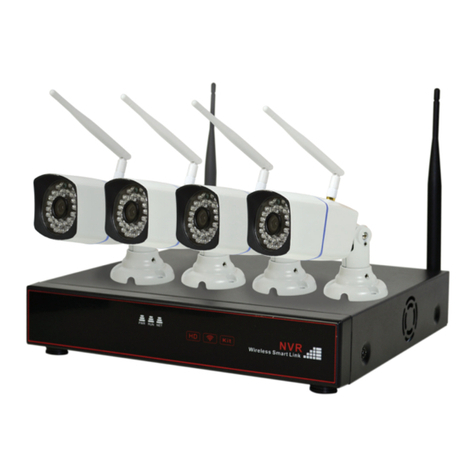
PNI House WiFi550
User manual / Manual de usuario / Használati utasítás /
Manuale utente / Instrukcja obsługi / Manual de utilizare / Ръководство
за потребителя

EN
2
SAFETY INSTRUCTIONS
• Do not install the product in a damp or dusty environment
• Install the NVR in a well-ventilated environment
• Check the power source before installing the NVR to avoid problems caused by inappropriate power
supply
• Install the NVR on a at, horizontal, vibration-free surface
• If dust enters the main board, it may cause a shortcircuit if it gets wet. Wipe the main board dust,
connectors, and NVR casing
• If the battery is discharged, use the same type of battery. Do not open or attempt to repair the battery.
• Use only recommended hard drives for surveillance systems to ensure continuous and stable recording
NVR INSTALLATION SCHEME
POSITIONING IP CAMERAS
Right Wrong
The shape of the wireless signal coverage area is round, with the antenna positioned in the center. The signal
is stronger around the antenna. Based on how the wireless waves spread, position the IP cameras parallel or
perpendicular to the NVR to provide a stable signal and quality images.
INSTALLATION INSTRUCTIONS
1. Make holes in the wall at least 30 mm deep
2. Fix the camera to the wall. Use 3 PA4 screws
3. Unscrew the screw on the bracket to turn the camera as needed
4. Install the Hard Disk into the NVR. Be sure to disconnect the power before installation
NVR REAR PANEL DESCRIPTION
Antenna AUDIO
output
VGA
output
HDMI
output
Ethernet USB2.0 Power supply
12V DC

EN
3
TECHNICAL SPECIFICATIONS
NVR
System
Processor Hi3520D
Operating system LINUX
Channel display 1/4/9
Display resolutions 1080P, 960P, 720P, 960H, D1, 360P, VGA
Video input 8 CH 1.0MP
Motion detection Yes
Recording and playback
Registration modes Manual, Scheduled, Alarm, Motion Detection
Playback 4 CH 1.0MP
Backup USB
Video output 1 x VGA, 1 x HDMI
General
Ethernet 1 x RJ45 10/100mbps
USB interface 2 x USB2.0
HDD SATA 1 x max. 4TB
Power supply DC12V 2A
Working temperature -20 ~ +60°C
Dimensions 260 x 220 x 40 mm
Weight 1150 g
IP camera
Pixels 1.0MP 1280 x 720
Sensor CMOS 1/4
Electronic Shutter NTSC: 1/30-1/10000s; PAL: 1/25-1/10000s
Day / night mode IR Cut
Frames per second 50Hz 25FPS; 60Hz 30FPS
Image settings Brightness, contrast, saturation, gain control, shutter, white balance
Alarm Motion detection, video signal loss, no connection, IP conict
Protocol TCP/IP, DHCP, HTTPS, NTP, DNS,RTP, RTSP
Ethernet 1 x RJ45 10/100mbps
Lens 3.6mm
Power supply DC 12V 1A
Consumption ≤6W
Dimensions 60 x 183 x 60 mm (bracket included)
Weight 400 g
Working temperature -20 ~ +60°C

EN
4
NVR MENU
Connect the NVR to a monitor via the HDMI or VGA cable.
Authentication data:
Username: Admin
Password: 1234
ADD IP CAMERA
1. Right-click in the NVR’s main interface and select [IP Camera]
2. If you add a single camera, connect the camera and the NVR via an
Ethernet cable. If you add more cameras, connect the cameras to a
switch, then connect the switch to the NVR
3. Click [Match Code]. The system will pair the camera with the NVR.
4. Click [Search], then [Add All]
Note: The cameras in this kit are paired with the NVR from the factory.
REPEATER FUNCTION
With this feature, the NVR has a higher wireless signal transmission distance. Thus, IP cameras located in
remote areas can connect to another IP camera and thus connect to the NVR.
1. Right-click in the main interface and select [IP Camera]
2. Click [Repeater]
3. Click “+” to establish the connection between 2 cameras
The picture below shows three models for connecting the cameras:
• One by one: CH3 → CH2 → CH1 → NVR
• Two to one: CH5 si CH6 → CH4 → NVR
• Directly to NVR: CH7 → NVR, CH8 → NVR

EN
5
To delete a camera connected via the Repeater:
Go to the [Repeater] interface above, left-click on the camera you want to delete from the link scheme, choose
[Delete], then [Save].
The camera that was removed from the schema will automatically connect to the NVR after 30 seconds.
RECORDING AND PLAYBACK
Note: In order to register, you need to install a hard disk in the NVR. This product only works with hard drives
specially dedicated to surveillance systems. (Note: The HDD is not included in this kit)
1. Check your Hard Disk. In the main interface, click [System Setup] → [Record] → [Disk].
Notes:
Make sure the hard disk is connected properly.
We recommend formatting the Hard Disk before using it for the rst time.
2. Scheduled recording and alarm recording. Go to the [System Setup] → [Record] → [Record] in the
main interface. Choose the channel and recording mode. Click [Apply]. You can copy settings from one
channel to another by selecting [Copy].
3. Manual recording. In the main interface, go to [Manual Record]. Choose the channel you want to record,
then click [Save]
4. Motion detection recording. Go to [System Setup] → [Alarm] → [Channel]. Select “Alarm Type” →
“Motion detection” for the desired channel. Set the sensitivity, area, time, and warning mode: Screen,
Email, or Beep

EN
6
In the interface [System Setup] → [Record] check “Motion” next to the selected period.
5. Playback. In the main interface, go to [Playback]. Choose the channel and date, then click [Query].
Double-click Timeline to start playback.
BACKUP
Go to [System Setup] → [Record] → [Backup]. Choose the channel and date / time, select the desired file, click
[Backup]. If there is no Recording in the selected timeframe, click [Clean] then [Add].
Note: Make sure you plug in a USB stick on the back panel where to copy the les.

EN
7
NETWORK SETTINGS - INTERNET CONNECTION
Go to [Wire Net] .
There are 2 types of Internet connection:
• By manual conguration: Manually set network parameters (IP Address, DNS)
• By automatic conguration: Check the DHCP option. The system will automatically retrieve the network
parameters.

EN
8
SYSTEM CONTROL THROUGH MOBILE APPLICATION “DANALE”
1. Download the “Danale” app by accessing the AppStore or Google Play or scanning the codes below:
2. Create an account in the application or log in directly if you already have one.
3. Ensure that the NVR is connected to the Internet and that the NVR’s IP address is correct.
4. Connect the NVR to your router via cable.
5. In the NVR menu in the [WireNet] section, check the DHCP option to get the IP address automatically or
add the network parameters manually.
6. Enable P2P. In the main NVR interface, go to [System Setup] → [Network] → [Mobile]. Click “Enable”
and “Refresh” until the status becomes “Online”. If after 5 minutes the status is still “Not online” then it is a
problem with setting the network parameters. Ensure that the NVR is connected to the Internet.
7. Adding the device in the app.
• Push “+” button
a. Add NVR through network search. Choose the WiFi network you want to connect to. Enter your network
password. The application will look for the connected systems in the network
Note: Your mobile phone and NVR must be connected to the same router.
b. Add NVR manually. Click Scan the QR Code - Device ID.
Note: Device ID can be found by accessing the main interface of the NVR- [System setup] → [Network] →
[Mobile].

EN
9
8. Preview:
Click on the desired device in the list.Clicon for full screen preview.
9. Icons description
Settings
Share
Channel
Image switch Alarm information
Full screen
Playback
Screen capture Local recordings

EN
10
10. Share device
Click on and add the account you want to share your device with.
MONITORING THE SYSTEM FROM PC
1. Install the “Dana CMS” software on your computer. The installation kit can be found on the CD included
in the package.
2. Sign in using the login data used in your mobile app or sign up here if you do not already have an account
created in your mobile app.
3. Click “Add device”, enter the device name and ID if you have not already added this device to the mobile
application. If you added it, the two applications will automatically sync.
In the list on the right, green means Online, gray means the system is Oine. Double-click to view that camera.
MONITORING FROM INTERNET EXPLORER
1. Connect your NVR to Internet through cable
2. Enter the IP address of the surveillance system in the address bar
Note: The IP address can be found in the [System setup] → [Network]
3. Enter user and password (For Admin user, default password is “1234”)
4. Click on then [Live View] to preview that camera.

ES
11
INSTRUCCIONES DE SEGURIDAD
• No instale el producto en un ambiente húmedo o con polvo
• Instale el dispositivo NVR en un ambiente bien ventilado, con buena ventilación de aire
• Verique la fuente de alimentación antes de instalar el dispositivo NVR, para evitar problemas causadas
de una fuente de alimentación inadecuada
• Instale el dispositivo NVR en una supercie plana, horizontal y sin vibraciones
• Si entra polvo en la placa base, este puede causar un cortocircuito si se vuele húmedo. Limpie el polvo
de la placa base, sus conectores y la carcasa de NVR.
• Si se descarga la batería, utilice el mismo tipo de batería. No abra y no intente reparar la batería.
• Utilice solamente los discos duro recomendados para los sistemas de vigilancia para asegurar una
grabación continua y estable.
ESQUEMA DE INSTALACIÓN NVR
POSICIONAR LAS CÁMARAS IP
Posición correcta Posición incorrecta
La forma del área de cobertura de la señal inalámbrica es redonda, con la antena posicionada en el centro.
La señal es más fuerte alrededor de la antena. En función del tipo de propagación de las ondas inalámbricas,
posicione las cámaras IP paralelas o perpendiculares sobre el dispositivo NVR para asegurar una señal
estable una imagen de calidad.
INSTRUCCIONES DE INSTALACIÓN
1. Haga agujeros en la pared con una profundidad de al menos 30 cm
2. Fije la cámara en la pared. Utilice 3 tornillos PA4
3. Aoje el tornillo que está en el soporte para guiar la cámara según sus necesidades.
4. Instale el disco duro en el dispositivo NVR. Asegúrese de que habéis interrumpido la alimentación antes
de la instalación
DESCRIPCIÓN DEL PANEL POSTERIOR NVR
Antena Salida
AUDIO
Salida
VGA
Salida
HDMI
Puerto
Ethernet
Puerto
USB2.0
Alimentación
12V DC

ES
12
DETALLES TÉCNICOS
NVR
Sistema
Procesador Hi3520D
Sistema operativo LINUX
Visualización canales 1/4/9
Resolución visualización 1080P, 960P, 720P, 960H, D1, 360P, VGA
Entrada video 8 canales 1.0MP
Detección de movimiento Soporta
Grabación y
reproducción
Tipo de grabación Manual, Programado, Alarma, Detección mov.
Reproducción 4 canales 1.0MP
Copia de seguridad USB, HDD externo
Salida video 1 x VGA, 1 x HDMI
General
Ethernet 1 x RJ45 10/100mbps
Interfaz USB 2 x USB2.0
HDD SATA 1 x máximo 4TB
Alimentación DC12V 2A
Temperatura de trabajo -20 ~ +60°C
Dimensiones 260 x 220 x 40 mm
Peso 1150 g
Cámara IP
Pixeles 1.0MP 1280 x 720
Sensor CMOS 1/4
Obturador electrónico NTSC: 1/30-1/10000s; PAL: 1/25-1/10000s
Modo día/noche IR Cut
Cuadros por segundo 50Hz 25FPS; 60Hz 30FPS
Ajustes imagines Luminosidad, contraste, saturación, control casting, diafragma etc.
Alarma Detección movimiento, falta señal video, falta conexión, conicto IP
Protocolo TCP/IP, DHCP, HTTPS, NTP, DNS,RTP, RTSP
Ethernet 1 x RJ45 10/100mbps
Lentilla Fixa 3.6mm
Fuente alimentación DC 12V 1A
Consumo ≤6W
Dimensiones 60 x 183 x 60 mm (suporte incluido)
Peso 400 g
Temperatura de trabajo -20 ~ +60°C

ES
13
ACCESARE MENIU NVR
Conecte el dispositivo NVR a una pantalla mediante el cable HDMI o VGA.
Datos autenticación:
Nombre usuario: Admin
Contraseña: 1234
AÑADIR CÁMARA IP
1. Haga clic derecha en la interfaz principal y seleccione [IP Camera]
2. Si se añade solamente una cámara, conecte la cámara con el NVR
mediante un cable Ethernet. Si se añade más de una cámara, conecte
las cámaras al switch, luego conecte el switch al dispositivo NVR
3. Haced clic en [Match Code]. El sistema emparejara la cámara con
NVR.
4. Haced clic en [Search], luego en [Add All]
Nota: Las cámaras del paquete están conguradas en fábrica.
FUNCIÓN REPETIDOR (REPEATER)
Mediante esta función, el dispositivo NVR ofrece una distancia más larga de transmisión de la señal
wireless. De esta manera, las cámaras IP situadas en zonas más lejanas se pueden conectar a otra cámara
IP y mediante esta se conecta al dispositivo NVR.
1. Haz clic derecha en la interfaz principal y seleccione [IP Camera]
2. Clic en [Repeater]
3. Clic en “+“ para establecer conexión entre las dos cámaras
La imagen de abajo muestra 3 modelos de conexión para las cámaras:
• De una en una: CH3 → CH2 → CH1 → NVR
• De dos a una: CH5 si CH6 → CH4 → NVR
• Conectadas directamente al NVR: CH7 → NVR, CH8 → NVR

ES
14
Para borrar una cámara conectada mediante la función Repeater:
Acceder a la interfaz [Repeater] de arriba, haced clic izquierda en la cámara que deseáis borrar de la esquema
de conexiones, elige [Delete] u luego [Save].
La cámara que se ha borrado del esquema, se conectara directamente al NVR automáticamente tras 30
segundos.
GRABACIÓN Y REPRODUCCIÓN
Nota: para poder grabar, tenéis que instalar en NVR un disco duro. El producto solamente funciona con
discos duros especial diseñados para los sistemas de vigilancia. (Nota: el HDD no está incluido en el kit)
1. Verique el disco duro. En la interfaz principal haced clic en [System Setup] → [Record] → [Disk].
Nota:
Asegúrese que el disco duro está conectado correctamente. Se recomienda formatear el disco duro entes
de su primera utilización.
2. Grabación programada y la alarma. Acceda a la interfaz principal [System Setup] → [Record] →
[Record]. Elija el canal y el tipo de grabación. Clic en [Apply]. Puede copiar las conguraciones de un
canal a otro seleccionando la opción [Copy].
3. Grabación manual. En la interfaz principal accede al [Manual Record]. Elija el canal del cual desea
grabar, y luego haced clic en [Save]
4. Grabar al detectar movimiento. Acceder a la interfaz principal [System Setup] → [Alarm] → [Channel].
5. Seleccione la opción “Alarm Type” → “Motion detection” para el canal deseado. Congurar la sensibilidad,
la zona, el intervalo de tiempo y el tipo de advertencia: Screen, Email o Beep.

ES
15
La interfaz [System Setup] → [Record] seleccione “Motion” junto al periodo seleccionado.
6. Reproducción de grabaciones. En la interfaz principal acceder a [Playback]. Elija el canal y la fecha,
luego haced clic en [Query]. Haced doble clic en Timeline que empiece la función de reproducir.
BACKUP (COPIE DE SEGURIDAD)
Acceder a la interfaz principal [System Setup] → [Record] → [Backup]. Elija el canal y la fecha/hora,
seleccione el archivo deseado, haz clic en [Backup]. Si no aparece ninguna grabación en el intervalo de
tiempo seleccionado, haced clic en [Clean] y luego en [Add].
Nota: Asegurase que ha conectado en el puerto USB que está en parte de atrás un Stich USB donde se
registrara la copia de los archivos.

ES
16
CONFIGURACIÓN DE LA RED – CONEXIÓN A INTERNET
En la interfaz principal acceder a [Wire Net]
Hay 2 tipos de conexión a la internet:
• Mediante conguración manual: congure de forma manual los parámetros de la red (Dirección IP,
DNS)
• Mediante conguración automática: elije la opción DHCP. El sistema encontrara automáticamente
los parámetros de la red.

ES
17
SISTEMA DE CONTROL A TRAVÉS DE LA APLICACIÓN “DANALE“
1. Descarga la aplicación “Danale” accediendo a AppStore o Google Play o escaneando los códigos de
abajo:
2. Genere una cuenta en la aplicación o autentifíquese directamente si ya tenéis una.
3. Asegúrese de que el NVR está conectado a Internet y que la dirección IP del NVR esta correcta.
4. Conecte el NVR al Reuter mediante el cable.
5. En el menú del NVR en la sección [WireNet], elija la opción DHCP para obtener la dirección IP
automáticamente o añada manualmente los parámetros de la red.
6. Active la opción P2P. En la interfaz principal del NVR, accede al [System Setup] → [Network] →
[Mobile]. Haced clic en “Enable“ y “Refresh“ que el estado se convierte “Online”. Si tras 5 minutos, el
estado se queda en “Not online“ entonces hay un problema con la conguración de los parámetros de la
red. Asegúrese que el NVR está conectado a Internet.
7. Añada el dispositivo en la aplicación.
• Pulse el botón “+”
a. Añade el NVR mediante búsqueda en la red. Elija la red WiFi a la que desea conectarse. Introduzca la
contraseña de la red. La aplicación buscara en la red los sistemas de conexión.
Nota: El teléfono móvil y el NVR tienen que estar conectados al mismo Router.
b. Anadir manualmente el NVR. Haced clic en Escanee el codigo QR - Device ID.
Nota: Encuentra el Device ID accediendo a la interfaz principal del NVR - [System setup] → [Network] →
[Mobile].

ES
18
8. Visualización de las cámaras:
Haced clic en el dispositivo de la lista. Haced clic en para visualizar en toda la pantalla.
9. Descripción iconos
Configuración
Distribución del dispositivo
Canale
Cambio imagen Información alarma
Pantalla completa
Reproducción
Captura pantalla Grabación local

ES
19
10. Dividir el dispositivo
Haced clic en el icono y añada la cuenta con la que deseas dividir el dispositivo
SEGUIMIENTO MEDIANTE EL PC
1. Instale en su ordenador el soft “Dana CMS“. El kit de instalación lo encontráis en el CD que esta incluido
en el paquete.
2. Autentifíquese utilizando los datos de autenticación utilizados en la aplicación para móviles o registrase
aquí si no tenéis todavía una cuanta creada en la aplicación móvil.
3. Haced clic en “Add device“, introduzca el nombre y el ID del dispositivo si no habéis añadido todavía
el dispositivo en la aplicación móvil. En el caso de que ya lo tenéis añadido, las dos aplicaciones se
sincronizaran automáticamente.
En la lista de la parte derecha, el color verde signica Online y el gris signica que el sistema esta Oine.
Haga doble clic para visualizar la respectiva cámara.
VISUALIZAR MEDIANTE INTERNET EXPLORER
1. Conecte el NVR al Internet mediante el cable
2. Introduzca en la barra la dirección IP del sistema de vigilancia
Nota: La dirección IP la puede encontrar accediendo a la interfaz del NVR [System setup] → [Network]
3. Introduzca el User y la Contraseña (Para user: Admin, La Contraseña implícita es “1234“)
4. Haz clic en y luego en [Live View] para visualizar la respectiva cámara

HU
20
INSTRUCTIUNI DE SIGURANTA
• Nu instalati produsul intr-un mediu umed sau cu praf
• Instalati NVR-ul intr-un ambient bine aerisit, cu o ventilatie buna a aerului
• Vericati sursa de alimentare inainte de instalarea NVR-ului, pentru a evita probleme cauzate de
alimentarea necorespunzatoare
• Instalati NVR-ul pe o suprafata plana, orizontala si fara vibratii
• Daca intra praf pe placa de baza, acesta poate cauza scurtcircuit daca devine umed. Stergeti de praf
placa de baza, conectorii si carcasa NVR-ului
• Daca se descarca bateria, folositi acelasi tip de baterie. Nu deschideti si nu incercati sa reparati bateria.
• Folositi doar Hard Disk-uri recomandate pentru sistemele de supraveghere pentru a asigura o inregistrare
continua si stabila
SCHEMA INSTALARE NVR
POZITIONAREA CAMERELOR IP
Pozitionare corecta Pozitionare incorecta
Forma zonei de acoperire a semnalului wireless este rotunda, cu antena pozitionata in centru. Semnalul este
mai puternic in jurul antenei. Bazat de modul de imprastiere a undelor wireless, pozitionati camerele IP paralel
sau perpendicular pe NVR pentru a asigura un semnal stabil si imagini de calitate.
INSTRUCTIUNI DE INSTALARE
1. Faceti gauri in perete de cel putin 30 mm adancime
2. Fixati camera pe perete. Folositi 3 suruburi PA4
3. Desfaceti surubul de pe suport pentru a orienta camera conform necesitatilor
4. Inslatati Hard Disk-ul in NVR. Asigurati-va ca ati intrerupt alimentarea inainte de instalare
DESCRIERE PANOU POSTERIOR NVR
Antena Iesire
AUDIO
Iesire
VGA
Iesire
HDMI
Port
Ethernet
Porturi
USB2.0
Alimentare
12V DC
Other manuals for House WiFi550
1
Table of contents
Languages:
Other PNI Security System manuals

PNI
PNI House WiFi550 User manual

PNI
PNI IPMAX POE FIVE User manual

PNI
PNI HOUSE PTZ1300 User manual

PNI
PNI SafeHouse HS007LR User manual

PNI
PNI PG600LR User manual
PNI
PNI PG2710 User manual

PNI
PNI HOUSE IPMAX POE 3 User manual

PNI
PNI PG100 User manual

PNI
PNI SafeHouse HS008 User manual

PNI
PNI House WiFi 400 User manual
Popular Security System manuals by other brands

Leitronic AG
Leitronic AG EasyAlarm ManDown Use instruction

Blaupunkt
Blaupunkt SA 2700 user manual

First Alert
First Alert FA168CPSSIA Installation and setup guide

Pyronix
Pyronix Enforcer installation manual

Lifebuoy
Lifebuoy BCone Installation & operation guide

Emergency Response USA
Emergency Response USA S.O.S COMPANION quick start guide