manuals.online logo
Brands
  1. Home
  2. •
  3. Brands
  4. •
  5. PowerTraveller
  6. •
  7. Batteries Charger
  8. •
  9. PowerTraveller HARRIER 25 User manual

PowerTraveller HARRIER 25 User manual

QUICK START GUIDE
HARRIER 25
WIRELESS POWER PACK
CHARGEUR SANS FIL | CARGADOR INALÁMBRICO | CARICABATTERIE SENZA FILI
LADEGERÄT KABELLOS | DRAADLOOS STROOMPAKKET
P A R T CODE : PTL-HRW025
E A N C O D E : 5060 1769 8003 7
UPC: 812097030033
WWW.POWERTRAVELLER.COM
For full details of our CE declaration – please
go to www.powertraveller.com/support.
6
7
8
S P E C IF I C AT I ONS:
KIT INCLUDES:
•
•
•
•
•
•
Wireless charger with 6700mAh/24.8Wh
Rugged design
Waterproof and Dustproof to IP65 Rating
Elastic Strap to hold smartphone
1x wireless output: 10W Quick Charge
1x USB output: 5V/3A Quick Charge
1x USB-C input/output: PD 15W
Smart charging: automatic on/o
detection (USB-C)
4 LED battery charge indicator
Weight: 220g
Size: 86mm x 86mm x 25.5mm
•
•
•
•
•
•
•
1 x Harrier power pack
1 x USB-C to USB cable
QUICK START GUIDE:
To activate wireless charging and check the power level of your Harrier 25, briefly press
the power button and the white charge level LEDs will illuminate. Each white LED
indicates 25% of charge. If the first white LED is flashing the Harrier 25 needs
recharging; if all of the white LEDs are solid-on, your Harrier 25 is fully charged.
The 5th LED is blue and indicates that the wireless charging pad is ready to use.
If the LED is red your Harrier 25 cannot begin wireless charging; check there are no metal
objects on the wireless pad, and check that your Harrier is charged, and your phone is
placed centrally on the pad. The LED will slowly flash blue while wireless charging.
Please remove any phone cases with metal or magnetic components. Keep your phone
secured to your Harrier 25 by placing it perpendicularly under the yellow straps .
The wireless pad can provide 5W, 7.5W or 10W of power when the Harrier 25 is more
than 25% charged, and will automatically detect the appropriate setting for your phone.
Your Harrier 25 will automatically turn o after 15 seconds with no use.
To recharge your devices using the bi-directional USB-C port or the USB port ,
connect your device via the included USB to USB-C cable (and Micro USB adapter if
needed) or your device’s own cable. The ports will automatically detect when a device
is connected. If all 3 outputs are being used simultaneously, the wireless pad will
output at 5W.
To recharge your Harrier 25, connect the included USB to USB-C cable or your own cable
to the USB-C port and connect to a power source. Close the port cover when not in
use to keep the ports clean and dry.
6 7
8
Um die drahtlose Ladung zu aktivieren und den Leistungspegel Ihres Harrier 25 zu
überprüfen, drücken Sie kurz die Power-Taste und die weißen Ladezustands-LEDs
leuchten auf. Jede weiße LED zeigt 25% der Ladung an. Wenn die erste weiße LED
blinkt, muss der Harrier 25 aufgeladen werden; wenn alle weißen LEDs leuchten, ist
Ihr Harrier 25 voll geladen.
Die fünfte LED leuchtet blau und zeigt an, dass die drahtlose Ladestation
betriebsbereit ist. Wenn die LED rot leuchtet, kann Ihr Harrier 25 nicht mit dem
drahtlosen Laden beginnen; prüfen Sie, dass sich keine Metallgegenstände auf der
drahtlosen Ladestation befinden, und stellen Sie sicher, dass Ihr Harrier geladen ist
und Ihr Telefon zentral auf der Ladestation platziert ist. Die LED blinkt langsam blau
während des drahtlosen Ladevorgangs. Bitte entfernen Sie alle Telefongehäuse mit
Metall- oder Magnetkomponenten. Halten Sie Ihr Telefon an Ihrem Harrier 25 befestigt,
indem Sie es senkrecht unter den gelben Riemen platzieren. Die drahtlose Ladestation
kann 5W, 7,5W oder 10W Leistung liefern, wenn der Harrier 25 zu mehr als 25%
aufgeladen ist, und erkennt automatisch die passende Einstellung für Ihr Telefon.
Ihr Harrier 25 schaltet sich bei Nichtgebrauch nach 15 Sekunden automatisch aus.
Um Ihre Geräte über den bidirektionalen USB-C-Anschluss oder den USB-Anschluss
aufzuladen, schließen Sie Ihr Gerät über das mitgelieferte USB zu USB-C-Kabel
(und ggf. Micro-USB-Adapter) oder das eigene Kabel Ihres Geräts an. Die Anschlüsse
werden automatisch erkannt, wenn ein Gerät angeschlossen ist. Wenn alle 3 Ausgänge
gleichzeitig verwendet werden, gibt die drahtlose Ladestation eine Leistung von 5W aus.
Um Ihren Harrier 25 aufzuladen, schließen Sie das mitgelieferte USB zu USB-C-Kabel
oder Ihr eigenes Kabel an den USB-C-Anschluss an und verbinden Sie es mit einer
Stromquelle. Schließen Sie die Portabdeckung bei Nichtgebrauch, um die Anschlüsse
sauber und trocken zu halten.
6
7
8
Para activar la base de carga inalámbrica y comprobar el nivel de batería del Harrier 25,
pulse brevemente el botón de encendido , las luces led blancas que indican el nivel
de carga se iluminarán. Cada luz led blanca indica un 25 % de carga. Si la primera luz
led blanca parpadea, necesita cargar el Harrier 25; Si todas las luces led blancas se
mantienen iluminadas, el Harrier 25 está cargado completamente.
La quinta luz led es azul e indica que la base de carga inalámbrica está lista
para su uso. Si la luz led está en rojo, el Harrier 25 no puede iniciar la carga inalámbrica;
compruebe que no haya objetos de metal en el cargador, que el Harrier esté cargado y que
el teléfono esté colocado en el centro del cargador. La luz led parpadeará lentamente en
color azul durante la carga. Retire las carcasas del teléfono que contengan metal o
componentes magnéticos. Mantenga el teléfono sujeto al Harrier 25 colocándolo
perpendicularmente debajo de las correas amarillas . El cargador inalámbrico puede
suministrar 5 W, 7,5 W o 10 W de potencia cuando el Harrier 25 está cargado más de un
25 % y detectará automáticamente la configuración apropiada para su teléfono. El Harrier
25 se apagará automáticamente después de 15 segundos sin usar.
Para cargar dispositivos mediante el puerto USB-C bidireccional o el Puerto USB ,
conecte el dispositivo mediante el cable USB a USB-C incluido (y el adaptador micro USB
si es necesario) o el cable propio del dispositivo. Los puertos detectarán automáticamente
cuando se conecta un dispositivo. Si las tres salidas están utilizándose al mismo tiempo,
el cargador inalámbrico suministrará 5 W de potencia.
Para recargar el Harrier 25, conecte el cable USB a USB-C incluido o su propio cable al
puerto USB-C y conecte la fuente de alimentación. Cierre la cubierta del puerto
cuando no la utilice para mantener los puertos limpios y secos.
6 7
8
Pour activer la charge sans fil et vérifier le niveau de charge de votre Harrier 25,
appuyez brièvement sur le bouton d’alimentation , les LED blanches indiquant
le niveau de charge, s’allument. Chaque LED blanche indique 25% de charge. Si la
première LED blanche clignote, le Harrier 25 a besoin de recharge ; si toutes les LED
blanches sont allumées, le Harrier 25 est entièrement chargé.
La 5e LED est bleue et indique que la plaque de charge sans fil est prête à l’emploi.
Si la LED est rouge, le Harrier 25 ne peut pas commencer la charge sans fil ; vérifiez
qu’aucun objet métallique ne se trouve sur la plaque sans fil et que le Harrier est
chargé et que votre téléphone est placé au centre sur la plaque. La LED clignote
lentement en bleu quand la charge sans fil est en cours. Veuillez enlever tout etui de
téléphone ayant des composants métalliques ou magnétiques. Pour attacher votre
téléphone au Harrier 25, placez-le perpendiculairement sous les sangles jaunes .
La plaque de charge sans fil peut fournir 5W, 7,5W ou 10W d’énergie quand le Harrier
25 a plus de 25% de charge, et détectera automatiquement la configuration convenable
de votre téléphone. Votre Harrier 25 s’éteint automatiquement après 15 secondes de
non-usage.
Pour recharger vos appareils avec le port bidirectionnel USB-C ou le port USB ,
branchez votre appareil via le câble USB fourni au câble USB-C (et à l’adaptateur Micro
USB, si nécessaire) ou au câble de votre appareil. Les ports détecteront automatiquement
quand un appareil est branché. Si toutes les 3 sorties sont utilisées simultanément, la
plaque sans fil aura un débit de 5W.
Pour recharger le Harrier 25, branchez le USB fourni au câble USB-C ou votre propre
câble au port USB-C et branchez à une source d’alimentation. Fermez le couvercle de
port après usage afin que les ports restent propres et secs.
6 7
8
Canada ICES-003 (B) / NMB-003 (B)
Per attivare la carica senza fili e controllare il livello di potenza di Harrier 25, premere
brevemente il pulsante di accensione e i LED bianchi del livello di carica si
accenderanno. Ogni LED bianco indica il 25% della carica. Se il primo LED bianco
lampeggiasse, l'Harrier 25 deve essere ricaricato; se tutti i LED bianchi sono accesi,
l'Harrier 25 è completamente carico.
Il quinto LED è blu e indica che il pad di ricarica wireless è pronto all'uso. Se
il LED è rosso, l’Harrier 25 non può cominciare la ricarica wireless; controlla che non
ci siano oggetti metallici sul pad wireless, controlla che l’Harrier sia carico e che il
telefono sia posizionato centralmente sul pad. Il LED lampeggia lentamente di colore
blu durante la ricarica wireless. Si prega di rimuovere le custodie del telefono con
componenti metallici o magnetici. Tieni il telefono vicino all’Harrier 25 posizionandolo
perpendicolarmente sotto le cinghie gialle . Il pad wireless può fornire 5W, 7,5W o
10W di potenza quando l'Harrier 25 presenta più del 25% di carica, e rileverà
automaticamente l'impostazione appropriata per il telefono. L’Harrier 25 si spegnerà
automaticamente dopo 15 secondi senza alcun utilizzo.
Per ricaricare i dispositivi utilizzando la porta USB-C bidirezionale o la porta USB
collegare il dispositivo tramite il cavo USB a USB-C (e, se necessario, l'adattatore
Micro USB) o il cavo del dispositivo stesso. Le porte rilevano automaticamente
quando un dispositivo è collegato. Se tutte e 3 le uscite vengono utilizzate
contemporaneamente, il pad wireless produce 5W.
Per ricaricare l'Harrier 25, collegare il cavo USB a USB-C incluso o il proprio cavo alla
porta USB-C e collegarlo a una fonte di alimentazione. Chiudere il coperchio della
porta quando non in uso per mantenere le porte pulite e asciutte.
6 7
8
För att aktivera trådlös laddning och kontrollera laddningsnivån på Harrier 25, tryck lätt
på strömknappen varvid de vita LED-lamporna för batterinivå kommer att tändas.
Varje vit LED-lampa indikerar 25 % av laddningen. Om den första vita LED-lampan
blinkar innebär det att Harrier 25 behöver laddas; om alla de vita LED-lamporna har
fast ljus innebär det att din Harrier 25 är fullt laddat.
Den femte LED-lampan är blå och indikerar att den trådlösa laddningsplattan
är färdig att användas. Om LED-lampan lyser rött innebär det att din Harrier 25 inte
starta den trådlösa laddningen; kontrollera att det inte finns något metallföremål på
den trådlösa laddningsplattan och kontrollera att din Harrier är laddad och att din
telefon är centralt placerad på plattan. LED-lampan kommer sakta att blinka blått
under trådlös laddning. Ta bort alla telefonfodral med metalldelar eller magnetiska
komponenter. Fäst din telefon till din Harrier 25 genom att placera den vertikalt
under de gula banden . Den trådlösa laddningsplattan har en eekt på 5W, 7.5W
eller 10W när din Harrier 25 är mer än 25 % laddad, och kommer automatiskt att
detektera lämplig ströminställning för din telefon. Din Harrier 25 stängas automatiskt
av efter 15 sekunder utan användning.
För att ladda enheter med den dubbelriktade USB-C porten eller USB porten,
anslut din enhet med den medföljande USB till USB-C kabeln (och Micro-USB-adapter,
vid behov) eller din enhets egen kabel. Portarna kommer automatiskt att upptäcka
när enheten är ansluten. Om alla utgångarna används samtidigt kommer den trådlösa
laddningsplattan att mata ut 5W.
För att ladda din Harrier 25, anslut den medföljande USB till USB-C kabeln eller din
egen kabel till USB-C porten och anslut sedan till en strömkälla. Stäng portluckan
när den inte används för att hålla portarna rena och torra.
6 7
8
ワイヤレス充電を有効にしてHarrier25の電力レベルを確認するには、電源ボタン
を短く押してください。白色の充電レベルLEDが点灯します。各白色LEDは25%の
電荷を示します。最初の白色LEDが点滅している場合は、Harrier25を充電する必要が
ありますが、すべての白色LEDが点灯していれば、Harrier25は完全に充電されています。
5番目のLEDは青色で、ワイヤレス充電パッドの使用準備ができていることを示
しています。
LEDが赤の場合、Harrier25はワイヤレス充電を開始できません。ワイヤレスパッド
の上に金属製のものがないことを確認し、Harrierが充電されていることと、電話がパ
ッドの中央に置かれていることを確認してください。ワイヤレス充電中は、LEDがゆっ
くり青く点滅します。金属製または磁気部品のある電話ケースはすべて取り外してくだ
さい。黄色いストラップの下に垂直に置いて、電話機をHarrier25に固定したまま
にします。Harrier25が25%以上充電されている場合、ワイヤレスパッドは5W、7.5W、
または10Wの電力を供給することができ、お使いの電話機に適した設定を自動的に検出しま
す。Harrier25は使わない場合、15秒後に自動的にオフになります。
双方向USB-CポートまたはUSBポートを使用してデバイスを充電するには、付属
のUSB-USB-Cケーブル(および必要に応じてMicroUSBアダプタ)またはデバイス専用のケ
ーブルを使用してデバイスを接続します。デバイスが接続されると、ポートが自動的に検
出します。3つすべての出力が同時に使用されている場合、ワイヤレスパッドは5Wで出
力します。
Harrier25を充電するには、付属のUSBtoUSB-Cケーブルまたは独自のケーブルをUSB-C
ポートに接続してから電源に接続します。使用していないときはポートカバーを閉じて、
ポートを清潔で乾燥した状態に保ってください。
6 7
8
         Harrier 25  (1)      
  LED      .   (2)  LED  25%  
   . LED      Harrier 25       
     Harrier 25  .
   LED    .  (4)        (3) 
LED       Harrier 25          
       Harrier    .     
LED            .     
      . Harrier 25  .(5)      
     10   7.5   5       Harrier 25 25%  
    .     Harrier 25    15  .
     USB-C   (6)   USB (7)     USB 
 USB-C ( Micro USB  .       .   (  
 5            .
   Harrier 25   USB   USB-C     USB-C  
           (8)    ..
6 7
8
如果需要激活无线充电,并检查Harrier 25的现有电量,只需按下电源按钮 ,四只用于显示电
量的白色LED灯 将会亮起。每一只白色LED灯显示25%的电量。如果第一只白色LED灯闪动,
表明Harrier 25需要充电;如果所有的白色LED都处于高亮状态,表面Harrier 25已经充满电量。
第5只LED灯 呈现蓝色,表明无线充电板 可以使用。如果该LED灯处于红色状态,
表明Harrier 25不能用于无线充电。在这种情况下,需要检查无线充电板上是否存在金属物品,
检查Harrier是否已经充满电量,手机是否放在无线充电板的中央。在进行无线充电时,LED灯
会慢慢闪烁,呈现蓝色。请取下任何带有金属或磁性部件的手机套。将手机垂直放置在黄色带
子之下 ,从而将其固定在Harrier 25上。当Harrier 25充电超过25%时,无线充电板可以
提供5W、7.5W或10W的电量,并会自动检测出适合该手机的设置。如果连续15秒处于未使
用状态,Harrier 25将会自动关闭。
如果需要使用双向USB-C端口 或USB端口 为设备充电,请通过原装的USB或USB-C
导线(如果需要,可以使用微型USB适配器)或用户自己的导线进行设备连接。端口将自动检
测设备的连接情况。如果同时使用3个输出端口,无线充电板将输出5W。
如果需要再次给Harrier 25充电,请通过原装的USB或USB-C 导线,或用户自己的导线 将
设备连接至USB-C端口或电源。在处于未使用状态时,请合上端口盖 ,保持端口清洁干燥。
6 7
8
Om draadloos laden te activeren en het stroomniveau te controleren van uw Harrier 25,
druk kort op de stroomknop en de witte LED’s van het laadpeil zullen oplichten.
Elke witte LED geeft 25% lading aan. Indien het eerste witte LED flikkert, moet de
Harrier 25 weer opgeladen worden; indien alle witte LED’s aan zijn, dan is uw Harrier
25 volledig opgeladen.
Het 5e LED is blauw en geeft aan dat de draadloze laadpad klaar is voor gebruik.
Indien de LED rood is, kan uw Harrier 25 niet beginnen draadloos te laden; controleer of
er geen metalen voorwerpen op de draadloze pad zijn, en controleer of uw Harrier
opgeladen is en uw telefoon centraal op de pad geplaatst is. De LED zal langzaam
blauw flikkeren terwijl u draadloos oplaadt. Verwijder alle telefoonhoesjes met metalen
of magnetische onderdelen. Houd uw telefoon bevestigd op uw Harrier 25 door het
loodrecht te plaatsen onder de gele bandjes . De draadloze pad kan stroom van 5W,
7,5W of 10W leveren als de Harrier meer dan 25% geladen is en zal automatisch de
passende instelling voor uw telefoon detecteren. Uw Harrier 25 zal automatisch
uitgeschakeld worden na 15 seconden zonder gebruik.
Om uw toestellen opnieuw te laden met de bi-directionele USB-C-poort of de
USB-poort , verbind uw toestel via de inbegrepen USB met de USB-C-kabel
(en Micro USB-adapter indien nodig) of de eigen kabel van uw toestel. De poorten
zullen automatisch detecteren als een toestel aangesloten is. Indien de 3 uitgangen
tegelijk gebruikt worden, is de output van de draadloze pad 5W.
Om uw Harrier 25 opnieuw te laden, verbind de inbegrepen USB met de USB-C-kabel of
uw eigen kabel met de USB-C-poort en sluit aan op een stroombron. Sluit het deksel
van de poort indien niet in gebruik om de poorten proper en droog te houden.
6
7
8
Other PowerTraveller Batteries Charger manuals

PowerTraveller POWERMONKEY EXPLORER 2 User manual

PowerTraveller

PowerTraveller POWERMONKEY EXPLORER 2 User manual

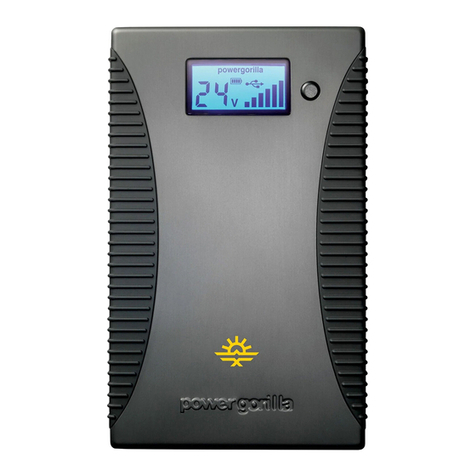
PowerTraveller Powergorilla User manual

PowerTraveller

PowerTraveller Powergorilla User manual

PowerTraveller Powergorilla User manual

PowerTraveller

PowerTraveller Powergorilla User manual

PowerTraveller Powermonkey Extreme User manual

PowerTraveller

PowerTraveller Powermonkey Extreme User manual

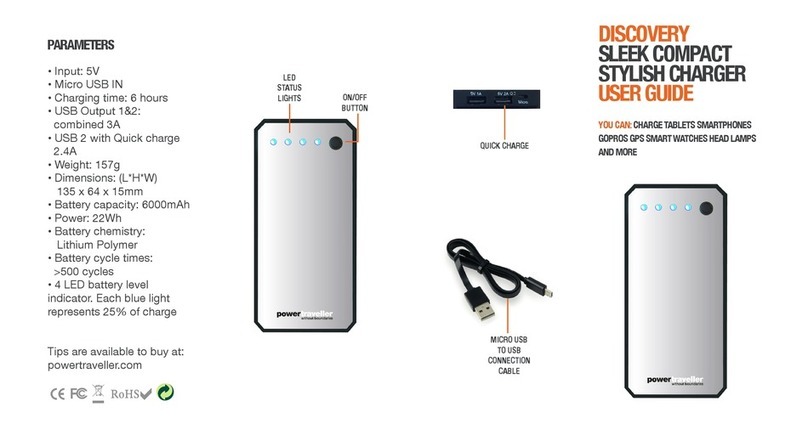
PowerTraveller Discovery User manual

PowerTraveller

PowerTraveller Discovery User manual

PowerTraveller SOLAR ADVENTURER User manual

PowerTraveller

PowerTraveller SOLAR ADVENTURER User manual

PowerTraveller MINI-G User manual

PowerTraveller

PowerTraveller MINI-G User manual

PowerTraveller Powergorilla User manual

PowerTraveller

PowerTraveller Powergorilla User manual

PowerTraveller POWERMONKEY EXPLORER User manual

PowerTraveller

PowerTraveller POWERMONKEY EXPLORER User manual

PowerTraveller POWERCHIMP 4A User manual

PowerTraveller

PowerTraveller POWERCHIMP 4A User manual

PowerTraveller Powergorilla User manual

PowerTraveller

PowerTraveller Powergorilla User manual

PowerTraveller POWERMONKEY EXPEDITION Operating and maintenance instructions

PowerTraveller

PowerTraveller POWERMONKEY EXPEDITION Operating and maintenance instructions

PowerTraveller SOLAR ADVENTURER II User manual

PowerTraveller

PowerTraveller SOLAR ADVENTURER II User manual

PowerTraveller EXTREME User manual

PowerTraveller

PowerTraveller EXTREME User manual

Popular Batteries Charger manuals by other brands

Dynamite Passport DYNC3000 instruction manual

Dynamite

Dynamite Passport DYNC3000 instruction manual

Altronix AL400ULXJ installation guide

Altronix

Altronix AL400ULXJ installation guide

Tycon Power Systems TP-SCPOE-1212 user manual

Tycon Power Systems

Tycon Power Systems TP-SCPOE-1212 user manual

AGPtek TS01 user manual

AGPtek

AGPtek TS01 user manual

Philips SJA1185 Specifications

Philips

Philips SJA1185 Specifications

LEAB TS 12 user manual

LEAB

LEAB TS 12 user manual

Matrix Infinity MA-PWM30A user manual

Matrix Infinity

Matrix Infinity MA-PWM30A user manual

XS Power HF Series user guide

XS Power

XS Power HF Series user guide

Analytic Systems BCA310MS Installation & operation manual

Analytic Systems

Analytic Systems BCA310MS Installation & operation manual

EG4 CHARGEVERTER 5KW user manual

EG4

EG4 CHARGEVERTER 5KW user manual

HI-Q TOOLS PM3500 user guide

HI-Q TOOLS

HI-Q TOOLS PM3500 user guide

therm-ic Heated Beanie Instructions for use

therm-ic

therm-ic Heated Beanie Instructions for use

Milwaukee M12-18AC Original instructions

Milwaukee

Milwaukee M12-18AC Original instructions

Jarv JRV-DTC5000 user guide

Jarv

Jarv JRV-DTC5000 user guide

Jonsered 275Ci Owner's/operator's manual

Jonsered

Jonsered 275Ci Owner's/operator's manual

VOLTCRAFT V-CHARGE ECO 6X 1S operating instructions

VOLTCRAFT

VOLTCRAFT V-CHARGE ECO 6X 1S operating instructions

POD Point Solo S3-1C Technical manual

POD Point

POD Point Solo S3-1C Technical manual

andi be free WIRELESS VENT MOUNT CHARGER manual

andi be free

andi be free WIRELESS VENT MOUNT CHARGER manual

manuals.online logo
manuals.online logoBrands
  • About & Mission
  • Contact us
  • Privacy Policy
  • Terms and Conditions

Copyright 2025 Manuals.Online. All Rights Reserved.