Raven AutoBoom John Deere 4700 User manual

John Deere 4700 (1998 and Older)
AutoBoom™Installation Manual

While every effort has been made to ensure the accuracy of this document,
Raven Industries assumes no responsibility for omissions and errors. Nor is any
liability assumed for damages resulting from the use of information contained
herein.
Raven Industries shall not be held responsible or liable for the effects of
atmospheric conditions and sunspot activity on the performance of our products.
Raven Industries cannot guarantee the accuracy, integrity, continuity, or
availability of the GPS signal from the U.S. Department of Defense/NAVSTAR
GPS satellites, the OmniSTAR correction service or the WAAS correction
service.
Raven Industries accepts no responsibility for the use of the signal for other than
the stated purpose. Raven Industries shall not be responsible or liable for
incidental or consequential damages or a loss of anticipated benefits or profits,
work stoppage or loss or impairment of data arising out of the use, or inability to
use, the SmarTrax or any of its components.
Disclaimer

Table of Contents
Manual No. 016-0230-012 i
Chapter 1 Important Safety Information................................................. 1
Important Safety Information .....................................................................................................1
Hydraulic Safety ..................................................................................................................2
Electrical Safety ...................................................................................................................2
Chapter 2 Introduction............................................................................. 3
Recommendations ..............................................................................................................4
Tools Needed ......................................................................................................................4
Preparing for Installation .....................................................................................................4
Point of Reference ...............................................................................................................4
Hydraulic Fittings .................................................................................................................4
Chapter 3 PowerGlide.............................................................................. 5
PowerGlide Kit Contents ...........................................................................................................5
Install the PowerGlide Hydraulic System ................................................................................10
Install Fittings on the AutoBoom Valve ..............................................................................10
Install the PowerGlide Dual Cartridge Option (If Applicable) ............................................. 11
Mount the AutoBoom Valve ...............................................................................................12
Install the Pressure and Tank Hoses .................................................................................13
To Install the Pressure and Tank Hoses ............................................................................14
Install the Left Cylinder and Right Cylinder Hoses ............................................................16
Install the Left and Right Down Hoses ..............................................................................17
To Install the Load Sense Hose .........................................................................................18
PowerGlide Hydraulic Schematic ......................................................................................19
Mount the Gauge Wheels .......................................................................................................20
Moving The Wet Boom ......................................................................................................21
Install the PowerGlide Wiring ..................................................................................................23
Wiring Connections ...........................................................................................................23
Connect the Harness .........................................................................................................23
To Connect the Harness Cable .........................................................................................24
Connect the Controller ......................................................................................................24
To Connect the Power Leads ............................................................................................24
PowerGlide Wiring Schematic .................................................................................................25
Chapter 4 PowerGlide Plus ................................................................... 27
PowerGlide Plus Kit Contents .................................................................................................27
Install the PowerGlide Plus Hydraulic System ........................................................................32
Install Fittings on the AutoBoom Valve ..............................................................................32
Mount the AutoBoom Valve ...............................................................................................33
Install the Pressure and Tank Hoses .................................................................................34
Install the Left Cylinder and Right Cylinder Hoses ............................................................36
Install the Left and Right Down Hoses ..............................................................................37

Table of Contents
ii John Deere 4700 (1998 and Older) AutoBoom Installation Manual
To Install the Load Sense Hose .........................................................................................38
PowerGlide Plus Hydraulic Schematic ....................................................................................39
Mount the Gauge Wheels ........................................................................................................40
Moving The Wet Boom ......................................................................................................41
Install the PowerGlide Plus Wiring ..........................................................................................43
Wiring Connections ...........................................................................................................43
Install the AutoBoom Node ................................................................................................43
Connect the Harness .........................................................................................................44
To Connect the Harness Cable ..........................................................................................44
Connect the Controller (If Applicable) ................................................................................45
Connect the Computer (If Applicable) ...............................................................................45
Connect the Power Leads .................................................................................................45
PowerGlide Plus Wiring Schematics .......................................................................................46
AutoBoom Controller .........................................................................................................46
Envizio Plus .......................................................................................................................47
SCS 4000/5000 .................................................................................................................48
Viper Pro and
Envizio Pro ........................................................................................................................49
Chapter 5 UltraGlide .............................................................................. 51
UltraGlide Kit Contents ............................................................................................................51
Install the UltraGlide Hydraulic System ...................................................................................55
Install Fittings on the AutoBoom Valve ..............................................................................55
Mount the AutoBoom Valve ...............................................................................................56
Install the Pressure and Tank Hoses .................................................................................57
Install the Left Cylinder and Right Cylinder Hoses ............................................................59
Install the Left and Right Down Hoses ..............................................................................60
To Install the Load Sense Hose .........................................................................................61
UltraGlide Hydraulic Schematic ...............................................................................................62
Install The Ultraglide Sensors .................................................................................................63
To Mount the Left and Right UltraGlide Sensors ...............................................................63
To Connect the Sensor Cables ..........................................................................................63
Installing Center Sensor and Center Rack Control ............................................................65
Install the Ultraglide Wiring ......................................................................................................67
Wiring Connections ...........................................................................................................67
Install the AutoBoom Node ................................................................................................67
Connect the Harness .........................................................................................................68
To Connect the Harness Cable ..........................................................................................68
Connect the Controller (If Applicable) ................................................................................69
Connect the Computer (If Applicable) ...............................................................................69
Connect the Power Leads .................................................................................................69
Mount the Gauge Wheels- Optional ........................................................................................70
Moving The Wet Boom- Optional ......................................................................................71
UltraGlide Wiring Schematics ..................................................................................................73

Table of Contents
Manual No. 016-0230-012 iii
AutoBoom Controller .........................................................................................................73
Envizio Plus .......................................................................................................................74
SCS 4000/5000 .................................................................................................................75
Viper Pro and
Envizio Pro ........................................................................................................................76
Chapter 6 Replacement Parts ............................................................... 77
Valve Blocks ............................................................................................................................77
Wheel and Assembly Brackets ................................................................................................79
Sensor and Brackets ...............................................................................................................80

Table of Contents
iv John Deere 4700 (1998 and Older) AutoBoom Installation Manual

CHAPTER
1
Manual No. 016-0230-012 1
C hapt er 1
Important Safety
Information
Important Safety Information
Read this manual carefully before installing the AutoBoom system.
•Follow all safety information presented within this manual.
•If you require assistance with any portion of the installation or service of your Raven equipment, contact
your local Raven dealer for support.
•Follow all safety labels affixed to the AutoBoom system components. Be sure to keep safety labels in good
condition and replace any missing or damaged labels. To obtain replacements for missing or damaged
safety labels, contact your local Raven dealer.
When operating the machine after installing AutoBoom, observe the following safety measures:
•Be alert and aware of surroundings.
•Do not operate AutoBoom or any agricultural equipment while under the influence of alcohol or an illegal
substance.
•Remain in the operator’s position in the machine at all times when AutoBoom is engaged.
•Disable AutoBoom when exiting from the operator’s seat and machine.
•Do not drive the machine with AutoBoom enabled on any public thorough-fare or main road.
•Determine and remain a safe working distance from other individuals. The operator is responsible for
disabling AutoBoom when the safe working distance has diminished.
•Ensure AutoBoom is disabled prior to starting any maintenance work on AutoBoom or the machine.
Please review the operation and safety instructions included with your implement and/or controller.
NOTICE

Chapter 1
2 John Deere 4700 (1998 and Older) AutoBoom Installation Manual
When starting the machine for the first time, be sure that all persons stand clear, in case a hose has not been
completely tightened.
This machine must remain stationary and switched off with the booms unfolded and supported while
installation or maintenance is conducted.
Hydraulic Safety
Hydraulics may be under pressure. Never attempt to open or work on a hydraulic system with the equipment
running. Care should always be taken when first opening a system that has previously been pressurized.
When disconnecting the hydraulic hoses or purging is required, be aware that the hydraulic oil may be
extremely hot and under high pressure. Caution must be exercised. Any work carried out on the hydraulic
system must be performed in accordance with the machine manufacturers's approved maintenance
instructions. Raven Industries recommends that appropriate protective equipment be worn at all times when
working on the hydraulic system. When installing AutoBoom hydraulics or performing diagnostics,
maintenance, or routine service, ensure precautions are taken to prevent any foreign material or
contaminants from being introduced in the machine's hydraulic system. Objects or materials that are able to
bypass the machine’s hydraulic filtration system will adversely reduce performance and possibly damage the
AutoBoom hydraulic valves.
Electrical Safety
Do not reverse power leads. Doing so could cause severe damage to the equipment. Always make sure that
the power leads are connected to the correct polarity as marked. Ensure that the power cable is the last cable
to be connected.
WARNING
CAUTION

CHAPTER
2
Manual No. 016-0230-012 3
C hapt er 2
Introduction
Congratulations on your purchase of the Raven AutoBoom system. This system is designed to provide
automated boom height adjustment for agricultural spraying equipment.
This manual applies to the following machine. For future reference, write your serial number in the space
below:
Make: John Deere
Model: 4700
Year: 1998 and Older
Serial Number:
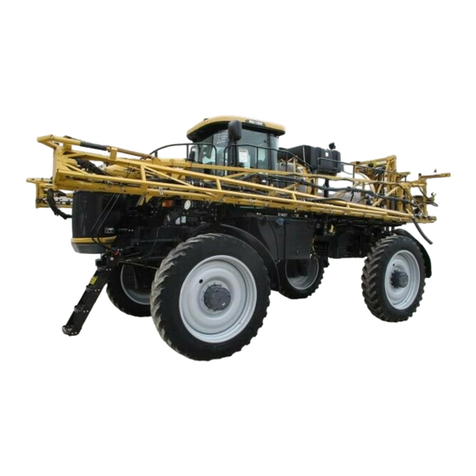
FIGURE 1. 4700 Machine
Note: This manual contains the installation instructions for the PowerGlide, PowerGlide Plus, and
UltraGlide Systems. Be sure to identify which system you have and follow only the instructions for
that system.

Chapter 2
4 John Deere 4700 (1998 and Older) AutoBoom Installation Manual
Recommendations
Raven Industries recommends the following best practices when installing the AutoBoom system:
•Use part numbers to identify the parts.
•Do not remove the plastic wrap from a part until it is necessary for installation.
•Do not remove plastic caps from a part until it is necessary for installation.
Tools Needed
The following tools are recommended for installation of the AutoBoom system:
•SAE standard-sized wrenches
•Cable ties
•Set of tools
Preparing for Installation
Before installing AutoBoom, park the machine where the ground is level, clean, and dry. Leave the machine
turned off for the duration of the installation process.
During the installation process, follow good safety practices. Be sure to carefully read the instructions in this
manual as you complete the installation process.
Point of Reference
The instructions in this manual assume that you are standing behind the machine, looking to the cab.
Hydraulic Fittings
This manual may reference the following types of hydraulic fittings
•SAE O-ring fittings
•ORFS (O-Ring Face Seal) fittings
•JIC fittings
SAE O-Ring fitting (M) ORFS fitting (M) JIC fitting (M)

CHAPTER
3
Manual No. 016-0230-012 5
C hapt er 3
PowerGlide
PowerGlide Kit Contents
This section contains a list of the kit contents that you should have received in these AutoBoom kits. Before
you begin assembling the kit, compare the items in your AutoBoom kit with this list. If you have questions about
your kit, contact your Raven dealer.
TABLE 1. PowerGlide Installation Kit (P/N 117-0230-012)
Picture Item Description Part Number Qty.
Not Pictured John Deere 4700 (1998) and Older
AutoBoom Installation Manual 016-0230-012 1
PowerGlide AutoBoom Valve Block 063-0131-119 1
Wheel 322-0131-008 2
Left Bracket 116-0159-596 1
Right Bracket 116-0159-533 1

Chapter 3
6 John Deere 4700 (1998 and Older) AutoBoom Installation Manual
Bolt- 1/2”-13 x 1 1/2” SS 311-0058-186 4
Nut-1/2-13 Zinc Hex 312-1001-043 4
Nut- 3/8”-16 Zinc Flanged Lock 312-1001-164
20
(16 in box 1
and
4 in box 2)
U- Bolt- 1 9/16” W x 2 2/12”L x 3/8” Thd 107-0171-611 8
Valve Mounting Plate 107-0171-619 1
U- Bolt- 3 1/16” W x 4” L x 3/8 Thd 107-0171-608 2
Cable- Boom Sense Adapter Kit 117-0131-010
(Includes 117-
0131-631/633) 1
Bolt- 5/16”- 24 x 1” GR 8 Hex 311-0049-235 4
Washer- 5/16” Zinc Plated Lock 313-1000-019 4
Right Wheel Axle Assembly 063-0131-585 1
TABLE 1. PowerGlide Installation Kit (P/N 117-0230-012)
Picture Item Description Part Number Qty.

Manual No. 016-0230-012 7
PowerGlide
Left Wheel Axle Assembly 063-0131-590 1
Or
Right Wheel Straight Axle Assembly 063-0131-566 2
TABLE 2. PowerGlide Console Kit (P/N 117-0137-022)
Picture Item Description Part Number Qty.
PowerGlide Calibration & Operation Manual 016-0130-061 1
AutoBoom Controller 063-0130-011 1
Controller Cable 115-0230-002 1
Harness Cable 115-0230-003 1
TABLE 1. PowerGlide Installation Kit (P/N 117-0230-012)
Picture Item Description Part Number Qty.

Chapter 3
8 John Deere 4700 (1998 and Older) AutoBoom Installation Manual
TABLE 3. AutoBoom Hydraulic Kit (P/N 117-0134-012)
Picture Item Description Part Number Qty.
Fitting- 9/16” ORFS Tee 333-0012-022 1
Fitting- 11/16” ORFS Tee 333-0012-069 2
Fitting- 11/16” ORFS (M) to 9/16” SAE O-
Ring (M) 333-0012-084 4
Fitting- 9/16” JIC (M) to 3/4” SAE O-Ring
(M) (Restrictor) 333-0012-230 2
Fitting- 11/16” ORFS 90 º Elbow 333-0012-065 2
Fitting- 11/16” ORFS (M) to 3/4” SAE O-
RING (M) 333-0012-199 2
Fitting- 11/16 ORFS (M) 90 º To 3/4” SAE
O-RING (M) 333-0012-165 2
Fitting- 9/16” ORFS (M) To 7/16” SAE O-
RING (M) 333-0012-209 1
Pressure/ Tank Hose, 36” 214-1000-317 2

Manual No. 016-0230-012 9
PowerGlide
Left Cylinder, 84” 214-1000-318 1
Right Cylinder,102” 214-1000-319 1
Load Sense Hose, 26” 214-1000-316 1
Down Hoses, 52” 214-1000-452 2
TABLE 3. AutoBoom Hydraulic Kit (P/N 117-0134-012)
Picture Item Description Part Number Qty.

Chapter 3
10 John Deere 4700 (1998 and Older) AutoBoom Installation Manual
Install the PowerGlide Hydraulic System
Install Fittings on the AutoBoom Valve
Before mounting the AutoBoom valve on the machine, install the proper fittings on the valve. This prepares the
valve for installation and simplifies the hose connection process later in the procedure.
Use the following table to install the fittings in the appropriate ports on the AutoBoom valve.
Note: Remove fittings from rod and barrel end of tilt cylinders to see if orifices are installed in cylinder
ports.
If orifices are found in cylinder ports, remove orifices and install the ROD END orifices into ‘LV’ and
‘RV’ port on the AutoBoom valve (FLAT SIDE AWAY).
If orifices are not found in the cylinder ports, continue with the installation.
WARNING
This machine must remain stationary and
switched off with the booms unfolded and
supported while installation or maintenance is
conducted.
Fitting Port
11/16” ORFS (M) to 9/16” SAE O-Ring (M) (P/N 333-012-084) LV, RV, LC, RC
11/16” ORFS (M) to 3/4” SAE O-Ring (M) (P/N 333-012-199) T, P
9/16” ORFS (M) to 7/16” SAE O-Ring (M) (P/N 333-012-209) LS1
11/16” ORFS (M) 90° to 3/4” SAE O-Ring (M) Elbow, (P/N 333-012-165) Outside LT CYL RTN, Outside RT CYL
RTN
9/16” JIC (M) to 3/4” SAE O-Ring (M), Orifice (P/N 333-012-230) Inside LT CYL RTN, Inside RT CYL
RTN

Manual No. 016-0230-012 11
PowerGlide
Install the PowerGlide Dual Cartridge Option (If Applicable)
This procedure will demonstrate how to install a second cartridge to the AutoBoom valve, which will enable the
AutoBoom system to operate the left and right booms independently. Otherwise, the AutoBoom system will
operate the left and right booms in conjunction.
Note: To install the PowerGlide Dual Cartridge Option, you will need to order a Mechanical Cartridge
(P/N 334-0002-072) from your Raven Dealer.
1. Remove the port plug from Port ‘6A’.
FIGURE 1. Removing Cavity and Port Plug from the AutoBoom Valve
2. Remove the cavity plug from Port ‘5A’ and insert it into Port ‘6A’.
3. Insert a Mechanical Cartridge (P/N 334-0002-072) into Port ‘5A’.
FIGURE 2. Inserting Cavity Plug
Note: The port plug will not be used with the PowerGlide Dual Cartridge option. However, you will want
to keep this plug if you plan to upgrade to the PowerGlide Plus System.
6A
Port Plug
5A
Cavity Plug

Chapter 3
12 John Deere 4700 (1998 and Older) AutoBoom Installation Manual
Mount the AutoBoom Valve
1. Secure the AutoBoom valve (P/N 063-0131-119) to the mounting plate (P/N 107-0171-619) using the 5/16”
hex bolts (P/N 311-0049-235) and 5/16” lock washers (P/N 313-1000-019).
FIGURE 3. AutoBoom Valve Mounted on the Valve Mounting Bracket
2. Secure the Autboom valve/mounting plate to the machine’s center rack by using the U-bolts (P/N 107-0171-
608) and 3/8” lock nut (P/N 312-1001-164).
Note: The valve should be installed to the left of the machine’s center rack.
FIGURE 4. AutoBoom Valve Mounted on the Machine’s Top, Left, Center Rack Rail

Manual No. 016-0230-012 13
PowerGlide
Install the Pressure and Tank Hoses
WARNING
Hydraulics are under pressure. Care should
always be taken with a system that has been
pressurized. When disconnecting or
purging hydraulic hoses, be aware that the
hydraulic oil within the machine system may
be extremely hot and under high pressure.
CAUTION
When installing AutoBoom hydraulics or
performing diagnostics, maintenance, or
routine service, ensure precautions are
taken to prevent any foreign material or
contaminants from being introduced in the
machine’s hydraulic system.
Objects or materials that are able to bypass
the machine’s hydraulic filtration system
will adversely reduce performance and
possibly damage the AutoBoom hydraulic
valves.

Chapter 3
14 John Deere 4700 (1998 and Older) AutoBoom Installation Manual
To Install the Pressure and Tank Hoses
1. Locate and disconnect the pressure hose from the right side of the machine’s stack valve.
Note: This should be the port labeled ‘P’ (IN). If you cannot determine which line is the pressure line,
trace back each line until you find the line that connects to the hydraulic pump. That is the pressure
line.
2. Install a tee fitting (P/N 333-0012-065) to the pressure port on the machine’s valve.
3. Connect the machine’s pressure hose to the installed tee fitting.
FIGURE 5. Pressure and Tank Lines teed off of Machine Valve
4. Connect the straight fitting on the hydraulic hose (P/N 214-1000-317) to the installed tee fitting.
Pressure and Tank
lines teed off of
machine valve
Table of contents
Other Raven Farm Equipment manuals

Raven
Raven Hawkeye User manual

Raven
Raven SmarTrax User manual

Raven
Raven SmarTrax User manual

Raven
Raven AutoBoom User manual

Raven
Raven SmarTrax User manual

Raven
Raven SmarTrax Use and care manual

Raven
Raven SC1 Use and care manual

Raven
Raven SmarTrax John Deere 8R 2009 Series User manual

Raven
Raven CRX ROS-RS1 User manual

Raven
Raven AutoBoom XRT User manual

Raven
Raven SmarTrax User manual

Raven
Raven AutoBoom User manual

Raven
Raven TC1 User manual

Raven
Raven SmarTrax MD Series User manual

Raven
Raven SmarTrax User manual

Raven
Raven SmarTrax User manual

Raven
Raven SmarTrax User manual

Raven
Raven SC1 Use and care manual

Raven
Raven SmarTrax User manual

Raven
Raven SmarTrax User manual