Retevis RT69 User manual

1
1
2
3
4-5
6-8
6-7
8
8
9-14
15-44
45-55
45-48
49-52
53-55
55
56
57
58
Table of Contents
Caring tips ..............................................................
Notice .....................................................................
Using instruction ...................................................
Unpacking and Checking the Equipment ..............
Familiar with the product ...................................
Functional introduction ......................................
1.Brief functions .....................................................
2. Variety working modes of the radio ...........................
3. Basic operations ....................................................
Functional menu process ...............................
Functional operation instruction ....................
Description of part function ...........................
1. function of GPS ..............................................
2. private call, group call, all call ...........................
3. the using of radio repeater function ...................
4. Frequency/CTCSS detection .................................
Technical specifications ...........................................
Warranty card ...............................................................
Announce ..................................................................

Caring tips
Please read the following security information so you can know how to use the transceiver safely.
1. Please keep the radio and accessories in where the children can’t touch them.
2. Please do not disassembly radio, it will cause radio broken when non professional staff handle it.
3. Please use the standard battery and charger, avoid to damage the radio.
4. Please use the matching antenna, avoid to shorten the communication distance.
5. Do not keep the radio under the sunshine with long time, or keep it into the superheat place.
6. Do not keep the radio into where is full with the dust and damp.
7. Do not use strong chemical products, cleaning agents or strong Lotion to cleaning the radio.
8. Please don’t transmitting without installing it’s antenna.
9. If it find that radio have the peculiar smell or smoke, please turn off the supply power of radio promptly, and
contact with supplier about this case.
10. Please don’t connect the battery terminal or put the battery in the fire.
Notice
All above mention advise are applied to your radio and it’s accessories, if they still can’t working normally, please promptly contact
with supplier about this case.
If using those parts and accessories those are not producing and not selling by our company, we can’t promise that the safety and
operation of radio.
01 02
Using instructions
1. Install/Remove battery pack
Install:Please put the battery pack align with radio backside, then push it with up towards direction, until release
plus of radio base is locked.
Removing the battery pack, push it with down towards direction, until release plus of radio base unlocked.
2. Charge steps
The charger plug into the mains of 220V or 110V power outlet, the charger indicator green light flashing, the
battery pack or the radio with battery pack insert into the charger card slot.
The charger red light flashing to start charging. Charging then the charger green light flashing, charging end.
3. Install Antenna
Install the antenna into the radio connector, holding the antenna base and turning it clockwise until secure.
4. Install/Remove belt clip
If necessary install the belt clip at the rear of the battery compartment cover.

Familiar with the product
1
STEP
GPS
EXIT
A/B
MENU
RPT
VFO/MR
LOCK
3
*
SAVE
TOT
SCAN
2
SQL
4
TXP
7
VOX
89#
W/N
560
ROGER
VOICE
Encoder
Power/ volume switch
Transmit indictor light (red)
(When the battery is low the red light flashes)
Exit / cancel key
/AB main frequency switch key
/GPS and the distance measuring key
VFO/MR switch key
Reverse frequency, scan key
Lock, Stopwatch timer key
Floodlight
Antenna
Receive indictor Light (green)
LED screen
Menu/ confirm key
GPS
Short press: simple/ dual display mode
Long press: start/ exit transit
Number blackboard
Up/ down key
0403
1
STEP
GPS EXIT
A/B
MENU
RPT
VFO/MR
LOCK
3
*
SAVE
TOT
SCAN
2
SQL
4
TXP
7
VOX
89#
W/N
560
ROGER
VOICE
+
_
POW FULL
+
_
Unpacking and Checking the Equipment
Please take out the walkie talkie carefully from the box. We recommend that you identify the items in the following
table before discarding the packing material. If any items are missing or have been damaged during shipment,
please notify your dealer.
Supplied accessories table
Transceiver High Gain Antenna Lithium Battery Pack Smart Charger
Adapter Belt clip Hand strap User’s Manual
Intelligent charger device

Functional introduction
1.Brief functions
1. GPS function
2. NIGHT mode
3. Backlight mode
4. Duplex different/ same band transfer function
5. Duplex working mode(A zone transmit, B zone receive )
6. Dual receive
AB zone duplex working(in the same or different frequency, AB zone all can receive contemporary )
7. Super colorful LCD display
8. Dual display
Large screen dual band display, two completely operation system
9. Offset frequency setting and frequency direction setting
10. Duplex repeater UHF to VHF or VHF to UHF
11. 999 memory channel
12. Output power 10W
13. CTCSS /DCS, CTCSS /DCS scan function
14. VOX function
0605
Side key PF1: selective call、
sub frequency transmit key
Transmit (PTT)
Side key PF2: monitor key (long press)
floodlight (short press)
Side key PF3: scan, blackboard light,
remote alarm, SOS, radio
(according to use-defined)
MIC
S P
MIC/SP Jacks/
Programming Port
For connect the earphone
or programming cable to
set the functions by PC

07
15. Definition function of Multi - side key
16. Caller ID display
17. Main caller ID display
18. FSK code
19. All Calls, Group Calls and Selective Calls
20. SOS function
21. Priority Scan Function
22. Remote emergency alarm
23. Wide/Narrow bandwidth Selection (12.5KHZ/25KHZ)
24.SingleTone Pulse Frequency: 2100Hz/1750Hz/1000Hz/1450Hz (signaling for activating repeater)
25. Reverse Frequency
26. Stopwatch function
08
2. Variety working modes of the radio
(1) Working models.
(2)
Cross section directional transfer mode of work or dual transit work mode, the same frequency dual transfer function.
Note: the working mode is set by RPT key.
(一)
Walkie talkie display LCD screen is divided into A, B two zones, respectively, to display the working information
of the two channels. The top right of the main channel will show [MAIN], this symbol is very important, all of the
following operations and instructions for the symbol of the channel, there is no symbol of the channel, we call it the
sub frequency.
(二)
The parameters of the two working channels of the interphone can be respectively set, and when the channel
set to be set is set as the main frequency, the setting is set up.
(三)
Work in the cross directional radio relay, cross section, two-way transit mode, some functions will prohibit the
placement with walkie talkie.
3 Basic operation
1. Quick search function
Press [UP] or [DOWN] to set function or parameter, Long press [UP] or [DOWN] to quick search function.
2. DTMF
3. Reverse frequency function
When using this function TX and RX frequency will be exchanged, with CTCSS /DCS code will be exchanged; the
Operating : Under of standby states, press [*SCAN] to open this function, then press [*SCAN] again to turn off.

09
press or
choose parameter
press or
choose parameter
press or
choose parameter
press or
choose parameter
press or
choose parameter
press or
choose parameter
press or
choose parameter
press or
choose parameter
press or
choose parameter
P15
P15-16
P16
P16
P16-17
P17
P17
P18
P18
Functional menu process
ON: open the function
OFF: close the function
Function No. Name Enter function Screen display
Choose parameters Optional parameters
Confirm
Return to
Page
standby
1 STEP
2 SQL-LE
3 SAVE
4 TXP
5 ROGER
6 TOT
7 VOX
8 W/N
9 VOICE
STEP
SQL
SAVE
TXP
ROGER
TOT
VOX
W/N
VOICE
Have 7 type Frequency step,
including 5K, 6.25K, 10K, 12.5K,
25K, 50K, 100K;
Have level “0~9” to select
ON: open the function
OFF: close the function
HIGH: high power
MEDIUM: medium power
LOW: low power
OFF,BOT,EOT,BOTH
Have 60 grade of times ,
15 seconds per level
Have the grades “1~10”
OFF:turn off the function;
WIDE: wide bandwidth (25K)
NARR: narrow bandwidth(12.5k)
10
CALL:select call key
VFTX:amplitude-frequency emission
P18-19
P19
P19
P19-20
P20
P20-21
P21
P21
P22
P23
The standard DCS total 105group
(D023N-D7541)
OFF: close function
Nonstandard DCS range: 001-777
The standard DCS total 105group
(D023N-D7541)
OFF: close function
Nonstandard DCS range: 001-777
The standard CTCSS total 50group
(67.0HZ-254.1HZ)
OFF: close the function
Nonstandard CTCSS range: 65-260
The standard CTCSS total50 group
(67.0HZ-254.1HZ)
OFF: close the function
Nonstandard CTCSS range: 65-260
TO: scanning by time
CO: scanning by carrier signal
SE: scanning by search
ENGLISH
ON: open the function
OFF: close the function
ON: open the function
OFF: close the function
10 TOA
11 BEEP
12
LANGUAGE
13 BCL
14 SC-REV
15 R-CTC
16 T-CTC
17 R-DCS
18 T-DCS
19 PF1-KEY
TOA
BEEP
LANGUAGE
BCL
SC-REV
R-CTC
T-CTC
R-DCS
T-DCS
PF1
press or
choose parameter
press or
choose parameter
press or
choose parameter
press or
choose parameter
press or
choose parameter
press or
choose parameter
press or
choose parameter
press or
choose parameter
press or
choose parameter
press or
choose parameter
ON: open the function
OFF: close the function

P31
P31
P32
P32-33
P33
P33-34
P34
P34-37
P38
P38
press or
choose parameter
press or
choose parameter
press or
choose parameter
press or
choose parameter
press or
choose parameter
press or
choose parameter
press or
choose parameter
press or
choose parameter
press or
choose parameter
press or
choose parameter
1. BITMAP: pictures
2.BATT-V: Power and voltage
1. QT
2. QT*DTMF (QT or DTMF)
3. QT+DTMF (QT and DTMF)
ON: open function
OFF: close function
The radio code by the number 3-6 bits,
100-999999 option, first bit non-zero.
1. DT-ST: opening keyboard side tone
when transmitting
2. ANI-ST: opening ANI code side tone
when transmitting
3. DT+ANI: opening the side tone of
keyboard and ID code when transmitting
4. OFF: close function
ON: open the function
OFF: close the function
ON: open the function
OFF: close the function
1. X-DIRPT: directional cross band repeater
2. X-TWRPT: dual direction cross band repeater
ON: open speaker when repeater
OFF: close speaker when
ON: open the function
OFF: close the function
30 PONMSG
31 SP-MUTE
32 ANI-SW
33 ANI-EDIT
34 DTMF-ST
35 AUTOLOCK
36 PRI CH-SW
37 RPT-SET
38 RPT-SPK
39 RPT-PTT
PONMSG
SP-MUTE
ANI-SW
ANI-EDIT
DTMF-ST
AUTOLOCK
PRI CH-SW
RPT-SET
RPT-SPK
RPT-PTT
12
11
P23-25
P25
P26
P26
P26-27
P27-28
P28
P28-29
P30
P30
0-999.99500MHZ option
press or
choose parameter
press or
choose parameter
press or
choose parameter
press or
choose parameter
press or
choose parameter
press or
choose parameter
press or
choose parameter
press or
choose parameter
press or
choose parameter
press or
choose parameter
1. SCAN: scan function
2. LAMP: long light
3. SOS-CH: alarm
4. Tele alarm
5. RADIO
6. DISABLE: undefined
1. VFO mode
2. MR mode:
MR display mode
VFO+MR display mode
Channels name display mode
Always on: backlight always on
1s-20s: backlight setting time
Always off: backlight always off
Offset frequency direction:
1. Positive (+)
2. Negative (-)
OFF: close function
ON: open the function
OFF: close the function
1. The channel name is composed of
26 letters (a-b) or 10 Number (0-9).
2. The channel name can only edit up to
8 characters .
999 group channel
999 group channel
CTCSS
DCS
20 PF3-KEY
21 CH-MDF
22 ABR
23 OFF-SET
24 SFT-D
25 SECOND
26 CHNAME
27 MEM-CH
28 DEL-CH
29 SCNCD
PF3
CH-MDF
ABR
OFFSET
SFT-D
SECOND
CHNAME
MEM-CH
DEL-CH
SCNCD

13
P39
P39
P39-40
P40
P40
P41
P41
P41-42
press or
choose parameter
press or
choose parameter
press or
choose parameter
press or
choose parameter
press or
choose parameter
press or
choose parameter
press or
choose parameter
press or
choose parameter
P38
press or
choose parameter
ON: open the function
OFF: close the function
Optional pulse signal including
1750Hz, 2100Hz,1000Hz, 1450Hz
Delay time option:
100ms,200ms……3000ms
BOT (beginning)
EOT (ending)
BOTH (beginning and ending)
The radio have1-10 levels,
each level 1 second
All full channel,
and 1-10 scanning group
All full channel,
and 1-10 scanning group
ON: turn on the function
OFF: turn off the function
1. Saving as receiving and transmitting QT (ALL)
2. Saving as transmitting QT (ENCODER)
3. Saving as receiving QT (DECODER)
40 SCAN-ADD
41 ALERT
42 PTT-DLY
43 PTT-ID
44 RING
45 SCG-A
46 SCG-B
47 RPT-TONE
48 SC-QT
SCAN-ADD
ALERT
PTT-DLY
PTT-ID
RING
SCG-A
SCG-B
RPT-TONE
SC-QT
14
SMUTESET
CALLCODE
RESET
BACKLIGHT
NIGHTMODE
GPS
ADJ-TIME
P43
P43-44
P44
P44
P44
P43
P42
press or
choose parameter
press or
choose parameter
press or
choose parameter
press or
choose parameter
press or
choose parameter
press or
choose parameter
press or
choose parameter
OFF: close the function
TX: Main frequency transmitting, turn off sub -
frequency when receiving
RX: Main frequency receiving, turn off sub-
frequency when receiving
TX/RX: Main frequency transmitting/receiving,
turn off sub-frequency when receiving
49
SMUTESET
50
CALLCODE
51 RESET
52
BACKLIGHT
53
NIGHTMODE
54 GPS
55
ADJ-TIME
ON: open the function
OFF: close the function
Time differece
ON: open the function
OFF: close the function
Light brightness: 01-05 level
1. VFO:
the parameter of function setting reset
2. ALL: reset all function parameter
Selective call group:
1-99 group

15
Functional operation introduction
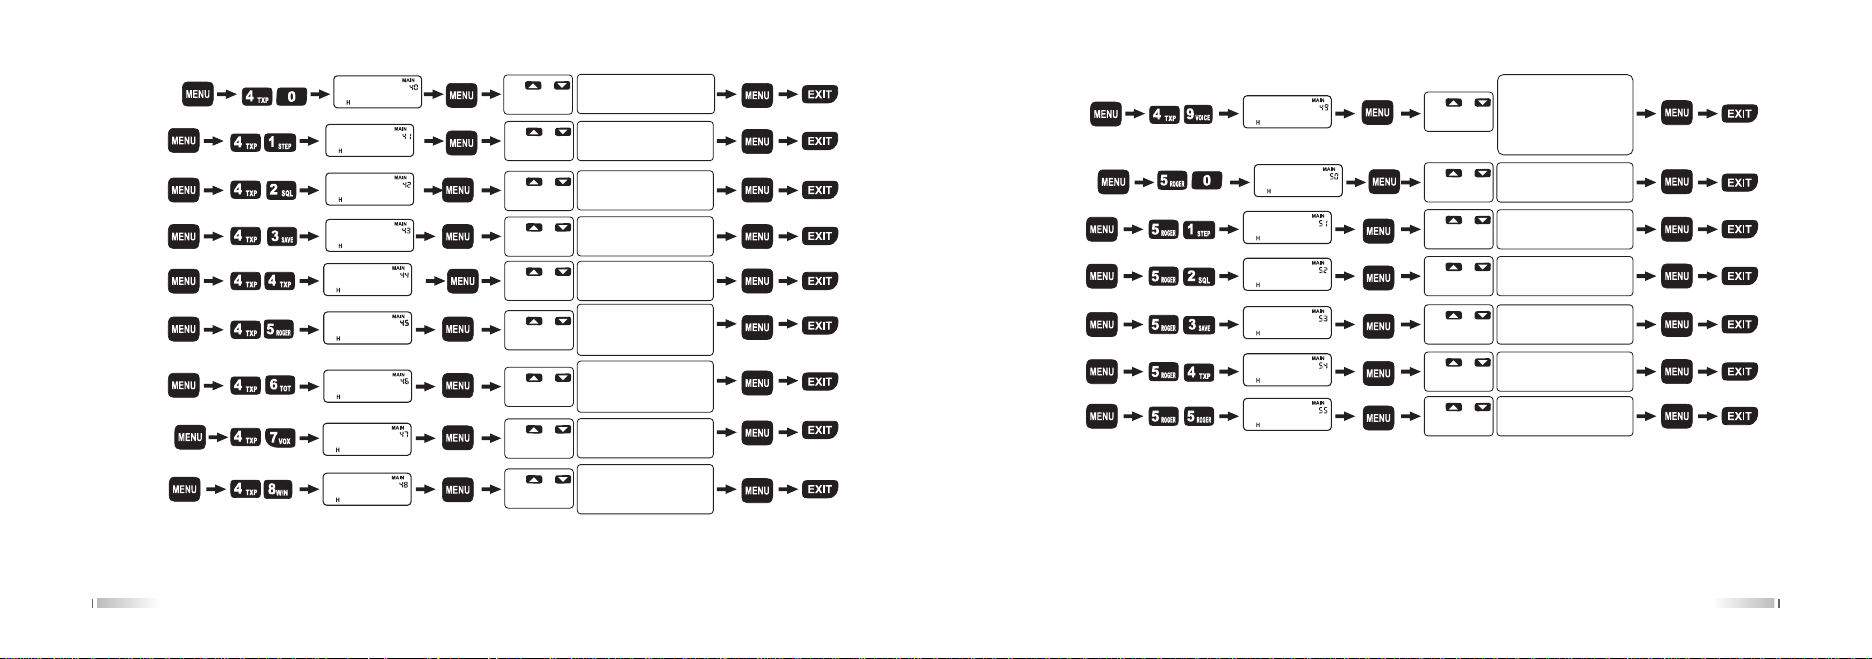
Frequency step (STEP) ---Menu 1
In the standby, Press [MENU]+[1 STEP], LCD display:
Press [MENU], then Press [UP]/[DOWN] to select the freq step, and press [MENU] to confirm, final press [EXIT]
back to standby.
SQL level (SQL-le)---Menu 2
The SQL level selection is actual that Open this function or close this function when signal up to what is level. When
open this function and set up in the same signaling ,the speaker will issue the voice; if select higher level of this
function will cause the weak signal so as to not receive very well; if select lower level of this function, will cause the
disturb of noise and other signal.
In the standby, press [MENU]+ [2 SQL]. LCD Display:
Press [MENU], then Press [UP]/[DOWN] to select the SQL level, and press [MENU] to confirm, final press [EXIT]
back to standby.
STEP
SQL
Tips:
The radio have 7 type Freq step, including 5K, 6.25K, 10K, 12.5K, 25K, 50K, 100K.
16
Power save mode (SAVE)---Menu 3
In order to reduce battery consume, This function will be shut down the receiver circuit of radio for some time, then
open for a moment to checking the received signal.
In the standby, press [MENU]+[3 SAVE]. LCD Display:
Press [MENU], then Press [UP]/[DOWN] to select ON(open function )/OFF(close function), and press [MENU] to
confirm, final press [EXIT] back to standby states.
Power Level (TXP)---Menu 4
Under the standby states, press [MENU]+[4 TXP]. LCD Display:
Press [MENU], then Press [UP]/[DOWN] to select level, and press [MENU] to confirm, final press[EXIT] back to
standby states.
The radio have 3 power level:HIGH/MEDIUM/LOW
Transmitting prompt voice (ROGER)---Menu 5
In the standby, press [MENU]+[5 ROGER]. LCD Display:
SAVE
TXP
Tips:
The radio have level “0~9” to select, selecting “0” will keep this function closing, the level “1~9”, the level
higher and the function higher.
ROGER

17
TOT
VOX
Press [MENU], then Press [UP]/[DOWN] to select the prompt mode, and press [MENU] to confirm, final press
[EXIT] back to standby states.
The radio have 4 type prompt mode of Transmitting prompt voice: BOT, EOT, BOTH, OFF.
Transmitter time-out timer (TOT)---Menu 6
In the standby, press [MENU]+[6 TOT], LCD Display:
Press [MENU], then Press[UP]/[DOWN] to select the times, and press [MENU] to confirm, final press [EXIT] back
to standby.
The radio have total 60 grade of times, From 15s to 900s, 15s increment per level.
VOX function (VOX)---Menu 7
In the standby, press [MENU]+[7 VOX], LCD Display:
Press [MENU], then Press [UP]/[DOWN] to select the VOX grade, and press [MENU] to confirm, final press [EXIT]
back to standby states.
The radio have the grades “1~10” of VOX function. OFF: turn off function.
Tips:
VOX Function open higher level grade, the used sound will be higher.
It can’t open this function under the scanning states or FM states.
18
W/N
VOICE
Tips:
If want to turn off all operation prompt voice, it must be turn of Menu 9 operation prompt voice setting
(VOICS) and Menu11 beep prompt setting (BEEP)
Wide/Narrow Band setting (W/N)---Menu 8
In the standby, press [MENU]+[8 W/N], LCD Display:
Press [MENU], then Press [ UP]/[DOWN] to select the bandwidth, and press [MENU] to confirm, final press [ EXIT]
back to standby.
The radio have 2 type of bandwidth, WIDE: Wide bandwidth(25K) and NARR: narrow bandwidth(12.5K).
Operation prompt voice (VOICE)---Menu 9
In standby states, press [MENU]+[9 VOICE], LCD Display:
Press [MENU], then press [UP]/[DOWN] to select the prompt mode, and press [MENU] to confirm, final press
[EXIT] back to standby.
The radio have 2 type prompt mode: ON (open function)/OFF( close function)
Transmit overtime alarm (TOA) ---MENU 10
In standby, press [MENU]+[1 STEP][0DW], screen display: TOA

19
Tips:
If transmit time continuous exceed “overtime alarm”, error voice then stop transmit.
Press [MENU] enter, press [UP]/[DOWN] choose time, then press [MENU] confirm, final press [EXIT] back to standby.
Transmit overtime alarm have 10 seconds, total is 10 level, each level 1 second. Off: close the over time alarm.
Beep (BEEP)---Menu 11
In the standby states, press [1 STEP][1 STEP], LCD Display:
Press [MENU], then Press [UP]/[DOWN] to select ON/OFF, and press [MENU]to confirm, final press [EXIT] back
to standby.
Screen English(LANGUAGE )---Menu 12
In the standby, press [MENU]+[1 STEP][2 SQL], LCD Display:
Press [MENU], then Press [UP]/[DOWN] to select language, and press [MENU]to confirm, final press [EXIT] back
to standby.
The radio only 1 language display: ENGLISH
Busy channel lock-out (BCL)---Menu 13
BEEP
LANGUAGE
20
Tips:
when radio working under the mode of cross band repeater and transmit , this is function is prohibit.
Tips:
Press [*SCAN] with 2 second, then can enter into scanning states.
BCL
SC-REV
R-CTC
In the standby, press [MENU]+[1 STEP][ 3 SAVE], LCD Display:
Press [MENU], then Press [UP]/[DOWN] to select ON/OFF, and press [MENU] to confirm ,final press [EXIT] back
to standby.
Scan mode (SC-REV) ---Menu 14
In the standby, press [MENU]+[1 STEP][4 TXP], LCD Display:
Press [MENU], then press [UP]/[DOWN] to select scan mode, and press [MENU] to confirm, final press [EXIT] back
to standby.
To: scanning the carrier signal, and not any operation within 5 seconds will continue to scan.
CO:
scanning the carrier signal will stop scanning, carrier signal will disappear after 3 seconds then continue to scan.
SE: scanning the carrier signal will stop scanning.
Receiving CTCSS(R-CTC) ---Menu 15
In the standby, press [MENU]+[1 STEP][5 ROGER], LCD Display:

21
T-CTC
R-DCS
Press [MENU], then press [UP]/[DOWN] to select CTCSS, and press [MENU] to confirm, final press [EXIT] back
to standby .
The standard CTCSS total 50 group, the range of CTCSS: 67.0-254.1Hz. OFF: turn off function.
The range of non-standard CTCSS:60-254.1HZ, open receive CTCSS, top left of the screen display"QT"
Transmit CTCSS(T-CTC)---Menu 16
Under the standby states, press[MENU]+[1 STEP][6 TOT], LCD Display:
Press [MENU], then press [UP]/[DOWN] to select CTCSS, and press [MENU]to confirm, final press [EXIT] back
to standby.
The standard CTCSS total 50 group, the range of CTCSS: 67.0-254.1Hz. OFF: turn off function.
The range of non-standard CTCSS:65.0-254.0HZ
Receive DCS(R-DCS) ---Menu 17
Under the standby states, press [MENU]+[1 STEP][7 VOX], LCD Display:
Press [MENU], then Press [UP]/[DOWN] to select DSC, and press [MENU]to confirm, final press [EXIT] back to
standby states.
The standard DCS total 105 grouporthocode, 105 group reverse code the range: D023N-D754I. OFF: turn off function.
22
Transmit DCS(T-DCS)---Menu 18
In the standby, press [MENU]+[1 STEP][8 W/N], LCD Display:
Press [MENU], then Press [UP]/[DOWN] to select DCS, and press [MENU] to confirm, final press [EXIT] back to
standby.
The standard DCS total 105 grouporthocode, 105 group reverse code the range: D023N-D754I. OFF: turn off function.
In the non standard digital tone range 001-777, any number containing 8 or 9 digits. (such as numerical 680.719
and the such number are not the legitimate non standard digital subsonic) non-standard subsonic set can pass the
over positive code or complement, according to the off.
T-DCS

23
PF1
Side Key 1 definitions ( PF1-KEY) ---Menu 19
In the Standby, press [MENU] + [1 STEP] + [9 VOICE], LCD Display:
Press the [MENU], press the [UP] / [DOWN] to select the desired parameter type Press [MENU] confirm, press
[EXIT] back to standby.
The radio side keys 2 parameters: CALL (call option), FTX (amplitude-frequency emission)
Selective call code by our supporting software for editing.
Define the side key 3 (PF3-KEY) ---Menu 20
In the Standby, press [MENU] + [2SQL] + [0] key, LCD display:
Press the [MENU] , press the [UP] / [DOWN] keys to select the desired parameter type, then Press [MENU] button
to confirm, press [EXIT] go back to standby.
The radio side key 1 parameter: SCAN, LAM, SOS, Tele Alarm, RADIO, DISABLE. Default set is FM radio.
The above parameters are selected to achieve their each function:
1. PF3 selecting SCAN function
In the standby, press PF3 key to enter Scan state (scan mode base on the menu functions (14), the scanning
process, press any key to stop scanning.
2. PF3 selecting LAMP long light
In the standby, press PF3 key to start the lamp, press the PF3 key to close the long light.
PF3
24
Tips:
Transmission time is 10 seconds, 5 minutes in the next time. Press any key to exit.
3. PF3 selecting SOS-CH alarm
In the standby, press PF1 key, the speaker alarm in 2 seconds, and pronounce alarm tone.
4. PF3 Select Tele Alarm
In the standby, press PF3, speaker alarm sound and alarm code, press the PTT key to exit.
5. PF3 Select RADIO
a. Open the radio:
In the standby, press PF3 key to open the radio.
Open the radio the screen display long press [* SCAN] key to enter the radio to automatically search
for radio stations,receipt the signal of radio stop automatically.
The radio stays in the search to a radio station.
b. Set radio frequency:
Activate the radio, press [* SCAN] screen display , can press number0-9 to set radio channel.
c. Exit radio:
Exit radio, press the PF3 key.
d. Radio can storage the last station
6.PF. Select call
In the standby, press the [UP]/[DOWN] key to switch private call/group call/all call, then press PTT to send signal.

Tips:
FM radio working, the current frequency or channel still in standby, will automatically return to radio status
when receiving a signal. Automatically return to FM radio in 5 seconds after Signal disappearing. Press the
PTT key, will automatically return to radio in 5 seconds.
Tips:
The setting of exchanged password only through by the software of our company.
Setting 6 number of password all is “0”, will cancel the exchanged password setting, setting of exchanged
password is not all “0”, is right.
CH-MDF
Working mode (CH-MDF) ---Menu 21
In the Standby, press [MENU] + [2 SQL] [1 STEP], screen displays:
Press the [MENU], press the [UP] / [DOWN] keys to select the desired working mode, press the [MENU] to confirm,
press [EXIT] back to standby.
The product have two working mode
1. VFO mode
2. MR mode
①CH ②CHFREQ ③NAME
25 26
ABR
OFF-SET
SFT-D
Backlight (ABR) ---Menu 22
In the standby, press [MENU] + [2 SQL] [2 SQL], screen display:
Press [MENU] to enter, press the [UP] / [DOWN] to select the desired setting, press the [MENU] button to confirm,
press [EXIT] key to return to standby.
Always ON: Backlight always on
1S-20S: backlight light setting time
Always OFF: Backlight always off (TIPS: This function is invalid, because display is colorful)
Offset frequency (OFFSET) ---Menu 23
In the Standby, press [menu]+[2SQL]+[3SAVE], the screen displays:
Press the [MENU] to enter, press [UP] / [DOWN] keys to select the desired offset frequency, then press [MENU] to
confirm, press [EXIT] back to standby.
The radio is the offset frequency between 0 ~ 999.99500MHz, the frequency of the input frequency difference of 7,
8-bit stepping frequency automatic judgment.
Offset frequency direction setting (SHIFT-D) ---Menu 24
In the standby, press [menu]+[2SQL]+[4TXP], the screen displays:
Press [MENU] to enter, press [UP] / [DOWN] keys to select the desired offset frequency direction, then press

27
Tips:
If offset frequency over the range of valid, it can’t transmit. In this case, please adjust the receive frequency
or poor frequently poor in order to make transmission frequency band range.
SECOND
[MENU] to confirm, press [EXIT] back to standby.
The radio offset frequency direction:
a. Transmit frequency is higher than the receiver offset frequency is positive (+).
b. Transmit frequency is lower than the receiver offset frequency is negative (-).
c. Turn off offset frequency direction(off).
(SECOND) ---Menu 25
In the Standby, press [MENU] + [2 SQL] [5 ROGER], the screen displays:
Press the [MENU] to enter, press [UP] / [DOWN] key to select ON / OFF and press [MENU] to confirm, press [EXIT]
to back standby.
Second instruction
when the second is on, press the [#LOCK] key to start the counting, press any key except [#LOCK] to stop the
counting; press [#LOCK] the second restart.
28
Tips:
stop second should press any key (except ) exit the second function.
Tips:
1. The channel name can edit up to eight characters.
2. When the edited eight characters are all empty, the default channel name is blank, channel name
displayed as NO-NAME !
3. The channel name can edit twelve ENGLISH character through the programming software.
CHNAME
Channel Name setting (CHNAME) ---Menu 26
Edit channel name only in channel mode to edit the current channel, frequency mode operation is invalid.
In the standby, press [MENU] + [2 SQRT] [6 TOT], the screen displays:
Press the [MENU] to enter, then the first character flashing(this character instructions being edited), press [UP]/
[DOWN]
keys to select the desired character, press [#LOCK] key to edit the next one, press the [#AB] to confirm,
press [EXIT] to exit.
Channel memory setting (MEM-CH) ---Menu 27

29
Tips:
When the selected channel is a blank channel, the channel number font is displayed in blue; if the selected
channel is originally had set the parameters of the channel, the channel number is displayed font is yellow.
MEM-CH
In channel mode or frequency mode, press [MENU] + [2 SQL] [7 VOX], the screen displays:
Press [MENU] to enter, press [UP] / [DOWN] keys to select the desired channel number storage, press the [MENU]
to confirm,press the [EXIT] key to exit.
When the working mode is MR mode. Will copy all parameter expect MR name and scan will in channel.
When the working mode is VFO mode, you can set different offset frequency and frequency direction and other
channel parameter enter storage channel, so you can set the same spectrum frequency or different frequencies
pilot frequency your channel.
Example "RX frequency 450.025MHz, CTCSS 67.0Hz, TX frequency 460.025MHz, stored in the first 10 channels.
1. In the frequency mode, frequency 450.025, press [MENU] + [1 STEP] [5 ROGER] setting RX CTCSS function,
press [UP] / [DOWN] keys to select 67.0Hz, press [MENU] to confirm.
2. Press the [MENU] + [2 SQL] [3 SAVE] to set the offset frequency 10.000MHz, Choose offset frequency direction
is positive +.
3. Press the [MENU] + [2 SQL] [7 VOX] into the storage channel, select the channel no.10, Press [MENU] to
confirm and back to standby.
In the standby, press [MENU] + [2 SQL] [7 VOX] to enter the channel stored, To input channel number of hundred’s
digit, ten’s digit and unit’s digit, press [MENU] to confirm.
30
Tips:
The first channel can’ t be deleted.
When the selected channel is a blank channel, the channel number font is displayed in blue; if the selected
channel is originally had set the parameters of the channel, the channel number is displayed font is yellow.
Tips:
Current working channel or frequency corresponding to the carrier signal is not received, the function is not working.
Reverse the scan direction, press [UP]/[DOWN] keys or rotate the channel knob.
When scan the CTCSS frequency, it will stay in screen, then you can press to save. If scan no we need, can press.
DEL-CH
SCNCD
Channel Delete setting (DEL-CH) ---Menu 28
In the Standby, press [MENU] + [2 SQL] [8 W / N], the screen displays:
Press the [MENU] to enter, press the [UP] / [DOWN] keys to select the channel number to be deleted, Press the
[MENU] to confirm, press [EXIT] back to standby.
SCNCD scan setting ---Menu 29
This function scan all CTCSS frequency, If there is a launch CTCSS frequency to determine the launch party. When
you are with a group of people are using CTCSS frequency does not match, can use this function to determine
CTCSS frequency.
In the standby, press [MENU] + [2 SQL] [9 VOICE] key, the screen displays:
Press the [MENU] to enter the CTCSS scan.

ANI-SW
ANI-EDIT
ANI-EDIT
ANI-EDIT
ANI code setting (ANI-SW) ---menu 32
In the Standby, Press [MENU] + [3 SAVE] [2 SQL], the screen displays:
Press the [MENU] enter, press [UP] / [DOWN] key to select ON / OFF, and press the [MENU] button to confirm,
press [EXIT] back to standby.
ANI code edit (ANI-EDIT) ---Menu 33
The radio ANI code by the Arabic numerals 0-9, first bit non-zero, minimum three bits, maximum six bits.
In the standby, press [MENU] + [3 SAVE] [3 SAVE], the screen displays:
Press the [MENU] to enter, put into the desired number and press the [MENU] button to confirm, press [EXIT] back
to standby.
Ex1. Edit 6 bits of ANI code (123456)
In the Standby, press [MENU] + [3 SAVE] [3 SAVE], the screen displays:
Press [MENU], First bit flicker, put into [1 STEP][2 SQL][3 SAVE][4 TXP][5 ROGER][6 TOT] then press [MENU] to
confirm, And press [EXIT] back to standby.
Ex2. Edit 3 bits of ANI code (123)
In the Standby, press [MENU] + [3 SAVE] [3 SAVE], the screen displays:
Press [MENU], if edited ANI code display ANI code directly, and first bit flicker. If not be edited display 101 and first
bit flicker, then put into [1 STEP] [2 SQL][3 SAVE], press[MENU]to confirm, And press [EXIT] back to standby.
3231
Power message setting (PONMSG) ---Menu 30
In the Standby, press [MENU] + [3 SAVE] [0], the screen displays:
Press [MENU] to enter, press [UP] / [DOWN] keys to select the desired parameter press [MENU] to confirm, press
[EXIT] back to standby.
Mute mode (SP-MUTE) ---Menu 31
In the Standby, press [MENU] + [3 SAVE] [1 STEP], the screen displays:
Press the [MENU] to enter, press [UP] / [DOWN] keys to select the desired quiet mode and press the [MENU] to
confirm, press [EXIT] back to standby.
Mute mode: when the speaker is open condition, this setting is particularly suitable for selective calling, group
calling, all calling.
Mute mode:
QT: matching QT audio sub-carrier signal, the speaker will turn on.
QT+DTMF: matching QT and other tone signaling carrier signal, the speaker will turn on.
QT*DTMF: matching QT or other tone signaling carrier signal, the speaker will turn on.
PONMSG
SP-MUTE
Tips:
There are two kinds of display mode
1. BITMAP
2. BATT-V

33
Tips:
Every radio only have one unique ANI code, A area /B area editing are the same ANI code.
Tips:
The radio ANI code Side Tone like below.
DT-ST: Opening Keyboard Side Tone when transmitting.
ANI-ST: Opening ANI code side tone when transmitting.
DT+ANI: Opening the side tone of keyboard and ID code when transmitting.
DTMF-ST
AUTOLOCK
ANI code side tone (DTMF-ST) ---Menu 34
In the Standby, press [MENU]+[3 SAVE][4 TXP], the screen displays:
Press [MENU] to Enter, Press [UP/DOWN] to select the ID Side Tone you need, then press [MENU] to confirm, and
press [EXIT] back to standby.
Automatic keyboard lock setting (AUTOLOCK) ---Menu 35
In the Standby, press [MENU]+[3 SAVE][5 ROGER], the screen displays:
Press [MENU] to Enter, Press [UP/DOWN] to select ON/OFF, then press[MENU]to confirm, and press[EXIT] back
to standby.
After the automatic lock is ON, The keyboard will automatic lock Within 15 seconds when radio have not any
34
Tips:
Manual Lock: In the standby, Press hold [#LOCK] for 2seconds or more and will be locked, then hold
[#LOCK] for 2seconds or more and will be unlocked.
PRI CH-SW
operation , please hold [#LOCK] for 2seconds or more and will be unlocked.
Priority channel switch setting (PRI CH-SW) ---Menu 36
In the Standby, press [MENU]+[3 SAVE][6 TOT], the screen displays:
Press [MENU] to Enter, Press [UP/DOWN] to select ON/OFF, then press[MENU]to confirm, and press [EXIT] back
to standby.
Sometimes it needs check some activity of priority frequency while monitoring other frequency. Then you can use
priority scanning function.
Ex: Scanning 6 common channel CH1、CH2、CH3、CH4、CH5、CH6, and Ch6 will be set to priority channel.
The scanning process CH1→CH6→CH2→CH6→CH3→CH6→CH4→CH6→CH5→CH6.
If the radio detects a signal on the "priority channel", it will call-up this frequency; it can go ahead select the priority
channel through our software.
Repeater setting (RPT-SET) ---Menu 37

Tips:
Under the mode of X-DIRPT directional cross band repeater, or X-TWRPT dual direction crossband
repeater, Setting reverse frequency of working channel or frequency, Frequency difference direction or
frequency difference frequency, the frequency of the corresponding frequency is beyond the range of the
frequency of transmission, then the area can’t be transmitted.
The Menu of repeater setting has 2 mode of X-DIRPT directional cross band repeater, X-TWRPT dual direction
cross band repeater.
Two working channel must be two cross band frequency and channel ( Radio receive frequency in UHF band on
the A area, and transmit frequency in VHF band on the B area). of course, can setting of Radio transmitting
frequency in VHF band on the A area, and receive frequency in UHF band on the B area.
1. X-DIRPT directional cross section transfer: the main frequency area is defined as the middle switch, while the
secondary frequency is defined as the repeater transmitter; the receiver is only responsible for receiving, the
transmitter is only responsible for transmitting.
2. X-TWRPT two-way cross section repeater: in the standby, main and auxiliary frequency area are converted to
the receiver, when the frequency of first received carrier signal effectively after the side frequency region is
automatically defined as cross section relay transmitter, of course the standby state side frequency region first
received carrier signal effectively, frequency is defined as the cross section area automatically transit transmitter.
35 36
The receiver and transmitter of the bidirectional cross section are not fixed, the first receiving area is the receiver,
and the other is the transmitter.
After entering into the cross section, the receiving frequency and the transmitting frequency are the same.
Ex1:
A area, the channel mode enters into the cross section relay, and the reception frequency of the A area is the
receiving frequency of the channel when the standby time is received.
After receiving the effective carrier signal in the B area, the A area starts the transmission, and the transmitting
frequency is the transmitting frequency of the channel.
If you set the frequency conversion function, then the A transceiver frequency and send and receive sub tone will
be inverted.
Ex 2:
A area to the frequency mode into the cross section of the relay, then standby A area waiting for the receiving
frequency is the frequency of the frequency of the mode of reception, the reception is still in the frequency of the
sub model of the received sub tone.
When the B area receives the effective carrier signal, when the A area is started, the frequency of the frequency of
the received frequency or the frequency difference is taken as the transmitting frequency.
If you set the frequency conversion function, then the A transceiver frequency and send and receive sub tone will
be inverted.
The cross section model through the menu 38 (RPT-SPK) transit horn switch, 39 menu (RPT-PTT) transfer PTT

37
RPT-SET
switch settings, select the audio conversion receiver and transmitter speaker is open the machine according to
whether to support the [PTT] in transit or relay transmission. However, the signal will be temporarily interrupted
when PTT is transmitted.
In the standby, press [MENU]+[3 SAVE][7 VOX], the screen displays:
Press [MENU] to enter, press [UP] / [DOWN] keys to select the desired parameter press [MENU] to confirm.
The RPT key on the speaker and repeater mode to switch on the waiting state, long press [RPT] 2
second can realize conversion between speaker and repeater mode.
Under the mode of directional/dual cross band repeater, the screen display
In order to use the repeater platform repeater receipt sound can be timely and effectively reflect the repeater
state of the work, improve the use efficiency of the simulator, you can use the menu function [47] to set.
Keep the timer relay to prevent hand response messages and communication have been repeatedly press
and release the button. When the mobile receiver release button, "holding time " allows the hand while
waiting for the moment to launch in response to user. If the QT/DQT is not detected during the duration of
the hold time, the transmitter is allowed to release the key. This parameter determines that the duration of
the state of the key is maintained when the valid QT/DQT receiver signal disappears. The function may
be set by our company to write software.
Notice:
38
Tips:
The radio working under the cross band repeater or repeater /Transmitting mode, this function is prohibited.
RPT-SPK
RPT-PTT
Repeater speaker setting (RPT-SPK) ---Menu 38
In the standby, Press [MENU]+[3 SAVE][8 W/N], the screen display
Press [MENU] to enter, Press [UP]/[DOWN] to select ON/OFF, then Press [MENU] to confirm, and Press [EXIT]
back to standby.
Repeater PTT setting (RPT-PTT) ---Menu 39
In the standby, Press[MENU]+[3 SAVE] [9 VOICE], the screen display
Press [MENU] to enter, Press [UP]/[DOWN] to select ON/OFF then Press [MENU] to confirm, and Press [EXIT]
back to standby.
Scan Add setting (SCAN-ADD)---Menu 40
SCAN-ADD function can only be set in the channel mode, the current channel can be set, the frequency mode
settings are invalid.
In the standby, Press[MENU]+[4 TXP][ 0 ], the screen display
Press [MENU] to enter, Press[UP]/[DOWN] to select ON/OFF then Press[MENU] to confirm, and Press [EXIT]
back to standby.
The radio working under the cross band repeater or repeater /Transmitting mode, this function is prohibited.
SCAN-ADD
Table of contents
Other Retevis Radio manuals

Retevis
Retevis RB28 User manual

Retevis
Retevis NR630 User manual

Retevis
Retevis RT647 User manual

Retevis
Retevis NR30 User manual

Retevis
Retevis RA25 User manual

Retevis
Retevis RA25 User manual

Retevis
Retevis RA87 User manual

Retevis
Retevis RT72 User manual

Retevis
Retevis RA85 User manual

Retevis
Retevis RB66 User manual