manuals.online logo
Brands
  1. Home
  2. •
  3. Brands
  4. •
  5. Rielta
  6. •
  7. Security Sensor
  8. •
  9. Rielta FOTON-10M User manual

Rielta FOTON-10M User manual

1 Introduction
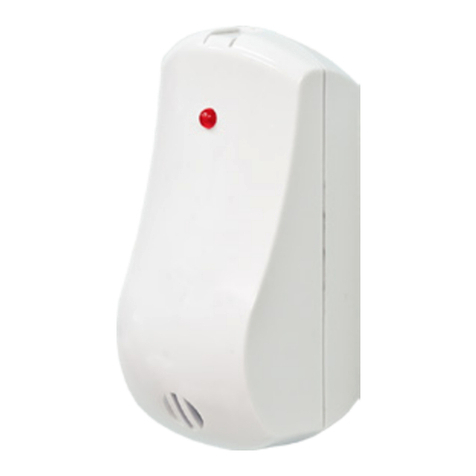
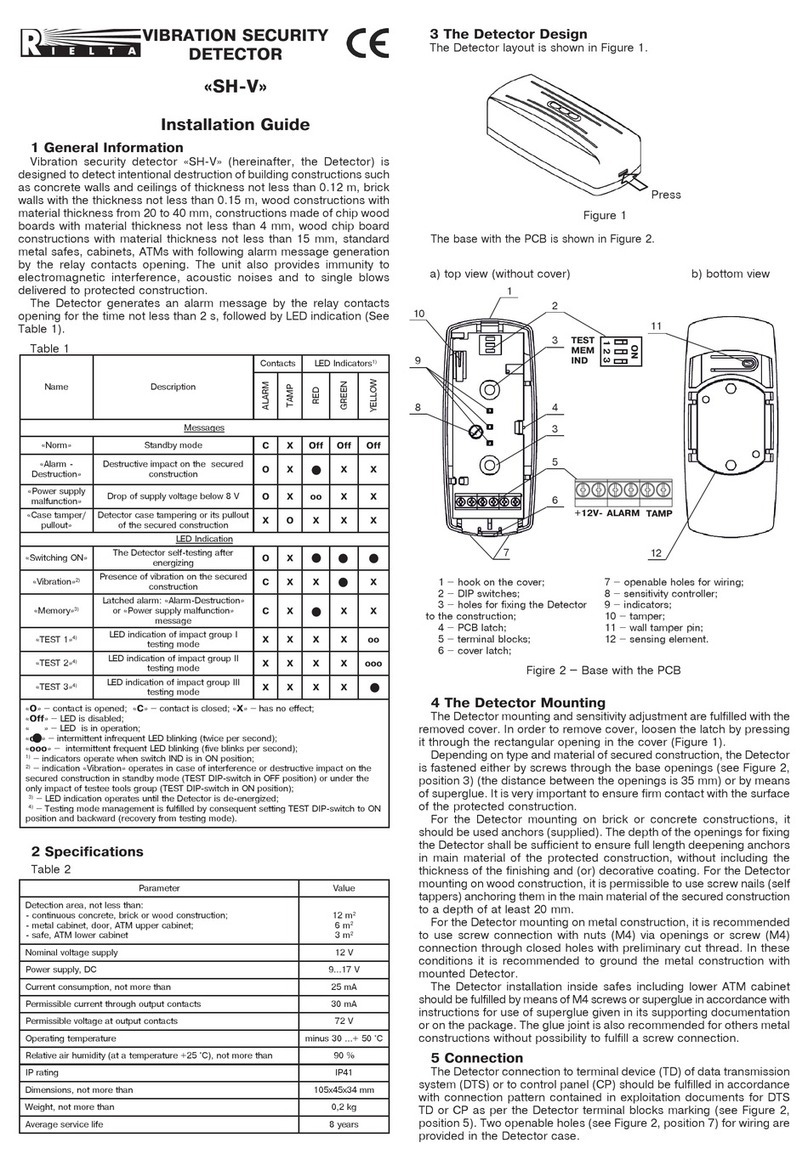
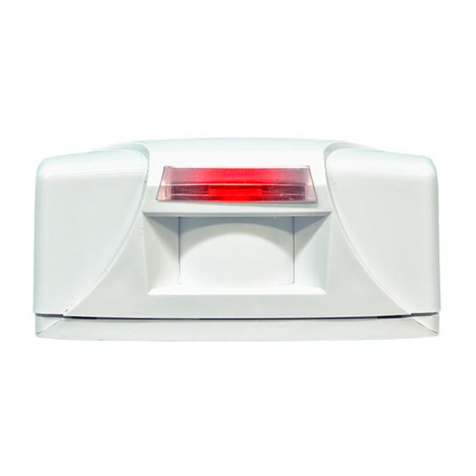
The detectors «Foton-10M», «Foton-10M-01» (hereinafter, the
detector) is designed for detecting intrusion into the protected space
and generating an alarm message by opening the relay output contacts.
The detector ensures tamper protection. The «Tamper»message is
generated by opening microswitch contacts.
The detector is resistant to the exposure of ambient light and radio
interference, as well as to influence of small pets: mice, rats, birds,
placed in the cages at a distance not less than 2.5 m.
The detector is compact, attractive, simple in installation, and
servicing. It is possible to install the detector on the wall or in the
corner of the room.
2 Features
- Dual-element pyrodetector.
- Spherical Fresnel lens.
- Wide-angle detection zone.
- Immunity to insects intrusion to the pyrodetector.
- Microprocessor-based signal processing.
- Extended speed range, detecteed by Foton-10M-01 (0.1 – 3 m/sec).
- Selectable modes of testing, sensitivity, alarm memory and led
indication.
- Self-test mode.
- The detector is rated for switching to the DC power source with
output voltage 10 – 15 V.
- Possibility to install the detector on the swivel bracket (supplied)
for the detection zone repositioning.
- Case tamper protection.
3 Specifications
Table 1
Parameter Value
Detection zone 12 x10 m
Power supply, V DC 10 – 15 V, current 15 mА
Tamper output contacts Closed – «Norm» message, current
30 mА, voltage 72 V
Alarm message duration Not less than 2 sec
Detection zones 9 long-range, 5 short-range
Sensitivity Chosen by switch «1» (position 1/2)
Installation height range 2 – 5 m
Operating temperature range minus 30 … + 50 0С
Relative humidity 95 % under 25 0С without moisture
condensation
IP rating IP41
Dimensions, max 90 х 60 х 50 mm
Weight, max 60 g
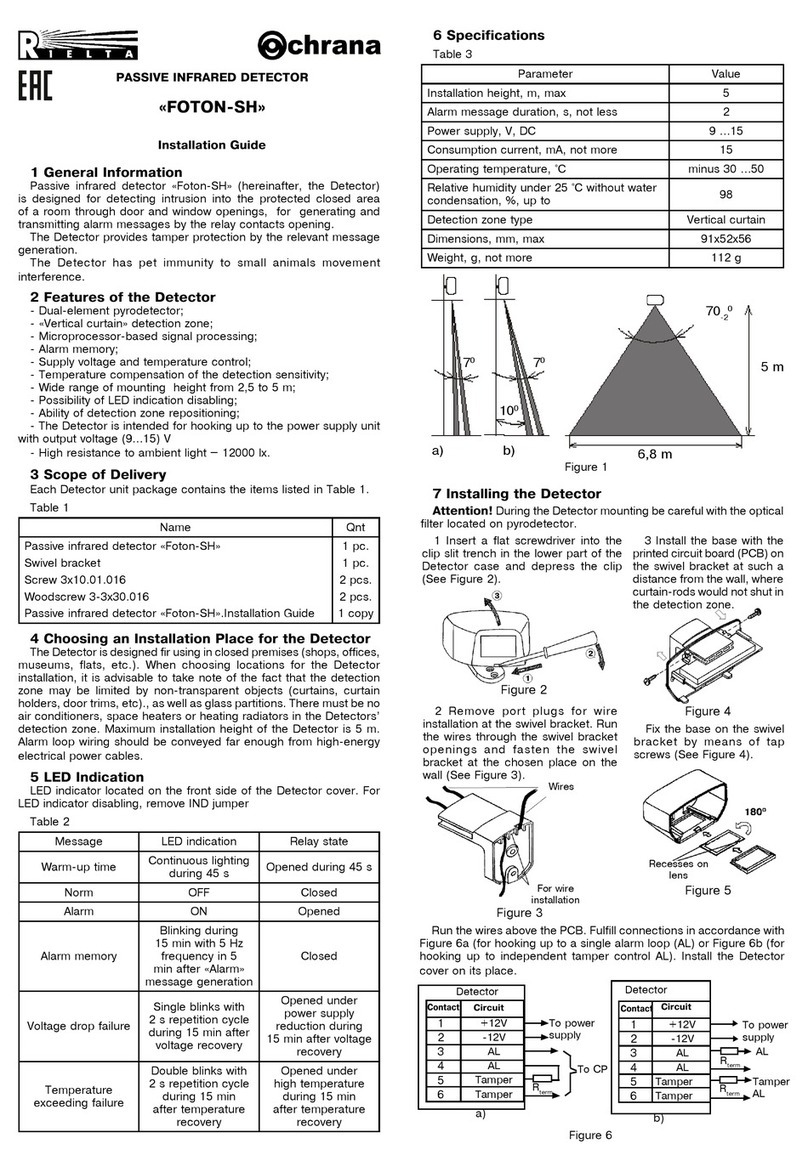
Detection zone pattern is shown in Figure 1.
PASSIVE INFRARED
DETECTORS
«FOTON-10M»,
«FOTON-10M-01»
Installation Guide
Table 2
Name Version
- -01
Passive infrared detector «Foton-10M»
Passive infrared detector «Foton-10M-01»
Swivel bracket
Screw 3-3х30.016
Passive infrared detector «Foton-10M»,
«Foton-10M-01». Installation Guide
1 pc.
1 pc.
2 pcs.
1 copy
1 pc.
1 pc.
2 pcs.
1 copy
6 Choosing the Place of Installation
The detector is designed for operation in the closed areas. When
choosing the detector installation place, take note of the fact that the
detection zone may be limited by non-transparent objects (curtains,
houseplants, cabinets, bookcases, etc), as well as glass and mesh
partitions. There must be no windows, air conditioners, space heaters
or heating radiators in the detector visibility range.
Recommended installation height:
- without swivel bracket – 2 – 3 m;
- by means of swivel bracket – 2.3 – 3 m (on condition that the
detector tilt is adjusted).
Power supply and alarm loop wires should be located far enough
from power feed cables.
7 The Detector Installation
- Unfasten the latch through the opening, which is situated downside
the detector case by means of screwdriver and put off the detector
cover (Figure 2).
- When installing the detector without swivel bracket it is necessary
to put off the PCB by means of pushing up it’s fixing arm.
Figure 2 – The Detector Base and the Swivel Bracket
- Drill the holes in the base of the detector for wiring and fastening
the detector (Figure 2).
- Choose the place of installation, mark the places for mounting
holes with the regard to detector base (or swivel bracket) openings,
drill the holes in the wall.
- Pass the wire through the mounting holes in the base, leave several
centimeters of installation wire for it’s fastening inside the case.
- Fix the base of the detector case on the wall (swivel bracket) at
the chosen place.
- Put the PCB on its place.
Note – In case of swivel bracket using, unscrew the cap screw
M3x20 from the swivel bracket sphere. Holding the assembled swivel
bracket, fit the square bulge of the swivel bracket external sphere with
the corresponded opening on the detector base. Turn the detector
base to the left full point and then to the right. Plug in the screw to
the opening in the top of the detector base and fix the connection by
the screw. Set the detector base to the operating position and fasten
it with the cap screw M3x20.
In case of the detector installation at 2 – 5 m height with keeping
12 m detection zone, it is necessary:
- After the detector fastening to the swivel bracket, turn the detector
case vertically in accordance with the chosen installation height.
Measure the distance (L) from the wall to the detector base edge with
the cover opened (Figure 2, Table 2).
- Fix the preset detector position and fasten it with the cap screw,
passing through the detector base to the swivel bracket.
Ceiling
Mounting
For the wall
mounting
Opening for the
cover latch
Port plug
For fastening
the base
To the swivel
bracket
PCB fixing
arm
For corner
mounting
Latch
Nut
Internal
sphere
Swivel
bracket base
External
sphere
Fastening
screw
Wall Mounting
L
2.3 m
12 m
0
0
Figure 1 – Detection zone pattern
4 Application
The detector may be installed in the flats, shops, offices, museums.
5 Scope of Delivery
Each Detector unit package contains the items listed in Table 2.
Note –In this mode the alarm message generated in compliance
with the adjusted sensitivity mode is not displayed by LED indication.
In the motion absence in the detection zone the LED indicator must
not light. Upon the expiry of 5 minutes check procedure, the detector
transfers to normal mode. If DIP-switch is in position «2» – «ON»,
generation of alarm message is displayed by LED-indicator lighting
for the 3 sec period.
2) Sensitivity mode adjustment
DIP-switches position: «1» – «ON», «2» – «ON». The mode is intended
for detector sensitivity appraisal (the distance, which is possible to pass
through the detection zone up to the point, where the movement is
detected, and alarm message is generated). The LED indicator blinks
for 0.25 period under the condition of detection zone beam crossing,
and for 3 sec during alarm message generation.
Stop after each alarm message generation and wait until the LED
indicator is disabled for 8 – 10 sec and more, then continue movement
through the detection zone.
Note – If the detector does not identify movement within the
detection zone, it is necessary to change detector position by means
of swivel bracket (in case of wall mounting the horizontal turning angle
of the detector on swivel bracket – ±450, vertical – not less than 200).
12 LED Indication Disabling
For the detector operation masking, the LED indication disabling
mode is available. DIP-switch «2» – «OFF».
In this mode the LED indicator is lighting for only one minute after
detector energizing, as well as in «Alarm Memory» and «Malfunction»
modes.
13 Alarm Memory Mode
DIP-switch «3» – «ON». The LED indicator is lighting green in
5 min after alarm memory generation. Duration of indication – 15 min.
14 Self-Test Mode
The detector provides self-testing of the following parameters:
amplifier operability, input voltage, ambient temperature. If the
ambient temperature range is close to 36 оС, the sensitivity threshold
changes, the level of sensitivity is automatically adjusted, what leads
to detectability enhance (temperature compensation).
In case of self-test failure (amplifier malfunction, voltage drop lower
than 9-1 V, ambient temperature out of permissible temperature range),
«Malfunction» message is generated by opening the relay output
contacts repeated by alternate LED indicator blinking red and green.
«Malfunction» message duration – 15 min. After elimination of
malfunction, the detector turns to self-test mode.
ATTENTION! The detector must be checked at least once annually
for functional testing.
15 Storage and Transportation
The detectors in their original packing may be shipped by any
transport means in covered vehicles (in railway, cars, trucks, sealed
heated compartments of aircraft, ship cargo holds, etc). The storage
room should be free from current-conducting dust, acid vapors, alkali
and gases that cause corrosion and destroy insulation.
16 Manufacturer’s Guarantees
The Manufacturer guarantees conformity of the detector to it’s
Technical Specifications if conditions of transportation, storage,
assembling and operation are observed. The guaranteed storage
period is 63 months since the date of manufacturing the detector.
The guaranteed period of operation is 60 months since the date of
commissioning within the storage period guaranteed.
The detectors that are found to non-conforming to it’s Technical
Requirements shall be repaired by the Manufacturer, provided the
installation and operation rules have been complied with.
17 Acceptance and Packing Certificate
Passive infrared detector
«Foton-10M»
«Foton-10M-01»
batch №___________________
manufactured in accordance with current technical documentation
is classified as fit for operation and is packed by «RIELTA» JSC.
Person responsible for acceptance and packing
QC representative_________________ __________________.
Date, month, year
Figure 3
Table 3
Mode DIP-switch DIP-switch Position
«ON» «OFF»
Sensitivity «1»
TEST
«SENS» (Sensitivity
determination)
«ZONE» (Detection
zone determination)
Testing «2»
IND «IND» (ON) «OFF» (LED indicator is
disabled)
Indication
Disabling
«3»
MEM
«MEM» (Alarm
memory ON)
«OFF» (Alarm memory
OFF)
9 LED Indication
The Led indicator located at the front of the cover displays the
detector mode.
Table 3
Message Led Indicator
Color LED Indication State
«Warm-up Time» RED Blinking with 1 Hz frequency during
60 sec
«Norm» - LED Indication is OFF
«Alarm» RED LED Indication is on during 3 sec
«Malfunction» RED
GREENN Alternate switching during 15 min
«Alarm Memory» GREENN LED Indication is ON during 15 min
10 Functional Check
After energizing of the detector, the self-testing process is realized
during one minute. It ensures control of the following parameters:
input voltage, ambient temperature, operation capacity of the amplifier
channel. During the procedure, the LED indicator is blinking red
(irrespective of the DIP-switch «2» position), relay contacts are opened.
11 Testing Mode
Upon the expiry of the warm-up time, the detector turns to standby
mode and is able to generate alarm message. During the process
within 5 minutes it is possible to check the detector parameters. The
checking procedure provides two modes.
1) Detection zone position location
DIP-switches position: «1» – «OFF», «2» – «ON». The mode is
intended for each beam of detection zone positioning in the secured
premises. Under the condition of each beam crossing the LED indicator
switches for 0.25 sec. Optimized speed of movement at maximal
distance – 0.5 m/sec.
Rev. 2 of 26.01.15
№00108
CircuitCont.
1
2
3
4
5
6
+12V
-12V
AL
AL
Taper
Taper
To power
source
Rterm1
Detector
To CP
а)
Taper-
control
AL
Security
AL
Rterm1
Circuit
Cont.
To power
supply unit
Rterm1
Detector
1
2
3
4
5
6
+12V
-12V
AL
AL
Taper
Taper
«RIELTA» JSC, www.rielta.ru,
Chapaeva Str. 17, Saint Petersburg, Russia, 197101, [email protected],
Tel./fax. +7 (812) 233-0302, 703-1360,
Technical support, tel. +7 (812) 233-29-53, 703-13-57, [email protected].
b)
Table 2
Installation height Detector tilt Distance to the wall, L, mm
2 – 3 m
3 – 4 m
4 – 5 m
0°
5°
9°
35
28
22
Notes:
1 The tilt and the distance values listed in Table 2 are reference
data. Final distance L value is defined in accordance with the test
pass results.
2 The detector base turning horizontally would change the distance
(L) from the wall to the inclined detector base. The change depends
on the turning angle. Thus, it is necessary to adjust the detector tilt.
8 Connection
- The terminals for the detector connection are located at the top
of PCB.
- Fulfill connections in accordance with the Figure 3a (for single
alarm loop connection) and with Figure 3b (with alarm loop and tamper
connection).
- Install the DIP-switches in accordance with application conditions.
- Put the detector cover on it’s place.
- Install DIP-Switches «1», «2», «3» in accordance with application
conditions.
- Put the detector cover on it’s place.
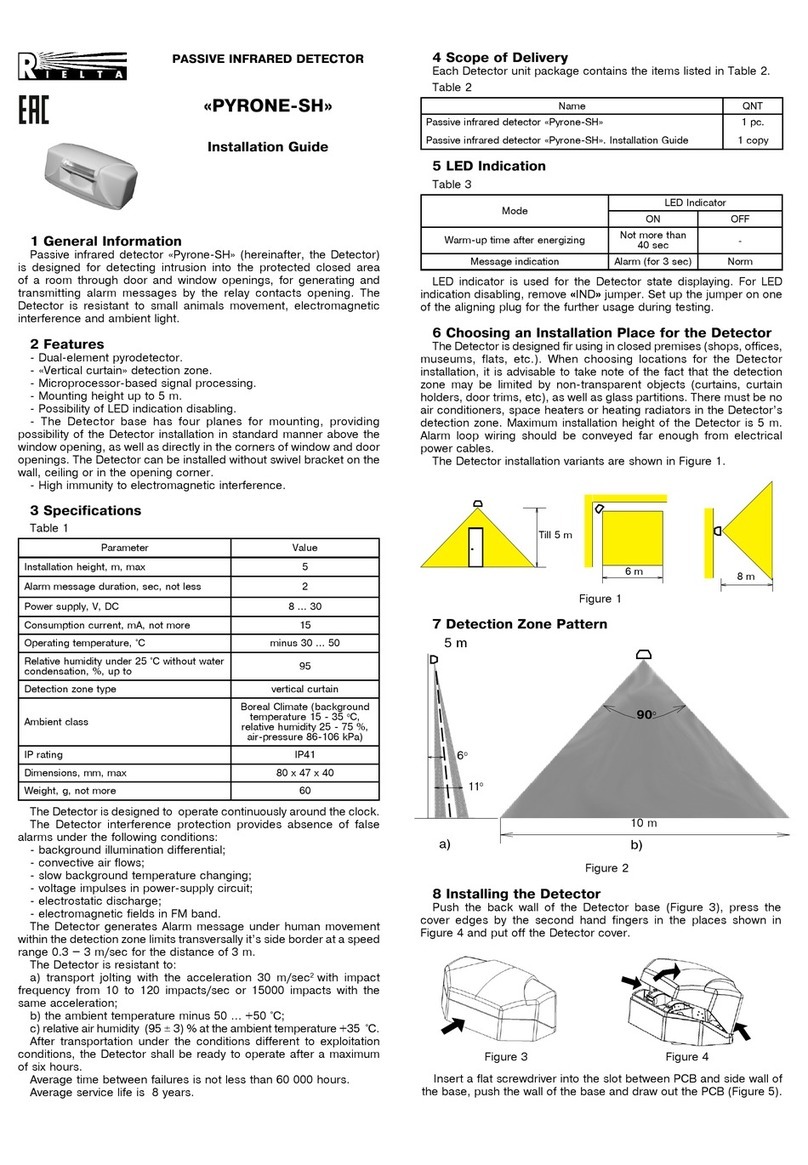
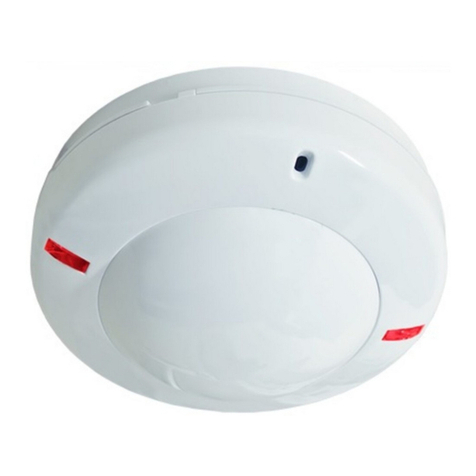
This manual suits for next models

1

Other Rielta Security Sensor manuals

Rielta PYRONE-SH2-RK User manual

Rielta

Rielta PYRONE-SH2-RK User manual

Rielta SH-V User manual

Rielta

Rielta SH-V User manual

Rielta ZVON-1 User manual

Rielta

Rielta ZVON-1 User manual

Rielta STEKLO-3 User manual

Rielta

Rielta STEKLO-3 User manual

Rielta STZ-RK User manual

Rielta

Rielta STZ-RK User manual

Rielta IPDL-Ex User manual

Rielta

Rielta IPDL-Ex User manual

Rielta FOTON-17 User manual

Rielta

Rielta FOTON-17 User manual

Rielta STZ-RK User manual

Rielta

Rielta STZ-RK User manual

Rielta ORLAN-D User manual

Rielta

Rielta ORLAN-D User manual

Rielta Pyrone-7 User manual

Rielta

Rielta Pyrone-7 User manual

Rielta FOTON-SH2-RK User manual

Rielta

Rielta FOTON-SH2-RK User manual

Rielta C.Nord CN-Glass User manual

Rielta

Rielta C.Nord CN-Glass User manual

Rielta PYRONE-4i User manual

Rielta

Rielta PYRONE-4i User manual

Rielta STZ-RK User manual

Rielta

Rielta STZ-RK User manual

Rielta PYRONE-5 User manual

Rielta

Rielta PYRONE-5 User manual

Rielta Pyrone-7i User manual

Rielta

Rielta Pyrone-7i User manual

Rielta FOTON-16B User manual

Rielta

Rielta FOTON-16B User manual

Rielta Ladoga MK-RK User manual

Rielta

Rielta Ladoga MK-RK User manual

Rielta FOTON-16A User manual

Rielta

Rielta FOTON-16A User manual

Rielta STEKLO-3RK User manual

Rielta

Rielta STEKLO-3RK User manual

Rielta STEKLO-2 User manual

Rielta

Rielta STEKLO-2 User manual

Rielta Ladoga MK-RK User manual

Rielta

Rielta Ladoga MK-RK User manual

Rielta ZVON-1 User manual

Rielta

Rielta ZVON-1 User manual

Rielta CELSIUS-RK User manual

Rielta

Rielta CELSIUS-RK User manual

Popular Security Sensor manuals by other brands

MSA FlameGard 5 quick start guide

MSA

MSA FlameGard 5 quick start guide

Bosch RF940U installation instructions

Bosch

Bosch RF940U installation instructions

ABLE Ultima OPIR-5 Installation & maintenance instructions

ABLE

ABLE Ultima OPIR-5 Installation & maintenance instructions

Hilti PS 35 operating instructions

Hilti

Hilti PS 35 operating instructions

Extronic Electronic PD-33 DL installation instructions

Extronic Electronic

Extronic Electronic PD-33 DL installation instructions

REED R5044 instruction manual

REED

REED R5044 instruction manual

Kingspan SafePro 2 Installer's guide

Kingspan

Kingspan SafePro 2 Installer's guide

IQ-group E-700 Installer's guide

IQ-group

IQ-group E-700 Installer's guide

Servodan niko 41-720 user manual

Servodan

Servodan niko 41-720 user manual

ESYLUX PD-C360i/24 DIMplus manual

ESYLUX

ESYLUX PD-C360i/24 DIMplus manual

Elektor TAPIR Construction manual

Elektor

Elektor TAPIR Construction manual

ST Quadrat LUX-top GBD-RR 465 installation instructions

ST Quadrat

ST Quadrat LUX-top GBD-RR 465 installation instructions

MAXIMUM Security Multi Zone manual

MAXIMUM Security

MAXIMUM Security Multi Zone manual

UTC Fire and Security Det-Tronics Dual Spectrum PM-5MPX instructions

UTC Fire and Security

UTC Fire and Security Det-Tronics Dual Spectrum PM-5MPX instructions

Honeywell Home SIXCOMBO-CN Quick installation guide

Honeywell Home

Honeywell Home SIXCOMBO-CN Quick installation guide

EDS SCL-01 technical information

EDS

EDS SCL-01 technical information

EMX Industries RAVEN instruction manual

EMX Industries

EMX Industries RAVEN instruction manual

steute sWave 2.4 GHz-safe Mounting and wiring instructions

steute

steute sWave 2.4 GHz-safe Mounting and wiring instructions

manuals.online logo
manuals.online logoBrands
  • About & Mission
  • Contact us
  • Privacy Policy
  • Terms and Conditions

Copyright 2025 Manuals.Online. All Rights Reserved.