manuals.online logo
Brands
  1. Home
  2. •
  3. Brands
  4. •
  5. ROHDE & GRAHL
  6. •
  7. Indoor Furnishing
  8. •
  9. ROHDE & GRAHL Denuo User manual

ROHDE & GRAHL Denuo User manual

Bedienungsanleitung
Operating instruction
Instrukcja obsługi
Guide d’utilisation
Denuo
LP33-ST
LP33N-ST
8
6
3
4
1
5
2
8
2 5
6
1
7
DE
Um Ihnen den Umgang mit den Funktionen
von Denuo zu erleichtern, haben wir diese
kurze Erläuterung für Sie zusammengestellt.
Achtung! Jede Einstellung des Stuhles sollte
man in einer Sitzposition ausführen.
1Mechanik
Um den Neigungswinkel der Lehne zu blockieren,
ist der Drehknopf auf der linken Seite unter dem
Sitz so weit wie möglich nach hinten zu drehen.
Um den Synchronmechanismus zu entsperren
und den Effekt des dynamischen Sitzens zu
erreichen, ist der gleiche Drehknopf einmal nach
vorn zu drehen und die Lehne maximal nach
hinten zu neigen. Die Sperre wird gelöst, was
durch einen charakteristischen Ton angezeigt
wird.
2Einstellung der Höhe des Sitzes
Um die Sitzhöhe einzustellen, ist der Hebel auf
der rechten Seite unter dem Sitz nach oben.
3Einstellung der Tiefe des Sitzes
Um die Sitztiefe einzustellen, ist der Hebel auf
der linken Sitze unter dem Sitz zu ziehen und zu
halten, der Sitz in die gewünschte Position zu
bringen und anschließend der Hebel loszulassen.
4Einstellung der Neigung des Sitzes
(als Option: LP33N-ST)
Um einen negativen Neigungswinkel des Sitzes
einzustellen, ist der Drehknopf auf der rechten
Seite unter dem Sitz zweimal nach vorn zu
drehen. Um den Sitz in dieser Position zu
blockieren, Drehknopf einmal nach hinten drehen.
Um diese Funktion wieder auszuschalten, ist
der Drehknopf in die letzte Position nach vorn
drehen.
5Einstellung der Widerstandskraft der
Lehne
Um die Widerstandskraft der Lehne einzustellen,
ist der Drehknopf auf der rechten Seite unter
dem Sitz im Uhrzeigersinn (die Widerstandkraft
der Lehne erhöht sich) bzw. entgegen dem
Uhrzeigersinn (die Widerstandskraft der Lehne
verringert sich) zu drehen.
6Einstellung der 4D-Armlehnen
Um die Höhe der Armlehnen einzustellen, ist
die Taste auf der Vorderseite der Armlehne
unter der Auflage zu drücken.Um die Breite der
Armlehnen einzustellen, ist der Blockadehebel
unter der Armlehne zu lösen und anschließend
die Armlehne in die gewünschte Position zu
bringen und der Hebel wieder zu blockieren.
Um die Breite des Abstands der Auflage der
Armlehnen einzustellen, ist diese nach außen
oder nach innen in die gewünschte Position
zu schieben.Um die Breite des Abstands der
Auflage der Armlehnen einzustellen, ist diese
nach außen oder nach innen in die gewünschte
Position zu schieben. Um den Winkel der Auflage
der Armlehnen einzustellen, ist diese nach außen
oder nach innen in die gewünschte Position zu
drehen.
7Höhenverstellbare Lordosenstütze
Besitzt der Stuhl eine Lendenstütze mit
Höheneinstellung, kann diese vertikal verschoben
werden, um die gewünschte Höhe einzustellen.
8Rollen
Rollen nach der Norm DIN EN 12 5 29 – mit
Bremsmechanismus ohne Belastung.
Für weiche Flächen: Rollen in einer Farbe auf
der gesamten Fläche.
Für harte Flächen: weiche Auflage in einer
anderen Farbe.
Pflege
Die Reinigung der Polsterteile kann mit
handelsüblichen Polsterreinigungsmitteln
erfolgen.
Benutzerhinweis
Diesen Bürodrehstuhl nur bestimmungsgemäß
unter Beachtung der allgemeinen Sorgfaltspflicht
benutzen. Bei Verwendung als Aufstiegshilfe,
Sitzen auf Armlehnen oder anderweitig besteht
Unfallgefahr.
EN
In order to simplify the handling of Denuo, we
have created a brief summary of the functions
for you. Warning ! All regulations should be
provided while sitting.
1Mechanism
To lock the tilt angle of the backrest, turn the
knob on the left side underneath the seat
backwards as far as possible. To unlock the
synchronous mechanism in order to use the
dynamic seating feature, turn the same knob
forwards once and lean back on the backrest as
far as possible. The lock will be released, making
a characteristic sound.
2Seat height adjustment
To adjust the height of the seat, pull up the lever
on the right side underneath the seat.
3Seat depth adjustment
To adjust the depth of the seat, pull and hold
the handle on the left side underneath the seat,
slide the seat to the desired position and release
the handle.
4Seat inclination adjustment
(optional: LP33N-ST)
To set a negative seat angle, turn the knob on
the left side underneath the seat forwards twice.
To lock the seat in this position, turn the knob
backwards once. To disable this function, turn
the knob forwards into the final position.
5Weight adjustment
To adjust backrest tilt force, turn the knob on
the right side underneath the seat clockwise
(backrest tilt force will increase) or counter
clockwise (backrest tilt force will decrease).
64D armrest adjustment
To adjust the height of an armrest, press the
button on the front of the armrest, underneath the
armrest pad. To adjust the width of an armrest,
open the locking lever underneath the armrest,
then move the armrest to the desired position
and lock the lever. To adjust the span of an
armrest pad, move the pad outwards or inwards
until you reach the desired position. To adjust the
depth of an armrest pad, move the pad forwards
or backwards until you reach the desired
position. To change the angle of an armrest pad,
rotate the pad to the inside or to the outside of
the chair, until you reach the desired position.
7Lumbar support adjustment
If the chair has a lumbar support with adjustable
height, you can adjust the height by moving it
vertically.
8Castors
Castors compliant with DIN EN 12 5 29 – with a
load-controlled braking mechanism .
For soft floors: the entire surface of castors is
in one colour.
For hard floors: a soft tire in a different colour.
Cleaning
Upholstery parts can be cleaned by means of the
appropriate commercial detergents for
upholstery.
Considerations for use
Only use this office swivel chair conventionally
by respecting the general duty of care. Danger of
accident exists in the case of use as an ascent
assistance, sitting on armrests or other improper
use.
PL
W celu ułatwienia obsługi Denuo,
przygotowaliśmy krótkie omówienie
dostępnych funkcji. Uwaga! Wszystkie
regulacje krzesła należy wykonywać z pozycji
siedzącej.
1Mechanizm
Aby zablokować kąt odchylenia oparcia, należy
przekręcić maksymalnie do tyłu pokrętło
umieszczone po lewej stronie pod siedziskiem.
Aby odblokować mechanizm synchroniczny w
celu osiągnięcia efektu dynamicznego siedzenia,
należy przekręcić to samo pokrętło raz do przodu
i odchylić się na oparciu maksymalnie do tyłu.
Nastąpi zwolnienie blokady, któremu towarzyszy
charakterystyczny dźwięk.
2Regulacja wysokości siedziska
Aby ustawić wysokość siedziska, należy
pociągnąć do góry dźwignię znajdującą się po
prawej stronie pod siedziskiem.
3Regulacja głębokości siedziska
Aby ustawić głębokość siedziska należy
pociągnąć i przytrzymać uchwyt znajdujący się
po lewej stronie pod siedziskiem, przesunąć
siedzisko do wybranej pozycji, a następnie
zwolnić uchwyt.
4Regulacja nachylenia siedziska
(jako opcja: LP33N-ST)
Aby ustawić ujemny kąt nachylenia siedziska,
należy dwukrotnie przekręcić pokrętło znajdujące
się po lewej stronie pod siedziskiem do przodu.
Aby zablokować siedzisko w tej pozycji, należy
przekręcić pokrętło raz do tyłu. Aby wyłączyć tę
funkcję, należy przekręcić pokrętło do przodu, do
ostatniej pozycji.
5Regulacja siły oporu oparcia
Aby ustawić siłę oporu oparcia, należy przekręcić
pokrętło znajdujące się po prawej stronie pod
siedziskiem zgodnie z ruchem wskazówek zegara
(siła oporu oparcia zwiększy się) lub w kierunku
przeciwnym do ruchu wskazówek zegara (siła
oporu oparcia zmniejszy się).
6Regulacja podłokietników 4D
Aby ustawić wysokość podłokietnika, należy
nacisnąć przycisk znajdujący się na przedniej
stronie podłokietnika pod nakładką. Aby ustawić
szerokość podłokietnika, należy zwolnić dźwignię
blokującą, znajdującą się pod podłokietnikiem, a
następnie przesunąć podłokietnik do wymaganej
pozycji i zablokować dźwignię. Aby ustawić
szerokość rozstawu nakładki podłokietnika,
należy przesunąć ją na zewnątrz lub do wewnątrz
do wymaganej pozycji. Aby ustawić głębokość
nakładki podłokietnika, należy przesunąć ją
do przodu lub do tyłu, do wymaganej pozycji.
Aby zmienić kąt nakładki podłokietnika, należy
przekręcić ją do wewnątrz lub na zewnątrz
krzesła, do wymaganej pozycji.
7Regulacja podparcia lędźwi
Jeśli krzesło posiada podparcie lędźwi z
regulacją wysokości, można ustawić jego
wysokość przesuwając je w pionie.
8Kółka
Kółka zgodne z normą DIN EN 12 5 29 – z
mechanizmem hamowania bez obciążenia.
Do miękkich powierzchni: kółka w jednym
kolorze na całej powierzchni.
Do twardych powierzchni: miękka nakładka
w innym kolorze.
Czyszczenie
Części tapicerowane należy czyścić za pomocą
specjalnych detergentów do tapicerek.
Uwagi dotyczące użytkowania
Obrotowe krzesło biurowe należy używać
zgodnie z przeznaczeniem, przestrzegając
ogólnej zasady dbałości o produkty. Istnieje
niebezpieczeństwo wypadku w przypadku
stawania na krześle, siadania na podłokietnikach
lub wykorzystywania krzesła do innych
niewłaściwych celów.
FR
Afin de vous simplifier le maniement de
Denuo, nous vous avons préparé un court
résumé de ses fonctions. Attention ! Tous les
réglages du siège doivent être effectués en
position assise.
1Mécanisme
Afin d'incliner le dossier en position souhaitée,
tournez à fond vers l'arrière la poignée se
trouvant à gauche sous l'assise. Afin de libérer le
mécanisme synchrone pour obtenir l'effet d'une
position dynamique, tournez la même poignée
une fois vers l'avant, tout en se penchant avec
le dossier le plus possible vers l'arrière. La
libération du blocage est accompagné d'un bruit
caractéristique.
2Réglage de la hauteur d'assise
Pour un réglage de la hauteur d'assise, tirez le
levier situé à droite sous l'assise.
3Réglage de la profondeur d'assise
Pour un réglage de la profondeur d'assise, tirez
et maintenez la poignée située à gauche sous
l'assise ; ensuite, déplacez l'assise jusqu'à la
position souhaitée et libérez la poignée.
4Réglage d'inclinaison d'assise
(option : LP33N-ST)
Afin de régler l'assise en position négative,
tournez deux fois vers l'avant la poignée se
trouvant à gauche sous l'assise. Afin de bloquer
l'assisse dans cette position, tournez la poignée
une fois vers l'arrière. Afin de revenir vers la
position initiale, tournez la poignée vers l'avant,
jusqu'à la dernière position.
5Réglage de la tension de retour du
dossier
Afin de régler la tension de retour du dossier,
tournez la poignée située à droite sous l'assise :
dans le sens des aiguilles de la montre (la tension
devient plus forte) ou contre la montre (la tension
devient plus faible).
6Réglage d'accoudoirs 4D
Pour un réglage de la hauteur des accoudoirs,
appuyez sur le bouton situé à l'avant de
l'accoudoir sous la manchette. Afin de modifier la
largeur des accoudoirs, liberez le levier situé sous
l'accoudoir, ensuite déplacez l'accoudoir jusqu'à
la position souhaitée et bloquez le levier. Afin
de régler l'écart de la manchette d'accoudoir,
déplacez la manchette vers l'intérieur ou vers
l'extérieur, jusqu'à la position souhaitée. Afin de
régler la profondeur de la manchette d'accoudoir,
déplacez la manchette vers l'avant ou vers
l'arrière, jusqu'à la position souhaitée. Afin de
modifier l'angle de la manchette d'accoudoir,
tournez la manchette vers l'intérieur ou vers
l'extérieur du siège, jusqu'à la position souhaitée.
7Réglage du renfort lombaire
Si le siège est équipé d'un renfort lombaire
réglable en hauteur, le réglage de la hauteur
s'effectue en le déplaçant vers le haut ou vers
le bas.
8Roulettes
Les roulettes sont conformes à la norme
DIN EN 12 5 29 et auto-freinées.
Pour moquette : les roulettes sont unicolores sur
toute la surface.
Pour sols durs : la bande de protection souple
de la roulette est d'une couleur différente.
Nettoyage
Les parties en tissu peuvent être nettoyées avec
des produits nettoyants pour tissu disponibles
dans le commerce.
Remarques
N'utilisez ce fauteuil de bureau pivotant qu'en
respectant le devoir de prudence général. Il
existe un risque d'accident si vous vous mettez
debout sur le fauteuil, si vous vous asseyez
sur les accoudoirs ou en cas d'autre mauvaise
utilisation.
8
4
52
7 6
8
4
3
52
6
1
M0303-1841
Nowy Styl Group
ul. Pużaka 49
38-400 Krosno
Poland
T+48 13 43 76 100
F+48 13 43 62 732
E [email protected]
www.nowystylgroup.com

This manual suits for next models

2

Other ROHDE & GRAHL Indoor Furnishing manuals
ROHDE & GRAHL xenium-basic XE45 User manual

ROHDE & GRAHL

ROHDE & GRAHL xenium-basic XE45 User manual

ROHDE & GRAHL Duo-Back Balance User manual

ROHDE & GRAHL

ROHDE & GRAHL Duo-Back Balance User manual

ROHDE & GRAHL alero AL15 User manual

ROHDE & GRAHL

ROHDE & GRAHL alero AL15 User manual

ROHDE & GRAHL xenium XE51 User manual

ROHDE & GRAHL

ROHDE & GRAHL xenium XE51 User manual

ROHDE & GRAHL easySit User manual

ROHDE & GRAHL

ROHDE & GRAHL easySit User manual
ROHDE & GRAHL xio move M User manual

ROHDE & GRAHL

ROHDE & GRAHL xio move M User manual

ROHDE & GRAHL Duo back 45 User manual

ROHDE & GRAHL

ROHDE & GRAHL Duo back 45 User manual

ROHDE & GRAHL Xpendo ME40-ST User manual

ROHDE & GRAHL

ROHDE & GRAHL Xpendo ME40-ST User manual

ROHDE & GRAHL Operator 24 User manual

ROHDE & GRAHL

ROHDE & GRAHL Operator 24 User manual

ROHDE & GRAHL ERGONOM User manual

ROHDE & GRAHL

ROHDE & GRAHL ERGONOM User manual
ROHDE & GRAHL duo back 11 User manual

ROHDE & GRAHL

ROHDE & GRAHL duo back 11 User manual

ROHDE & GRAHL xenium x-basic User manual
ROHDE & GRAHL

ROHDE & GRAHL xenium x-basic User manual

ROHDE & GRAHL xio move M User manual

ROHDE & GRAHL

ROHDE & GRAHL xio move M User manual

ROHDE & GRAHL Arthrodesis chair User manual
ROHDE & GRAHL

ROHDE & GRAHL Arthrodesis chair User manual

ROHDE & GRAHL Xpendo plus ME33-ST User manual
ROHDE & GRAHL

ROHDE & GRAHL Xpendo plus ME33-ST User manual

ROHDE & GRAHL mono balance User manual

ROHDE & GRAHL

ROHDE & GRAHL mono balance User manual

ROHDE & GRAHL x-cross User manual

ROHDE & GRAHL

ROHDE & GRAHL x-cross User manual
ROHDE & GRAHL XENIUM XE61 User manual

ROHDE & GRAHL

ROHDE & GRAHL XENIUM XE61 User manual

ROHDE & GRAHL xio motion M User manual
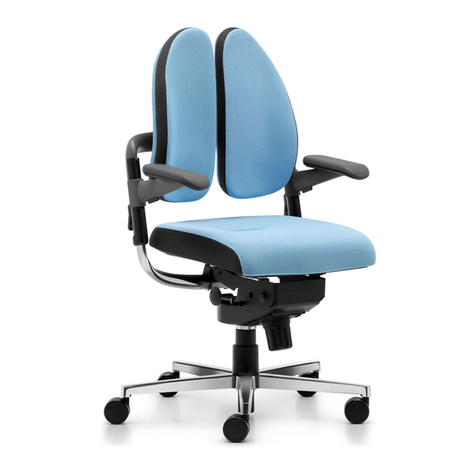
ROHDE & GRAHL

ROHDE & GRAHL xio motion M User manual

ROHDE & GRAHL Duo Back ESP-ST User manual

ROHDE & GRAHL

ROHDE & GRAHL Duo Back ESP-ST User manual

ROHDE & GRAHL Xenium-Freework User manual

ROHDE & GRAHL

ROHDE & GRAHL Xenium-Freework User manual

ROHDE & GRAHL ixo IX30 User manual

ROHDE & GRAHL

ROHDE & GRAHL ixo IX30 User manual

ROHDE & GRAHL xpendo User manual

ROHDE & GRAHL

ROHDE & GRAHL xpendo User manual

ROHDE & GRAHL Xenium x-classic User manual

ROHDE & GRAHL

ROHDE & GRAHL Xenium x-classic User manual

Popular Indoor Furnishing manuals by other brands

Profijt Meubel JONDAL TV7 Assembly instructions

Profijt Meubel

Profijt Meubel JONDAL TV7 Assembly instructions

StyleWell FCS70391-PW Use and care guide

StyleWell

StyleWell FCS70391-PW Use and care guide

VC Fit-Out Akupanels installation guide

VC

VC Fit-Out Akupanels installation guide

IKEA KOPPANG manual

IKEA

IKEA KOPPANG manual

Comfort-n-Motion GS60 owner's manual

Comfort-n-Motion

Comfort-n-Motion GS60 owner's manual

BDI TERRACE 1150 Assembly manual

BDI

BDI TERRACE 1150 Assembly manual

Konig & Meyer 14044 Assembly instructions

Konig & Meyer

Konig & Meyer 14044 Assembly instructions

Next SOPHIE CABIN STATION 889951 Assembly instructions

Next

Next SOPHIE CABIN STATION 889951 Assembly instructions

Dorel Asia Baby Relax DA6094SO-CO Instruction booklet

Dorel Asia

Dorel Asia Baby Relax DA6094SO-CO Instruction booklet

Mocka Haywood Desk Assembly instructions

Mocka

Mocka Haywood Desk Assembly instructions

HB Moveis Home Suspenso Limit 1.8 Assembly instructions

HB Moveis

HB Moveis Home Suspenso Limit 1.8 Assembly instructions

Otto 73791466 Assembly instructions

Otto

Otto 73791466 Assembly instructions

Next JULIETTE 367794 Assembly instructions

Next

Next JULIETTE 367794 Assembly instructions

Furniture of America Sarles CM6326-SF Assembly instructions

Furniture of America

Furniture of America Sarles CM6326-SF Assembly instructions

Dedeman MASILIA 220 OG H217 UP 01324 Assembling Instruction

Dedeman

Dedeman MASILIA 220 OG H217 UP 01324 Assembling Instruction

Bolia Friedman Shelf product manual

Bolia

Bolia Friedman Shelf product manual

Delta Childrens Products 75514 Series Instructions for use

Delta Childrens Products

Delta Childrens Products 75514 Series Instructions for use

Bensons for Beds Alexis Assembly instructions

Bensons for Beds

Bensons for Beds Alexis Assembly instructions

manuals.online logo
manuals.online logoBrands
  • About & Mission
  • Contact us
  • Privacy Policy
  • Terms and Conditions

Copyright 2025 Manuals.Online. All Rights Reserved.