manuals.online logo
Brands
  1. Home
  2. •
  3. Brands
  4. •
  5. Russound
  6. •
  7. Keypad
  8. •
  9. Russound CA 6.4 LRN User manual

Russound CA 6.4 LRN User manual

CA 6.4 LRN
Learning Keypad
Instruction Manual
FFREW
DISC
CHANGE
SELECT
MODE
SELECT
PLAYSTOP
SCANPAUSE
Reset Procedure Instructions
The Reset button is used to restart the LRN Keypad if any problem occurs
during programming. If the LRN Keypad locks-up for any reason, follow
the below procedure:
1) Press the Reset button (shown in Figure 3).
2) The Program indicator will illuminate momentarily.
3) The LRN Keypad will now operate properly. No stored information will
be lost.
Operation Instructions
1) Read the KP Control Features section of the CA-Series Multi-Zone
Controller manual.
2) Select the source that you wish to control on the KP (This will also
select the source for listening.).
3) Press the command key(s) on the LRN which have been programmed
with the commands that you wish to execute.
4) The Program indicator will flash as the command is outputted. If the
Program indicator does not flash when the command key is pressed,
the command was not stored properly.
Limited Warranty
The Russound CA LRN are fully guaranteed for Two (2) years from the date
of purchase against all defects in materials and workmanship. During this
period Russound will replace any defective parts and correct any defect in
workmanship without charge for either parts or labor. For this warranty to
apply, the unit must be installed and used according to its written
instructions. If service is necessary, it must be performed by Russound. The
unit must be returned to Russound at the owner’s expense and with prior
written permission. Accidental damage and shipping damage are not
considered defects under the terms of the warranty. Russound assumes no
responsibility for defects resulting from abuse or servicing performed by an
agency or person not specifically authorized in writing by Russound.
Damage to or destruction of components due to improper use voids the
warranty. In these cases the repair will be made at the owner’s expense. To
return for repairs, the unit must be shipped to Russound at the owner’s
expense, along with a note explaining the nature of the service required.
Be sure to pack in a corrugated container with at least 3 inches of resilient
material to protect the unit from damage in transit.
FFREW
DISC
CHANGE
SELECT
MODE
SELECT
PLAYSTOP
SCANPAUSE
PROGRAM INDICATOR
STORED INDICATOR
ERROR INDICATOR
IR RECEIVER DIODE
PROGRAM BUTTON
CLEAR BUTTON
RESET BUTTON
Figure 3
5 Forbes Rd. Newmarket, NH 03857
☎ 603.659.5170 •Fax 603.659.5388
e-mail: [email protected]
Come visit us at:
Product Overview
The CA 6.4 LRN Keypad is an accessories to the CA-Series Multi-Zone
Control Systems. The LRN connects to the CA KP Keypad via a 16 pin
ribbon cable, connected to the back side of the keypad. The LRN adds the
ability to store and remotely activate infrared commands of virtually any
IR-controlled device connected to a CA Multi-Zone System. Infrared
commands can be stored into the LRN Keypad through a simple
programming procedure. Commands are executed by simply pressing the
command keys to which the infrared commands were previously stored.
There are 12 command keys on the front face of the keypad. The LRN has
a total of 4 control layers which allows control of up to 4 infrared-
controlled devices. A total of 48 infrared commands can be stored and
executed by the LRN Keypad.
Connection Instructions
1) Read the KP Keypad Wiring Instruction section of the CA6.4 Multi-
Zone Controller manual, as well as the section on the infrared emitter
outputs.
2) Turn off the CA-Series Multi-Zone Controller.
3) Connect the CA6.4 LRN’s Interface cable to the 16 pin header located
on the CA6.4 KP Interface. Note the location of the red stripe.
4) Connect the KP Keypad to the corresponding keypad input of the CA-
Series Multi-Zone Controller, as shown in the controller’s instruction
manual and as seen in Figure 1.
5) Check the ribbon cable for correct orientation of the LRN and the KP
Keypad. Note the location of the RED STRIPE. Refer to Figure 2 for
correct orientation of the cable.
Installation Instructions
1) Using the (4) provided 3/4”flat-head screws, install the two connected
keypads into a double-gang junction box or plaster ring.
2) Do not install the cover plate yet, as you will need access to the LRN
Keypad during programming.
3) Once all keypads are connected and installed, turn on the CA-Series
Multi-Zone Controller to power the keypads.
Programming Instructions
The command keys on the LRN Keypad are labeled for reference only. You
may program any IR command onto any command key.
1) Read the KP Keypad Control Features section of the CA-Series Multi-
Zone Controller manual.
2) Turn on the KP Keypad by turning the knob to the right.
3) Press the Program button on the left side of the LRN Keypad (button
locations are shown in Figure 3).
4) The Program indicator will light continuously (indicator light locations
are shown in Figure 3).
5) Select the desired layer by selecting the source input on the KP Keypad
(i.e. If you want to program CD player functions, select the CD source
on the KP Keypad.).
6) Press the command key that you wish to program into, on the LRN
front plate (i.e. If you wish to program the play function for your CD
player, press the PLAY button on the LRN.). The Program indicator will
now blink rapidly.
7) Hold your hand-held remote control so that the IR emitting end faces
the IR receiving diode located on the right side of the LRN Keypad (see
Figure 3 for IR receiving diode location). The hand-held remote should
be held 1- 4 inches away from the IR receiving diode during command
transfer.
8) Press the command key on the hand-held remote that you wish to
program into the LRN Keypad’s command key.
9) While the command is being transferred, the Program indicator will
light continuously.
10) After the command is successfully captured, the Stored indicator will
light momentarily, and the Program indicator will remain lit.
11) If you wish to continue programming command keys, repeat steps 5-
10.
12) If the Error indicator is illuminated, there was a problem processing the
last command. Repeat steps 5-10.
13) To exit the Program mode, press the Program button. All indicators will
no longer be illuminated, and the LRN Keypad will be ready for
operation (see Operation Instructions).
Clear Procedure Instructions
To Clear Individual Commands:
1) Press the clear button. The Program indicator will be illuminated. (Do
not press the Clear button for more than 1 second. Holding the Clear
button for more than 1 second will cause all stored commands to be
deleted.)
2) Select the layer in which the command resides by selecting the source
input on the KP Keypad.
3) Press the command key to be cleared.
4) To continue to delete commands, repeat steps 2 and 3.
5) To exit the Clear mode, press the Clear button twice, or wait 5 seconds
for the LRN to exit the Clear mode automatically.
To Clear All Commands:
1) Press and hold the Clear button for more than 1 second.
2) The Program, Stored and Error indicators will all light in sequence.
3) All commands previously stored in the LRN Keypad are now deleted.
4) The LRN Keypad is now ready to be re-programmed (see Programming
Instructions).
87654321
BACK SIDE OF KEYPAD
Figure 1
RED
STRIPE
INTERCONNECT
CABLE
CA6.4 LRN CA6.4 KP
Figure 2

Other Russound Keypad manuals

Russound ISK2 User manual

Russound

Russound ISK2 User manual

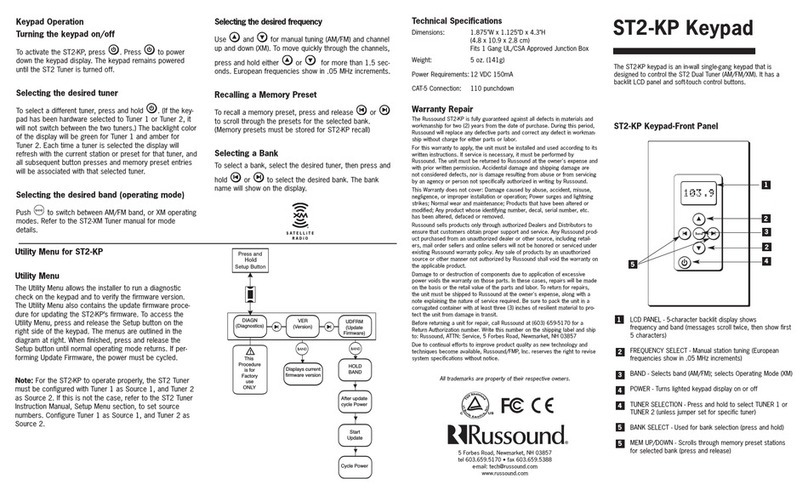
Russound ST2-KP User manual

Russound

Russound ST2-KP User manual

Russound KP4 User manual

Russound

Russound KP4 User manual

Russound CA-LCD2 User manual

Russound

Russound CA-LCD2 User manual

Russound A-K3 User manual

Russound

Russound A-K3 User manual

Russound V-KP-1 User manual

Russound

Russound V-KP-1 User manual

Russound SaphIR K2 User manual

Russound

Russound SaphIR K2 User manual

Russound DAN User manual

Russound

Russound DAN User manual

Russound ISK1 User manual

Russound

Russound ISK1 User manual

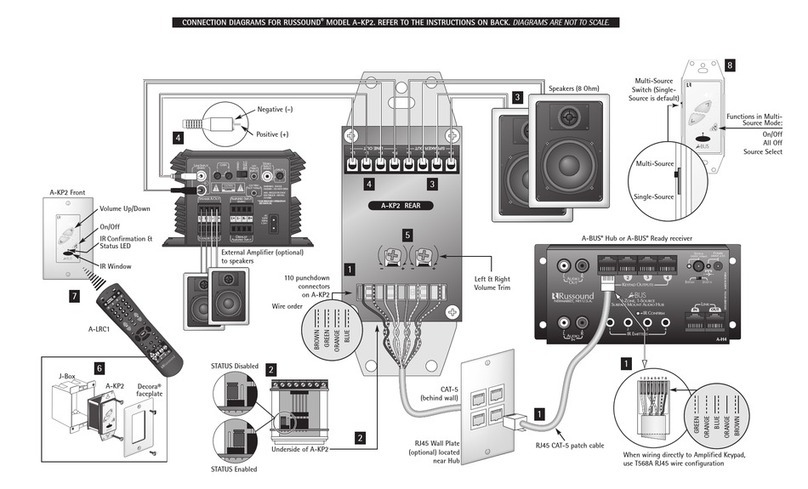
Russound A-BUS A-KP2 User manual

Russound

Russound A-BUS A-KP2 User manual

Russound MDK-C6 User manual

Russound

Russound MDK-C6 User manual

Russound A-K4 User manual

Russound

Russound A-K4 User manual

Russound UNO-S1 User manual

Russound

Russound UNO-S1 User manual

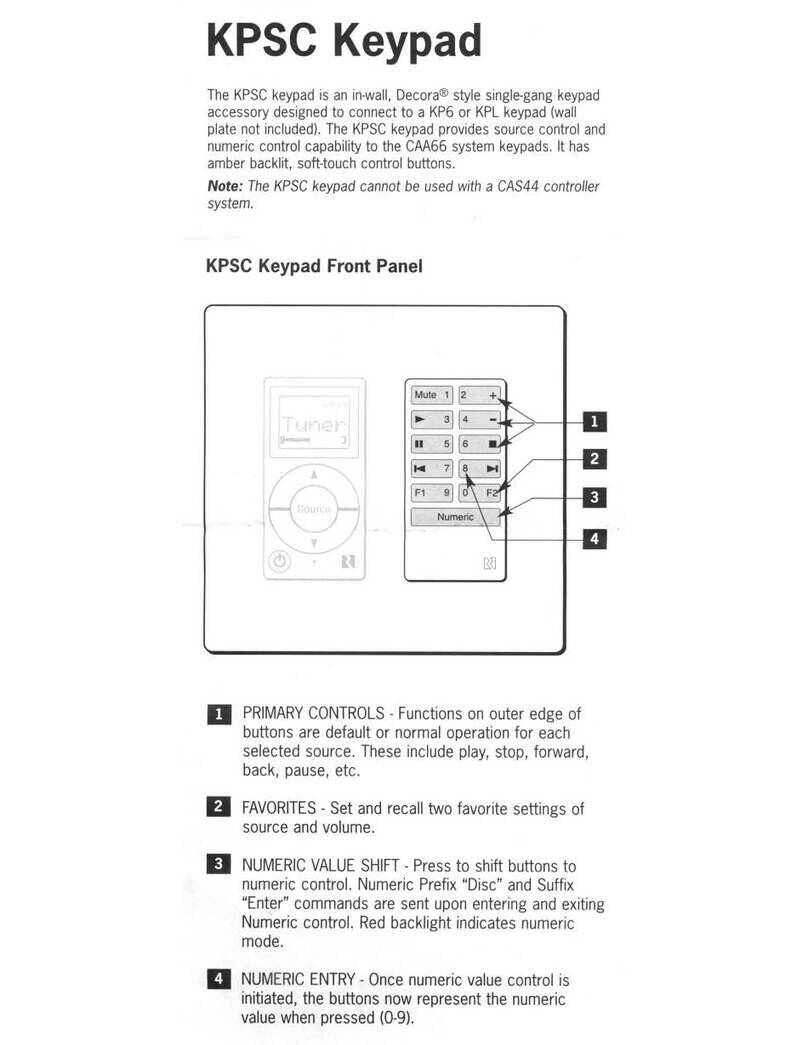
Russound KPSC User manual

Russound

Russound KPSC User manual

Russound V-KP-1 User manual

Russound

Russound V-KP-1 User manual

Russound CA4-KP User manual

Russound

Russound CA4-KP User manual

Russound UNO-S2 User manual

Russound

Russound UNO-S2 User manual

Russound CA-LCD User manual

Russound

Russound CA-LCD User manual

Russound SLK-1 User manual

Russound

Russound SLK-1 User manual

Russound SPG User manual

Russound

Russound SPG User manual

Russound UNO-S2 User manual

Russound

Russound UNO-S2 User manual

Russound KP4-KP6 User manual

Russound

Russound KP4-KP6 User manual

Russound KPSC User manual

Russound

Russound KPSC User manual

Russound UNO-S2 User manual

Russound

Russound UNO-S2 User manual

Popular Keypad manuals by other brands

Targus WIRELESS user guide

Targus

Targus WIRELESS user guide

NAPCO Security System operating guide

NAPCO

NAPCO Security System operating guide

Speed Link SL-6433 user guide

Speed Link

Speed Link SL-6433 user guide

Resolution RE152 user guide

Resolution

Resolution RE152 user guide

Paradox 1686V user guide

Paradox

Paradox 1686V user guide

Security Command XRSuper6 user guide

Security Command

Security Command XRSuper6 user guide

GSM Activate KP V2 quick start guide

GSM Activate

GSM Activate KP V2 quick start guide

Keyautomation EGKTB1 Instructions and warnings for installation and use

Keyautomation

Keyautomation EGKTB1 Instructions and warnings for installation and use

Paradox TM50 Touch instruction sheet

Paradox

Paradox TM50 Touch instruction sheet

Paradox Esprit 616 user manual

Paradox

Paradox Esprit 616 user manual

Doorentryonline K401-IE user manual

Doorentryonline

Doorentryonline K401-IE user manual

HIK VISION DS-PK1-E-WB manual

HIK VISION

HIK VISION DS-PK1-E-WB manual

HIK VISION DS-PK1-E-WB quick start guide

HIK VISION

HIK VISION DS-PK1-E-WB quick start guide

gebatronic Cody Universal 2 manual

gebatronic

gebatronic Cody Universal 2 manual

Watchguard WKP owner's manual

Watchguard

Watchguard WKP owner's manual

UseTECH FlowTimer+ Remote Set instruction manual

UseTECH

UseTECH FlowTimer+ Remote Set instruction manual

Contro l4 C4-KA installation guide

Contro l4

Contro l4 C4-KA installation guide

KLH VX-1 manual

KLH

KLH VX-1 manual

manuals.online logo
manuals.online logoBrands
  • About & Mission
  • Contact us
  • Privacy Policy
  • Terms and Conditions

Copyright 2025 Manuals.Online. All Rights Reserved.