manuals.online logo
Brands
  1. Home
  2. •
  3. Brands
  4. •
  5. Safety 1st
  6. •
  7. Lock
  8. •
  9. Safety 1st OutSmart HS271 User manual

Safety 1st OutSmart HS271 User manual

©2015 Dorel Juvenile. www.djgusa.com (800) 544-1108 www.safety1st.com
Made in CHINA. Hecho en CHINA. Styles and colors may vary. Los estilos y los colores pueden variar.
Distributed by (distribuido por) Dorel Juvenile Group, Inc., 2525 State St., Columbus, IN 47201-7494
Dorel Juvenile Canada, 873 Hodge, St. Laurent, QC H4N 2B1 05/13/15 4358-6745
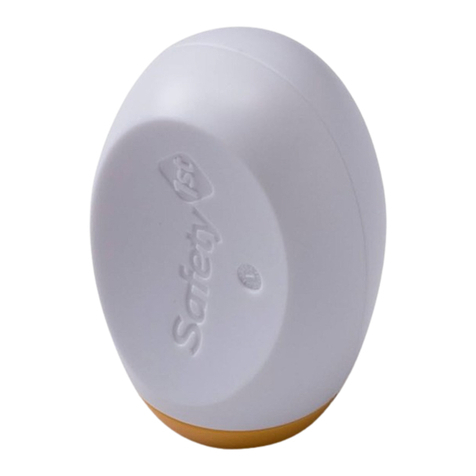
OutSmartTM Flex Lock
HS271
User Guide
Traba flexible OutSmartTM
HS271
Guía del Usuario
WARNING: Do not use this product to guard
against toxic and dangerous substances, or sharp-edged or
pointed objects. Such materials should always be placed “high
up” or otherwise made completely inaccessible to children.
ADULT INSTALLATION REQUIRED.
AVISO: No utilice este producto para evitar que los
niños tengan acceso a sustancias tóxicas y peligrosas u objetos
punzantes y cortantes. Tales materiales siempre deben colocarse
en lugares “altos” u otros lugares a los que los niños no puedan
llegar de ninguna manera.
REQUIERE INSTALACIÓN POR PARTE DE UN ADULTO.
Thank you for purchasing this OutSmart Flex Lock. We’re proud to
be your choice for safeguarding your child’s environment.
Gracias por comprar este Traba flexible OutSmart. Es un orgullo estar
dentro de su elección para proteger el entorno de su hijo.
NOTE: This product has a two unique features that help to redirect
and distract your child’s attention.
NOTA: Este producto tiene dos características únicas que ayudan a redi-
reccionar y distraer la atención de su hijo.
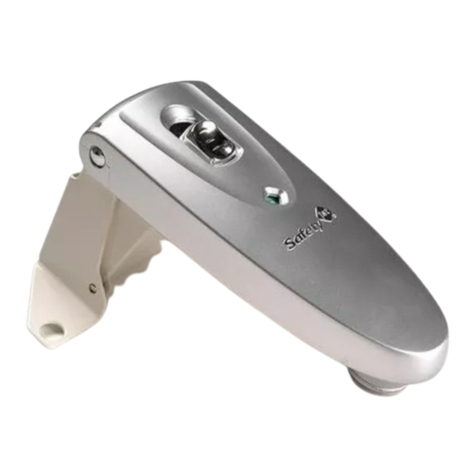
The decoy button is
non-functioning.
The functional
buttons are hidden
underneath a flexible
over mold.
Los botones funcionales
quedan ocultos debajo
de una superficie flexible.
Features Características
1
ANTES DE COMENZAR
• Lea todas las instrucciones antes de instalar.
• Guarde estas instrucciones para su uso futuro.
• Retire todo el contenido del embalaje y deseche la caja.
• Despliegue e identifique todas las piezas.
• No devuelva este producto al lugar donde lo compró. Si falta alguna pieza,
envíe un correo electrónico a consumer@djgusa.com, llame al Departamento
de Relaciones con el Consumidor al (800) 544-1108, o envíe un fax al
(800) 207-8182. También puede visitar nuestro sitio web en www.safety1st.com.
Tenga a mano el número de modelo (HS271) y el código de fecha (fecha de
fabricación), que se encuentran indicados en el parte posterior del producto.
Información de seguridad importante
Después de su colocación, verifique que funcione correctamente tirando
firmemente de la puerta o el cajón. Deje de usarlo cuando su hijo alcance
cierta edad que le permita inutilizar la protección que brinda. Un niño sin
supervisión puede ser capaz de inutilizar la protección que ofrece este pro-
ducto. Para que este producto funcione efectivamente durante más tiempo,
evite que los niños vean como se opera. Si los niños ven cómo usted libera una
traba, un pestillo o una cubierta, podrían aprender más rápido la manera de
inutilizar cualquier tipo de dispositivo de seguridad.
BEFORE YOU BEGIN
• Read all instructions before installing.
• Keep these instructions for future use.
• Remove all contents from packaging and discard box.
• Lay out and identify all parts.
• Do not return this product to the place of purchase. If any parts are
missing, email consumer@djgusa.com, call Consumer Relations at
(800) 544-1108, or fax at (800) 207-8182. You can also visit our website
at www.safety1st.com. Have the model number ready (HS271 ) and date
code (manufacture date) located on back of product.
Important Safety Information
Check for security after installation by tugging firmly on the door or
drawer. Discontinue use when your child becomes old enough to defeat
it. Your child will eventually be able to defeat this product. To keep this
product effective for as long as possible, avoid letting children see how
you operate child safety devices. Watching you disengage a lock, latch or
cover could enable them to learn sooner how to defeat it.
CAUTION: This product is only a deterrent. It is not a
substitute for proper adult supervision. DO NOT use this
product if damaged or broken. These products are not toys.
DO NOT allow children to play with them.
FOR INDOOR HOME USE ONLY.
PRECAUCIÓN: Este producto solo funciona como dispositivo de
seguridad. No sustituye la supervisión por parte de un adulto. NO
use este producto si se encuentra roto o dañado. Estos productos
no son juguetes. NO permita que los niños jueguen con ellos.
PARA USO DOMÉSTICO ÚNICAMENTE EN INTERIORES.
El botón señuelo no funciona.
3
Place the strap through cabinet handle or around the knob. If
nessecary, reinsert the strap through the slot (Figure 4).
Repeat on the other cabinet handle or knob.
4
Snap lock together (Figure 5). Pull straps to tighten straps
(Figure 6). Ensure that straps are snug and cannot be removed
from knobs.
Tug firmly on the handles or knobs to check for a secure fit. The
cabinets should not create a gap larger than 1”.
3
Pase la correa a través de la manija o alrededor de la perilla del
armario. Si fuera necesario, vuelva a pasar la correa a través de la
ranura (Figura 4).
Repita en la otra manija o perilla del armario.
4
Vuelva a unir la traba (Figura 5). Tire de las correas para ajustarlas
(Figura 6). Asegúrese de que las correas quedaron bien apretadas y
no pueden quitarse de las manijas o perillas del armario.
Tire firmemente de las perillas o manijas del armario para
comprobar que quedaron bien aseguradas. El armario no debería
poder abrirse más de 1”.
Repeat step 1 of To Install.
Lock can remain on cabinet knobs or handles in a non-use position,
when accessing cabinets.
Repeat step 4 to reengage lock and prevent access to cabinets.
To Remove: Repeat Steps 1 and 2 of “To Install.”
Repita el paso 1 de Para instalar.
La traba puede permanecer en las perillas o manijas del armario en la
posición de no uso, cuando se necesita tener acceso al armario.
Repita el paso 4 para volver a colocar la traba y evitar el acceso al
armario.
Para quitar: Repita los pasos 1 y 2 de Para instalar.
To Clean Para limpiar
Wipe with damp cloth and dry. Frotar la cubierta con un paño húmedo y secarla.
2
Push inner button in order to loosen or remove flexible strap on
the front housing (Figure 3a). Slide front lever in order to loosen or
remove flexible strap on the rear housing (Figure 3b).
2
Presione el botón interno para aflojar o quitar la correa flexible ubicada en
la cubierta delantera (Figura 3a). Deslice la palanca para aflojar o quitar la
correa flexible ubicada en la cubierta trasera (Figura 3b).
1 Open lock by pressing top and bottom release buttons together
with your right hand (Figure 1) and pull the rear housing out with
your left hand (Figure 2).
1 Abra la traba presionando los botones de liberación superior e inferior
al mismo tiempo con la mano derecha (Figura 1) y tire de la cubierta
trasera con la mano izquierda (Figura 2).
To Install Para instalar
To Use Para Usar
1
4
2
5a 5b
3a 3b
6
2
Cubierta delantera
Front Housing
Cubierta trasera
Rear Housing

Other Safety 1st Lock manuals

Safety 1st HS291 User manual

Safety 1st

Safety 1st HS291 User manual

Safety 1st HS129 User manual

Safety 1st

Safety 1st HS129 User manual

Safety 1st OutSmart SECRET BUTTON User manual

Safety 1st

Safety 1st OutSmart SECRET BUTTON User manual

Safety 1st 48206 User manual

Safety 1st

Safety 1st 48206 User manual

Safety 1st OutSmart HS361 User manual

Safety 1st

Safety 1st OutSmart HS361 User manual

Safety 1st HS130 User manual

Safety 1st

Safety 1st HS130 User manual

Safety 1st HS162 User manual

Safety 1st

Safety 1st HS162 User manual

Safety 1st HS247 User manual

Safety 1st

Safety 1st HS247 User manual

Safety 1st 3202001400 User manual

Safety 1st

Safety 1st 3202001400 User manual

Safety 1st OUTSMART 3202007000 User manual

Safety 1st

Safety 1st OUTSMART 3202007000 User manual

Safety 1st 33110039 User manual

Safety 1st

Safety 1st 33110039 User manual

Safety 1st HS129 User manual

Safety 1st

Safety 1st HS129 User manual

Safety 1st HS294 User manual

Safety 1st

Safety 1st HS294 User manual

Safety 1st OutSmart HS288 User manual

Safety 1st

Safety 1st OutSmart HS288 User manual

Safety 1st OUTSMART User manual

Safety 1st

Safety 1st OUTSMART User manual

Safety 1st 48517 User manual

Safety 1st

Safety 1st 48517 User manual

Safety 1st OutSmart HS289 User manual

Safety 1st

Safety 1st OutSmart HS289 User manual

Safety 1st 33110038 User manual

Safety 1st

Safety 1st 33110038 User manual

Safety 1st OutSmart HS270 User manual

Safety 1st

Safety 1st OutSmart HS270 User manual

Safety 1st 48448 User manual

Safety 1st

Safety 1st 48448 User manual

Safety 1st HS247 User manual

Safety 1st

Safety 1st HS247 User manual

Popular Lock manuals by other brands

Steren MFD-008/OTG instruction manual

Steren

Steren MFD-008/OTG instruction manual

Kit-Lock KL1000 user manual

Kit-Lock

Kit-Lock KL1000 user manual

ADAMS RITE 4300 series installation instructions

ADAMS RITE

ADAMS RITE 4300 series installation instructions

Secu SELO-B operating instructions

Secu

Secu SELO-B operating instructions

Assa Abloy 3090 installation instructions

Assa Abloy

Assa Abloy 3090 installation instructions

Siegenia GENIUS 2.1 A quick reference

Siegenia

Siegenia GENIUS 2.1 A quick reference

Guub DP151 user manual

Guub

Guub DP151 user manual

COMPX C8139 Dimensional drawing

COMPX

COMPX C8139 Dimensional drawing

Assa Abloy YALE 4600CK Series installation instructions

Assa Abloy

Assa Abloy YALE 4600CK Series installation instructions

Kwikset SMARTCODE 915 Installation and user guide

Kwikset

Kwikset SMARTCODE 915 Installation and user guide

nedis KEYCCP01BK user manual

nedis

nedis KEYCCP01BK user manual

ABB Magne 3 Series User instructions

ABB

ABB Magne 3 Series User instructions

Schlage Everest 29 Service manual

Schlage

Schlage Everest 29 Service manual

HEITECH 04003624 quick start guide

HEITECH

HEITECH 04003624 quick start guide

TUYA E202 user manual

TUYA

TUYA E202 user manual

Dormakaba LA GARD 700 Series quick start guide

Dormakaba

Dormakaba LA GARD 700 Series quick start guide

Kaba Simplex 6200 Series installation instructions

Kaba

Kaba Simplex 6200 Series installation instructions

Burg Wächter 610/53 operating instructions

Burg Wächter

Burg Wächter 610/53 operating instructions

manuals.online logo
manuals.online logoBrands
  • About & Mission
  • Contact us
  • Privacy Policy
  • Terms and Conditions

Copyright 2025 Manuals.Online. All Rights Reserved.