manuals.online logo
Brands
  1. Home
  2. •
  3. Brands
  4. •
  5. Safety 1st
  6. •
  7. Lock
  8. •
  9. Safety 1st OutSmart HS289 User manual

Safety 1st OutSmart HS289 User manual

Other Safety 1st Lock manuals

Safety 1st OUTSMART User manual

Safety 1st

Safety 1st OUTSMART User manual

Safety 1st HS291 User manual

Safety 1st

Safety 1st HS291 User manual

Safety 1st OutSmart HS361 User manual

Safety 1st

Safety 1st OutSmart HS361 User manual

Safety 1st 48206 User manual

Safety 1st

Safety 1st 48206 User manual

Safety 1st OutSmart HS288 User manual

Safety 1st

Safety 1st OutSmart HS288 User manual

Safety 1st OutSmart SECRET BUTTON User manual

Safety 1st

Safety 1st OutSmart SECRET BUTTON User manual

Safety 1st OUTSMART 3202007000 User manual

Safety 1st

Safety 1st OUTSMART 3202007000 User manual

Safety 1st OutSmart HS270 User manual

Safety 1st

Safety 1st OutSmart HS270 User manual

Safety 1st 33110039 User manual

Safety 1st

Safety 1st 33110039 User manual

Safety 1st HS129 User manual

Safety 1st

Safety 1st HS129 User manual

Safety 1st HS294 User manual

Safety 1st

Safety 1st HS294 User manual

Safety 1st 48448 User manual

Safety 1st

Safety 1st 48448 User manual

Safety 1st HS130 User manual

Safety 1st

Safety 1st HS130 User manual

Safety 1st HS162 User manual

Safety 1st

Safety 1st HS162 User manual

Safety 1st 48517 User manual

Safety 1st

Safety 1st 48517 User manual

Safety 1st HS247 User manual

Safety 1st

Safety 1st HS247 User manual

Safety 1st 3202001400 User manual

Safety 1st

Safety 1st 3202001400 User manual

Safety 1st HS129 User manual

Safety 1st

Safety 1st HS129 User manual

Safety 1st 33110038 User manual

Safety 1st

Safety 1st 33110038 User manual

Safety 1st HS247 User manual

Safety 1st

Safety 1st HS247 User manual

Safety 1st OutSmart HS271 User manual

Safety 1st

Safety 1st OutSmart HS271 User manual

Popular Lock manuals by other brands

Magic 105 manual

Magic

Magic 105 manual

Gantner GAT NET.Lock 7020 System Installation, configuration & operation

Gantner

Gantner GAT NET.Lock 7020 System Installation, configuration & operation

Dorma Studio Classic Installation instruction

Dorma

Dorma Studio Classic Installation instruction

Securam ECSL-601 quick start guide

Securam

Securam ECSL-601 quick start guide

Sudhaus 3003 operating manual

Sudhaus

Sudhaus 3003 operating manual

Pado FDS-10 user manual

Pado

Pado FDS-10 user manual

Esco systeQ Series installation instructions

Esco

Esco systeQ Series installation instructions

COMPX National D8951 instruction sheet

COMPX

COMPX National D8951 instruction sheet

secureo Key Box instruction manual

secureo

secureo Key Box instruction manual

Stock Loks C8713 instruction sheet

Stock Loks

Stock Loks C8713 instruction sheet

COMPX 1T-058 Information

COMPX

COMPX 1T-058 Information

Auslock T11 user manual

Auslock

Auslock T11 user manual

Stealth SAFES ShadowVault Instructions & Troubleshooting

Stealth SAFES

Stealth SAFES ShadowVault Instructions & Troubleshooting

Knox KeySecure 5 Admin & user guide

Knox

Knox KeySecure 5 Admin & user guide

Kwikset 48334/01 Quick installation guide

Kwikset

Kwikset 48334/01 Quick installation guide

Metra Electronics Door Access Terminal Combo Technical manual

Metra Electronics

Metra Electronics Door Access Terminal Combo Technical manual

Kilitronik miniK10m operating manual

Kilitronik

Kilitronik miniK10m operating manual

Ingersoll-Rand SCHLAGE Everest Service manual

Ingersoll-Rand

Ingersoll-Rand SCHLAGE Everest Service manual

manuals.online logo
manuals.online logoBrands
  • About & Mission
  • Contact us
  • Privacy Policy
  • Terms and Conditions

Copyright 2025 Manuals.Online. All Rights Reserved.

OutSmartTM Lever Handle Lock
HS289
User Guide
Lock Traba para manija OutSmartTM
HS289
Guía del Usuario
WARNING:
DO NOT USE THIS PRODUCT ON EXTERIOR DOORS. DO NOT
USE ON GLASS DOORS. DO NOT use this product to guard
against toxic and dangerous substances, or sharp-edged
or pointed objects. Such materials should always be placed
“high up” or otherwise made completely inaccessible to
children. ADULT INSTALLATION REQUIRED.
AVISO:NO UTILICE ESTE PRODUCTO EN PUERTAS
EXTERIORES. NO USE EN PUERTAS DE VIDRIO. NO utilice este
producto para evitar que los niños tengan acceso a sustancias
tóxicas y peligrosas u objetos punzantes y cortantes. Tales
materiales siempre deben colocarse en lugares “altos” u otros
lugares a los que los niños no puedan llegar de ninguna manera.
REQUIERE INSTALACIÓN POR PARTE DE UN ADULTO.
Thank you for purchasing this OutSmartTM Lever Handle Lock. We’re
proud to be your choice for safeguarding your child’s environment.
Gracias por comprar esta traba para manija OutSmartTM. Es un orgullo
estar dentro de su elección para proteger el entorno de su hijo.
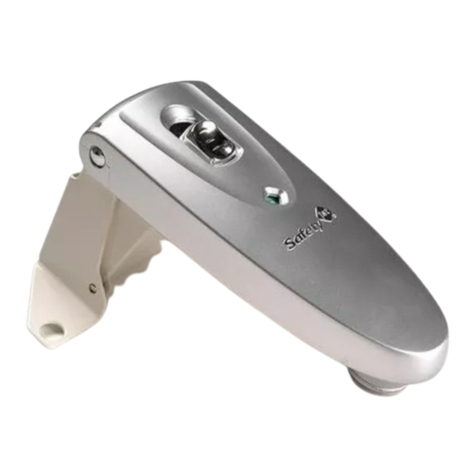
NOTE: This product has two unique features that
help to redirect and distract your child’s attention. NOTA: Este producto tiene dos características únicas
que ayudan a redireccionar y distraer la atención de
su hijo.
The decoy button is non-functioning.
The functional buttons are located on either side
of the pivoting lock arm. Los botones funcionales quedan al otro lado del
brazo de bloqueo pivotante.
Features Características
1
ANTES DE COMENZAR
• Lea todas las instrucciones antes de instalar.
• Guarde estas instrucciones para su uso futuro.
• Retire todo el contenido del embalaje y deseche la caja.
• No devuelva este producto al lugar donde lo compró. Si falta alguna pieza,
envíe un correo electrónico a consumer@djgusa.com, llame al Departamento
de Relaciones con el Consumidor al (800) 544-1108, o envíe un fax al
(800) 207-8182. También puede visitar nuestro sitio web en www.safety1st.com.
Tenga a mano el número de modelo (HS289) y el código de fecha (fecha de
fabricación), que se encuentran indicados en el producto.
HERRAMIENTAS NECESARIAS: Un lápiz (no incluidos).
Información de seguridad importante
Verifique por seguridad después de la instalación. Deje de usarlo cuando su
hijo alcance cierta edad que le permita inutilizar la protección que brinda. Un
niño sin supervisión puede ser capaz de inutilizar la protección que ofrece este
producto. Para que este producto funcione efectivamente durante más tiempo,
evite que los niños vean como se opera. Si los niños ven cómo usted libera
una traba, un pestillo o una cubierta, podrían aprender más rápido la manera
de inutilizar cualquier tipo de dispositivo de seguridad. Este producto solo se
instala una única vez y no debe reutilizarse.
BEFORE YOU BEGIN
• Read all instructions before installing.
• Keep these instructions for future use.
• Remove all contents from packaging and discard box.
• Do not return this product to the place of purchase. If any parts are
missing, email consumer@djgusa.com, call Consumer Relations at
(800) 544-1108, or fax at (800) 207-8182. You can also visit our website
at www.safety1st.com. Have the model number ready (HS289) and date
code (manufacture date) located on product.
TOOLS NEEDED: Pencil (not provided).
Important Safety Information
Check for security after installation. Discontinue use when your child
becomes old enough to defeat it. Your child will eventually be able to
defeat this product. To keep this product effective for as long as possible,
avoid letting children see how you operate child safety devices. Watching
you disengage a lock, latch or cover could enable them to learn sooner
how to defeat it.
This product is for one time installation only and it is not to be re-used.
CAUTION: This product is only a deterrent. It is not a
substitute for proper adult supervision. DO NOT use this
product if damaged or broken. These products are not toys.
DO NOT allow children to play with them.
FOR INDOOR HOME USE ONLY.
PRECAUCIÓN: Este producto solo funciona como dispositivo de
seguridad. No sustituye la supervisión por parte de un adulto. NO
use este producto si se encuentra roto o dañado. Estos productos
no son juguetes. NO permita que los niños jueguen con ellos.
PARA USO DOMÉSTICO ÚNICAMENTE EN INTERIORES.
El botón señuelo no funciona.
©2017 Dorel Juvenile. (800) 544-1108 www.safety1st.com Made in CHINA. Hecho en CHINA. Styles and colors may vary. Los estilos y los colores pueden variar.
Distributed by (distribuido por) Dorel Juvenile Group, Inc., 2525 State St., Columbus, IN 47201-7494
Dorel
Juvenile
Canada, 2855 Argentia Road, Unit 4, Mississauga, ON, L5N 8G6
Importado y Distribuido en Chile por: Comercial e Industrial Silfa S.A. - San Ignacio 0201 / Parque Industrial Portezuelo Quilicura, Santiago Chile. Fono (562) 2339 9000. En Perú por: Comexa
S.A. - Los Libertadores 455 – San Isidro, Lima – Perú. Fono (511) 4469014. En Centro América, Caribe y Ecuador por: Best Brands Group S.A. – Av. Balboa, Bay Mall Plaza, Planta Baja, local
9, Panamá. - Fono: (507) 300 2884. En Colombia por: Baby Universe S.A.S. - Vía 40 No. 77-29, Barranquilla, Colombia - Fono: (575) 353 1110
Importador: DJGM, S.A. DE C.V. Gabriel Mancera No. 1041 Col. Del Valle Delegación Benito Juárez C.P. 03100 México, D.F. R.F.C. DJG140305GN9 Tel. (55) 67199202 12/19/16 4358-6986
Adhesive Backing/
Adhesivo en la parte posterior
To Clean Para limpiar
Wipe with damp cloth and dry.
DO NOT use cleaning chemicals near the
adhesive.
Frotar la cubierta con un paño húmedo y secarla. NO USE químicos de
limpieza cerca del adhesivo.
To Remove Para quitar
Carefully use fishing line or dental floss in a sawing motion to cut adhesive
away from lock. Remaining adhesive residue can be rolled off the door.
Note: addition of heat from a hair dryer can help soften the adhesive and
aid in removal.
Use una tanza o hilo dental con cuidado, imitando el movimiento de una
sierra, para cortar el adhesivo de la traba. Los residuos del adhesivo pueden
despegarse fácilmente de la puerta. Nota: aplicar calor con un secador de pelo
puede ayudar a ablandar el adhesivo y facilitar su remoción.
To Install Para instalar
Installation Preparation Preparación de la instalación
To Use Para Usar
2
1
3
2
1
2
Wait 24 hours
Espere 24 horas
1
Mark location of lock with pencil: With paper still on adhesive, position
lock roughly 1/2” (1.27cm) from the base of the door lever and 1/4”
(.63cm) from the top of the handle (Figure 1) and lightly mark the
location (top, bottom, left, and right).
1
Marque la ubicación de la traba con lápiz: Aún con el papel adhesivo, coloque
la traba aproximadamente a 1/2” (1.27 cm) de la base de la manija de la puerta
y a 1/4” (0.63 cm) de la parte superior de la manija (Figura 1) y marque la
ubicación (arriba, abajo, izquierda y derecha).
3 Align lock with pencil marks and press firmly onto door (Figure 3).
IMPORTANT: Wait 24 hours for adhesive to set before using lock.
3Alinee la traba con las marcas en lápiz y presione firmemente sobre la puerta
(Figura 3).
IMPORTANTE: Espere 24 horas para que el adhesivo quede bien
fijado antes de utilizar la traba.
BEFORE YOU BEGIN:
Clean and dry the
contact surface.
To ensure the lock
works with your door
handle:
1 Rotate the lock arm
down by pinching
both side buttons
and pushing down
on the arm (Figure 1).
2With paper still on
2 R
emove from adhesive backing film from adhesive
(Figure 2). 2
Quite la película plástica del adhesivo de la parte posterior
(Figura 2).
1/2” (1.27 cm)
C
L
I
C
K
,
C
L
I
C
K
,
C
L
I
C
K
1 32
2
Deactivation Feature: Push all the way down until you hear a click
(Figure 2). Ensure the yellow “deactivated” indicators appear.
2
Características para desactivar: Presione hacia abajo hasta escuchar un clic (Figura
2). Asegúrese de que aparezcan los indicadores amarillos de “desactivado”.
3
To lock: Press the side buttons and raise the lock arm until it is snug
around your door handle (Figure 3). Test handle to be sure lock
functions properly.
3
Para trabar: Presione los botones laterales y levante el brazo de bloqueo hasta
que quede firme a la manija de su puerta (Figura 3). Pruebe la manija para
asegurarse de que la traba funcione correctamente.
1To unlock: While pinching the side buttons in, push the pivoting lock
arm down to unlock (Figure 1).
1Para destrabar: Mientras presiona los botones laterales, empuje el brazo de
bloqueo pivotante hacia abajo para destrabar (Figura 1).
1/4” (.63 cm)
Yellow = Deactivated
Amarillo = Desactivado
1/2” (1.27 cm)
1/4” (.63 cm)
adhesive, hold lock in position (using rough dimensions) behind
door lever and push door handle down to make sure there is
clearance for door handle to operate
(Figure 2). If lock works with
your handle. Proceed to “To Install” step 1.
ANTES DE COMENZAR:
Limpie y seque la
superficie de contacto.
Para asegurarse de
que la traba funcione
correctamente con la
manija de su puerta:
1 Rote el brazo de
bloqueo, presionando
ambos botones
laterales y empuje
el brazo hacia abajo
(Figura 1).
2 Aún con el papel adhesivo, mantenga la traba en su posición (utilizando
dimensiones aproximadas) detrás de la manija de la puerta y lleve la manija
de la puerta hacia abajo para asegurarse de que haya espacio para que la
manija funcione (Figura 2). Si la traba funciona con su manija, proceda con el
paso 1 “Para instalar”.