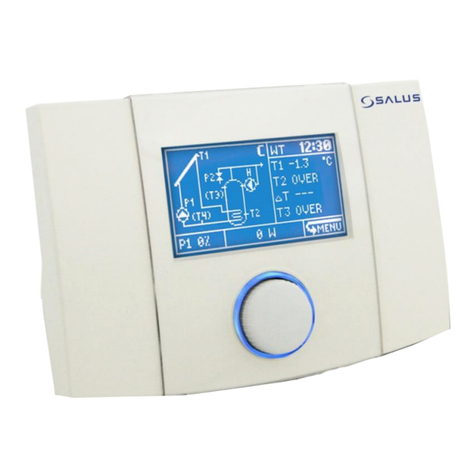
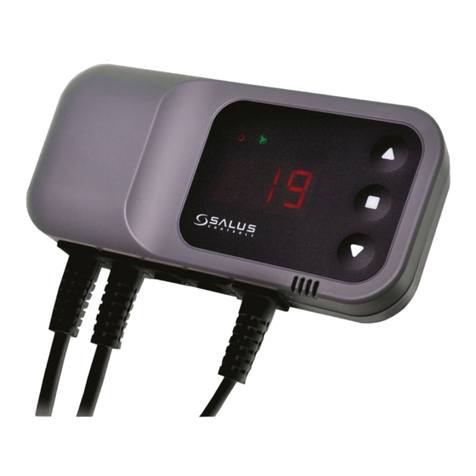
Salus PCSol 150 User manual

Controller
PCSol 150
REVISION: 1.1
SOFTWARE: 1.xx
26-05-2015
FOR SOLAR COLLECTORS
INSTALLATION AND OPERATION MANUAL


Contents
1.
SAFE INSTALLATION AND USE .....................4
2.
GENERAL ....................................................4
3.
DIRECTIVE WEEE 2002/96/EC......................5
4.
DOCUMENT KEEPING ...................................5
OPERATING MANUAL 7
5.
OPERATION ................................................8
5.1.
Temperature display .............................8
5.2.
Screen navigation .................................8
5.3.
Temperature presets.............................9
5.3.1.
TsDHW ............................................9
5.3.2.
TCOLmin ..........................................9
5.3.3.
TCOLcr ............................................9
6.
CONTROLLER SETTINGS CHANGE -OPTIONS .9
6.1.
Setting of deltas
4÷
14.................... 10
6.2.
Critical temperature alarm AL .............. 10
6.3.
Maximal DHW temperature - Max85÷9510
7.
CONTROLLER OPERATING ALGORITHM ....... 10
8.
ALARMS.................................................... 11
9.
SWITCHING OFF ....................................... 12
9.1.
Test of unit ........................................ 12
INSTALLATION MANUAL 13
10.
TECHNICAL DATA ...................................... 14
10.1.
Elements of the set............................. 14
11.
INSTALLATION .......................................... 14
11.1.
Installation of the controller ................ 14
11.2.
External circuits connection ................. 15
12.
DIAGRAM OF CONNECTIONS...................... 16
12.1.
Basic diagram of connections............... 16
12.1.1.
Use of connectors............................ 17
12.1.2.
Power supply connection .................. 17
12.1.3.
Temperature sensor connection......... 17
13.
HOW TO CLOSE CASING ............................ 18
14.
FUSE REPLACEMENT .................................. 19
15.
TROUBLESHOOTING .................................. 20
List of Figures
Fig. 2.1 Functional diagram ............................................. 4
Fig. 5.1 Controller screen ................................................ 8
Fig. 5.2 Collector temperature display. ............................. 8
Fig. 5.3 Reservoir temperature display.............................. 8
Fig. 5.4 Screen navigation. .............................................. 8
Fig. 6.1 Controller option setting/checking .......................10
Fig. 9.1 Identifying software version................................12
Fig. 11.1 How to open casing panel .................................14
Fig. 11.2 Incorrect method of casing opening ...................15
Fig. 11.3 Inside view with terminals ................................15
Fig. 12.1 Diagram of connections ....................................16
Fig. 12.2 Using clamped terminals...................................17
Fig. 12.3 Power supply connection...................................17
Fig. 12.4 Connection of temperature sensors ....................18
Fig. 13.1 Casing closing first step ....................................18
Fig. 13.2 Casing closing second step................................18
Fig. 14.1 Fuse replacement ............................................19
Fig. 15.1 Casing drawing for installation aid .....................21
4
1. SAFE INSTALLATION AND USE
The controller is designed only for household
and similar use.
Before installation, service or maintenance
and prior to making any connections, always
disconnect power supply and make sure that the
terminals and electric wires are not energized.
When the controller is switched off using
keyboard, the controller terminals are still
under dangerous voltage.
Controller may be used only for its
intended purpose.
It is required to use auxiliary protection
automatics to protect hot water system (in
case of controller or software malfunction).
Programmable settings must be selected
suitably to your system type, taking into
account all of its operating conditions.
Wrongful settings may cause the collector
or reservoir malfunction (e.g. collector
overheating, etc.).
Programmed settings may be modified
only by a person who read and understood
this manual.
Use only in heating systems that are set
up in accordance with valid regulations.
Electric system to which the controller is
connected must be protected with a cut-
out device suitable for expected loads.
Never use the controller when its casing is
damaged.
In any case do not alter the controller
components.
The controller has micro-disconnection for
connected devices (operation 2.B
according to PN-EN 60730-1). It means
that at 230V voltage supply the pump
outlets have dangerous voltage, even if
the pumps are not controlled.
Do not allow children access to the
controller.
Before you open casing, first disconnect
power supply from the unit.
The controller must be installed in
accordance to the requirements of EN
60335-1 standard, by qualified and
authorized technician.
Do not install the unit when connected to
voltage.
Do not operate the unit when it is
malfunctioning or was repaired by
unauthorized persons.
2. GENERAL
PCSol 150 is an advanced electronic
temperature controller designed for heat
distribution from solar collectors to hot utility
water reservoir. The controller is used to control
solar circuit systems accordingly to indications
from temperature sensors to recover highest
possible energy from the collector.
Fig. 2.1 Functional diagram

5
3. DIRECTIVE WEEE 2002/96/EC
The product you have purchased was designed
and made using the highest quality components
that may be recycled and reused.
If the product is marked with the
above crossed bin symbol, it means
that it meets requirements of the
European Directive 2002/96/EC.
It is recommended to know your
local electric and electronic products disposal
system.
It is recommended to process in accordance
with local regulations and not to dispose used
products to household garbage containers.
Proper disposal of outdated products will help to
avoid potential adverse effects on the
environment and human health.
4. DOCUMENT KEEPING
Please, keep carefully this installation and
operating manual and any other relevant
documents, so that they may be used at any
time. In case when you move or sell the unit,
please give the attached documents to its new
user.

6

OPERATING MANUAL
PCSol 150

8
5. OPERATION
The controller has
TOUCH&PLAY system that
facilitates its operation by the
knob with a button.
To switch the controller on
press and keep the knob
depressed for three seconds.
When on the controller
automatically starts controlling the collector
pump. Pump operation is described in section 7
about working algorithm.
When the controller is starting it runs a
test. Detailed test description is in section 9.1.
The collector pump operation is indicated
by illumination of the indicator icon under the
pump icon. When the indicator is lit –the collector
pump is working, when the indicator is not lit, it
means that the pump is not working.
Fig. 5.1 Controller screen
5.1. Temperature display
Measured temperatures from both connected
sensors are presented on PCSol 150 linear display
indicators.
Number of lit segments increases along with the
temperature rise. Measured temperature is shown
with the step of 10°C for T1 sensor (collector’s
temperature) and 5°C for T2 sensor (DHW
reservoir temperature). Subsequent segments of
the indicator indicate respective temperatures
reached in the sensor. Examples of the
temperature display is presented in Fig. 5.3, Fig.
5.4
a) b) c)
Fig. 5.2 Collector temperature display.
a) collector temperature below 10°C
b) collector temperature 70°C
c) collector temperature 120°C
a) b) c) .
Fig. 5.3 Reservoir temperature display.
a) reservoir temperature below 35°C
b) reservoir temperature above 85°C
c) reservoir temperature 55°C
5.2. Screen navigation
Screen position selection for edit is done
by knob turning. Cursor position in selection mode
is indicated by slow blinking of the indicator.
Fig. 5.4 Screen navigation.
Press the knob to start editing selected value. The
indicator will blink fast.
To remove blinking cursor from the screen (in
selection mode), keep the knob depressed for at
least 3 seconds or leave the controller untouched
for 10 seconds.

9
5.3. Temperature presets
The controller allows you to set the following
temperatures:
Temperature setting for reservoir TsDHW
Minimal collector temperature TCOLmin
Critical collector temperature TCOLcr
5.3.1. TsDHW
Temperature setting for DHW reservoir is a
temperature to which the controller will load heat
by controlling the collector pump on the base of
temperature difference in T1-T2 sensors.
Temperature setting for
DHW reservoir (TsDHW)
may be checked by placing
the cursor on T2 indicator.
By
pressing the knob (DHW
indicator will start fast
blinking) you may open
edition mode for the
DHW temperature
preset. Turn the knob
to change the preset
value. The
temperature
selection step is 5°C. Press again the knob to
confirm the temperature change. If the cursor is
left in edition mode for 10 seconds or the knob is
depressed for 3 seconds, the controller will leave
the preset change mode and any made change
will be rejected.
5.3.2. TCOLmin
Minimal collector temperature is a temperature in
T1 sensor that allows loading heat to DHW
reservoir, if the temperature difference makes it
possible. Below minimal collector temperature,
the pump operation is stopped.
To read minimal collector
temperature (TCOLmin)
move the cursor to the
indicator with sun symbol.
Press the knob (sun symbol
will start fast blinking) to
enter value editing mode.
You may change the value
by turning the knob. The
temperature selection step is
10°C. Confirmation and leaving edition is the
same as for TsDHW preset.
5.3.3. TCOLcr
Critical collector temperature is such T1 sensor
temperature that despite switching the collector
pump off, after the temperature setting is
reached, will allow discharge increasing heat in
the collector.
Critical collector
temperature setting
(TCOLcr) may be read
by moving the cursor to
T1 indicator.
Press the knob (T1
indicator will start fast
blinking) to enter value
editing mode. You may change the value by
turning the knob. The temperature selection step
is 10°C. Confirmation and leaving edition is the
same as for TsDHW
preset.
6. CONTROLLER
SETTINGS
CHANGE -
OPTIONS
Any option may be
seen by moving the
cursor to the option indicator (Fig. 5.4). To edit
options press the knob on the options indicator.
The options icon will start fast blinking. Now,
turning the knob you may browse through the
options. To modify any option, press the knob
when the option is selected. If
selected option is active, the indicator
will be blinking fast. If the option is
inactive, the indicator will be blinking
slowly. The option values are shown on the left-
hand side of the indicator.

10
a) b)
Fig. 6.1 Controller option setting/checking
a) option preset checking
b) option preset setting
Settings of each controller option are
described below.
6.1. Setting of deltas 4÷14
The controller allows to set
temperature difference dT=T1-T2 that
will start the collector pump.
Possible setting values are: 4, 6,
8, 10, 12, 14K.
6.2. Critical temperature alarm
AL
Critical temperature is such collector
temperature (T1 sensor) that despite
collector pump stopping, after reaching reservoir
temperature preset, will start collector pump in
order to discharge excessive heat from the
collector.
The controller allows you to turn on or off
loud alarm for the collector critical temperature. If
AL option is off, the controller will not sound
audible alarm when the critical temperature is
reached, but it will take alarm action (discharge
heat from the collector into the reservoir).
6.3. Maximal DHW temperature -
Max85÷95
The controller allows you to set
maximal temperature for the reservoir.
It is T2 temperature above which the
controller will start the reservoir overheating
alarm and it will stop heat loading to the
reservoir.
This alarm has the highest priority and it will
always stop the collector pump operation. It
means that even in case of critical collector
temperature, the reservoir overheating alarm will
disable the collector pump from further operation.
It possible to set three values for the
reservoir maximal temperature option: 85, 90,
95°C
7. CONTROLLER OPERATING
ALGORITHM
When switched on the controller
automatically starts to control the collector pump
operation.
When the T1 sensor temperature reaches
minimal collector operation value (TCOLmin), the
controller will enable the collector pump
operation. Such status is indicated by illumination
of the sun symbol indicator. When the collector
temperature drops two degrees below minimal
temperature preset, the sun symbol will go off
and the controller will disable the collector pump,
if the last was working.
The collector minimal temperature
TDHWmin is set by selecting edition at the
sun symbol indicator
If the temperature difference between the
collector and reservoir (T1-T2) exceeds value set
in options as d4÷14 and the minimal collector
temperature is reached (sun indicator is lit), the
controller will start the collector pump and it will
be loading heat into the reservoir (sun indicator is
lit) until the temperature difference T1-T2<dT-2
(current dT is lower than preset by two degrees)
or the collector temperature (T1 sensor) drops
below minimal collector temperature (TCOLmin-
2). Then, the collector pump will be turned off.
The controller turns the collector pump off
and on in cycles, depending on sunlight intensity
and reservoir conditions, by the time when the
DHW reservoir preset temperature (TsDHW) is
reached.
The reservoir preset temperature TsDHW
is set by selecting edition at the T2
indicator
When the DHW reservoir preset
temperature is reached, the controller will stop
the collector pump, until the reservoir
temperature (T2 sensor) is lower than the preset
by one degree (T2<TsDHW-1). Then, the
controller will restart the collector pump, if
current conditions allow the reservoir loading.
When the collector pump is stopped,
because the reservoir preset temperature has
been reached, the controller will monitor the
collector temperature (T1 sensor) and if it
exceeds preset value TCOLcr, the controller will
start the collector pump to discharge the
collector’s critical temperature. When the collector
temperature drops in relation to TCOLcr preset by
2°C, the controller will stop to force its operation.
The collector critical temperature TCOLcr
is set by selecting edition at the T1
indicator

11
Cyclical discharge of heat from the
collector may be only up to the time when DHW
reservoir maximal temperature is reached. Then,
the controller will not let loading heat into the
reservoir, even if critical temperature has been
reached in the collector.
The reservoir maximal temperature
TDHWmax is set in option menu, available
values are max85, max90, max95
Reservoir overheating alarm will be
stopped when the reservoir temperature drops in
relation to preset by 2 degrees.
If the collector temperature (T1 sensor)
exceeds 180°C, the collector pump operation will
be stopped and the collector maximal
temperature alarm will be signaled.
8. ALARMS
The controller alarms by acoustic
signal and display alarm indicator
blinking. The unit recognizes five
alarm situations that may be
identified in the controller screen as described in
the table below.
List of alarms
T1 sensor malfunction, interruption
Alarm on incorrect
operation or damage to T1
sensor. Signals interruption
in T1 sensor circuit. Check if
the sensor is not e.g. off the
unit or the connecting wire
is cut.
Collector pump operation
will be stopped.
During the alarm the collector temperature
indicator for 10÷90°C temperatures is blinking,
while 100°C temperature is lit steadily.
T1 sensor malfunction, short circuit
Alarm on incorrect
operation or damage to T1
sensor. Signals short circuit
in T1 sensor circuit. Check
connections and
temperature sensor wiring
for short circuit caused e.g.
by mechanical damage of
wire, crushed sensor tube
or melted insulation.
Collector pump operation will be stopped.
During the alarm the collector temperature
indicator for 20÷100°C is blinking, while 10°C
temperature is lit steadily.
T2 sensor malfunction, interruption
Alarm on incorrect operation or damage to T2
sensor. Signals interruption in T2 sensor circuit.
Check if the sensor is not e.g. off the unit or the
connecting wire is cut.
Collector pump operation will be stopped.
During the alarm the collector temperature
indicator for 35÷75°C is blinking, while 80°C
temperature is lit steadily.
T2 sensor malfunction, short circuit
Alarm on incorrect operation or damage to T1
sensor. Signals short circuit in T1 sensor circuit.
Check connections and temperature sensor wiring
for short circuit caused e.g. by mechanical
damage of wire, crushed sensor tube or melted
insulation.
Collector pump operation will be stopped.
During the alarm the collector temperature
indicator for 40÷80°C is blinking, while 35°C
temperature is lit steadily.
DHW reservoir overheating
Alarm on hot water reservoir
overheating. It is initiated when
the reservoir temperature reaches
value set in options as max. It
means excessive heat in reservoir.
Frequent alarms may indicate too
low heat capacity of the reservoir
for given collector surface.
Collector pump operation will
be stopped.
Alarm will be off and the pump operation
restarted, when the reservoir temperature drops
by two degrees in relation to max preset.
During alarm the reservoir temperature indicator
(entire) is blinking.
Collector critical temperature
Alarm on reaching collector
critical temperature preset.
If the alarm is not connected
with switching off the
collector pump when set TS
sensor temperature is
reached, it may indicate too
low pump capacity, pump is
operated at too law speed.
Alarm allows normal operation of the system and
it may be set off in option menu by disabling AL.
Collector pump will be started, unless other
alarm is on and the reservoir is not
overheated.
During alarm the collector temperature indicator
shows current temperature in collector and blinks
all.
Collector maximal temperature

12
3sek.
Alarm on reaching the
collector maximal
temperature 180°C. Alarm
stops the collector pump
operation. Alarm will be off
when the collector
temperature drops below
178°C and the pump
operation will be allowed.
Collector pump operation will be stopped.
During alarm the collector temperature indicator
shows current temperature in collector. Segments
10, 20 ,30°C are not lit.
9. SWITCHING OFF
To switch the controller off, keep the
knob depressed for about 3 seconds in
displaying mode. If the controller is in
other mode, first leave the mode.
To leave edition mode, confirm
set value or keep the knob depressed
for 3 seconds or leave the controller for 10
seconds and it will close the selection mode.
To leave the selection mode, keep the
knob depressed for 3 seconds or leave the
controller for 10 seconds.
After switching the controller off, the
pump operation will be stopped.
9.1. Test of unit
When switched on, the unit undergoes some
testing. At the time the display shows alternately
the testing screen and the software version.
Testing screen should illuminate all segments
of display; they should be lit with the same light.
If any segments are not lit during the testing
screen display, it indicates the controller damage.
Contact your local service.
Software version will be useful at possible
contacts with the service.
Software version is identified from lines that
display the collector and the reservoir
temperatures. Example of testing screen is
presented in Fig. 9.1
Fig. 9.1 Identifying software version
The example screen presents software version
1.20
The table below includes numbers of software
versions and corresponding temperature
indications.
Collector
temp.
Number 1
Reservoir
temp.
Number 2
100°C
9
80°C
90
90°C
8
75°C
80
80°C
7
70°C
70
70°C
6
65°C
60
60°C
5
60°C
50
50°C
4
55°C
40
40°C
3
50°C
30
30°C
2
45°C
20
20°C
1
40°C
10
10°C
0
35°C
0
1
.
20

INSTALLATION MANUAL
PCSol 150

14
10. TECHNICAL DATA
Measurement inputs
solar collector temperature (T1, terminals 9 and 10)
d.h.w. reservoir temperature (T2, terminals 11 and 12)
High-voltage output
DHW pump circuit control CWU P1(terminals P1L and P1N):
230V/0.5 A
Controller supply:
230 V, I=0.52A*, 50 Hz
Nominal impulse voltage
2500 V~
Operating conditions
0 ≤ Ta ≤ 40 °C, humidity 10-90 %, without condensation
Protection degree
IP 20
Weight
~280 g (controller only)
Dimensions WxHxL
140x95x40
* power intake only by controller is 0.02A
Table of temperature measurement accuracy:
Controller internal structure
Pt1000 class B (CT6 and CT6w)
Temperature range
-40 ÷0 °C
0 ÷130°C
130 ÷210°C
Accuracy*
±3 °C
±2 °C
±3 °C
Displayed range / Step
T1
10 ÷200°C with step of 10 K
T2
35 ÷80°C with step of 5 K
Measured range / Step
T1
-40 ÷210°C with step of 0,6 K
T2
-10 ÷ 110°C with step of 0,5 K
* unit at ambient temperature of 23°C
10.1. Elements of the set
- Controller PCSol 150
- Temperature sensor T1(CT6w)
- Temperature sensor T2(CT6)
- Installation and operating manual
1 pc.
1 pc.
1 pc.
1 pc.
11. INSTALLATION
The controller is designed for operation in the
environment where only dry conductive
contaminations may be present (2 degree of
contamination according to PN-EN 60730-1).
In addition, the controller may not be used in
water condensation conditions and it may not be
exposed to water.
The unit software does not ensure
required protection level that must be
assured by external protections of the
system.
11.1. Installation of the controller
The controller is designed for vertical wall-
mounted installation. Mounting hole locations are
presented in Fig. 15.1 External wires are supposed
to be leaded out of the wall (flushed).
Before opening the unit casing,
disconnect power supply. The unit
installation must be done at disconnected
voltage.
Controller must be installed by qualified
and authorized technichian in accordance
with EN 60335-1 standard.
Fig. 11.1 shows how to open the panel
Fig. 11.1 How to open casing panel

15
Do not open casing by levering its cover
from below. It will break the cover clip.
Fig. 11.2 Incorrect method of casing opening
The controller must be installed in a way that:
Degree of protection is ensured suitably
to environmental conditions
Dust and water access is prevented
Permissible operating temperature is not
exceeded (40°C for controller)
Air exchange inside casing is allowed
Access to dangerous parts is disabled
Electrical installation, to which the
controller is connected, must be equipped
with the device that allows disconnection
of both supply poles, in accordance
regulations that applies to such systems
11.2. External circuits connection
Fig. 11.3 Inside view with terminals

16
12. DIAGRAM OF CONNECTIONS
See below diagram of connections for PCSol 150 controller. Details of connecting to individual ports are
presented in sections 12.1.2÷12.1.3
Presented hydraulic diagram will not replace
central heating technical design and may be
used only for informative purposes.
Collector and hot water reservoir must be
installed in accordance with local regulations
and their manufacturers’ instructions.
12.1. Basic diagram of connections
Fig. 12.1 Diagram of connections

17
12.1.1. Use of connectors
The controller is provided with spring loaded
terminals suitable for reception of wire with an
end sleeve.
The table below includes permissible size ranges
for wires connected to the controller terminals:
Circuit type
Wire cross-section
Power supply circuits
0.75÷1mm2*
Low-voltage circuits
0.25÷0.75mm2
*For installations with bare wire cables the maximal size is
1.5mm2
For good connection between the terminal
and cable, insulation and sleeve free length
should be in the range of 8÷10mm.
To place wire in terminal press the terminal push
with flat screwdriver, insert the wire end
(with a sleeve on) and then release the push.
Fig. 12.2 Using clamped terminals
12.1.2. Power supply connection
Unit must be installed at disconnected
power supply voltage.
The controller is designed for supply
voltage 230V~, 50Hz. Supply is connected to
terminals marked „”, „L” and „N”. Electric
connection diagram is presented in Fig. 12.3
230V supply wires must be lead so as
their contact with sensor and other low-voltage
cabling is prevented, additionally, all cables may
not contact surfaces with temperatures that
exceed the cables operating temperature limits.
The controller has no PE protective
connector, because the controller itself does not
require grounding. PE terminals of the pump shall
be connected with PE of supply network,
according to periphery instructions and regulation
concerning electric systems. Proper electric
installation method is responsibility of the
electrician. It is recommended to connect PE
circuits through external screw connector, as
presented in diagrams.
Collector pump must be installed on the
return from the reservoir
Fig. 12.3 Power supply connection
12.1.3. Temperature sensor connection
PCSol 150 controller works with temperature
sensors with pt1000 structure, types CT6w and
CT6, with the temperature ranges:
Sensor
Type
Temperature range
T1
CT6w
(collector)
-40÷210°C
T2
CT6 (reservoir)
-10÷110°C
Sensor CT6 is provided in standard with 2m
long cable, while the collector sensor CT6w with
cable. If you need longer cables, use
0.5÷1.5mm2 cable not longer than 30 meters,
and connection points must secured against short
circuit and humidity.
CT6w sensor is provided with special
high-temperature silica cables, it must
not be replaced with CT6 sensor, because
of possible insulation damage when the
collector temperature is high.

18
Fig. 12.4 Connection of temperature sensors
Temperature sensors are equipped with
brass coat with diameter of 6mm and 50mm
long. They should be installed possibly close to
the temperature measurement point. The sensors
must be installed so that the brass coat is
thermally insulated from the environment.
The collector temperature sensor must be
located in the collector tube possibly deep, as
this is conditional for correct measurement.
The reservoir temperature sensor must be
located in thermometric tube between the supply
and return connectors of the collector exchanger
pipe coil.
The sensors resistance per temperature
table:
CT6w\CT6
Temp.
°C
Min.
Ω
Nom.
Ω
Max.
Ω
0
999,7
1000,0
1000,3
25
1096,92
1097,35
1097,77
50
1193,42
1193,97
1194,52
100
1384,26
1385,06
1385,86
125*
1478,59
1479,51
1480,44
150*
1572,2
1573,25
1574,30
*only for CT6w sensor
13. HOW TO CLOSE CASING
To close the unit casing hook the casing cover
with recesses against the base insets (shown in
Fig. 13.1)
Fig. 13.1 Casing closing first step
Then, press the cover in place indicated
by red arrow (Fig. 13.2), until you clearly hear
the latch click.
Fig. 13.2 Casing closing second step

19
14. FUSE REPLACEMENT
Before fuse replacement, disconnect the
unit from power supply.
It is not possible to check the fuse visually.
Fuse may be checked by means of
ohmmeter. Infinite resistance in the fuse
circuit means that the fuse is burnt and
must be replaced.
For the unit use sub-miniature slow blow
fuse 1.25A compliant to IEC 60127 and with
maximum switching current not lower than 100A.
Example of such fuse is slow blow fuse 1.25A
type MXT-250 (from Schurter). To replace the
fuse, disconnect the controller from power
supply, open its casing and replace the burnt
fuse with a new one (Fig. 14.1)
Fig. 14.1 Fuse replacement

15. TROUBLESHOOTING
Symptom
Remedy
Controller is not working
1. Start the controller by keeping its knob depressed for at least
2 seconds
2. Check power supply
3. Check fuse in the controller
Controller alarms on collector
overheating
1. Collector pump runs at too low speed
2. Collector pump capacity is too low, pump is not able to
transfer heat to reservoir exchanger
3. Temperature preset for reservoir has been reached and
controller has disabled the pump. Collector pump is switched on
by collector’s critical temperature; relevant laud alarm may be
set off in options.
Record of changes
First edition
Rev. 1.1 z of 20-04-2012
1. Update of unit current
The manufacturer reserves the right to
make changes in design and software
without prior notice
Table of contents
Other Salus Controllers manuals

Salus
Salus PC16F User manual

Salus
Salus TRV10RFM User manual

Salus
Salus RX10RF User manual

Salus
Salus EP310 User manual

Salus
Salus TRV10RFM-3 User manual

Salus
Salus WT100 Specification sheet

Salus
Salus SC102ZB User manual

Salus
Salus AKL06P User manual

Salus
Salus PC11 User manual

Salus
Salus AKL04P User manual
Popular Controllers manuals by other brands

DX Engineering
DX Engineering DXE-CC-8A user manual

Interactive Instruments
Interactive Instruments Jet Stream 500 Program manual

CEM Systems
CEM Systems Ethernet Input Output Controller EIOC specification

Lust
Lust VF1000M TR manual

HomeSeer
HomeSeer HS-FC200+ quick guide

Roland
Roland GLC-1 Owner's manual and user's guide