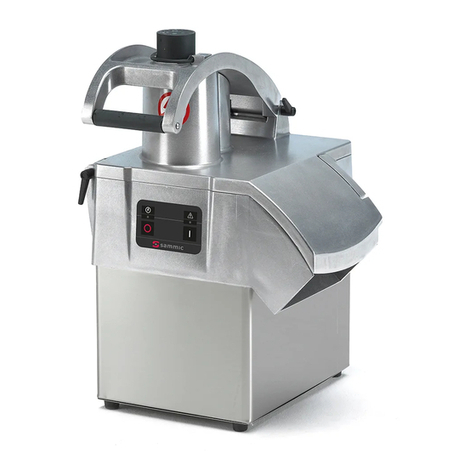
Sammic CK-241 User manual

INSTRUCCIONES
USERS MANUAL
GEBRAUCHSANWEISUNG
MODE D’EMPLOI
ISTRUZIONI PER L’USO
MANUAL DE INSTRUÇÕES
Cortadora de hortalizas - cutter
Vegetable preparation machine - cutter
Gemüseschneider - Cutter
Cortadora de hortalizas - cutter
Tagliaverdure - cutter
Cortadora de hortalizas - cutter
Krajarka do warzyw
ES
EN
DE
FR
IT
PT
PL
CK-241
CA-21
K-41

- 2 -
2
- 2 -
FIG 1
FIG 2

- 3 -
3
- 3 -
FIG 3
FIG 5
FIG 7
FIG 4
FIG 6

- 4 -
ES
4
- 4 -
FIG 1
1 – Conexión a red.
2 – Estado/Seguridad.
3 – Marcha.
4 – PULSE.
5 – Parada.
Operacion Cantidad maxima
Cutter
Cuchilla
recomendada
Notas
Carne cruda en general 1-1.5 Kg Lisa
Carne cocinada o Jamón York 2-2.5 Kg Lisa Recomendacion: Pulse
Patés 1-1.5 Kg Lisa o Microdentada
Pescados 1.5-2 Kg Lisa
Masas y pastas 1-1.5 Kg Lisa o Microdentada
Pan rallado 0.5-1 Kg Microdentada
Pures, salsas, sopas 2 litros Microdentada
Mayonesa 3 litros Todos
Azúcar glass 1-1.5 Kg Lisa
Picar cebolla, ajo, perejil 1 Kg Lisa o Microdentada Recomendacion: Pulse
FIG 2 - Descripción técnica
A - Disco.
B - Pisador.
C - Pasador desmontable.
D - Mazo.
E - Tapa.
F - Tapa inferior.
G - Rejilla.
H - Rampa.
I - Expulsor.
J - Teclado.
K - Bloque motor.
M - Tapa olla.
N - Cuchilla.
O - Olla.

- 5 -
ES
5
- 5 -
Instrucciones originales
Este manual describe la instalación, funcionamiento y mantenimiento de la
CK-241, CA-21, K-41.
Cada máquina lleva las siguientes indicaciones:
- Nombre y dirección del fabricante: SAMMIC S.L - Basarte 1 Azkoitia.
Gipuzkoa (SPAIN)
- Modelo de máquina y número de serie.
- Marcas de homologación.
- En la hoja de garantía y en la declaración de conformidad se indican tam-
bién el número de serie y toda la información sobre la normativa vigente bajo
la cual ha sido fabricado este aparato.
NOTA: Los modelos de 120V han sido homologados bajo la norma de
seguridad UL-763 y norma de higiene y materiales ANSI NSF-8.
OBSERVACIONES IMPORTANTES
- Para reducir la posibilidad de accidentes (cortocir-
cuitos, heridas o incendios, etc.), obtener las mejores
prestaciones y una buena conservación de la máqui-
na, es necesario leer y seguir atentamente estas ins-
truccio- nes. Conserve las instrucciones y haga que
todos los usuarios de la maquina las lean antes de su
utilización. Conserve también la hoja de garantía, la
declaración de conformidad.
- Los discos (A), rejillas (G), y el conjunto cuchillas (N)
hay que manipularlas cuidadosamente tanto durante
el desembalaje, como durante el uso y limpieza de las
mismas y de la máquina. Se recomienda utilizar guan-
tes resistentes al corte.
- Esta máquina es de uso vigilado. No dejar nunca la
máquina en marcha sin que alguien esté a su cargo.
- Antes de utilizar la máquina por primera vez, limpiar
la zona de contacto con alimentos con agua jabonosa
(templada), aclarar y dejarla secar.
- Al término de cada operación y antes de cualquier
intervención para cambio de herramientas o cabezales,
limpieza, revisión o reparación de la máquina, es obli-
gatorio desconectar la máquina de la red.
- Este aparato no está destinado para ser usado por
personas (incluidos niños) cuyas capacidades físicas,
sensoriales o mentales estén reducidas, o carezcan de
experiencia o conocimiento, salvo si han tenido supervi-
sión o instrucciones relativas al uso del aparato por una
persona responsable de su seguridad. Los niños tienen
que ser supervisados para asegurar que no juegan con
la máquina.
- Los modelos citados en el manual han sido diseña-
dos para el uso en hostelería, restauración catering y
comercial, pero nunca para una fabricación industrial
continuada.
- El fabricante no se responsabilizará en aquellos casos
en el que el uso haya sido incorrecto o distinta al citado
anteriormente. Tales como, el uso sanitario, uso quími-
co, uso en atmosferas explosivas…
EMPLAZAMIENTO
actúe como caja de resonancia, a una altura que sea cómoda y no pro-
duzca fatiga. Colocar el recipiente de recuperación por debajo de la boca
de salida de los alimentos. La máquina no está sujeta y es fácilmente
desplazable.
CONEXIÓN ELÉCTRICA
¡ATENCIÓN! ES OBLIGATORIA LA CONEXIÓN A TIERRA. PELIGRO DE
ELECTROCUCIÓN.
Comprobar que las características eléctricas del equipo coinciden con el
de la red.
El equipo se suministra para tensión de 230V 50 Hz monofásica, 220V 60Hz
monofásica o 120V50-60Hz monofásica.
Preparar una toma de corriente mural, con interruptor general de secciona-
miento, y protección diferencial y magneto-térmica de 2P (de 13A a 20A)
con su clavija correspondiente. Colocar un interruptor general o la clavija
de forma visible y accesible para la desconexión de la máquina. Este equi-
po se puede conectar en una instalación eléctrica con una impedancia no
red eléctrica.
UTILIZACIÓN
- No dejar que la comodidad o la familiaridad con el producto (a base de
utilizarlo repetidamente) sustituya la estricta observancia de las normas de
seguridad, manténgase alerta, ponga atención a lo que hace y use el sentido
común al operar el equipo.
-
gas, alcohol o medicamentos. Si utiliza la herramienta de forma no segura o
incorrecta, puede sufrir daños corporales o materiales.
- NUNCA abrir la tapa antes de que el motor se haya parado por completo.
- NUNCA suprimir los sistemas de bloqueo y de seguridad.
- NUNCA introducir la mano en la boca de salida o en las tolvas de introduc-
ción de alimentos.
- Sólo introduzca alimentos (nunca objetos) en las tolvas.
- NUNCA usar objetos externos para guiar los ingredientes en las tolvas de
entrada o de bocas de salida.
- No se debe sobrecargar la máquina.
- No ejercer excesiva presión con los pisadores, puede deteriorar el producto
y forzar el motor en exceso.
- Se recomienda hacer periodos de marcha de 30 minutos con descansos
de 15 minutos.
LIMPIEZA
- Es necesario limpiar la máquina al término de cada día o cada vez que se
cambie de producto o de accesorio.
- Todos los elementos que están en contacto con los alimentos se deben
limpiar inmediatamente después de su utilización, con agua caliente y un
detergente admitido en alimentación. Después, aclarar con abundante agua
caliente y desinfectar con un paño suave impregnado en alcohol etílico (90 º).
- NO SE DEBEN utilizar detergentes abrasivos (agua-fuerte, lejía concen-
trada etc…) ni estropajos o rasquetas que contengan acero común. Pueden
causar la degradación u oxidación de la máquina.

- 6 -
ES
- En caso de que los elementos desmontables de la CK y CA sean intro-
ducidos en un lavavajillas para su limpieza, utilizar detergentes que no
deterioren los mismos.
- NO SE DEBE limpiar el exterior de la máquina con un chorro directo de agua.
Emplear para su limpieza un paño húmedo y cualquier detergente habitual.
MANTENIMIENTO
máquina. En caso de detectar alguna anomalía llamar al servicio técnico
reconocido por SAMMIC.
-
var la estanqueidad
de esta zona. Cada vez que se suelte el eje de arrastre para el mantenimien-
to se recomienda colocar un retén nuevo.
- Si el cable de alimentación se deteriora es preciso instalar uno nuevo antes
de volver a utilizar la máquina. Dicho recambio sólo podrá ser realizado por
un servicio técnico reconocido por SAMMIC.
- Si el bloque motor (K) se deteriora es preciso sustituir las piezas afectadas
antes de volver a utilizar la máquina. Dicho recambio sólo podrá ser realiza-
do por un servicio técnico reconocido por SAMMIC.
- El nivel de ruido de la máquina según la norma EN ISO 11201:1995,
en marcha y colocada a 1,6m de altura y a 1 m de distancia, es inferior a
70dB(A). Ruido de fondo:32dB(A).
FUNCIONES DEL CONTROL ELECTRÓNICO Y SU
FUNCIONAMIENTO
PILOTO MAQUINA EN TENSION (1):
Al conectar la cortadora a la red, este piloto (1) se enciende indicando que
la cortadora esta alimentada.
PILOTO ESTADO/SEGURIDAD (2):
Este piloto (2) nos da información sobre el estado de la máquina.
Modo cortadora:
- Con motor parado, tapa (E) cerrada y pisador (B) abajo esta apagado.
- Con motor en marcha, tapa (E) cerrada y pisador (B) abajo esta encendido.
- Con tapa (E) cerrada y pisador (B) arriba parpadea.
- Con tapa (E) abierta parpadea.
Modo cutter:
- Con el motor parado, olla (O) y tapa olla (M) cerrada esta apagado.
- Con el motor en marcha, olla (O) y tapa olla (M) cerrada esta encendido.
PULSADOR MARCHA (3)
Modo cortadora:
- Con la tapa (E) cerrada y pisador (B) abajo, si pulsamos esta tecla el
motor arranca.
- Con el motor parado, tapa (E) cerrada y pisador (B) arriba, si pulsamos esta
tecla, el piloto “seguridad” (2) parpadea. Al bajar el pisador (B) el motor arranca.
- Con el motor en marcha si subimos el pisador (B) el motor se para. Al bajar
el pisador (B) el motor vuelve a arrancar automáticamente. Si en 30 sg no se
ha bajado el pisador (B) es necesario volver a pulsar el pulsador de “Marcha”
(3) para poder arrancar la máquina.
- Con el motor en marcha si se abre la tapa (E) el motor se para. Al cerrar la
tapa (E) el motor vuelve a arrancar automáticamente. Si en 30 sg no se ha
cerrado la tapa (E) es necesario volver a pulsar el pulsador de “Marcha” (3)
para poder arrancar la máquina.
- Si se deja la máquina en marcha con el pisador (B) abajo a los 30 minutos
la máquina se para automáticamente.
Modo cutter:
- Estando la olla (O) en su posición y la tapa olla (M) cerrada, si pulsamos
este botón la máquina se pone en marcha.
PULSE (4)
El motor se pone en marcha mientras está pulsado esta tecla y se para al
soltarlo.
PARADA (5)
La pulsación de esta tecla para el motor.
PUESTA EN MARCHA FUNCIONAMIENTO
GENERAL
Modo de funcionamiento “Cortadora de Hortalizas” (CK-241, CA-21)
Es posible colocar el accesorio “Cortadora Hortalizas” (F) en dos direcciones
diferentes (FIG 3) de modo que la salida para los productos quede en un
sentido o en otro.
Con la máquina desconectada de red:
- Colocar el accesorio “Cortadora Hortalizas” (F) sobre el bloque motor y
girarlo en sentido anti-horario según se indica en los dibujos (FIG 4).
- Es necesario colocar la tapa (E) según se indica en los dibujos girándolo
en sentido anti-horario (FIG-5).
los dibujos (FIG 6).
Colocación de discos (A) y rejillas (G) (FIG 2)
- Retirar el conjunto tapa (E) – pisador (B) girándolo en sentido horario (FIG 4).
- Colocar el expulsor (H) en su alojamiento del eje de arrastre o la rampa
de evacuación (H).
- La rejilla (G) se inserta en la cavidad de la tapa inferior (F) cuando el pro-
ceso lo requiera.
- Colocar un disco (A) en el eje de arrastre. Los discos que trabajan con
- Volver a colocar conjunto tapa (E) – pisador (B) girándolo en sentido anti-
horario.
Funcionamiento con la tolva normal (Q) y pisador (B). CK-241 y CA-21
se hace girándolo en el sentido antihorario.
- Poner en marcha la cortadora.
- Levantar el pisador (B). El motor separa.
- Introducir los productos en la tolva normal (Q).
- Al empezar a bajar el pisador (B) el motor arranca y empieza el proceso
de corte. Empujar el producto bajando suavemente el pisador (B). Repetir la
operación una y otra vez.
- Pulsar “Parada” (14) al terminar la producción.
Funcionamiento con tolva cilíndrica (P). CK-241, CA-21.
Esta tolva de Ø47mm se utiliza para el corte de productos cilíndricos y alar-
gados, como las zanahorias, endivias, pepinos, etc.

- 7 -
ES
- Poner en marcha la cortadora.
- Desbloquear el mazo (D) girándolo en el sentido horario.
“Mazo”(D). Repetir la operación una y otra vez.
- Pulsar “Parada” (14) al terminar la producción.
IMPORTANTE: Cuando no se utiliza la tolva cilíndrica, dejar el mazo (D)
dentro de la tolva.
Modo de funcionamiento “Cutter”. (CK-241, K-41 y KE-41):
Con la máquina desconectada de red:
Colocar el accesorio “Cutter” sobre el bloque motor y girarlo en sentido
anti-horario según el dibujo. Para que la máquina funcione el asa tiene que
colocarse justo encima del teclado. (Fig. 7)
Colocar el “Conjunto de cuchillas” (N) y cerrar la tapa (M) girándola en
sentido antihorario hasta que quede encajada y bloqueada. La tapa (M) va
está funcionando
El motor se pone en marcha al pulsar la tecla de marcha (3), y está en
marcha hasta volver a pulsar la tecla de parada (5) o la tecla PULSE (4).
También arranca y está en marcha mientras se mantenga pulsada la tecla
de PULSE (4).
LIMPIEZA
Limpieza de accesorio “Cortadora Hortalizas” CK-241 y CA-21:
- Desbloquear la tapa (E) girándolo en sentido horario según indicado en el
dibujo y retirarla.
- Retirar el disco (A) girándolo en sentido horario y tirando de él hacia arriba cui-
dadosamente. Retirar la rejilla (G) y el expulsor (I) o la rampa de evacuación (H).
- Es posible desmontar el pisador (B) y la tapa articulada (F) para facilitar
su limpieza.
ATENCION: Para poder retirar los productos encajados en las rejillas
(G) basta con golpearlas con una patata alargada o una zanahoria ente-
ra en el sentido de corte. De esta forma no se daña la rejilla (G). Tener
precaución con el lo de la rejilla (G). Nunca utilizar objetos duros para
golpear la rejilla (G).
Limpieza de accesorio “Cutter” (CK-241 y K-41):
- Si la suciedad está seca, adherida a la olla y a las cuchillas, poner agua
caliente y detergente en la olla y hacer funcionar a la máquina para que los
residuos se ablanden.
- Para evitar salpicaduras, una vez procesado el producto y quitar la olla (O)
con la cuchilla dentro(N).
Limpieza del bloque motor CK:
El exterior de la máquina NO SE DEBE limpiar con un chorro directo de
agua. Emplear para su limpieza un paño húmedo y cualquier detergente
habitual. NO SE DEBEN utilizar detergentes abrasivos (agua fuerte, lejía
concentrada etc…) ni estropajos o rasquetas que contengan acero común,
pueden causar el deterioro y la oxidación de la máquina.
Accesorio “Cortadora Hortalizas”: Funcionamiento de discos (A) y
rejillas (G).
- Discos (A):
1 y 2mm.
- Discos (A) de FCS-3 a FCS-12 para obtener rodajas de 3 a 12mm de
patatas, zanahorias, remolachas, coles, pepinos, calabacines, cebollas,
rábanos, etc.
- Discos (A) ralladores tipo SHS, desde 2 a 7mm, para deshilar verduras y
rallar queso, pan, nueces, almendras, etc.
Para cortar patatas del tipo “paja” y “cerilla”, tiras de zanahorias, apio, remo-
lacha, etc., discos (A) FCES
- Discos (A) SHSF y SHSG para rallar el pan, queso, chocolate, etc.
- Discos (A) y rejillas (G). Combinaciones posibles:
- Los discos(A) FCS-8, FCS-10 y FCS-12 combinadas con las rejillas(G),
FFS- 8 y FFS-10 se obtienen patatas del tipo “fritas”.
- Los discos (A) FCS-8, FCS-10 y FCS-12 combinados con las rejillas (G) FMS-
8, FMS- 10 y FMS-12, se obtienen dados y/o cubos de 8 a 12 mm de patatas
para tortillas, de hortalizas y frutas para macedonia, ensalada rusa, etc.
Expulsor (I) y rampa (H).
- Expulsor: Para extraer el producto cortado a gran velocidad y mantener así
una producción grande.
- Rampa: El producto va cayendo por gravedad poco a poco. Para dañar
menos el producto cortado.
Accesorio “Cutter”
Mediante el accesorio “Cutter” se puede:
PICAR: Perejil, ajo, cebolla, queso, jamón cocido, carne cocinada, etc...
SALSAS: Tomate, mayonesa, tártara, alioli, verde, gazpacho, etc...
PURES: Legumbres, verduras, compotas, etc... PASTAS: Gambas, mejillo-
nes, ostras, carne, embutidos, etc...
SOPAS / CREMAS: Marisco, ajo, verduras, legumbres, carne, etc...
En repostería:
PICAR: Almendras, avellanas, chocolate, pasas, frutas para macedonia,
etc... PREPARAR: Azúcar glass, pasta de almendras, batir nata; crema de
chocolate, vainilla, café, fresas y frutas en general, etc...
AFILADO DE CUCHILLAS
ATENCION: Los discos (A), rejillas (G) y el conjunto cuchillas (N) están
provistos de cuchillas muy aladas, por tanto, hay que manipularlas
cuidadosamente.
Las cuchillas de los discos (A) y del Conjunto Cuchillas (N) se desmontan
blandas conservando el ángulo de corte de la cuchilla.
ELIMINACION
Embalaje
Para eliminar el embalaje siga las normas de protección medioambiental
- 8 -
ES
vigentes en su país.
Máquina
Esta máquina está sujeta a las disposiciones de la Directiva Europea
2012/19/UE sobre residuos de aparatos eléctricos y electrónicos RAEE
/ WEEE (Waste of Electrical and Electronic Equipment). La máquina está
marcada con el símbolo WEEE:
- No elimine esta máquina con la basura doméstica normal.
- Deseche la máquina en un centro de residuos autorizado o a través de las
organizaciones municipales de desecho de residuos. Observe las normas
vigentes.
Obtendrá información sobre la eliminación y la situación del centro de reci-
claje más cercano, por ejemplo, en el servicio de limpieza de su municipio
INCIDENCIAS DE FUNCIONAMIENTO
Estando la tapa (E) cerrada y el pisador (B) abajo pulsando marcha la cor-
tadora no arranca:
- La cortadora está conectada y el piloto “Máquina en tensión” (1) esta apa-
gado. No llega alimentación a la placa o la placa esta estropeada.
- Si el piloto “Seguridad” (2) parpadea lentamente con el pisador (B) abajo
hay algún problema en el micro de seguridad del pisador (B).
- Si el piloto “Seguridad” (2) parpadea con rapidez hay algún problema en el
puente “tapa” en la placa electrónica.
- Si el piloto “Máquina en tensión” (1) y “Seguridades” (2) parpadean alter-
nándose, la protección térmica del motor ha actuado. Esperar hasta que se
agarrotadas, problemas del relé arranque o condensadores...).
colocado, al pulsar cualquier tecla el piloto maquina en tensión se apaga
indicando que ha detectado la tecla.
La cortadora estaba en marcha y se ha parado sin pulsar ninguna tecla. Si
estando la máquina en marcha sin actuar sobre el pisador (B) la máquina se
para automáticamente a los 30 minutos.
Nota: La placa electrónica tiene los siguientes pilotos e indicadores:
- Power: Se enciende si hay tensión en la placa.
- SEG: Se enciende si todas las seguridades están cerradas.
- RL1, RL, RL3: Se encienden cuando el relé correspondiente cierra su
contacto.
-Interruptor SW1: Posición OFF cortadora 1 velocidad. Posición ON cor-
tadora 2 velocidades.
- Fus1-Var1: La placa tiene un fusible y un varistor de protección.
Al bajar el pisador el motor no arranca:
- Si se deja el pisador (B) abierto más de 30 Sg es necesario volver a pulsar
“Marcha” (3) para rearmar la cortadora.
- Puede que la tolva está demasiado llena y el pisador no actúa sobre el
micro. Vaciar parte de la tolva he intentarlo de nuevo.
- Si el ruido de la cortadora es excesivo o el disco roza en alguna parte, es
probable que los rodamientos del eje principal se hayan deteriorado.
Puede que algún trozo de alimento este adherido desequilibrado los mismos.

- 9 -
ES
CK-241
CARACTERÍSTICAS CK-241
Producción / hora 50-350 kg. - 110-772 lbs.
Alimentación eléctrica 230V / 50 Hz / 1~ 220V / 60 Hz / 1~ 120V / 60 Hz / 1~
Potencia eléctrica 800 W - 1 HP 800 W - 1 HP 1100 W - 1.5 HP
Velocidad (rpm) 1500 1500 1800
Dimensiones externas
-Ancho 378 mm. / 14 29/32”
-Fondo 309 mm. / 12 11/64”
-Alto 533 mm. / 20 31/32”
Peso neto 14,2 kg. / 31.3 lbs.

- 10 -
ES
CA-21
CARACTERÍSTICAS CK-21
Producción / hora 50-350 kg. - 110-772 lbs.
Alimentación eléctrica 230V / 50 Hz / 1~ 220V / 60 Hz / 1~ 120V / 60 Hz / 1~
Potencia eléctrica 800 W - 1 HP 800 W - 1 HP 1100 W - 1.5 HP
Velocidad (rpm) 1500 1500 1800
Dimensiones externas
-Ancho 378 mm. / 14 29/32”
-Fondo 309 mm. / 12 11/64”
-Alto 533 mm. / 20 31/32”
Peso neto 15,3 kg. / 33.73 lbs.

- 11 -
ES
K-41
CARACTERÍSTICAS K-41
Alimentación eléctrica 230V / 50 Hz / 1~ 220V / 60 Hz / 1~ 120V / 60 Hz / 1~
Potencia eléctrica 800 W - 1 HP 800 W - 1 HP 1100 W - 1.5 HP
Velocidad (rpm) 1500 1500 1800
Capacidad cuba 4,4 l. / 4,65 qt.
Dimensiones cuba mm ø 193 x161 h
Dimensiones externas
-Ancho 252 mm. / 9 59/64”
-Fondo 309 mm. / 12 11/64”
-Alto 434 mm. / 17 5/64”
Peso neto 14,2 kg. / 31.3 lbs.

- 12 -
EN
FIG 1
1 – Mains connection.
2 – Status/Safety.
3 – Start.
4 – PRESS.
5 – Stop.
Operation Maximum quantity
Cutter
Recommended
blade
Notes
Raw meat in general 1-1.5 kg Smooth
Cooked meat or boiled ham 2-2.5 kg Smooth Recommendation:
Press
Pâtés 1-1.5 kg Smooth or micro-
toothed
Fish 1.5-2 kg Smooth
Dough and pasta 1-1.5 kg Smooth or micro-
toothed
Breadcrumbs 0.5-1 kg Micro-toothed
Purées, sauces, soups 2 litres Micro-toothed
Mayonnaise 3 litres All
Icing sugar 1-1.5 kg Smooth
Chop onion, garlic, parsley 1 kg Smooth or micro-
toothed
Recommendation:
Press
FIG 2 - Technical description
A - Disk
B - Plunger
C - Removable pin
D - Mallet
E - Lid
F - Lower lid
G - Grid
H - Ramp
I - Ejector
J - Keyboard
K - Motor block
M - Pressure pot lid
N - Blade
O - Pressure pot

- 13 -
EN
Translation of the original instructions
This manual describes the installation, operation and maintenance of machi-
nes CK-241, CA-21 and K-41.
- Name and address of the manufacturer: SAMMIC S.L - Basarte 1 Azkoitia.
Gipuzkoa (SPAIN).
- Machine model and serial number.
- Approval marks.
- The serial number and all the information regarding the current legislation
under which this appliance was manufactured is indicated on the guarantee
card and in the declaration of conformity.
NOTE: The 120V models have been approved under the safety standard
UL-763 and hygiene and materials standard ANSI NSF-8.
IMPORTANT OBSERVATIONS
- Read and follow these instructions attentively to
reduce the risk of accidents (short circuits, injuries
machine and to ensure proper maintenance of the
same. Keep the instructions and ensure that all users
of the machine read them before use. Also keep the
guarantee card and the declaration of conformity.
-
important to handle the disks (A), screens (G) and
blade assembly (N) with great care during unpacking,
use and cleaning of the machine and its parts. The
use of cut-resistant gloves is recommended.
- This machine is for supervised use. Never leave the
machine running without supervision.
- Clean the food contact area with lukewarm soapy
water, rinse and allow to dry before using the
- The machine must be unplugged from the mains at
the end of each operation and before any intervention
to change tools or heads, cleaning, review or repair.
- This machine is not designed for use by people
(including children) with reduced physical, senso-
ry or mental capabilities or lacking the necessary
experience or knowledge unless they have received
supervision or instructions from a health and safety
expert. Children must be supervised to ensure they
do not play with the machine.
- The models cited in the manual have been designed
for use in hotels, restaurants, catering and retail
establishments but should never be used for contin-
uous industrial manufacturing.
- The manufacturer shall not be held responsible in
cases in which the machine has been used incorrect-
ly or for any use other than those mentioned above.
Such as, sanitary use, chemical use, use in explosive
atmospheres…
PLACEMENT
It is recommended to place the machine at a comfortable height on a stable
surface that does not act as a sounding board. Place the collector under the
food outlet. The machine is not secured and can be moved easily.
ELECTRICAL CONNECTION
WARNING! THE EARTH CONNECTION IS OBLIGATORY. DANGER OF
ELECTROCUTION.
supply.
The unit is designed for 230 V/50 Hz single-phase, 220 V/60 Hz single-phase
or 120 V/50-60 Hz single-phase power supply.
Prepare a wall-mounted socket with a general cut-out switch, differential resi-
dual current and 2-pole magneto-thermal circuit breakers (13 to 20 A) and
the associated plug. Place a general switch or the plug in a visibly accessible
place to disconnect the machine. The machine can be connected to an elec-
your mains electricity supplier.
INSTRUCTIONS FOR USE
- Do not allow convenience or familiarity with the product (due to using it
repeatedly) to take the place of strict compliance with the safety standards.
Stay alert, pay attention to what you are doing and use common sense
when operating the unit.
alcohol or medication. You may suffer personal injury or material damage if
you use the tool in an unsafe or incorrect manner.
- NEVER open the lid before the motor has completely stopped.
- NEVER attempt to bypass the blocking or safety systems.
- NEVER put your hand in the food outlet or the feeding hoppers.
- Only introduce foodstuffs (never objects) into the hoppers.
- NEVER use external objects to guide the ingredients in the feeding hoppers
or outlets.
- Do not overload the machine.
- Refrain from exerting excessive pressure with the plungers as this may
damage the product and overload the motor.
- 30-minute operating periods with 15-minute breaks are recommended.
CLEANING
- Clean the machine at the end of each day or each time the product or
accessory is changed.
- All components in contact with the food must be cleaned immediately after
use using hot water and a food-safe detergent. Then rinse with abundant
hot water and disinfect using an ethyl alcohol-soaked cloth (90º).
- DO NOT use abrasive detergents (hydrochloric acid, concentrated bleach,
etc.) or non-stainless steel scourers or scrubbers. They may degrade or
cause the machine to rust.
- If a dishwasher is used to clean the removable parts of the CK and CA, use
detergents that will not damage them.
- DO NOT clean the outside of the machine with a direct stream of water. Use
a damp cloth and any common detergent for cleaning.

- 14 -
EN
MAINTENANCE
- Verify before each use that the machine’s safety devices are working proper-
ly. Call the SAMMIC authorised technical service if you detect any anomaly.
- Check the condition of the drive shaft seal on a weekly basis to ensure that
this area remains water-tight. Installing a new seal is recommended every
time the drive shaft is loosened for maintenance.
- If the power cable is damaged, a new one must be installed before the
machine is used again. Only a SAMMIC authorised technical service may
perform this replacement.
- If the engine block (K) is damaged, the affected parts must be replaced
before the machine is used again. Only a SAMMIC authorised technical
service may perform this replacement.
- The noise level in operation (according to EN ISO 11201:1995) is less than
70 dB(A) with the machine placed at a height of 1.6 m and a distance of 1
m. Background noise: 32 dB(A)
FUNCTIONS AND OPERATION OF THE
ELECTRONIC CONTROL
MACHINE ENERGISED PILOT LIGHT (1):
When the cutter is connected to the main supply, pilot light (1) turns on to
indicate that the cutter is energised.
STATUS/SAFETY PILOT LIGHT (2):
Pilot light (2) provides information about the machine’s status.
Cutter mode:
- When the light is off, the motor is stopped, the lid (E) closed and the plunger
(B) down.
- When the light is on, the motor is running, the lid (E) closed and the plunger
(B) down.
Cutter mode:
- When the light is off, the motor is stopped, the pot (O) and pot lid (M) are
closed.
- When the light is on, the motor is running, the pot (O) and pot lid (M) are
closed.
START BUTTON (3)
Cutter mode:
- When the lid (E) is closed and the plunger (B) down, pressing this button
will start the motor.
- When the motor is stopped, the lid (E) closed and the plunger (B) up, the
will start if the plunger (B) is lowered.
- The motor will stop if the plunger (B) is raised. When the plunger (B) is
lowered, the motor restarts automatically. The “Start” button (3) must be
pressed again to start the motor if the plunger (B) is kept in the raised posi-
tion for more than 30 seconds.
- The motor will stop if the lid (E) is opened. The motor will automatically
restart when the lid (E) is closed again. If the lid (E) is not closed within
30 seconds, the “Start” button (3) must be pressed again to restart the
motor.
- The machine will stop automatically after 30 minutes if it is left running with
the plunger (B) down.
Cutter mode:
- With the pot (O) in position and the pot lid (M) closed, pressing this button
will start the machine.
PULSE (4)
The motor starts and runs as long as this key is held down and stops when
it is released.
STOP 5
The machine will stop when this button is pressed.
START-UP AND GENERAL OPERATION
“Vegetable Cutter” (CK-241, CA-21) operating mode
The “Vegetable Cutter” accessory (F) can be positioned in two different
directions (FIG 3) so that the outlet for the products faces one direction or
the other.
With the machine disconnected from the mains:
- Place the “Vegetable Cutter” (F) accessory on the motor block and turn it
anticlockwise as shown in the diagrams (FIG 4).
-
kwise (FIG-5).
- Place the plunger (B) and secure it with the pin (C), as shown in the dia-
grams (FIG 6).
Fitting the disks (A) and screens (G) (FIG 2)
- Remove the lid (E) - plunger (B) assembly by turning it clockwise (FIG 4).
- Place the ejector (I) in its housing on the drive shaft or discharge ramp (H).
- Insert the screen (G) into the lower cover (F) cavity when required for the
process.
- Fit a disk (A) on the drive shaft. Disks that work with screens need to be
fastened in position.
- Replace the lid (E) - plunger (B) assembly by turning it anticlockwise.
Operation with the standard intake hopper (Q) and plunger (B). CK-241
y CA-21
- The mallet (D) must be housed and locked in its hole. Rotate it anti-cloc-
kwise to do so.
- Start the machine.
- Raise the plunger (B). The motor stops.
- Insert the products in the standard hopper (Q).
- The motor starts and the cutting process begins when the plunger starts to
lower (B). Push the product by gently lowering the plunger (B). Repeat the
process as many times as required.
Operation with cylindrical hopper (P). CK-241, CA-21.
This Ø 47 mm hopper is used to cut long, cylinder-shaped vegetables such
as carrots, endives, cucumber, etc.
- Start the machine.
- Release the mallet (D) by rotating it clockwise.
- Insert the products through the hole and push them gently with the “Mallet”

- 15 -
EN
(D). Repeat the process as many times as required.
IMPORTANT: Leave the mallet (D) inside the cylindrical hopper when
the latter is not in use.
“Cutter” operating mode. CK-241, K-41 y KE-41.
With the machine disconnected from the mains:
- Place the “Cutter” accessory on the motor block and turn it anticlockwise as
shown in the drawings. The handle must be placed just above the keypad
for the machine to operate. (Fig. 7)
- Fit the “Blade assembly” (N) and close the lid (M) by turning it anticlockwise
until it is engaged and locked. The lid (M) has a hole for inserting the pro-
duct while the machine is running.
- The motor starts when the start (3) button is pressed and will run until the
stop (5) or PULSE (4) button is pressed. It also starts and continues to
operate while the PULSE button (4) is held down.
CLEANING
Cleaning the “Vegetable Cutter” accessory CK-241 and CA-21:
- Unlock the lid (E) by turning it clockwise as shown in the drawing and remove it.
- Remove the disk (A) by turning it clockwise and carefully pulling it upwards.
Remove the screen (G) and the ejector (I) or the discharge ramp (H).
- The plunger (B) and the hinged lid (F) can be removed for cleaning.
WARNING: To remove any product embedded in the screens (G), sim-
ply tap them in the cutting direction with a potato chip or carrot. This
prevents damage to the screen (G). Be careful with the edge of the
screen (G). Never use hard objects to hit the screen (G).
Cleaning the “Cutter” accessory CK-241 and K-41:
- Pour hot water and detergent into the pot and switch the machine on to
soften the residue if the fouling is dry and adheres to the pot and the blades.
- To avoid splashes, once the product has been processed, remove the pot
(O) with the blade (N) inside.
Cleaning the CK motor block:
The outside of the machine must NEVER be cleaned with a direct jet of
water. Use a damp cloth and any common detergent for cleaning. DO
NOT use abrasive detergents (nitric acid solution, neat bleach, etc.) or
non-stainless steel scourers or scrubbers as they may damage and rust
the machine.
“Vegetable Cutter” attachment: Operation of disks (A) and screens (G).
Disks (A):
- Use disks (A) FCS-1 and FCS-2 to cut potatoes chips or thin 1 and 2-mm
slices.
- Disks (A) from FCS-3 to FCS-12 to obtain 3 to 12-mm slices of potatoes,
carrots, beet, cabbage, cucumber, zucchini, onions, radishes, etc.
- SHS-type grater disks (A) 2-7 mm to shred vegetables and grate cheese,
bread, nuts, almonds, etc.
Use disks FCES to cut potato “matchsticks” and shred carrots, celery, bee-
troot, etc.
- Disks (A) SHSF and SHSG to grate bread, cheese, chocolate, etc.
- Disks (A) and screens (G). Possible combinations:
- Disks (A) FCS-8, FCS-10 and FCS-12 combined with screens (G) FFS- 8
and FFS-10 to obtain chip-style potatoes.
- Disks (A) FCS-8, FCS-10 and FCS-12 combined with screens (G) FMS-8,
FMS- 10 and FMS-12 for cubes of potatoes of 8 to 12 mm for omelettes,
cubes of vegetables and fruit for fruit salads, Russian salads, etc.
Ejector (I) and ramp (H).
- Ejector: To extract the cut product at high speed and keep up large-size
production.
- Ramp: The product falls out gradually thanks to the effect of gravity. To
avoid too much damage to the cut product.
“Cutter” attachment
celery and for grated products such as cheese, carrots, etc.
- Standard ejector: For all other cutting jobs.
“Cutter” attachment
Using the “Cutter” accessory you can:
CHOP: Parsley, garlic, onion, cheese, cooked ham, cooked meat, etc.
SAUCES: Tomato, mayonnaise, tartar, garlic mayonnaise, green sauce,
gazpacho, etc.
PUREES: Pulses, vegetables, spreads, etc. PASTA: Prawns, mussels, oys-
ters, meat, sausages, etc.
SOUPS / CREMES: Seafood, garlic, vegetables, legumes, meat, etc.
desserts and pastry:
CHOP: Almonds, hazelnuts, chocolate, raisins, fruit for fruit salad, etc.
PREPARE: Powdered sugar, almond paste, whip cream; creamed chocola-
te, vanilla, coffee, strawberries and fruit in general, etc.
SHARPENING THE BLADES
WARNING: Disks (A), screens (G) and the blade assembly (N) have very
sharp edges and must be handled with extreme care.
The disc blades (A) and blade assembly (N) can be removed easily for sha-
rpening. Always use soft stone to avoid damaging the blades’ cutting angle.

- 16 -
EN
DISPOSAL
Packaging
Follow current environmental standards in your country to dispose of the
packaging.
Machine
This machine is subject to the provision of European Directive 2012/19/EU
on waste electrical and electronic equipment (WEEE). The machine is mar-
ked with the WEEE symbol:
- Do not dispose of this machine with normal household waste.
- Dispose of the machine at an authorised waste management centre or
through municipal waste disposal entities. Follow the applicable regula-
tions.
You can obtain information about waste disposal and the location of your
nearest recycling centre, for example, from your municipal cleaning service.
TROUBLESHOOTING
When the lid (E) is closed and the plunger (B) down, the cutter does not start
when “start” is pressed:
- The cutter is connected to the mains supply and the “Machine energised”
pilot light (1) is off. The control panel is not receiving power or it is broken.
there is a fault with the plunger (B) safety microswitch.
bridge on the electronics board.
-
nately, the motor’s thermal protection has activated. Wait until it resets and
check what might have caused it to activate (overloaded, jammed parts,
fault in the starter relay or capacitors, etc.).
To check that the keypad works correctly, without any accessories in the
machine, pressing any button should cause the machine energised pilot light
to turn off, indicating it has detected the button.
The cutter was operating and it has stopped without pressing any buttons. If
the machine is running and no actions are performed with the plunger (B), it
will stop automatically after 30 minutes.
Note: The electronics board has the following pilot lights and indica-
tors:
- Power: Turns on when the board is energised.
- SEG: Turns on if all the safeties are closed.
- RL1, RL: Turn on when the corresponding relay is closed.
- Switch SW1: OFF position 1-speed cutter. ON position 2-speed cutter.
- Fus1-Var1: The board has a protective fuse and varistor.
The motor does not start when the plunger is lowered:
- Press “Start” (3) again to reset the cutter if the plunger (B) is left open for
more than 30 seconds.
- The hopper may be too full and the plunger may not activate the
microswitch. Reduce the amount of product in the hopper and try again.
- If the cutter is too noisy or the disc rubs against something, the bearings in
the main shaft are probably worn.
- If the machine vibrates excessively, check the condition of the disc (A) or
the blade (N). A piece of food may be stuck and unbalancing them.

- 17 -
EN
CK-241
PROPERTIES CK-241
Output / hour 50-350 kg. - 110-772 lbs.
Electrical power supply 230V / 50 Hz / 1~ 220V / 60 Hz / 1~ 120V / 60 Hz / 1~
Electric power 800 W - 1 HP 800 W - 1 HP 1100 W - 1.5 HP
Speed (rpm) 1500 1500 1800
External dimensions
-Witdth 378 mm. / 14 29/32”
-Depth 309 mm. / 12 11/64”
-Heigth 533 mm. / 20 31/32”
Net weight 14,2 kg. / 31.3 lbs.

- 18 -
EN
CA-21
PROPERTIES CA-21
Output / hour 50-350 kg. - 110-772 lbs.
Electrical power supply 230V / 50 Hz / 1~ 220V / 60 Hz / 1~ 120V / 60 Hz / 1~
Electric power 800 W - 1 HP 800 W - 1 HP 1100 W - 1.5 HP
Speed (rpm) 1500 1500 1800
External dimensions
-Witdth 378 mm. / 14 29/32”
-Depth 309 mm. / 12 11/64”
-Heigth 533 mm. / 20 31/32”
Net weight 15,3 kg. / 33.73 lbs.

- 19 -
EN
K-41
PROPERTIES K-41
Electrical power supply 230V / 50 Hz / 1~ 220V / 60 Hz / 1~ 120V / 60 Hz / 1~
Electric power 800 W - 1 HP 800 W - 1 HP 1100 W - 1.5 HP
Speed (rpm) 1500 1500 1800
Tank capacity 4,4 l. / 4,65 qt.
Tank dimensions ø 193 x161 h
External dimensions
-Witdth 252 mm. / 9 59/64”
-Depth 309 mm. / 12 11/64”
-Heigth 434 mm. / 17 5/64”
Net weight 14,2 kg. / 31.3 lbs.

- 20 -
DE
20
- 20 -
ABB. 1
1 – Stromnetzanschluss.
2 – Zustand/Sicherheit.
3 – Betriebsanzeige.
4 – DRÜCKEN (Betrieb solange gedrückt).
5 – Anhalten.
Vorgang Höchstmenge
Cutter
Empfohlenes
Messer
Hinweise
Rohes Fleisch im Allgemeinen 1-1,5 kg Glatt
Gekochtes Fleisch oder
Kochschinken
2-2,5 kg Glatt Empfehlung: Drücken Sie
Pasteten 1-1,5 kg Glatt oder mikroverzahnt
Fisch 1,5-2 kg Glatt
Teige und Pasten 1-1,5 kg Glatt oder mikroverzahnt
Paniermehl 0,5-1 kg Mikroverzahnt
Pürees, Soßen, Suppen 2 Liter. Mikroverzahnt
Mayonnaise 3 Liter. Alle
Puderzucker 1-1,5 kg Glatt
Häckseln von Zwiebeln,
Knoblauch, Petersilie
1 kg Glatt oder mikroverzahnt Empfehlung: Drücken Sie
ABB. 2 - Technische Beschreibung
A - Scheibe.
B - Andrückvorrichtung.
C - Herausnehmbarer Stift.
D - Stopfer.
E - Deckel.
F - Unterer Deckel.
G - Gitter.
H - Rampe.
I - Auswerfer.
J - Tastenfeld.
K - Motorblock.
M - Topfdeckel.
N - Messer.
O - Topf.
This manual suits for next models
2
Table of contents
Languages:
Other Sammic Kitchen Appliance manuals

Sammic
Sammic SV-33 User manual

Sammic
Sammic PC-22 User manual

Sammic
Sammic AG Series User manual

Sammic
Sammic P-12 User manual

Sammic
Sammic CA-301 User manual

Sammic
Sammic PS-12 User manual

Sammic
Sammic SU Series User manual

Sammic
Sammic GC-220 User manual

Sammic
Sammic XM-12 User manual

Sammic
Sammic TH-1100 User manual

Sammic
Sammic ES-100 User manual

Sammic
Sammic TR Series User manual

Sammic
Sammic XM-30 User manual

Sammic
Sammic FP User manual

Sammic
Sammic CE-135 User manual

Sammic
Sammic SmartVide 8 Plus User manual

Sammic
Sammic CA-300 User manual

Sammic
Sammic XM-30 / MB / B User manual

Sammic
Sammic GAE-350 User manual

Sammic
Sammic CA-31 User manual