SATO DR308e User manual

German English
Chinese
Korean
DR308e Quick Guide
DR308e
Quick Guide
STATUS
LINE
FEED

2
Korean
English
27
First Edition December, 2007 Q02147000
© 2007 Sato Corporation
Introduction
This manual is intended to help you become familiar with the basic operation of DR308e the barcode printer in a short time.
Please read this manual carefully to make full use of the functions of DR308e.
Notes
1. Reproduction of all or part of this manual is prohibited without permission of the copyright owner.
2. The information in this manual is subject to change without notice.
3. If you find any ambiguous or erroneous information in this manual, please contact your nearest
dealer or service center.
SBPL(SATO 바코드 프린터 언어)
UPC-A/UPC-E, JAN/EAN, CODE39, CODE93, CODE128, GS1-128 (UCC/EAN-128),
CODABAR (NW-7), ITF, Industrial2of5, Matrix2of5, MSI, BOOKLAND, POSTNET,
GS1 DataBar (RSS)
QR 코드, Micro QR, PDF417, Micro PDF, MAXI code, GS1 DataMatrix (ECC200)
합성기호 (JAN/EAN, UPC-A/UPC-E, GS1-128, GS1 DataBar (RSS))
(1) XU 텍스트 5 ×9 (문자 및 숫자, 기호)
(2) XS 텍스트 17 ×17(문자 및 숫자, 기호)
(3) XM 텍스트 24 ×24(문자 및 숫자)
(4) XB 텍스트 48 ×48(문자 및 숫자, 기호)
(5) XL 텍스트 48 ×48(문자 및 숫자, 기호)
(6) OCR-A 15 ×22(문자 및 숫자, 기호)
(7) OCR-B 20 ×24(문자 및 숫자, 기호)
(8) 가격 글꼴 24 ×36(숫자, 콤마, 소수점, 통화)
(9) POP1 텍스트 24 ×48(숫자, 콤마, 소수점, 통화)
(10) POP2 텍스트 60 ×90(숫자, 콤마, 소수점, 통화)
(11) POP3 텍스트 40 ×64(숫자, 콤마, 소수점, 통화)
문자 및 숫자, 기호
텍스트: 0°, 90°, 180° 및 270°
바코드: 병렬 1, 병렬 2, 직렬 1 및 직렬 2
1:2, 1:3, 2:5 사용자 정의 가능
텍스트: 수직 및 수평 방향으로 1 ~ 9배
바코드: 1 ~ 9 L
(1) 상태 보고 기능
(2) 그래픽 기능
(3) 연속 번호 지정 기능
(4) 양식 오버레이 기능
(5) 비표준 문자 저장 기능
(6) 흑백 반전 기능
(7) 선 및 상자 그리기 기능
(8) 형식 저장 기능
(9) 제로 슬래시 선택 기능
(10) JIS/Shift-JIS 선택 기능
(11) 캘린더 기능(캘린더 IC가 설치되어 있는 경우)
(1) 파손된 헤드 부품 점검
(2) 용지 끝부분 감지
(3) 테스트 인쇄
(4) 리본 끝부분 감지
(5) 리본 뒤쪽 끝부분 감지
(6) 캘린더 확인(캘린더 IC가 설치되어 있는 경우)
(7) 헤드 열림
(8) 컷터 오류(컷터 유니트가 설치되어 있는 경우)
외경: W211mm ×D350mm ×H240mm
무게: 약 8kg
입력 전압: AC100V ~ 240V±10%
정격 입력 전압: AC 100V ~ 240V(전범위)
최대: 104W 대기 시: 24W (평균)
사용 환경: 5 ~ 40℃/30 ~ 80%(응결 없음)
보관 환경: -5 ~ 60℃/30 ~ 90%(응결 없음)
명령
바코드
2차원 코드
사용 가능한
텍스트 종류
인쇄 방향
(텍스트/바코드)
바코드 비율
다양한 기능
자기진단 기능
전원 공급
온도 및 습도 환경
크기, 폭
합성 기호
내장 글꼴
윤곽선 글꼴
확대율 (텍스트/바코드)
타사 제품의 등록 및 상표에 관한 주의
QR 코드는 Denso Wave Incorporated의 등록 상표입니다.
소비 전력

3
English
Table of Contents
Introduction ................................................................................................................................................................................ 2
Notes .......................................................................................................................................................................................... 2
Safety Precautions ..................................................................................................................................................................... 4
Precautions for Installation and Handling................................................................................................................................... 8
Unpacking .................................................................................................................................................................................. 9
Parts Name .............................................................................................................................................................................. 11
Setting Labels .......................................................................................................................................................................... 14
When Using a Large Paper Core (Ø 100 Outer Diameter) ................................................................................................... 16
When Using a Small Paper Core (Ø 40 Outer Diameter) ...................................................................................................... 19
Loading the Ribbon .................................................................................................................................................................. 20
Tu r ning On Power .................................................................................................................................................................... 23
Basic Specifications of DR308e ............................................................................................................................................... 26

4
English
WARNING
Safety Precautions
In this section, safety precautions about printer operation are explained to ensure proper care and usage.
Make sure to read these carefully before using your printer.
Markings and Symbols
The following symbols or markings are used in this manual and on the printer so that you can properly use the
printer, and to prevent any damage to property, harm or injury to yourself and others.
Make sure to read their explanations carefully to familiarize yourself with their meanings.
This symbol indicates information that, if ignored or applied incorrectly, creates the danger of
death or serious personal injury.
This symbol indicates information that, if ignored or applied incorrectly, creates the possibility
of personal injury or property damage.
Symbol examples
The triangle indicates something you should take absolute care with. The cautions are indicated
concretely within the symbol. The symbol on the left indicates a risk of electric shock.
A circle with a diagonal line indicates something you should not do. The symbol on the left indicates
that you should not try to take the unit apart.
A black circle with a picture inside indicates something you need to do. The symbol on the left indicates
that you should unplug the unit from the wall outlet.
WARNING
Place the printer on a surface that is flat and level
Do not leave the printer on unstable surfaces. If the printer falls and hits someone, it could cause
injury.
Do not expose the printer to liquids or moisture
Do not place objects filled with liquids, such as beverages, vases, or chemical product near the
printer. Also, do not place small metal objects near the printer. If the liquids have been spilled or
objects have fallen into the printer, turn off the power immediately, disconnect the power cord from
the power outlet, and contact your nearest dealer, service center or the store where you purchased
the printer. Continue use of the printer in this condition may cause fire or electric shock.
Do not insert foreign material into the printer
Do not insert or drop any metal objects or flammable objects into the openings (cable end). If the
foreign material has fallen into the printer, turn off the power immediately, disconnect the power cord
from the power outlet, and contact your nearest dealer or service center or the store where you
purchased the printer. Continue use of the printer in this condition may cause fire or electric shock.
CAUTION

5
English
WARNING
Use only the designated electrical power and voltage
Use the type of power source indicated on the printer. Different voltage may cause fire or electric
shock.
Connect ground wire
Make sure to connect the ground wire of the printer to the ground slot. Failure to do so may cause
electric shock.
Do not insert foreign material into the printer
Do not insert or drop any metal objects or flammable objects into the openings (cable end). If the
foreign material has fallen into the printer, turn off the power immediately, disconnect the power cord
from the power outlet, and contact your nearest dealer or service center or the store where you
purchased the printer. Continue use of the printer in this condition may cause fire or electric shock.
Power cord
•Do not attempt to damage, break, or modify the power cord. Also, avoid placing a heavy object
on, heating, or pulling the power cord. This may damage the power cord causing fire and
electric shock.
•If the power cord becomes damaged in any way (exposed cable core, breaking of wire), contact
your nearest dealer, service center or the store where you purchased the printer. Continue use
of damaged power cord may cause fire or electric shock.
•Do not attempt to modify, jerk, knot, sharply bend, or otherwise abuse the power cord. Continue
use of damaged power cord may cause fire or electric shock.
In case of drop or damage
If the printer was dropped or damaged, turn off the power immediately, disconnect the power cord
from the power outlet, and contact your nearest dealer, service center or the store where you
purchased the printer. Continue use of the printer in this condition may cause fire or electric shock.
Do not use the printer in abnormal condition
In the case of abnormalities such as smoke or foul odors from the printer, stop using the printer
immediately. Continue use of the printer in this condition may cause fire or electric shock. Turn off
the power immediately, disconnect the power cord from the power outlet, and contact your nearest
dealer, service center or the store where you purchased the printer. Do not attempt to repair the
printer yourself.
Do not disassemble
Do not attempt to disassemble or modify the printer. Fire or electric shock may occur. For service
and repair of internal problem, please contact your nearest dealer or service center or the store
where you purchased the printer for assistance.

6
English
Cutter
Do not insert your hands or any other object inside the cutter. Such actions may result in injury.
Handling of the head cleaning fluid
•The head cleaning fluid is flammable. Never heat it or throw it into a fire.
•To prevent children from accidentally swallowing the cleaning fluid, store it in a location that is
out of their reach. If it is swallowed, consult a doctor immediately.
CAUTION
Do not use in locations with high humidity
Do not place the printer in any places where it will be subjected to high humidity or condensation. If
condensing, turn off the power switch immediately, stop using it and dry completely without using
any heat producing devices. Continued use under these conditions may cause electric shock.
Carrying the printer
•Disconnect the power cord from a power outlet before moving the printer to other places.
Leaving it connected and moving the printer will damage to the cord and connections. This may
cause fire or electric shock.
•Do not carry the printer when the label is set. If the label falls and hits someone, it could cause
injury.
•When placing the printer on the floor or the table, be careful not to get your fingers or hands
caught in the legs of the printer.
Power supply
Do not touch the power switch or plug-in/unplug the power cord with wet hands. This may cause
electric shock.
Power cord
•Keep the power cord out of any appliances that produce heat. This may melt the coating of
power cord and cause fire or electric shock.
•When disconnecting the power cord from the printer or a power outlet, pull on the plug. If not, it
may cause exposure of wire, breaking of wire, overheating, fire or electric shock.
• The power cord provided with this printer is for use with this printer only. It cannot be used with
other electrical devices.
Cover
When opening/closing the cover, be careful not to get your fingers caught.

7
English
CAUTION
Thermal head
•Thermal head will become hot during the printing process. When changing labels or when
cleaning after printing, be careful not to get burnt.
•Contact with the edge of thermal head with bare hands may cause injury. When changing
labels or when cleaning, be careful not to get injured.
•Take care when replacing the thermal head. Failure to do so may result in injury, burns or
electric shock.
Opening and closing thermal head
Do not insert foreign material other than labels when opening/closing the thermal head. This may
result in injury or malfunction.
Setting labels
When setting the roll labels, please be careful not to get your fingers caught between the label and
label supply spindle.
Cutter
This part contains a blade. Take care to avoid cutting your hands.
When unused for long periods of time
Disconnect the power cord from a power outlet when unused for long periods of time.
Maintenance and cleaning
Disconnect the power cord from a power outlet when maintaining or cleaning the printer.
*Compliance Statements for Acoustic Noise – Equipment and Product Safety Act (3rd version - GPSGV). The emitted sound
pressure resulted in 70 dB(A) or less per EN ISO 7779.
*This device is not intended for use at a video workstation in compliance with BildsharbV.
*Do not replace a fuse yourself.
*If a fuse has blown, contact the retailer, dealer, or support center.

8
English
This printer requires an AC power supply.
Be sure to connect the printer to an AC
power supply.
Failure to do so may result in miss
operation or a malfunction.
Connect the power cord to a grounded
power outlet.
Make sure to have the facility
equipped with the ground slot.
Precautions for Installation and Handling
Printer operation can be affected by the printer environment.
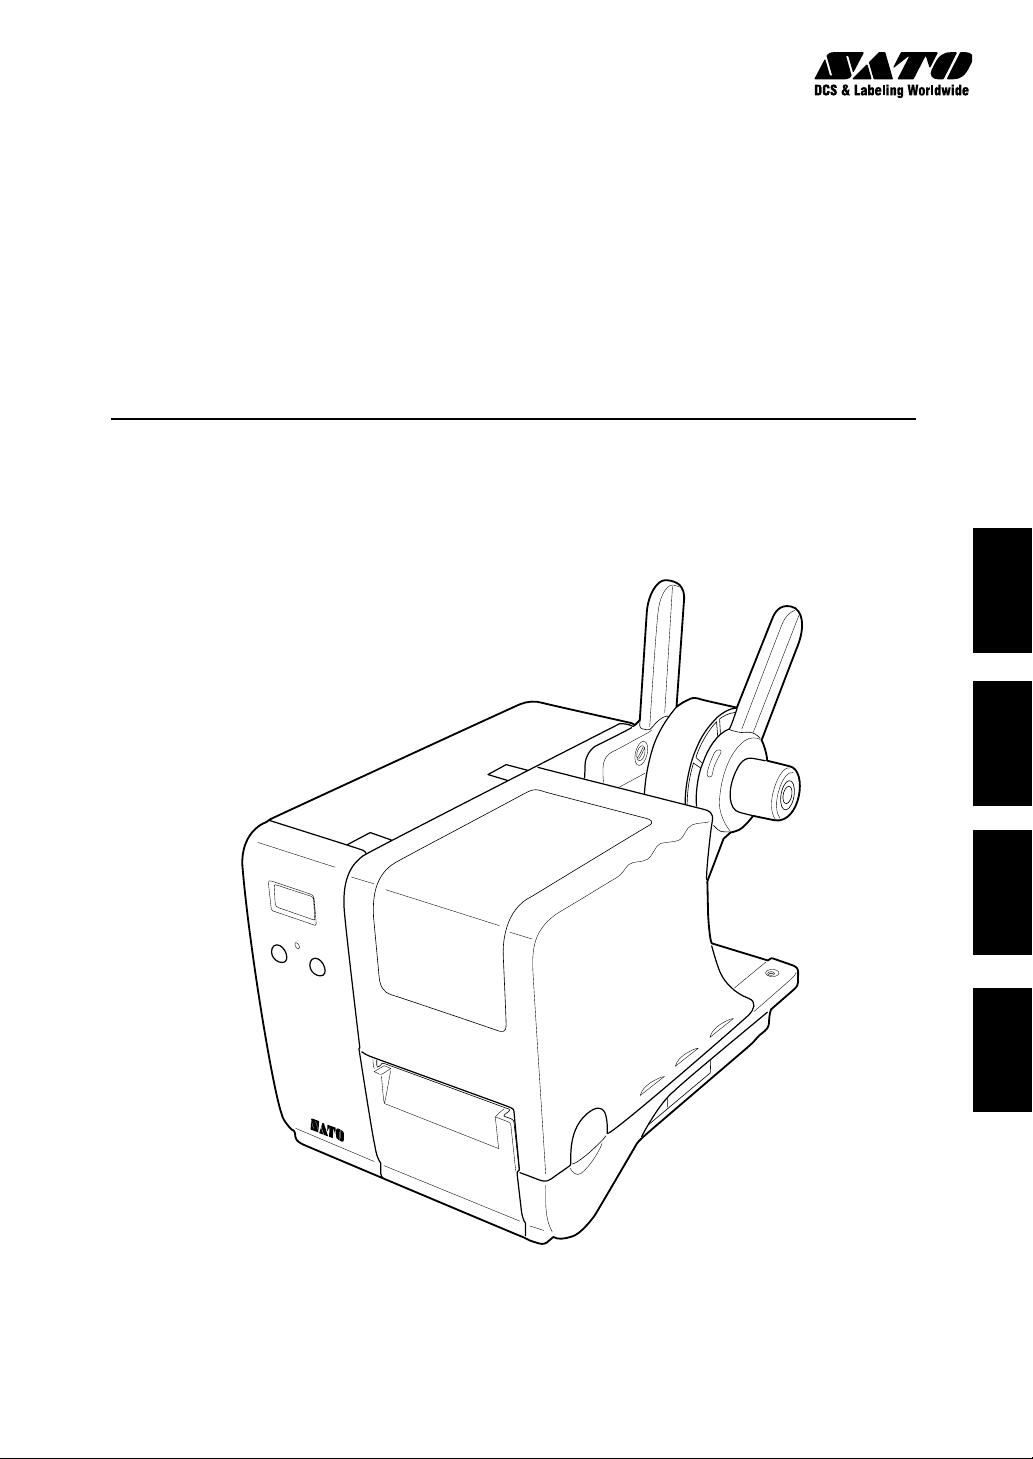
Refer to the following instructions for installation and handling of DR308e Series.
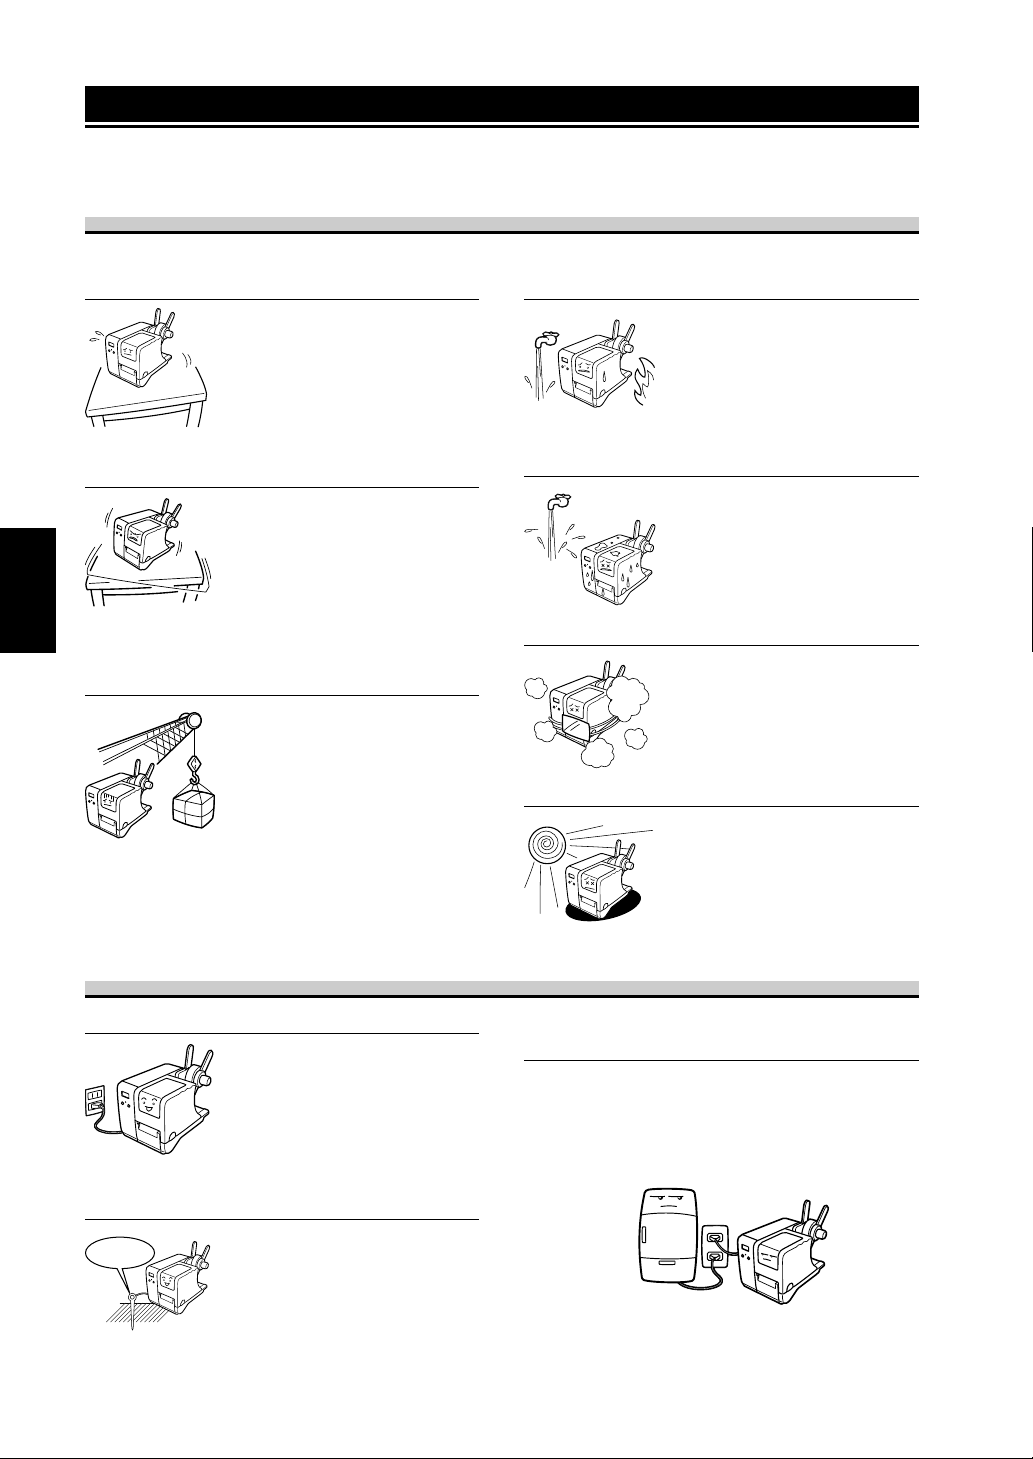
Select a Safe Location
Place the printer on a surface that is flat and
level.
If the surface is not flat and level, this
may result in poor print quality. This
may also cause malfunction and
shorten the life span of the printer.
Do not place the printer on a location that
produces vibration.
Do not carry the printer when the roll
label is set. Giving serious vibration
or shock to the printer may cause
malfunction and shorten the life span
of the printer.
Do not place the printer near crane or
pressing machine.
Machineries such as crane and
pressing machine require large
amount of power. This may cause
electrical noise or voltage reduction.
Avoid such locations to reduce the
risk of malfunction or damage to the
printer.
Keep the printer out of high temperature and
humidity.
Avoid locations subject to extreme or
rapid changes in temperature or
humidity. Exposure to these condi-
tions may cause electrical problems
within the printer.
Do not place the printer in a location subject
to water or oil.
Do not place the printer in a location
where it will be splashed with water or
oil. Water or oil entering inside the
printer may cause a fire, electric
shock, or malfunction.
Avoid dust.
Dust buildup may result in poor print
quality. This may cause not only
malfunction but also shorten the life
span of the printer.
Keep out of direct sunlight.
This printer has a built-in optical
sensor. Exposure to direct sunlight
will make the sensor less responsive
and may cause the label to be sensed
incorrectly. Close the cover when
printing.
Power Supply
STA
TUS
LINEFEED
LINEFEED
STATUS
LINEFEED
STATUS
LINEFEED
STATUS
LINEFEED
STATUS
LINEFEED
STATUS
LINEFEED
STATUS
LINEFEED
STATUS
LINEFEED
Provide a stable source of electricity to the
printer.
Do not share the power outlets with other appliances such
as a heater and refrigerator requiring a measurable amount
of power. Also, avoid using the power outlet near where
such appliances are plugged into. This may cause voltage
reduction and malfunction.
STA
TUS
LINEFEED
Ground

9
English
Unpacking
Unpack the printer and place it in the designated location. First of all, open the box.
Next, remove the printer and place it in the designated location.
Printer
Box of accessories
Cushioning material
Box
* The shape of the cushioning material (cushions that holds the printer in place) may differ from that shown.

10
English
Quick
Guide
Accessories
Make sure you have received all of the following items in this package. If there are any accessories missing, contact your
nearest dealer or the store where you purchased the printer.
About the box
Please retain both the box in which the printer was packed and the cushioning material
(cushions that hold the printer in place). If you need to send the printer in for repair,
repack it in this box.
Leaflet (Warranty)
Quick Guide Head cleaning sheet
(lapping sheet)
Power cord
Guide plates (extension label
guides), boss, boss securing screw
Ferrite core (for attaching
to power cord)
Ribbon core (for winding)

11
English
2Display panel
Parts Name
*For the optional keypad only. Never connect any other devices, as a computer-RS-232C communication is not enabled.
I STATUS (LED)
GLINE key
H FEED key
Label ejection
1 Cover
Front panel
8Boss (provided
as an accessory)
9AC input power terminal
(power connector)
3 Power ON/OFF switch
0 Keypad (simple input device)
connection terminal*
A Interface slot (option)
7 Roll media stopper
Rear panel
J External connector terminal

12
English
Interior
Knob for factory adjustment
DIP switch
(Pitch option adjustment knob
Offset option adjustment knob
Printing start position adjustment knob)
1 Cover
4 Ribbon take-up spindle
6 Head lock lever
5 Roll media
supply spindle
B Sliding guide
4 Ribbon supply spindle
7
Roll media stopper
Interior
Easy cutter
7 Roll media stopper
4 Ribbon take-up
spindle
4 Ribbon supply spindle
6 Head lock lever
B Sliding guide
D Pitch sensor guide
Paper guide shaft
8 Boss

13
English
6 Head lock lever
FPlaten roller
(consumable part)
E Thermal head
(consumable part)
C Pitch sensor
Interior
Name and Function of Controls
1Cover
Open and close this cover to load the paper, ribbon
and other items.
2Display panel
Displays an error message and instructions.
3Power ON/OFF switch
Tu r ns power ON or OFF.
4Ribbon take-up spindle, Ribbon supply spindle
Used to load the ribbon.
5Roll media supply spindle
Used to load the roll media.
6Head lock lever
Used to open and close the thermal head.
7Roll media stopper
Set to meet the size of the label used.
8Boss
Attach the boss to suit the size of the paper core used.
9AC input power terminal (power connector)
Used to connect the power cord.
0Keypad (simple input device) connection terminal
Used to connect the optional keypad (simple input device).
AInterface slot (option)
Optional interface slot for connection to a PC or other device.
BSliding guide
Used to hold down the paper.
CPitch sensor
Detects the holes in the tag stock so that the paper
can be cut off by the cutter.
DPitch sensor guide
Adjustment knob used to align the position of the
paper sensor with the holes.
EThermal head
This component is used to print on the paper. Perform
maintenance at regular intervals.
FPlaten roller
This roller feeds the paper. Perform maintenance at
regular intervals.
GLINE key
Used to start or stop printing, and also to toggle
between the on/off settings for data transmission and
reception.
HFEED key
Press once to feed one blank label.
ISTATUS (LED)
Lights or flashes to indicate the printer status.
JExternal connector terminal
Interface connector for external signals.
Dispenser sensor level
adjustment
Adjustment of option
positions (cutter position,
dispenser position, and
tear-off stop position)
Factory offset
adjustment
I-mark Gap DIP switch* Print start position
adjustment
Print density
adjustment
Jump hole sensor
adjustment
Connection terminal for
sensor level adjustment jig
*1: Download mode, 2: Maintenance mode, 3: Printing cut mode selection, 4 to 8: Unused

14
English
Tag stock
Center-hole tag Paper feed direction Front side Hole
Side-hole tag
l-mark tag
Paper feed direction Front side
Hole
Paper feed direction Front side
l-mark
Reverse side
Setting Labels
This printer can use five different types of paper: three types of tag stock and two types of label paper.
The methods used for loading tag stock and label paper differ.
• Be sure to use only paper supplied by SATO with this printer.
•Do not use non-standard paper.

15
English
Paper feed direction Front side
Paper feed direction Front side Fold perforation
I-mark
Reverse side
Label gap
Label I-mark
This printer accepts two paper core sizes.
φ40
φ100
1.5 mm
Label
3 mm
Gap (spacing)
3 mm
Gap (spacing)

16
English
When Using a Large Paper Core (Ø 100 Outer Diameter)
Opening out the printer’s roll media supply spindle enables a large roll of paper to be loaded in the printer. For details on
loading paper with a small core(Ø 40 outer diameter), please refer to “When Using a Small Paper Core (Ø 40 Outer
Diameter)” (page 19).
When using a large quantity of paper, attach the guide plates (extension paper guides) provided with this printer.
1Open the cover.
2
Unfasten the screw holding the roll media supply
spindle.
Use a flat-blade screwdriver to unfasten the screw.
3Rotate the spindle in the upper right direction.
4Fasten the screw that you unfastened in Step 2.

17
English
Boss attachment position
Attachment hole 1
Attachment hole 2
Attachment hole 3
Paper width
Up to 50 mm
50 mm to 80 mm
Not used
5Attach the guide plates (extension label guides).
6Using the boss attachment positions given in the
following table as a guide, attach the boss and
then fasten it in place with the screw.
23
Boss
Roll media supply spindle
7Load the paper.
Push the roll firmly toward the inside of the printer until it
touches the back of the spindle.
1

18
English
8Attach the roll media stopper.
When using a large quantity of paper (Ø 100 outer diameter
core), attach the extension guide plates.
Guide plate
9Close the cover.
When you need to replace the paper, proceed to “Preparations
for Printing” (page 26) and refer to the paper loading method for
the optional unit(s) that you have purchased.
When closing the cover, please be careful not to
get your fingers caught in the cover.
CAUTION

19
English
When Using a Small Paper Core (Ø 40 Outer Diameter)
1Open the cover.
Perform the procedure shown in Step 1 of “When Using a Large Paper Core (Ø 100 Outer Diameter)” (See page 16).
2Load the paper, and then attach the roll media stopper.
3Close the cover.
Perform the procedure shown in Step 9 of “When Using a Large Paper Core (Ø 100 Outer Diameter)” (page 18).
When you need to replace the paper, proceed to “Preparations for Printing” (page 26) and refer to the paper loading method for
the optional unit(s) that you have purchased.
When closing the cover, please be careful not to get your fingers caught in the cover.
CAUTION

20
English
Do not pass the carbon ribbon underneath the
sensor.
Loading the Ribbon
4Mount the ribbon core on the ribbon take-up
spindle.
Setting Carbon Ribbon
1Open the cover.
Perform the procedure shown in Step 1 of “When Using a Large Paper Core (Ø 100 Outer Diameter)” (See page 16).
2Rotate the purple head lock lever in the
counterclockwise direction.
The thermal head opens.
• Be sure to use only carbon ribbon supplied by SATO with this printer.
•Do not use a non-standard carbon ribbon.
3Open the carbon ribbon package, and then load
the ribbon on the ribbon supply spindle.
Confirm that the winding direction is correct, and push the ribbon
toward the inside of the printer.
Head lock lever
CAUTION
Other manuals for DR308e
1
Table of contents
Languages:
Other SATO Barcode Reader manuals

SATO
SATO ARGOX AS-9400DC User manual

SATO
SATO PV3 Instruction manual

SATO
SATO DR300 User manual

SATO
SATO CL4NX RIDF User manual

SATO
SATO GL412e User manual

SATO
SATO ARGOX AS-9400BT User manual

SATO
SATO Argox P4 Series User manual

SATO
SATO CT408i DT User manual

SATO
SATO ARGOX AS-9400DC User manual

SATO
SATO M-8400RVe Series User manual