manuals.online logo
Brands
  1. Home
  2. •
  3. Brands
  4. •
  5. Sauder
  6. •
  7. Indoor Furnishing
  8. •
  9. Sauder 419517 User manual

Sauder 419517 User manual

sauder.com
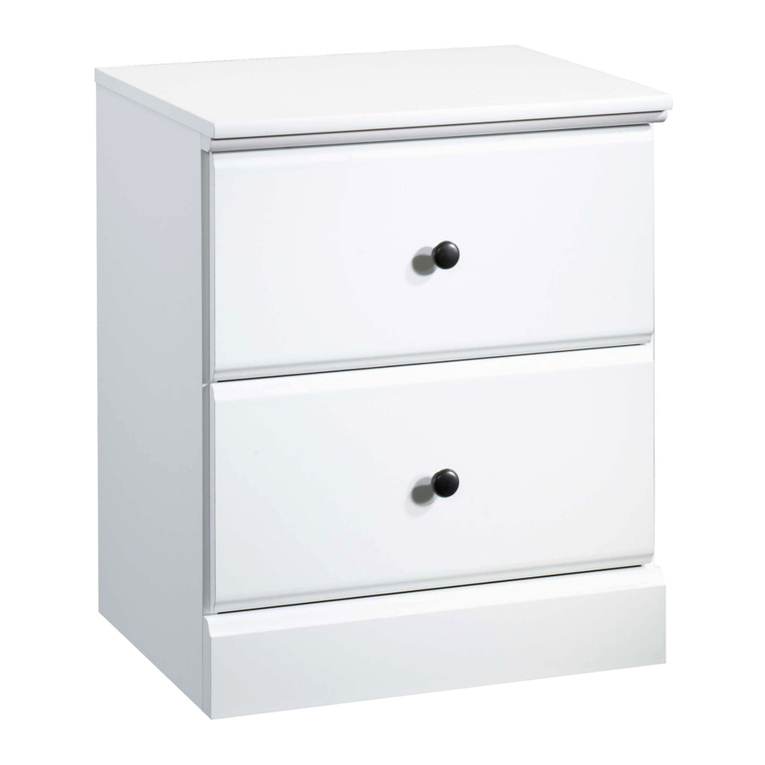
Dresser
Model 419517
NOTE: THIS INSTRUCTION
BOOKLET CONTAINS IMPORTANT
SAFETY INFORMATION.
PLEASE READ AND KEEP FOR
FUTURE REFERENCE.
English pg 1-22
Français pg 23-25
Español pg 26-28
Lot # 531876 07/23/19
Purchased: __________________
sauder.com
CONTACT US FIRST
BEFORE MAKING ANY RETURNS TO THE STORE.
Share your journey!
sauder.com
CONTACT US FIRST
BEFORE MAKING ANY RETURNS TO THE STORE.
Visit sauder.com/service to order replacement parts, view video assembly tips, or chat with a live rep.
Prefer the phone? Give us a ring at 1-800-523-3987.
Customer Service is available Monday-Friday - 9 a.m. to 5:30 p.m. EST (except holidays)
WARNING
CHOKING HAZARD - Small Parts
Not for children under 3 years.
Adult assembly required.
Table of Contents Assembly Tools Required
2-3
4
5-22
23-25
26-28
29-30
31
Part Identification
Hardware Identification
Assembly Steps
Français
Español
Safety
Warranty
Hammer
Not actual size
No. 2 Phillips Screwdriver
Tip Shown Actual Size
Skip the power trip.
This time.
419517 www.sauder.com/servicePage 2
Part Identification
åWhile not all parts are labeled, some of the parts will have a label or an inked letter on the edge
to help distinguish similar parts from each other. Use this part identification to help identify similar parts.
A RIGHT END (1)
B LEFT END (1)
C UPRIGHT (1)
D TOP (1)
D50 LOWER RIGHT DRAWER SIDE (4)
D51 LOWER LEFT DRAWER SIDE (4)
D166 UPPER DRAWER BACK (2)
D167 LOWER DRAWER BACK (4)
D212 UPPER RIGHT DRAWER SIDE (2)
D213 UPPER LEFT DRAWER SIDE (2)
- 1 with label
D975 DRAWER BOTTOM (6)
E BOTTOM (1)
F BACK (1)
H FRONT LEG (2)
I BACK LEG (2)
J UPPER RIGHT DRAWER FRONT (1)
K UPPER LEFT DRAWER FRONT (1)
LLOWER RIGHT DRAWER FRONT (2)
M LOWER LEFT DRAWER FRONT (2)
M65
DRAWER BRACE (6)
(Hidden part using recycled
material. Color may vary.)
N FRONT MOLDING (1)
O BOTTOM MOLDING (1)
P FOOT (2)
Part Identification Now you know
our ABCs.
419517www.sauder.com/service Page 3
D975
D212
D50
D51
D166
D213
D167
D975
J
L
D212
D166
D213
D975
K
D975
D50
D51
D167
M
M65
M65
M65
M65
A
B
C
D
E
F
H
I
N
O
P
P
H
I
Hardware Identification
åScrews are shown actual size. You may receive extra hardware with your unit.
419517 www.sauder.com/servicePage 4
5E CORNER CAP - 1 6E FOOT BRACKET - 1
SAFETY BRACKET - 1
1G
BLACK 9/16" LARGE HEAD SCREW - 36
1S
WASHER - 12
10I
BLACK 2-1/4" FLAT HEAD SCREW - 7
26S
7F TWIST-LOCK®
FASTENER - 10
SILVER 1/4" MACHINE SCREW - 12
61S
3S GOLD 5/16" FLAT HEAD SCREW - 48
CAM SCREW - 12
8F
WOOD DOWEL - 2
15F
NAIL - 39
1N
HIDDEN CAM - 12
1F
PULL - 6
98K
BLACK 1-15/16" FLAT HEAD SCREW - 2
113S
40DA UNIVERSAL CABINET RAIL - 12 40DC DRAWER RIGHT - 6 40DD DRAWER LEFT - 6
LARGE DRAWER
FRONT BRACKET - 4
9G
DRAWER FRONT
BRACKET - 2
8G
METAL BRACKET - 3
4G
30S BLACK 1-9/16" FLAT HEAD SCREW - 30
FELT DISC
CARD - 1
1M
Step 1 Look for this icon. It means a
video assembly tip is available at
www.sauder.com/service/tips
å Assemble your unit on a carpeted floor or on the empty
carton to avoid scratching your unit or the floor.
å To begin assembly, push a SAUDER TWIST-LOCK®
FASTENER (7F) into the large holes in the ENDS (A
and B) and UPRIGHT (C).
å Repeat this step for the BOTTOM (E).
419517www.sauder.com/service Page 5
7F
Do not tighten the TWIST-LOCK® FASTENERS in this step.
A
B
C
(10 used)
Step
å Push twelve HIDDEN CAMS (1F) into the ENDS (A and B)
and DRAWER BRACES (M65).
Step 2
419517 www.sauder.com/servicePage 6
A
B
Arrow
The arrow in the HIDDEN
CAM must point toward the
hole in the edge of the board.
Hole
Just think. The sooner
you do this, the sooner
you do something else.
Surface with
TWIST-LOCK®
FASTENERS
Surface with
TWIST-LOCK®
FASTENERS
1F
Arrow
1F
Arrow
M65
M65
M65
M65
M65
M65
Arrow
1F (12 used)
Step
419517www.sauder.com/service Page 7
Step 3
å Turn twelve CAM SCREWS (8F) into the FRONT LEGS (H)
and DRAWER FRONTS (J, K, L, and M).
8F
(12 used)
J
L
K
M
H
H
M
L
Step 4
å Insert a WOOD DOWEL (15F) into the indicated holes in the FRONT LEG (H).
å Fasten the RIGHT END (A) to the FRONT LEG (H). Tighten three HIDDEN CAMS.
å NOTE: Be sure the WOOD DOWEL in the LEG inserts into the RIGHT END.
å Fasten a BACK LEG (I) to the RIGHT END (A) as shown in the lower diagram. Use
three BLACK 2-1/4" FLAT HEAD SCREWS (26S).
419517 www.sauder.com/servicePage 8
1
2
A
A
H
Surface with
TWIST-LOCK®
FASTENERS
These surfaces should be even.
15F
The LEG will
overhang
this edge.
The LEG will
overhang
this edge.
I
These surfaces should be even.
BLACK 2-1/4" FLAT HEAD SCREW
(3 used in this step)
26S
å Insert the WOOD DOWEL (15F) into the indicated hole in the FRONT LEG (H).
å Fasten the LEFT END (B) to the FRONT LEG (H). Tighten three HIDDEN CAMS.
å NOTE: Be sure the WOOD DOWEL in the LEG inserts into the LEFT END.
å Fasten the BACK LEG (I) to the LEFT END (B) as shown in the lower diagram. Use
three BLACK 2-1/4" FLAT HEAD SCREWS (26S).
Step 5
419517www.sauder.com/service Page 9
15F
B
B
H
Surface with
TWIST-LOCK®
FASTENERS
These surfaces should be even.
The LEG will
overhang
this edge.
I
BLACK 2-1/4" FLAT HEAD SCREW
(3 used in this step)
26S
The LEG will
overhang
this edge.
Step 6
419517 www.sauder.com/servicePage 10
1
2
3
4
1
2
34
1
2
34
1
2
34
GOLD 5/16" FLAT HEAD SCREW
(12 used in this step)
3S
A
B
Surface with
TWIST-LOCK®
FASTENERS
Surface with
TWIST-LOCK®
FASTENERS
å Fasten six UNIVERSAL CABINET RAILS* (40DA) to the
ENDS (A and B). Use twelve GOLD 5/16" FLAT HEAD
SCREWS (3S) through holes #1 and #4.
å *patent pending glide system
Glide end
Glide end
1
2
3
4
1
2
3
4
VIEW THE DRAWER GLIDE VIDEO
Step 7
419517www.sauder.com/service Page 11
1
2
3
4
1
2
3
4
1
2
3
4
1
2
3
4
1
2
1
2
Surface with
TWIST-LOCK®
FASTENERS
C
GOLD 5/16" FLAT HEAD SCREW
(12 used in this step)
3S
å Fasten six UNIVERSAL CABINET RAILS* (40DA) to
the UPRIGHT (C). Use twelve GOLD 5/16" FLAT HEAD
SCREWS (3S) through holes #1 and #4.
å *patent pending glide system
Glide end
Finished edge
VIEW THE DRAWER GLIDE VIDEO
Step 8
419517 www.sauder.com/servicePage 12
å Fasten the LEFT END (B) to the TOP (D). Tighten two
TWIST-LOCK® FASTENERS.
How to use the SAUDER TWIST-LOCK®FASTENER
1. Insert the dowel end of the FASTENER into the
hole of the adjoining part.
NOTE: The dowel end of the FASTENER must
remain fully inserted in the hole of the adjoining
part while locking the FASTENER.
2. Tighten the FASTENER with a Phillips
screwdriver as tight as possible.
Dowel end
B
Surface with
TWIST-LOCK®
FASTENERS
H
D
Surface with holes
Finished edge
Do not stand the unit upright without the
BACK fastened. The unit may collapse.
Caution
å Fasten the UPRIGHT (C) to the TOP (D). Tighten two
TWIST-LOCK® FASTENERS.
Step 9
419517www.sauder.com/service Page 13
C
Finished edge
Don't worry. It isn't
Rome. This can be built
in a day.
Surface with
TWIST-LOCK®
FASTENERS
D
Step 10
å Fasten the BOTTOM (E) to the LEFT END (B). Tighten two
TWIST-LOCK® FASTENERS.
å Fasten the BOTTOM (E) to the UPRIGHT (C). Use two
BLACK 1-15/16" FLAT HEAD SCREWS (113S).
å Slide the BOTTOM MOLDING* (O) onto the notched edge
of the BOTTOM (E).
å *U.S. Patent No. 5,499,886
419517 www.sauder.com/servicePage 14
C
E
O
Notched edge
Surface with
TWIST-LOCK®
FASTENERS
B
BLACK 1-15/16" FLAT HEAD SCREW
(2 used in this step)
113S
The groove is
closer to this edge.
å Fasten the RIGHT END (A) to the TOP (D) and BOTTOM (E).
Tighten four TWIST-LOCK® FASTENERS.
å Fasten the METAL BRACKETS (4G) to the ENDS (A and B) and
UPRIGHT (C). Use three BLACK 9/16" LARGE HEAD SCREWS (1S).
å Fasten the FRONT MOLDING (N) to the ENDS (A and B) and
UPRIGHT (C). Use three BLACK 9/16" LARGE HEAD SCREWS (1S)
through the BRACKETS and into the MOLDING.
Step 11
419517www.sauder.com/service Page 15
N
C
B
A
Surface without
TWIST-LOCK®
FASTENERS
H
E
D
BLACK 9/16" LARGE HEAD SCREW
(6 used in this step)
1S
4G
4G
Step 12
å Carefully turn your unit over onto its front edges. Unfold
the BACK (F) and lay it over your unit.
å First, make equal margins along the top and bottom
edges of the BACK (F). Then, make equal margins along
the side edges of the BACK (F). Push on opposite corners
of your unit if needed to make it "square".
å Fasten the BACK (F) to your unit using the NAILS (1N).
å NOTE: Be sure to tap NAILS into the holes that line up
over the UPRIGHT (C).
å Peel the FELT DISC from the FELT DISC CARD (1M). Stick
the FELT DISC on the LEGS (H and I).
419517 www.sauder.com/servicePage 16
NAIL
(39 used in this step)
1N
Do not stand the unit upright without the
BACK fastened. The unit may collapse.
Caution
These holes must line up
over the UPRIGHT (C).
F
I
H
I
H
1M
å Fasten the FOOT BRACKET (6E) to the BOTTOM (E). Use
three BLACK 9/16" LARGE HEAD SCREWS (1S).
å Slide the FEET (P) onto the FOOT BRACKET (6E).
å Slide the CORNER CAP (5E) onto the FEET (P).
å Turn two BLACK 9/16" LARGE HEAD SCREWS (1S) into
the short slots of the FOOT BRACKET (6E).
Step 13
419517www.sauder.com/service Page 17
E
P
P6E
5E
6E
Completed foot support
BLACK 9/16" LARGE HEAD SCREW
(5 used in this step)
1S
1S
Step 14
419517 www.sauder.com/servicePage 18
D975
D50
D51
D167
D50
D50
D51
D51
VIEW THE T-SLOT BOX VIDEO
L
L
M65
L
1
3
2
4
Push down
å Pull the DRAWER FRONT BRACKETS (9G) apart and slide them
into the grooves in the DRAWER SIDES (D50 and D51). You may
need to gently tap them in with a hammer.
å NOTE: The DRAWER FRONT BRACKETS are marked "RH" and
"LH" for easy identification.
å Fasten a DRAWER FRONT (L) to the DRAWER FRONT
BRACKETS (9G). Use four BLACK 9/16" LARGE HEAD SCREWS (1S).
å Slide the DRAWER BOTTOM (D975) into the
grooves in the DRAWER SIDES (D50 and D51) and
DRAWER FRONT (L).
å Fasten the DRAWER BRACE (M65) to the DRAWER
FRONT (L). Tighten one HIDDEN CAM.
å Fasten the DRAWER BACK (D167) to the DRAWER
SIDES (D50 and D51) and DRAWER BRACE (M65).
Use five BLACK 1-9/16" FLAT HEAD SCREWS (30S).
å Repeat this step for the other three drawers using
DRAWER FRONTS (L and M).
BLACK 9/16" LARGE HEAD SCREW
(16 used in this step)
1S
Be sure the
DRAWER
BOTTOM
inserts into
the DRAWER
BACK groove.
With the palm of your hand,
tap the DRAWER BOTTOM
down into the groove.
30S
Start each screw a few turns before
completely tightening any of them.
BLACK 1-9/16" FLAT HEAD SCREW
(20 used in this step)
Unfinished surface
Surface with
HIDDEN CAM
9G
Hidden part using
recycled material.
Color may vary.
Step 15
419517www.sauder.com/service Page 19
VIEW THE T-SLOT BOX VIDEO
D212 D212
D212
D166
D213
D213
D213
D975
D166
J
J
J
M65
M65
1
3
2
4
Push down
å Pull the DRAWER FRONT BRACKETS (8G) apart and slide them
into the grooves in the DRAWER SIDES (D212 and D213). You
may need to gently tap them in with a hammer.
å NOTE: The DRAWER FRONT BRACKETS are marked "RH" and
"LH" for easy identification.
å Fasten the DRAWER FRONT (J) to the DRAWER FRONT
BRACKETS (8G). Use four BLACK 9/16" LARGE HEAD SCREWS (1S).
å Slide the DRAWER BOTTOM (D975) into the grooves in the
DRAWER SIDES (D212 and D213) and DRAWER FRONT (J).
å Fasten the DRAWER BRACE (M65) to the DRAWER
FRONT (J). Tighten one HIDDEN CAM.
å Fasten the DRAWER BACK (D166) to the DRAWER
SIDES (D212 and D213) and DRAWER BRACE (M65).
Use five BLACK 1-9/16" FLAT HEAD SCREWS (30S).
å Repeat this step for the other drawer.
BLACK 9/16" LARGE HEAD SCREW
(8 used in this step)
1S
Be sure the
DRAWER
BOTTOM
inserts into
the DRAWER
BACK groove.
With the palm of your hand,
tap the DRAWER BOTTOM
down into the groove.
30S
Start each screw a few turns before
completely tightening any of them.
BLACK 1-9/16" FLAT HEAD SCREW
(10 used in this step)
Unfinished surface
Surface with
HIDDEN CAM
8G
Hidden part using
recycled material.
Color may vary.
Step 16
419517 www.sauder.com/servicePage 20
L
D51
D50
98K
SILVER 1/4" MACHINE SCREW
(12 used for the PULLS)
61S
10I
If you're doing this to
help a friend, don't
leave without a bite.
å Fasten a DRAWER RIGHT (40DC) to the LOWER RIGHT
DRAWER SIDE (D50) and a DRAWER LEFT (40DD) to the
LOWER LEFT DRAWER SIDE (D51). Use four GOLD 5/16"
FLAT HEAD SCREWS (3S) through holes #1 and #2.
å NOTE: The glides are not intended to rotate.
å Fasten a PULL (98K) to the LOWER RIGHT DRAWER
FRONT (L). Use two WASHERS (10I) and two SILVER 1/4"
MACHINE SCREWS (61S).
å Repeat this step for the other drawers.
1
2
GOLD 5/16" FLAT HEAD SCREW
(24 used in this step)
3S
Glide end
Glide end
1
2
VIEW THE DRAWER GLIDE VIDEO

Other Sauder Indoor Furnishing manuals
Sauder HomePlus 422428 User manual

Sauder

Sauder HomePlus 422428 User manual

Sauder Hammond 428247 User manual

Sauder

Sauder Hammond 428247 User manual

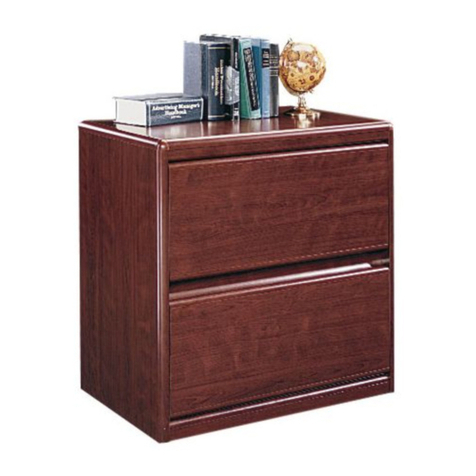
Sauder Lateral File 419606 User manual

Sauder

Sauder Lateral File 419606 User manual

Sauder Pogo 414433 User manual

Sauder

Sauder Pogo 414433 User manual

Sauder Harbor View 8070-297 User manual

Sauder

Sauder Harbor View 8070-297 User manual

Sauder North Avenue User manual

Sauder

Sauder North Avenue User manual

Sauder Pinwheel Collection 422600 User manual

Sauder

Sauder Pinwheel Collection 422600 User manual

Sauder OfficeWorks AFFIRM 426279 User manual

Sauder

Sauder OfficeWorks AFFIRM 426279 User manual

Sauder 420612 User manual

Sauder

Sauder 420612 User manual

Sauder 535782 User manual

Sauder

Sauder 535782 User manual

Sauder 1034-290 User manual

Sauder

Sauder 1034-290 User manual

Sauder 411904 User manual

Sauder

Sauder 411904 User manual

Sauder North Avenue 426016 User manual

Sauder

Sauder North Avenue 426016 User manual

Sauder Briarbrook 430070 User manual

Sauder

Sauder Briarbrook 430070 User manual

Sauder worksense PALO ALTO 427795 User manual

Sauder

Sauder worksense PALO ALTO 427795 User manual

Sauder Office Port 408293 User manual

Sauder

Sauder Office Port 408293 User manual

Sauder Whitaker Point 429369 User manual

Sauder

Sauder Whitaker Point 429369 User manual

Sauder 418073 User manual

Sauder

Sauder 418073 User manual

Sauder Library 412177 User manual

Sauder

Sauder Library 412177 User manual

Sauder Boulevard Cafe 420645 User manual

Sauder

Sauder Boulevard Cafe 420645 User manual

Sauder Beginnings 413037 User manual

Sauder

Sauder Beginnings 413037 User manual

Sauder 419188 User manual

Sauder

Sauder 419188 User manual

Sauder Stockbridge 409128 User manual

Sauder

Sauder Stockbridge 409128 User manual

Sauder Cottage Road 427307 User manual

Sauder

Sauder Cottage Road 427307 User manual

Popular Indoor Furnishing manuals by other brands

Coaster 701034 Assembly instructions

Coaster

Coaster 701034 Assembly instructions

BBO Ivette Wadrobe 4P Assembly instructions

BBO

BBO Ivette Wadrobe 4P Assembly instructions

AGILE WBD-18F710 Technical manual

AGILE

AGILE WBD-18F710 Technical manual

RTA BELLAGIO AEW2881 Assemble instructions

RTA

RTA BELLAGIO AEW2881 Assemble instructions

Altra furniture 1783215PCOM manual

Altra furniture

Altra furniture 1783215PCOM manual

Elements DMT3006CS Assembly instructions

Elements

Elements DMT3006CS Assembly instructions

Leggett & Platt style series owner's manual

Leggett & Platt

Leggett & Platt style series owner's manual

Ropox Vision Manual A user manual

Ropox

Ropox Vision Manual A user manual

aspenhome ICB-1636-BCH Assembly instructions

aspenhome

aspenhome ICB-1636-BCH Assembly instructions

WIEMANN Kansas manual

WIEMANN

WIEMANN Kansas manual

convenience concepts AMERICAN HERITAGE 7107159BL Assembly instructions

convenience concepts

convenience concepts AMERICAN HERITAGE 7107159BL Assembly instructions

Blanco BLANCOPRECISION 513-692 Specification sheet

Blanco

Blanco BLANCOPRECISION 513-692 Specification sheet

shopPOPdisplays 18000 Assembly instructions

shopPOPdisplays

shopPOPdisplays 18000 Assembly instructions

Ercol Bosco 1365 manual

Ercol

Ercol Bosco 1365 manual

Courtyard Creations TCS21CW Assembly instructions

Courtyard Creations

Courtyard Creations TCS21CW Assembly instructions

Next KOBE 876223 Assembly instructions

Next

Next KOBE 876223 Assembly instructions

Mocka Aspiring Classic Cot Assembly instructions

Mocka

Mocka Aspiring Classic Cot Assembly instructions

for Living 424231 Assembly instructions

for Living

for Living 424231 Assembly instructions

manuals.online logo
manuals.online logoBrands
  • About & Mission
  • Contact us
  • Privacy Policy
  • Terms and Conditions

Copyright 2025 Manuals.Online. All Rights Reserved.