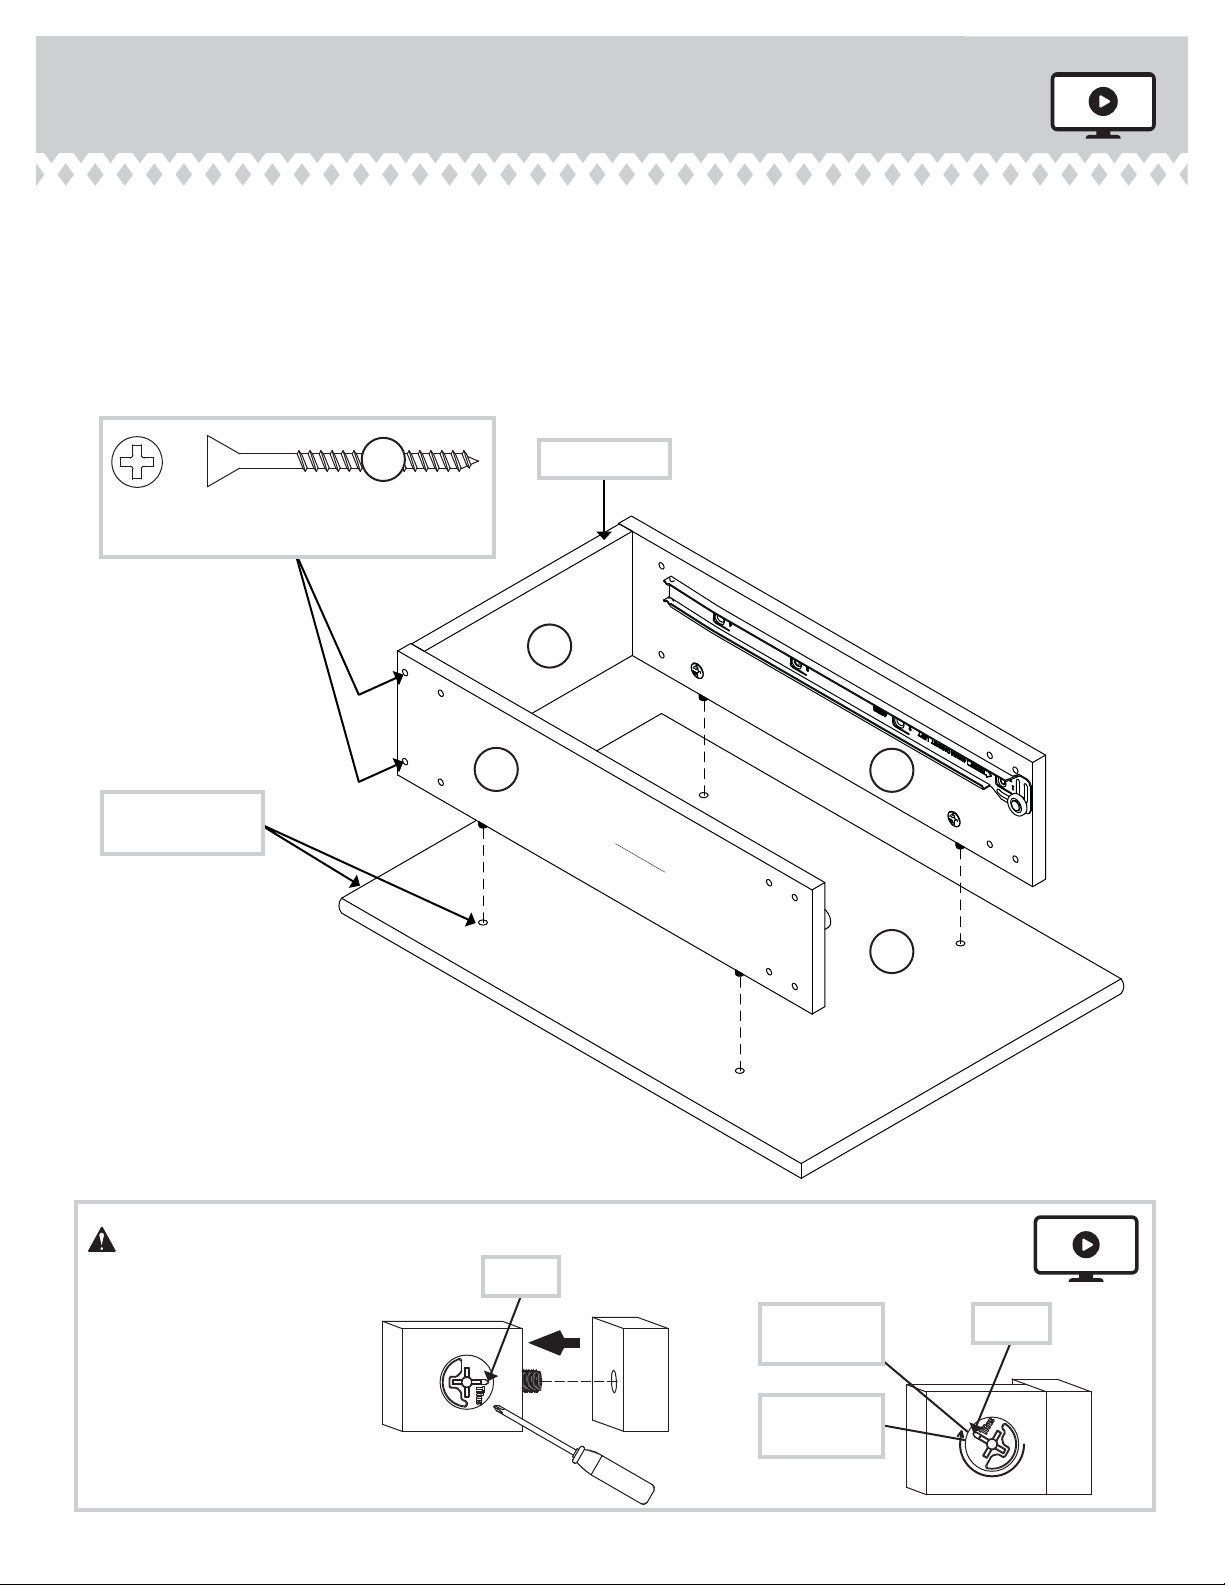
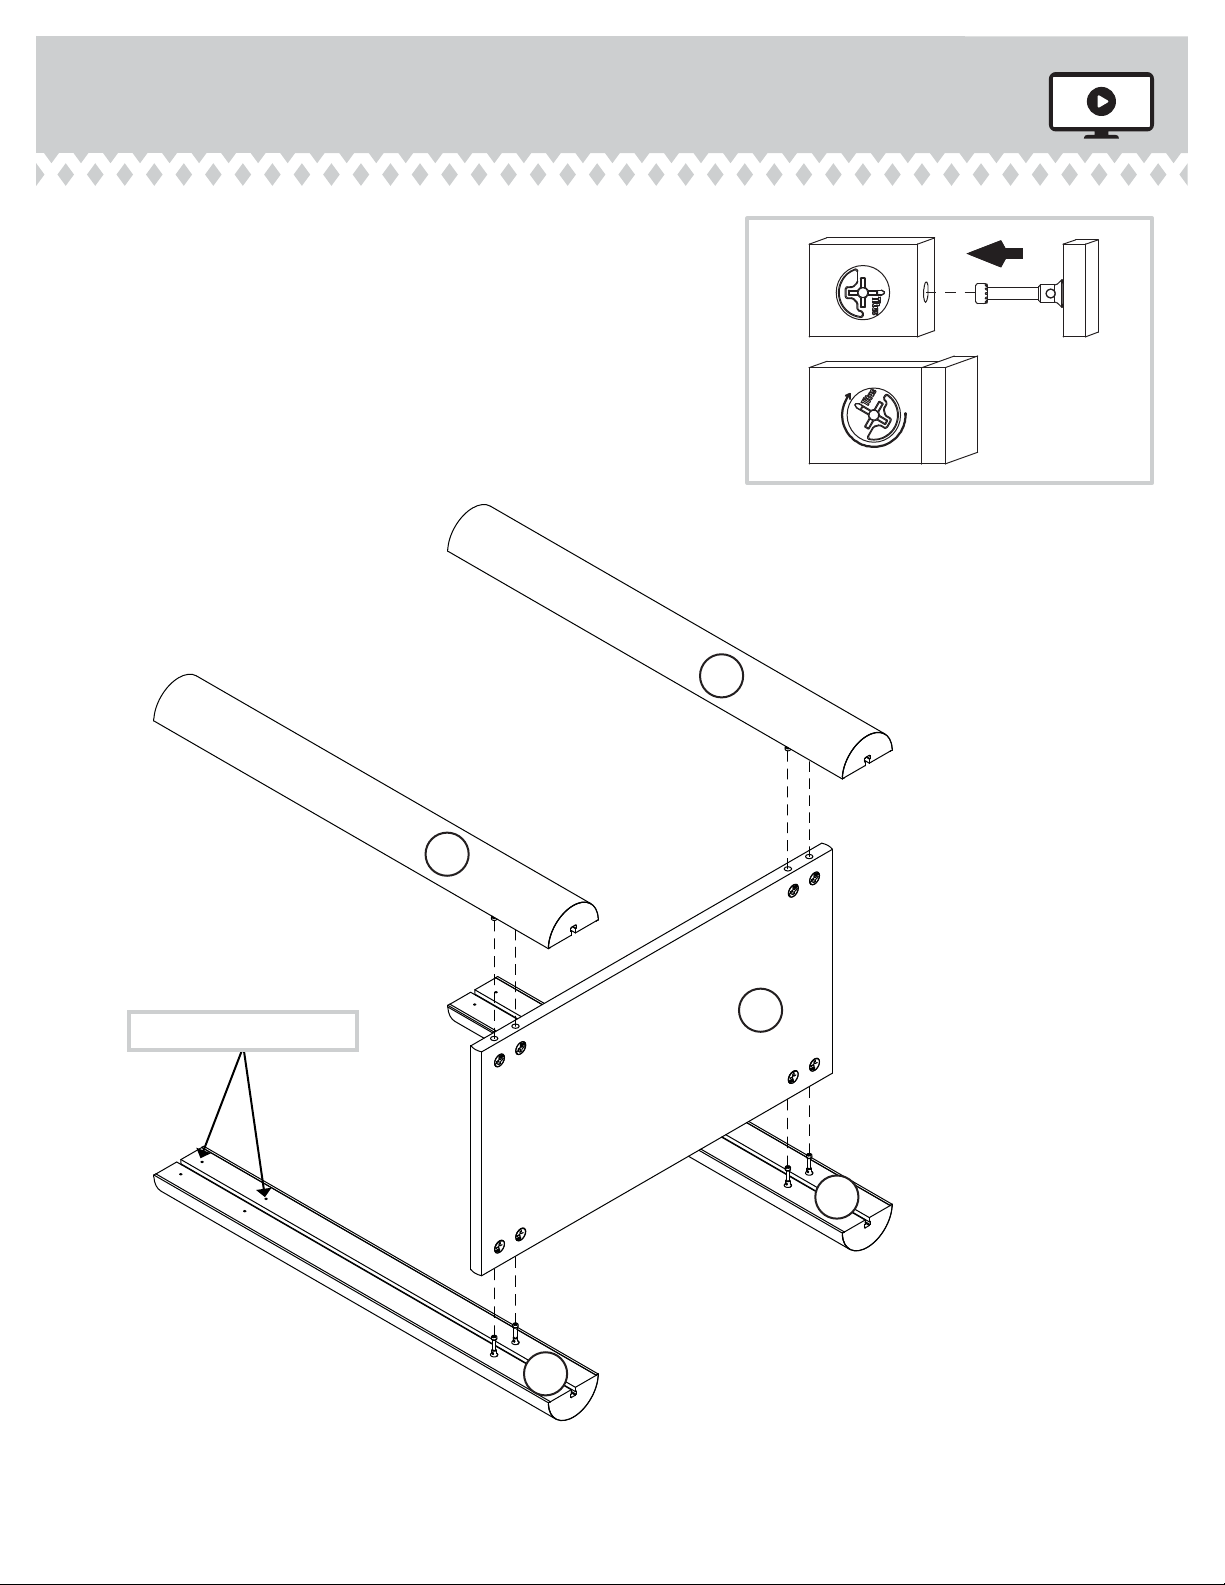
Sauder Boone Mountain 416561 User manual
Other Sauder Indoor Furnishing manuals

Sauder
Sauder 416091 User manual

Sauder
Sauder Nova Loft 423720 User manual

Sauder
Sauder 401822 User manual

Sauder
Sauder Harvey Park 421933 Installation and operation manual

Sauder
Sauder Shoal Creek 418662 User manual

Sauder
Sauder Parklane 423107 User manual

Sauder
Sauder Englewood 426484 User manual

Sauder
Sauder Costa Credenza 419959 User manual

Sauder
Sauder 417714 User manual

Sauder
Sauder Kitchen Cart 419324 User manual

Sauder
Sauder Dixon Dowel Stool Short User manual

Sauder
Sauder Cottage Road 420136 User manual

Sauder
Sauder Briarbrook Credenza 430074 User manual

Sauder
Sauder Office Port 408293 User manual

Sauder
Sauder Harvey Park 414986 User manual

Sauder
Sauder Cornerstone 404972 User manual

Sauder
Sauder Portage Park 426293 User manual

Sauder
Sauder Hammond 428244 User manual

Sauder
Sauder Cannery Bridge 420374 User manual

Sauder
Sauder 420850 User manual


Popular Indoor Furnishing manuals by other brands

Regency
Regency LWMS3015 Assembly instructions

Furniture of America
Furniture of America CM7751C Assembly instructions

Safavieh Furniture
Safavieh Furniture Estella CNS5731 manual

PLACES OF STYLE
PLACES OF STYLE Ovalfuss Assembly instruction

Trasman
Trasman 1138 Bo1 Assembly manual

Costway
Costway JV10856 manual