manuals.online logo
Brands
  1. Home
  2. •
  3. Brands
  4. •
  5. Sauder
  6. •
  7. Indoor Furnishing
  8. •
  9. Sauder August Hill 426135 User manual

Sauder August Hill 426135 User manual

sauder.com
NOTE: THIS INSTRUCTION
BOOKLET CONTAINS IMPORTANT
SAFETY INFORMATION.
PLEASE READ AND KEEP FOR
FUTURE REFERENCE.
sauder.com
CONTACT US FIRST
BEFORE MAKING ANY RETURNS TO THE STORE.
sauder.com
CONTACT US FIRST
BEFORE MAKING ANY RETURNS TO THE RETAILER.
Visit sauder.com/service to order replacement parts, view video assembly tips, or chat with a live rep.
Prefer the phone? Give us a ring at 1-800-523-3987.
Customer Service is available Monday-Friday - 9 a.m. to 5:30 p.m. EST (except holidays)
Sauder.com
Share your journey!
English pg 1-32
Français pg 33-36
Español pg 37-40
Lot # 539934 02/17/20
Purchased: __________________
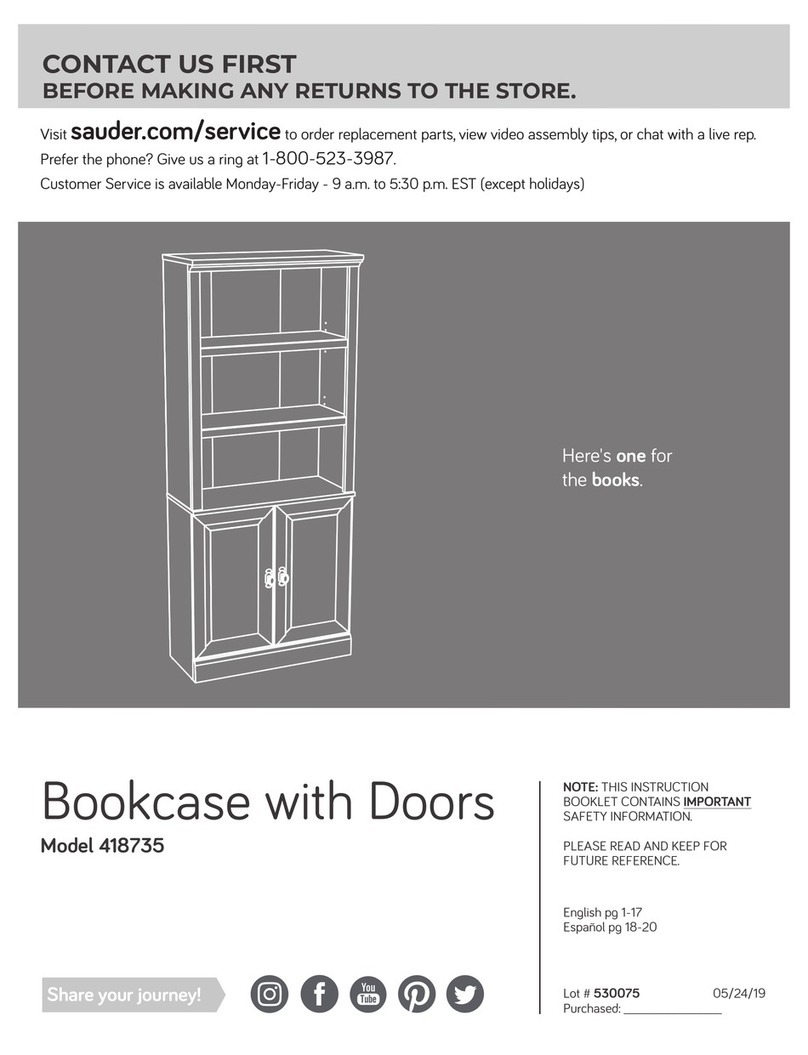
Bookcase With Doors
August Hill Collection | Model 426135
The stories of your life.
Table of Contents Assembly Tools Required
Part Identification
Hardware Identification
Assembly Steps
Français
Español
Safety
Warranty
Hammer
Not actual size
No. 2 Phillips Screwdriver
Tip Shown Actual Size
3
4-5
6-32
33-36
37-40
41-42
43
426135 www.sauder.com/servicePage 2
A END (2)
B TOP (1)
C TOP FRONT MOLDING (1)
D TOP SIDE MOLDING (2)
E UPPER LEG (4)
F RIGHT FRONT/LEFT REAR LEG (2)
G LEFT FRONT/RIGHT REAR LEG (2)
H BOTTOM (1)
J UPPER END MOLDING (2)
K LOWER END MOLDING (2)
L VERTICAL END MOLDING (2)
M UPPER FIXED SHELF (2)
N ADJUSTABLE SHELF (1)
O BOTTOM MOLDING (1)
P UPPER BACK (2)
Q LOWER FIXED SHELF (1)
R DOOR (2)
S LOWER BACK (1)
A
A
B
C
D
D
E
F
G
H
J
K
L
M
N
O
P
Q
R
R
M
K
J
L
E
EE
P
G
F
S
426135www.sauder.com/service Page 3
Part Identification
åWhile not all parts are labeled, some of the parts will have a label or an inked letter on the edge
to help distinguish similar parts from each other. Use this part identification to help identify similar parts.
Now you know
our ABCs.
Hardware Identification
FURNITURE TIPPING
RESTRAINT KIT - 1
97
APPLIQUE CARD - 5
100P
WASHER - 2
10I
METAL PIN - 4
1R
CAM SCREW - 12
8F
PULL - 2
22K
DOOR STOP - 2
4I
WOOD DOWEL - 6
15F
NAIL - 30
1N
HIDDEN CAM - 36
1F CAM DOWEL - 24
2F
RUBBER SLEEVE - 4
2R
14H HINGE - 4
426135 www.sauder.com/servicePage 4
Hardware Identification
åScrews are shown actual size. You may receive extra hardware with your unit.
BROWN 1-1/2" FLAT HEAD SCREW - 7
14S
SILVER 1/4" MACHINE SCREW - 2
61S
BLACK 1/2" FLAT HEAD SCREW - 8
11S
BLACK 9/16" FLAT HEAD SCREW - 12
32S
BLACK 1-15/16" FLAT HEAD SCREW - 12
113S
426135www.sauder.com/service Page 5
Hardware Usage Guide
Start Tighten
Arrow
Minimum
190 degrees
Caution
Risk of damage or
injury. HIDDEN CAMS
must be completely
tightened. HIDDEN
CAMS that are not
completely tightened
may loosen, and parts
may separate. To
completely tighten:
Arrow
Maximum
210 degrees
3. Start Tighten
Arrow
Minimum
190 degrees
Caution
Risk of damage or
injury. HIDDEN CAMS
must be completely
tightened. HIDDEN
CAMS that are not
completely tightened
may loosen, and parts
may separate. To
completely tighten:
Arrow
Maximum
210 degrees
HOW TO USE A HIDDEN CAM & CAM DOWEL
Hole
Hidden Cam
Cam Dowel
2.
Hole
Hidden Cam
Cam Dowel
Insert the metal end of the CAM
DOWEL into the HIDDEN CAM.
Metal end
Arrow
1. Push a HIDDEN CAM into
the part. The arrow in the
HIDDEN CAM must point
toward the hole in the
edge of the board.
Cam Screw
Hidden Cam
Arrow
Push a HIDDEN CAM into
the part. The arrow in the
HIDDEN CAM must point
toward the hole in the
edge of the board.
Hole
2. 3.
1
2
Insert the CAM SCREW into the HIDDEN CAM.
Tighten the HIDDEN CAM.
HOW TO USE A HIDDEN CAM & CAM SCREW
Turn the CAM SCREW until
the shoulder is against the
surface of the part.
1.
426135 www.sauder.com/servicePage 6
Step 1
å Assemble your unit on a carpeted floor or on the empty
carton to avoid scratching your unit or the floor.
å Push five HIDDEN CAMS (1F) into the UPPER BACKS (P)
and a UPPER LEG (E). Then, insert the metal end of a
CAM DOWEL (2F) into each HIDDEN CAM.
Look for this icon. It means a video assembly tip is
available at www.sauder.com/service/tips
Find the numbered video or scan the QR code. 1
Do not tighten the HIDDEN CAMS in this step.
Arrow
1F
2F
(5 used)
Metal end
P
P
E
426135www.sauder.com/service Page 7
å Open the FURNITURE TIPPING RESTRAINT KIT (97)
and fasten the SAFETY STRAP to the TOP (B). Use the
provided BLACK 9/16" LARGE HEAD SCREW.
å NOTE: Position the SAFETY STRAP exactly as shown.
å Fasten the TOP (B) to the UPPER BACKS (P) and LEG (E).
Tighten the HIDDEN CAM in the LEG (E).
å NOTE: The HIDDEN CAMS in the UPPER BACKS will be
tightened in a later step.
Step 2
P
P
E
B
B
1
BLACK 9/16" LARGE HEAD SCREW
(1 used for the SAFETY STRAP)
Safety strap
97
Surface without
HIDDEN CAMS Surface without
HIDDEN CAMS
Surface with HIDDEN CAMS
Do not stand the unit upright without the
BACK fastened. The unit may collapse.
Caution
426135 www.sauder.com/servicePage 8
å Push four HIDDEN CAMS (1F) into a UPPER FIXED SHELF (M).
Then, insert the metal end of a CAM DOWEL (2F) into each
HIDDEN CAM.
Step 3
M
Do not tighten the HIDDEN CAMS in this step.
1
1F
2F
Metal end
Arrow
1F
2F
Arrow
(4 used)
Metal end
426135www.sauder.com/service Page 9
å Fasten a UPPER FIXED SHELF (M) to the LEG (E). Tighten
one HIDDEN CAM.
Step 4
M
Surface without
HIDDEN CAMS
1
E
426135 www.sauder.com/servicePage 10
Just think. The sooner
you do this, the sooner
you do something else.
å Push one HIDDEN CAM (1F) into a LEG (E). Then, insert the
metal end of a CAM DOWEL (2F) into each HIDDEN CAM.
Step 5
E
Do not tighten the HIDDEN CAMS in this step.
Arrow
1F
2F
(1 used)
Metal end
1
426135www.sauder.com/service Page 11
å Fasten the LEG (E) to the TOP (B) and UPPER
FIXED SHELF (M). Tighten two HIDDEN CAMS.
Step 6
E
M
B
1
Surface with HIDDEN CAMS
426135 www.sauder.com/servicePage 12
å Push four HIDDEN CAMS (1F) into the UPPER FIXED SHELF (M). Then, insert the
metal end of a CAM DOWEL (2F) into each HIDDEN CAM.
å Fasten the UPPER FIXED SHELF (M) to the LEGS (E). Tighten two HIDDEN CAMS.
Step 7
M
E
E
M
1
Surface without
HIDDEN CAMS
1F
2F
Arrow
Metal end
1F
2F
(4 used)
Metal end
Arrow
426135www.sauder.com/service Page 13
å Push two HIDDEN CAMS (1F) into the remaining LEGS (E).
Then, insert the metal end of a CAM DOWEL (2F) into each
HIDDEN CAM.
å Fasten the LEGS (E) to the TOP (B) and UPPER FIXED
SHELVES (M). Tighten six HIDDEN CAMS.
Step 8 1
E
E
Arrow
1F
2F
(2 used)
Metal end
B
M
M
E
E
Surface without
HIDDEN CAMS
426135 www.sauder.com/servicePage 14
å Fasten the LOWER FIXED SHELF (Q) to the LEGS (E)
and UPPER BACKS (P). Use eight BLACK 1-15/16" FLAT
HEAD SCREWS (113S).
Step 9
E
E
E
E
Q
P
P
BLACK 1-15/16" FLAT HEAD SCREW
(8 used in this step)
113S
426135www.sauder.com/service Page 15
Surface with fewer holes
å Carefully stand your unit on its top surface.
å Tighten the four HIDDEN CAMS in the UPPER BACKS (P).
å Push two DOOR STOPS (4I) into the LOWER FIXED SHELF (Q).
å Fasten the UPPER BACKS (P) to the UPPER FIXED SHELVES (M).
Use four BLACK 1-15/16" FLAT HEAD SCREWS (113S).
å Peel APPLIQUES from the APPLIQUE CARDS (100P) and stick
them onto each visible HIDDEN CAM and SCREW head.
Step 10
P
P
Q
4I
(20 used)
To cover HIDDEN CAMS
To cover screws
100P
1
426135 www.sauder.com/servicePage 16
M
M
BLACK 1-15/16" FLAT HEAD SCREW
(4 used in this step)
113S
å Fasten the MOLDINGS (C and D) to the TOP (B). Use seven
BROWN 1-1/2" FLAT HEAD SCREWS (14S).
å Peel APPLIQUES from the APPLIQUE CARDS (100P) and
stick them onto each visible SCREW head.
Step 11
BC
D
D
BROWN 1-1/2" FLAT HEAD SCREW
(7 used in this step)
14S
426135www.sauder.com/service Page 17
100P
To cover screws
(7 used)
å Turn six BLACK 9/16" FLAT HEAD SCREWS (32S) into the END (A) until the shoulders of the SCREWS rest on the surface
of the END.
å NOTE: Do not overtighten the SCREWS.
å Slide the MOLDING (K) onto the END (A). Line up the grooves in the MOLDING over the heads of the SCREWS in
the END.
å NOTE: The MOLDING should be even on both edges of the END.
å NOTE: If the MOLDING comes up o of the SCREWS, remove it and slide it on again.
å Slide the MOLDING (L) onto the END (A) until it comes into contact with the MOLDING (K).
å NOTE: If the MOLDING comes up o of the SCREWS, remove it and slide it on again.
å Repeat this step for the remaining END.
Step 12
A
L
K
BLACK 9/16" FLAT HEAD SCREW
(12 used in this step)
32S
Apply pressure with your hands
as you guide the MOLDING over
the SCREWS and onto the END.
Surface with
less holes
Apply pressure with your hands
as you guide the MOLDING over
the SCREWS and onto the END.
426135 www.sauder.com/servicePage 18
å Slide the MOLDING (J) onto the END (A). Line up the
grooves in the MOLDING over the heads of the SCREWS
in the END.
å NOTE: The MOLDING should be even on both edges of
the END.
å NOTE: If the MOLDING comes up o of the SCREWS,
remove it and slide it on again.
å Repeat this step for the remaining END.
Step 13
J
A
Apply pressure with your hands
as you guide the MOLDING over
the SCREWS and onto the END.
426135www.sauder.com/service Page 19
Now might be a
good time to refresh
your drink.
å Push eight HIDDEN CAMS (1F) into a END (A)
å Repeat this step for the remaining END.
Step 14
1F
Arrow
1F
Arrow
1F
Arrow
1
A
426135 www.sauder.com/servicePage 20

Other Sauder Indoor Furnishing manuals

Sauder Hammond 431249 User manual

Sauder

Sauder Hammond 431249 User manual

Sauder 413081 User manual

Sauder

Sauder 413081 User manual

Sauder 414129 User manual

Sauder

Sauder 414129 User manual

Sauder 426927 User manual

Sauder

Sauder 426927 User manual

Sauder Primary Street 417932 User manual

Sauder

Sauder Primary Street 417932 User manual

Sauder Barrister Lane 414720 User manual

Sauder

Sauder Barrister Lane 414720 User manual

Sauder HomePlus 422428 User manual

Sauder

Sauder HomePlus 422428 User manual

Sauder 401822 User manual

Sauder

Sauder 401822 User manual

Sauder 420406 User manual

Sauder

Sauder 420406 User manual

Sauder Shoal Creek 411222 User manual

Sauder

Sauder Shoal Creek 411222 User manual

Sauder Lateral File Pacific View 427360 User manual

Sauder

Sauder Lateral File Pacific View 427360 User manual

Sauder New Grange 420021 User manual

Sauder

Sauder New Grange 420021 User manual

Sauder Heritage Collection User manual

Sauder

Sauder Heritage Collection User manual

Sauder Aspen Post 427015 User manual

Sauder

Sauder Aspen Post 427015 User manual

Sauder 408726 User manual

Sauder

Sauder 408726 User manual

Sauder Pinwheel 421886 User manual

Sauder

Sauder Pinwheel 421886 User manual

Sauder Boulevard Cafe 422420 User manual

Sauder

Sauder Boulevard Cafe 422420 User manual

Sauder Pinwheel Collection 422600 User manual

Sauder

Sauder Pinwheel Collection 422600 User manual

Sauder Harbor View 403793 User manual

Sauder

Sauder Harbor View 403793 User manual

Sauder Carson Forge 414444 User manual

Sauder

Sauder Carson Forge 414444 User manual

Sauder 419119 User manual

Sauder

Sauder 419119 User manual

Sauder Harbor View 414942 User manual

Sauder

Sauder Harbor View 414942 User manual

Sauder Shoal Creek 409937 User manual

Sauder

Sauder Shoal Creek 409937 User manual

Sauder OfficeWorks AFFIRM 427414 User manual

Sauder

Sauder OfficeWorks AFFIRM 427414 User manual

Popular Indoor Furnishing manuals by other brands

OSP Designs BRT432-CHY operating instructions

OSP Designs

OSP Designs BRT432-CHY operating instructions

Furniture of America Ann CM3752PT-5PK Assembly instructions

Furniture of America

Furniture of America Ann CM3752PT-5PK Assembly instructions

Style selections ROWAN 30AW COMBO installation manual

Style selections

Style selections ROWAN 30AW COMBO installation manual

Classic Exhibits LT-116 quick start guide

Classic Exhibits

Classic Exhibits LT-116 quick start guide

symbiosis KUBE 8490 IA Assembling instructions

symbiosis

symbiosis KUBE 8490 IA Assembling instructions

YitaHome FTOFOD-0010 Assembly instructions

YitaHome

YitaHome FTOFOD-0010 Assembly instructions

Article CONAN Assembly instructions

Article

Article CONAN Assembly instructions

Lightolier Xceed 1050RNSLW_3D specification

Lightolier

Lightolier Xceed 1050RNSLW_3D specification

Furniture of America CM6149 Assembly instructions

Furniture of America

Furniture of America CM6149 Assembly instructions

Coaster 509363 Assembly instructions

Coaster

Coaster 509363 Assembly instructions

SAUTHON easy JAZZY JF161A Technical manual

SAUTHON easy

SAUTHON easy JAZZY JF161A Technical manual

Ty Pennington Style PALMETTO Use and care guide

Ty Pennington

Ty Pennington Style PALMETTO Use and care guide

Otto 14441838 Assembly instructions

Otto

Otto 14441838 Assembly instructions

NEXERa 220303 Assembly instructions

NEXERa

NEXERa 220303 Assembly instructions

American Signature VCF WA-8215-QB Assembly instructions

American Signature

American Signature VCF WA-8215-QB Assembly instructions

Nightingale NXO 6401 Series User handbook

Nightingale

Nightingale NXO 6401 Series User handbook

Cooper Lighting METALUX 2HB15 Specification sheet

Cooper Lighting

Cooper Lighting METALUX 2HB15 Specification sheet

Techni Mobili RTA-3240 Assembly instructions

Techni Mobili

Techni Mobili RTA-3240 Assembly instructions

manuals.online logo
manuals.online logoBrands
  • About & Mission
  • Contact us
  • Privacy Policy
  • Terms and Conditions

Copyright 2025 Manuals.Online. All Rights Reserved.