manuals.online logo
Brands
  1. Home
  2. •
  3. Brands
  4. •
  5. Sauder
  6. •
  7. Indoor Furnishing
  8. •
  9. Sauder Cannery Bridge 429510 User manual

Sauder Cannery Bridge 429510 User manual

sauder.com
NOTE: THIS INSTRUCTION
BOOKLET CONTAINS IMPORTANT
SAFETY INFORMATION.
PLEASE READ AND KEEP FOR
FUTURE REFERENCE.
sauder.com
CONTACT US FIRST
BEFORE MAKING ANY RETURNS TO THE STORE.
sauder.com
CONTACT US FIRST
BEFORE MAKING ANY RETURNS TO THE RETAILER.
Visit sauder.com/service to order replacement parts, view video assembly tips, or chat with a live rep.
Prefer the phone? Give us a ring at 1-800-445-1527.
Customer Service is available Monday-Friday - 9 a.m. to 5:30 p.m. EST (except holidays)
Sauder.com
Share your journey!
Enlish p 1-47
Français p 48-53
Español p 54-59
Lot # 569747 08/02/21
Purchased: __________________
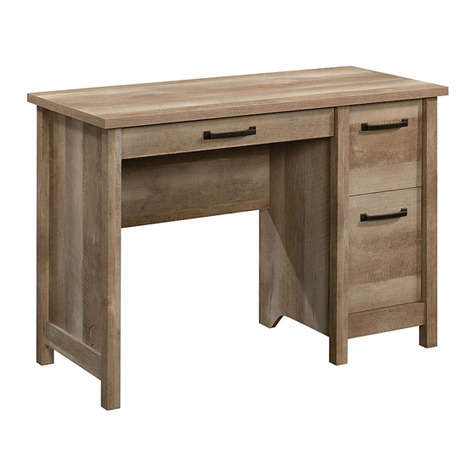
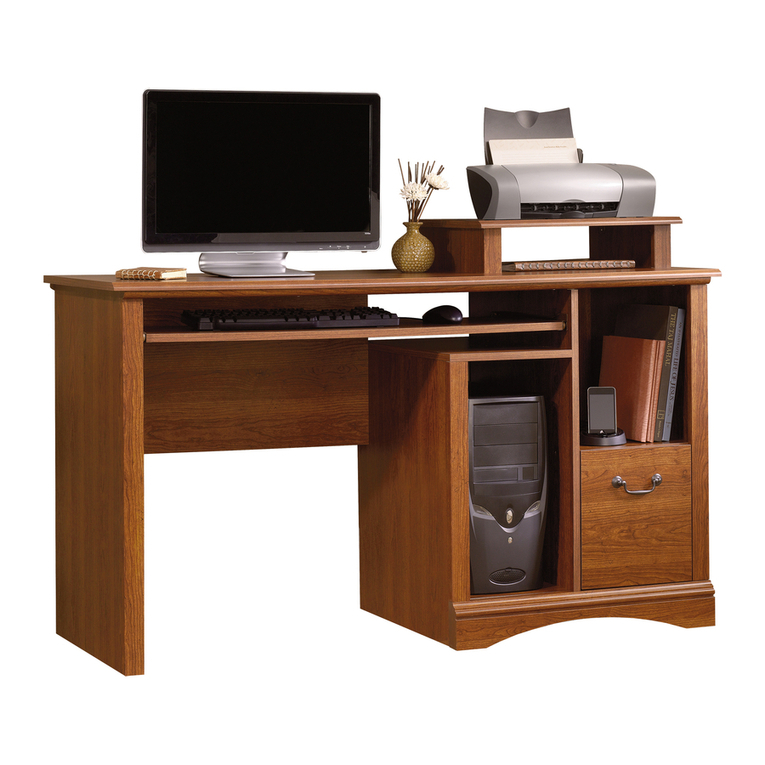
Computer Desk
Cannery Bride Collection | Model 429510
For all your
newfanled gadgetry.
Part Identification
Hardware Identification
Hardware Usage Guide
Assembly Steps
Français
Español
Safety
Warranty
No. 2 Phillips Screwdriver
Tip Shown Actual Size
Table of Contents Assembly Tools Required
3
4-5
6
7-47
48-53
54-59
60-62
63
Pae 2 www.sauder.com/service 429510
Part Identification
åWhile not all parts are labeled, some of the parts will have a label or an inked letter on the edge
to help distinguish similar parts from each other. Use this part identification to help identify similar parts.
Now you know
our ABCs.
A LEFT END (1)
B RIGHT END (1)
C LEFT UPRIGHT (1)
D RIGHT UPRIGHT (1)
E TOP (1)
F RIGHT BOTTOM (1)
G MODESTY PANEL (1)
H BACK (2)
K SKIRT (2)
L SMALL DRAWER FRONT (2)
M LEFT SMALL DRAWER SIDE (2)
N RIGHT SMALL DRAWER SIDE (2)
O SMALL DRAWER BACK (2)
P SMALL DRAWER BOTTOM (2)
Q LARGE DRAWER FRONT (1)
R LEFT LARGE DRAWER SIDE (1)
S RIGHT LARGE DRAWER SIDE (1)
T LARGE DRAWER BACK (1)
U LARGE DRAWER BOTTOM (1)
V SHELF (1)
W DOOR (1)
X LEFT BOTTOM (1)
A
B
C
D
E
F
G
H
K
L
M
N
O
Q
R
S
T
U
V
W
X
H
K
P
Pae 3www.sauder.com/service429510
Hardware Identification
åScrews are shown actual size. You may receive extra hardware with your unit.
(EXTENSION SET SHOWN SEPARATED)
1SMALL EXTENSION
RAIL - 4 2SMALL EXTENSION
SLIDE - 4
(EXTENSION SET SHOWN SEPARATED)
4LARGE EXTENSION
SLIDE - 2
3LARGE EXTENSION
RAIL - 2
LARGE HIDDEN
CAM - 47
5SMALL HIDDEN
CAM - 8
6CAM SCREW - 55
7
SMALL WOOD
DOWEL - 24
9METAL BRACKET - 8
10 PULL - 4
11 DOOR STOP - 1
12
13 HINGE - 2 APPLIQUE CARD - 1
14 15 BUMPER CARD - 1 METAL PIN - 4
16
GROMMET
WITH CAP- 1
17 18 FILE GLIDE - 2 19 FILE
HANGER  2 GROMMET - 2
20
Pae 4 www.sauder.com/service 429510
LARGE WOOD
DOWEL - 44
8
Hardware Identification
åScrews are shown actual size. You may receive extra hardware with your unit.
3/8" FLAT HEAD SCREW - 38
21 1/2" FLAT HEAD SCREW - 4
22
1/2" PAN HEAD SCREW - 18
23 1-1/2" FLAT HEAD SCREW - 8
24
25 78" MACHINE SCREW  4
Pae 5www.sauder.com/service429510
Hardware Usage Guide
HOW TO USE A HIDDEN CAM & CAM SCREW OR CAM DOWEL
NOTE: Various CAM SCREWS or a CAM DOWEL may be used.
Cam Screws Cam Dowel
Turn the CAM SCREW or
gently tap the CAM DOWEL
until the shoulder is against
the surface of the part.
1.
Hidden Cam
Arrow
Push a HIDDEN CAM into
the part. The arrow in the
HIDDEN CAM must point
toward the hole in the
edge of the board.
Hole
2.
3.
1
2
Insert the CAM SCREW or CAM DOWEL into the
HIDDEN CAM. Tighten the HIDDEN CAM.
Pae 6 www.sauder.com/service 429510
Step 1 Look for this icon. It means a video assembly tip is
available at www.sauder.com/service/tips
Find the numbered video or scan the QR code.
å Assemble your unit on a carpeted floor or on the empty
carton to avoid scratchin your unit or the floor.
å Push ten LARGE HIDDEN CAMS (5) into one of the
SKIRTS (K), and LEFT BOTTOM (X).
å Turn two CAM SCREWS (7) into the SKIRT (K).
X
1
5
Arrow
5
Arrow
Arrow
5
K
Arrow
5
7
5
Arrow
Pae 7www.sauder.com/service429510
Some assembly
(and snacks) required.
å Insert two LARGE WOOD DOWELS (8) into the SKIRT (K).
å Fasten the SKIRT (K) to the LEFT BOTTOM (X). Tihten
two HIDDEN CAMS.
å NOTE: Be sure the WOOD DOWELS in the SKIRT insert
into the LEFT BOTTOM.
Step 2
X
K
8
8
Surface with HIDDEN CAMS
1
Surface with
HIDDEN CAMS
Pae 8 www.sauder.com/service 429510
These surfaces should be even.
å Push four LARGE HIDDEN CAMS (5) into one of the BACKS (H).
Step 3 1
H
5
Arrow
Arrow
5
Pae 9www.sauder.com/service429510
å Insert two LARGE WOOD DOWELS (8) into the BACK (H).
å Push the LEFT BOTTOM (X) onto the LARGE WOOD
DOWELS (8) in the BACK (H).
Step 4
X
H
8
8
Surface with HIDDEN CAMS
Pae 10 www.sauder.com/service 429510
å Push three LARGE HIDDEN CAMS (5) into the LEFT END (A).
å Turn six CAM SCREWS (7) into the LEFT END (A).
Step 5 1
A
5
Arrow
7
7
Pae 11www.sauder.com/service429510
å Insert four LARGE WOOD DOWELS (8) into the LEFT END (A).
å Fasten the BACK (H), SKIRT (K), and LEFT BOTTOM (X) to the LEFT END (A). Tihten six HIDDEN CAMS.
å NOTE: Be sure the WOOD DOWELS in the LEFT END insert into the BACK and LEFT BOTTOM.
Step 6
A
X
H
8
8
Surface with HIDDEN CAMS
Surface without HIDDEN CAMS
1
Pae 12 www.sauder.com/service 429510
K
å Push three LARGE HIDDEN CAMS (5) into the LEFT UPRIGHT (C).
å Turn six CAM SCREWS (7) into the LEFT UPRIGHT (C).
å Turn the LEFT UPRIGHT (C) over.
å Turn three CAM SCREWS (7) into the LEFT UPRIGHT (C).
Step 7 1
C
5
Arrow
F
L
I
P
O
V
E
R
C
7
7
Pae 13www.sauder.com/service429510
å Insert four LARGE WOOD DOWELS (8) into the LEFT UPRIGHT (C).
å Fasten the LEFT UPRIGHT (C) to the BACK (H), SKIRT (K) and LEFT
BOTTOM (X). Tihten six HIDDEN CAMS.
å NOTE: Be sure the LARGE WOOD DOWELS in the LEFT UPRIGHT insert
into the BACK, and LEFT BOTTOM.
Step 8
C
X
H
8
8
Surface without HIDDEN CAMS
1
Pae 14 www.sauder.com/service 429510
K
Step 9
å Fasten four METAL BRACKETS (10) to the LEFT END (A), LEFT UPRIGHT (C),
BACK (H), and SKIRT (K). Use eiht 1/2" PAN HEAD SCREWS (23).
å NOTE: You should start each SCREW a few turns before completely
tihtenin any of them.
C
A
H
K
10
1/2" PAN HEAD SCREW
(8 used in this step)
23
(4 used)
Pae 15www.sauder.com/service429510
Step
å Push ten LARGE HIDDEN CAMS (5) into the RIGHT
BOTTOM (F), and remainin SKIRT (K).
å Turn two CAM SCREWS (7) into the SKIRT (K).
Step 10 1
Pae 16 www.sauder.com/service 429510
F
K
Arrow
5
5
Arrow
5
Arrow
Arrow
5
5
Arrow
7
Step
å Insert two LARGE WOOD DOWELS (8) into the SKIRT (K).
å Fasten the SKIRT (K) to the RIGHT BOTTOM (F). Tihten
two HIDDEN CAMS.
å NOTE: Be sure the LARGE WOOD DOWELS in the SKIRT
insert into the RIGHT BOTTOM.
Step 11 1
Pae 17www.sauder.com/service429510
F
K
These surfaces should be even.
8
Surface with HIDDEN CAMS
Surface with
HIDDEN CAMS
Step
å Push four LARGE HIDDEN CAMS (5) into the remainin BACK (H).
Step 12 1
H
5
Arrow
Arrow
5
Pae 18 www.sauder.com/service 429510
å Insert two LARGE WOOD DOWELS (8) into the BACK (H).
å Push the RIGHT BOTTOM (F) onto the LARGE WOOD
DOWELS (8) in the BACK (H).
Step 13
F
H
K
Surface with HIDDEN CAMS
8
8
Pae 19www.sauder.com/service429510
Step
å Push three LARGE HIDDEN CAMS (5) into the RIGHT UPRIGHT (D).
å Turn six CAM SCREWS (7) into the RIGHT UPRIGHT (D).
å Flip the RIGHT UPRIGHT (D) over.
å Turn three CAM SCREWS (7) into the RIGHT UPRIGHT (D).
Step 14 1
Pae 20 www.sauder.com/service 429510
D
7
7
5
Arrow
7
F
L
I
P
O
V
E
R
D

Other Sauder Indoor Furnishing manuals
Sauder Shoal Creek 411236 User manual

Sauder

Sauder Shoal Creek 411236 User manual

Sauder DESIGNER'S IMAGE 430621 User manual

Sauder

Sauder DESIGNER'S IMAGE 430621 User manual

Sauder Manhattan Gate 429257 User manual

Sauder

Sauder Manhattan Gate 429257 User manual

Sauder New Grange 420021 User manual

Sauder

Sauder New Grange 420021 User manual

Sauder Clifford Place 433364 User manual

Sauder

Sauder Clifford Place 433364 User manual

Sauder Barrister Lane Hutch 418295 User manual

Sauder

Sauder Barrister Lane Hutch 418295 User manual

Sauder 412321 User manual

Sauder

Sauder 412321 User manual

Sauder OfficeWorks AFFIRM 426279 User manual

Sauder

Sauder OfficeWorks AFFIRM 426279 User manual

Sauder Home Plus Base Cabinet User manual

Sauder

Sauder Home Plus Base Cabinet User manual

Sauder DESIGNER'S IMAGE 430616 User manual

Sauder

Sauder DESIGNER'S IMAGE 430616 User manual

Sauder 414817 User manual

Sauder

Sauder 414817 User manual

Sauder Harbor View 403794 User manual

Sauder

Sauder Harbor View 403794 User manual

Sauder Hammond 430786 User manual

Sauder

Sauder Hammond 430786 User manual

Sauder Beginnings 429357 User manual

Sauder

Sauder Beginnings 429357 User manual

Sauder 415421 User manual

Sauder

Sauder 415421 User manual

Sauder Office Port Series User manual

Sauder

Sauder Office Port Series User manual

Sauder Costa 419958 User manual

Sauder

Sauder Costa 419958 User manual

Sauder 415137 User manual

Sauder

Sauder 415137 User manual

Sauder 408739 User manual

Sauder

Sauder 408739 User manual

Sauder Portage Park 426294 User manual

Sauder

Sauder Portage Park 426294 User manual

Sauder 414724 User manual

Sauder

Sauder 414724 User manual

Sauder OFFICE WORKS AFFIRM 427431 User manual

Sauder

Sauder OFFICE WORKS AFFIRM 427431 User manual

Sauder 427470 User manual

Sauder

Sauder 427470 User manual

Sauder 422290 User manual

Sauder

Sauder 422290 User manual

Popular Indoor Furnishing manuals by other brands

Philips LivingColors 691503148 owner's manual

Philips

Philips LivingColors 691503148 owner's manual

Strictly Beds & Bunks PLUTO Assembly instructions

Strictly Beds & Bunks

Strictly Beds & Bunks PLUTO Assembly instructions

Knoll Antenna Digital Control Switch Quick setup guide

Knoll

Knoll Antenna Digital Control Switch Quick setup guide

modway EEI-2650 manual

modway

modway EEI-2650 manual

BLACK RED WHITE B169-KOM4D2S Assembly

BLACK RED WHITE

BLACK RED WHITE B169-KOM4D2S Assembly

EKVIP 016716 operating instructions

EKVIP

EKVIP 016716 operating instructions

World Market HARTLEY 535790 Assembly instructions

World Market

World Market HARTLEY 535790 Assembly instructions

J.Burrows JBTORO18BC Assembly instructions

J.Burrows

J.Burrows JBTORO18BC Assembly instructions

FM Furniture Cusco EDW5972 Assembly instructions

FM Furniture

FM Furniture Cusco EDW5972 Assembly instructions

Saber Compact K00AA3314 installation guide

Saber Compact

Saber Compact K00AA3314 installation guide

Forward Industries Smart Side Table REFS-KBBM1115 Assembly instruction

Forward Industries

Forward Industries Smart Side Table REFS-KBBM1115 Assembly instruction

Lorell 60268 Assembly instructions

Lorell

Lorell 60268 Assembly instructions

wildkin Levels of Discovery Two Step Stool Assembly instructions

wildkin

wildkin Levels of Discovery Two Step Stool Assembly instructions

Hülsta Lanum Assembly instruction

Hülsta

Hülsta Lanum Assembly instruction

Article FANTOL Series Assembly instructions

Article

Article FANTOL Series Assembly instructions

Safco E-Z Stor 9254 Assembly instructions

Safco

Safco E-Z Stor 9254 Assembly instructions

Gilman Creek 661219 Assembly and care instructions

Gilman Creek

Gilman Creek 661219 Assembly and care instructions

Ameriwood HOME 4836354EBL manual

Ameriwood HOME

Ameriwood HOME 4836354EBL manual

manuals.online logo
manuals.online logoBrands
  • About & Mission
  • Contact us
  • Privacy Policy
  • Terms and Conditions

Copyright 2025 Manuals.Online. All Rights Reserved.