manuals.online logo
Brands
  1. Home
  2. •
  3. Brands
  4. •
  5. Sauder
  6. •
  7. Indoor Furnishing
  8. •
  9. Sauder SmartCenter Edge Water 413092 User manual

Sauder SmartCenter Edge Water 413092 User manual

NOTE: THIS INSTRUCTION
BOOKLET CONTAINS IMPORTANT
SAFETY INFORMATION.
PLEASE READ AND KEEP FOR
FUTURE REFERENCE.
English pg 1-32
Français pg 33-36
Español pg 37-40
Lot # 372368 05/08/15
Purchased: __________________
Be sure to give us a ring before
making any returns. 1-800-523-3987
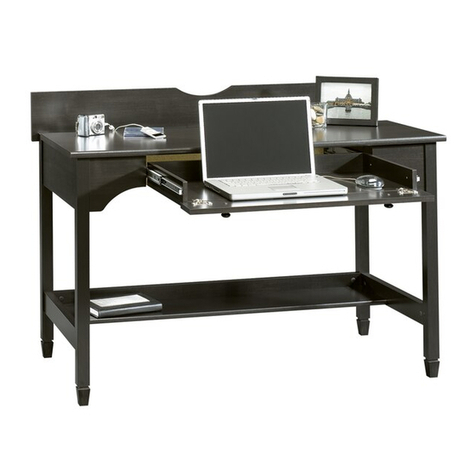
SmartCenter™ Secretary
Edge Water Collection | 413092
Need help? Visit Sauder.com to view video assembly tips or chat with a live rep.
Prefer the phone? Call 1-800-523-3987.
Share your journey!
sauder.com
Spark your style.
Table of Contents Assembly Tools Required
2-3
4-5
6-32
33-36
37-40
41-42
43
Part Identification
Hardware Identification
Assembly Steps
Français
Español
Safety
Warranty
Hammer
Not actual size
No. 2 Phillips Screwdriver
Tip Shown Actual Size
Skip the power trip.
This time.
413092 www.sauder.com/servicesPage 2
Part Identification
åWhile not all parts are labeled, some of the parts will have a label or an inked letter on the edge
to help distinguish similar parts from each other. Use this part identification to help identify similar parts.
A RIGHT END (1)
B LEFT END (1)
C RIGHT UPRIGHT (1)
D LEFT UPRIGHT (1)
E OUTLET UPRIGHT (1)
F TOP (1)
G BOTTOM (1)
H SHELF (1)
I TOP SHELF (1)
J OUTLET SHELF (1)
K PRINTER SHELF (1)
L SMALL SHELF (1)
M BACK (1)
N DOOR (2)
O FLIP DOWN DOOR (1)
P RIGHT LEG (1)
Q LEFT LEG (1)
R VALANCE (1)
S2 SIDE VALANCE (2)
T DRAWER FRONT (1)
U DRAWER BACK (1)
V DRAWER SIDE (2)
W DRAWER BOTTOM (1)
X TOP MOLDING (1)
Y SHELF MOLDING (1)
Z SKIRT (1)
AA EXTENSION BLOCK (2)
BB FOOT (2)
Part Identification
åWhile not all parts are labeled, some of the parts will have a label or an inked letter on the edge
to help distinguish similar parts from each other. Use this part identification to help identify similar parts.
Now you know
our ABCs.
413092www.sauder.com/services Page 3
A
B
C
D
E
F
G
H
I
J
K
L
M
N
O
P
Q
R
S2
T
UV
W
X
Y
Z
AA
AA
S2
N
V
BB
BB
Hardware Identification
åScrews are shown actual size. You may receive extra hardware with your unit.
413092 www.sauder.com/servicesPage 4
LL LIDSTAY - 2 SAFETY BRACKET - 1
MM METAL BRACKET - 6
NN
BUMPER CARD - 1
XX LONG METAL PIN - 2
ZZ
CAM COVER - 16
YY
TWIST-LOCK®
FASTENER - 2
GG
AAA METAL PIN - 12
KNOB - 9
SS BACKPLATE - 2
TT CORD CLIP - 3
WW
DOOR STOP - 1
VVUU GROMMET - 2
DRAWER FRONT
BRACKET - 2
OO
OUTLET - 1
KK
PP SWIVEL ROLLER - 4
HIDDEN CAM - 26
HH2 CAM DOWEL - 18
II2 CAM SCREW - 8
JJ2
QQ CURVED HINGE - 4 RR STRAIGHT HINGE - 2
40AW CABINET RIGHT - 1 40AX CABINET LEFT - 1 40AY DRAWER RIGHT - 1 40AZ DRAWER LEFT - 1
Hardware Identification
åScrews are shown actual size. You may receive extra hardware with your unit.
413092www.sauder.com/services Page 5
LLL BLACK 9/16" PAN HEAD SCREW - 12
FFF BLACK 1-1/8" MACHINE SCREW - 2
JJJ BLACK 9/16" LARGE HEAD SCREW - 25
EEE BLACK 1-1/4" FLAT HEAD SCREW - 3
CCC BLACK 1-5/8" PAN HEAD SCREW - 2
BBB BLACK 1-7/8" FLAT HEAD SCREW - 11
HHH BLACK 7/8" MACHINE SCREW - 7
DDD BROWN 1-1/2" FLAT HEAD SCREW - 12
GGG BROWN 1" FLAT HEAD SCREW - 4
NNN GOLD 5/16" FLAT HEAD SCREW - 4
III SILVER 5/8" FLAT HEAD SCREW - 4
MMM
BLACK 1/2" FLAT HEAD SCREW - 16
OOO NAIL - 62
Step 1 Look for this icon. It means a
video assembly tip is available at
www.sauder.com/services/tips
å Assemble your unit on a carpeted floor or on the empty
carton to avoid scratching your unit or the floor.
å To begin assembly, push a SAUDER TWIST-LOCK®
FASTENER (GG) into the large holes in
the UPRIGHTS (C and D).
413092 www.sauder.com/servicesPage 6
C
D
GG
Do not tighten the TWIST-LOCK® FASTENERS in this step.
å Push twenty-six HIDDEN CAMS (HH2) into the ENDS (A
and B), BOTTOM (G), SHELF (H), TOP SHELF (I), and
OUTLET SHELF (J). Then, insert the metal end of a CAM
DOWEL (II2) into each HIDDEN CAM, except the long edges
of the ENDS (A and B).
Step 2
413092www.sauder.com/services Page 7
A
B
Do not insert CAM
DOWELS into this edge.
J
I
H
G
Arrow
Hole
Do not insert CAM
DOWELS into this edge.
Arrow
HH2
II2
Do not tighten the HIDDEN CAMS in this step.
Insert the metal end of the CAM
DOWEL into the HIDDEN CAM.
Arrow
(26 used)
(18 used)
Step 3
å Turn eight CAM SCREWS (JJ2) into the LEGS (P and Q).
413092 www.sauder.com/servicesPage 8
P
Q
JJ2
(8 used)
Remember:
Righty tighty.
Lefty loosey.
å Fasten the LEGS (P and Q) to the ENDS (A and B).
Tighten eight HIDDEN CAMS.
å Fasten the FEET (BB) to the LEGS (P and Q). Use two
BLACK 1-5/8" PAN HEAD SCREWS (CCC).
Step 4
413092www.sauder.com/services Page 9
P
Q
B
Surface with
HIDDEN CAMS
BB
BB
A
Surface with
HIDDEN CAMS
1
2
Curved edge
These surfaces
should be even.
BLACK 1-5/8" PAN HEAD SCREW
(2 used in this step)
CCC
These surfaces
should be even.
Step 5
å NOTE: You have the option of fastening the EXTENSION
BLOCKS into the hole locations of your choice in the ENDS.
This will determine the height of your PRINTER SHELF. Be
sure to use the same set of holes on each END.
å Fasten the EXTENSION BLOCKS (AA) to the ENDS (A and B).
Use four BROWN 1-1/2" FLAT HEAD SCREWS (DDD).
å Fasten the CABINET RAILS (40AW and 40AX) to the
EXTENSION BLOCKS (AA) on the ENDS (A and B). Use four
GOLD 5/16" FLAT HEAD SCREWS (NNN).
å NOTE: The CABINET RAILS are marked "CABINET RIGHT"
and "CABINET LEFT" for easy identification.
413092 www.sauder.com/servicesPage 10
Short finished
edge
Before fastening the EXTENSION BLOCKS,
determine the positioning of your PRINTER SHELF.
Roller end
Short finished
edge
A
B
AA
AA
Finished surface
BROWN 1-1/2" FLAT HEAD SCREW
(4 used for the EXTENSION BLOCKS)
DDD
GOLD 5/16" FLAT HEAD SCREW
(4 used for the CABINET RAILS)
NNN
40AW
40AW
40AX
40AX
Roller end
å Fasten the VALANCES (R and S2) to the TOP (F). Use six
BLACK 1-7/8" FLAT HEAD SCREWS (BBB).
Step 6
413092www.sauder.com/services Page 11
F
S2
S2
R
Surface with
more holes
Surface without holes
Finished edge
Curved edge
Curved edge
Curved edge
Wide edge
Wide edge
BLACK 1-7/8" FLAT HEAD SCREW
(6 used in this step)
BBB
Step 7
å Fasten the RIGHT END (A) to the TOP (F). Tighten two
HIDDEN CAMS.
413092 www.sauder.com/servicesPage 12
F
A
P
Curved edge
Surface with
HIDDEN CAMS
Roller end
Start Tighten
Arrow
Minimum
190 degrees
Caution
Risk of damage or
injury. HIDDEN CAMS
must be completely
tightened. HIDDEN
CAMS that are not
completely tightened
may loosen, and parts
may separate. To
completely tighten:
Arrow
Maximum
210 degrees
Do not stand the unit upright without the
BACK fastened. The unit may collapse.
Caution
å Fasten the OUTLET SHELF (J) to the OUTLET UPRIGHT (E).
Tighten two HIDDEN CAMS.
å Insert eight METAL PINS (AAA) into the OUTLET UPRIGHT (E)
and OUTLET SHELF (J).
å Insert the METAL PINS (AAA) in one end of the OUTLET
UPRIGHT (E) and OUTLET SHELF (J) into the holes in the
RIGHT END (A).
å Push a CORD CLIP (WW) into the hole in the
OUTLET SHELF (J).
å NOTE: The CORD CLIP is used to manage your cords.
Step 8
413092www.sauder.com/services Page 13
A
JE
E
J
AAA
Finished edge
Large hole
WW
Large hole
Surface with
HIDDEN CAMS
(8 used)
Surface with
HIDDEN CAMS
Arrow
Minimum
190 degrees
Maximum
210 degrees
Step 9
å Fasten the TOP SHELF (I) to the RIGHT END (A). Tighten
two HIDDEN CAMS.
å Fasten the RIGHT UPRIGHT (C) to the TOP SHELF (I).
Tighten a TWIST-LOCK® FASTENER.
å Push a CORD CLIP (WW) into the hole in the
TOP SHELF (I).
å NOTE: The CORD CLIP is used to manage your cords.
413092 www.sauder.com/servicesPage 14
A
C
I
Surface with
HIDDEN CAMS
WW
Long finished edge
Surface with
TWIST-LOCK
®
FASTENERS
Flat edge
Arrow
Minimum
190 degrees
Maximum
210 degrees
How to use the SAUDER TWIST-LOCK®FASTENER
1. Insert the dowel end of the FASTENER into the hole of
the adjoining part.
NOTE: The dowel end of the FASTENER must remain
fully inserted in the hole of the adjoining part while
locking the FASTENER.
2. Tighten the FASTENER with a Phillips screwdriver as
tight as possible.
Dowel end
å Insert four METAL PINS (AAA) into the SMALL SHELF (L).
å Insert the METAL PINS (AAA) in one end of the SMALL
SHELF (L) into the holes in the RIGHT UPRIGHT (C).
å Fasten the LEFT UPRIGHT (D) to the TOP SHELF (I).
Tighten a TWIST-LOCK® FASTENER.
å NOTE: Be sure the METAL PINS in the SMALL SHELF (L)
insert into the holes in the LEFT UPRIGHT (D).
Step 10
413092www.sauder.com/services Page 15
C
I
L
D
Flat edge
Surface with holes
Finished edge
AAA
Surface without
TWIST-LOCK®
FASTENERS
(4 used)
Step 11
å Fasten the SHELF (H) to the RIGHT END (A). Tighten two
HIDDEN CAMS.
å Fasten the SHELF (H) to the UPRIGHTS (C and D). Use
four BLACK 1-7/8" FLAT HEAD SCREWS (BBB).
å Fasten the SHELF MOLDING (Y) to the SHELF (H). Use
three BLACK 1-1/4" FLAT HEAD SCREWS (EEE).
413092 www.sauder.com/servicesPage 16
D
A
H
Finished edge
Y
Rounded edge
Surface with
more holes
Arrow
Minimum
190 degrees
Maximum
210 degrees
BLACK 1-7/8" FLAT HEAD SCREW
(4 used for the UPRIGHTS)
BBB
Surface with
HIDDEN CAMS
BLACK 1-1/4" FLAT HEAD SCREW
(3 used for the SHELF MOLDING)
EEE
C
å Fasten the BOTTOM (G) to the RIGHT END (A). Tighten
two HIDDEN CAMS.
å Push a DOOR STOP (VV) into the hole in the
SHELF MOLDING (Y).
Step 12
413092www.sauder.com/services Page 17
YA
G
Finished edge
VV
Arrow
Minimum
190 degrees
Maximum
210 degrees
Surface with
HIDDEN CAMS
Don't worry. It isn't
Rome. This can be built
in a day.
Step 13
å Fasten the LEFT END (B) to the TOP (F), TOP
SHELF (I), SHELF (H), and BOTTOM (G). Tighten eight
HIDDEN CAMS.
å NOTE: Be sure the METAL PINS in the OUTLET
UPRIGHT (E) and OUTLET SHELF (J) insert into the
holes in the LEFT END (B).
413092 www.sauder.com/servicesPage 18
F
I
H
G
B
Q
J
E
Arrow
Minimum
190 degrees
Maximum
210 degrees
å Fasten six METAL BRACKETS (NN) to the BOTTOM (G)
and TOP MOLDING (X). Use six BLACK 9/16" LARGE
HEAD SCREWS (JJJ).
å NOTE: Be sure the BRACKETS are even with the edges of
the BOTTOM and TOP MOLDING.
å Fasten the TOP MOLDING (X) to the TOP (F). Use three
BLACK 9/16" LARGE HEAD SCREWS (JJJ).
å Fasten the SKIRT (Z) to the BOTTOM (G). Use three
BLACK 9/16" LARGE HEAD SCREWS (JJJ).
Step 14
413092www.sauder.com/services Page 19
NN
NN
G
F
X
Z
Angled edge
X
BLACK 9/16" LARGE HEAD SCREW
(12 used in this step)
JJJ
Step 15
å Carefully turn your unit over onto its front edges. Unfold the
BACK (M) and lay it over your unit.
å Make equal margins along both side edges and bottom edge of the
BACK (M). Push on opposite corners of your unit if needed to make
it "square".
å Fasten the top edge of the BACK (M) to the VALANCE (R). Use six
BLACK 9/16" LARGE HEAD SCREWS (JJJ).
å Finish fastening the BACK (M) to your unit using the NAILS (OOO).
å NOTE: Be sure to tap NAILS into the holes that line up over the
SHELVES (H, I, and J) and UPRIGHTS (C and D).
å NOTE: Perforations have been provided for access through the
BACK. Carefully cut out the holes needed.
413092 www.sauder.com/servicesPage 20
R
M
These holes must line up over
the SHELVES and UPRIGHTS.
These perforations
must be here.
Do not stand the unit upright without the
BACK fastened. The unit may collapse.
Caution
NAIL
(62 used in this step)
OOO
BLACK 9/16" LARGE HEAD SCREW
(6 used for the top edge)
JJJ
JJJ

Other Sauder Indoor Furnishing manuals
Sauder beginnings 413324 User manual

Sauder

Sauder beginnings 413324 User manual

Sauder 422294 User manual

Sauder

Sauder 422294 User manual

Sauder Aspen Post 427015 User manual

Sauder

Sauder Aspen Post 427015 User manual

Sauder 158085 User manual

Sauder

Sauder 158085 User manual

Sauder OfficeWorks AFFIRM 426277 User manual

Sauder

Sauder OfficeWorks AFFIRM 426277 User manual

Sauder Shoal Creek 420272 User manual

Sauder

Sauder Shoal Creek 420272 User manual

Sauder Via 401447 User manual

Sauder

Sauder Via 401447 User manual

Sauder 413081 User manual

Sauder

Sauder 413081 User manual

Sauder International Lux 430877 User manual

Sauder

Sauder International Lux 430877 User manual

Sauder Harbor View 420471 User manual

Sauder

Sauder Harbor View 420471 User manual

Sauder Hammond 431249 User manual

Sauder

Sauder Hammond 431249 User manual

Sauder 416091 User manual

Sauder

Sauder 416091 User manual

Sauder Summer Home Pantry 401867 User manual

Sauder

Sauder Summer Home Pantry 401867 User manual

Sauder 415421 User manual

Sauder

Sauder 415421 User manual

Sauder 423032 User manual

Sauder

Sauder 423032 User manual

Sauder 409110 User manual

Sauder

Sauder 409110 User manual

Sauder Tremont Row 427971 User manual

Sauder

Sauder Tremont Row 427971 User manual

Sauder Boulevard Cafe 420667 User manual

Sauder

Sauder Boulevard Cafe 420667 User manual

Sauder Entertainment Credenza User manual

Sauder

Sauder Entertainment Credenza User manual

Sauder worksense MASON PEAK 427807 User manual

Sauder

Sauder worksense MASON PEAK 427807 User manual

Sauder 413123 User manual

Sauder

Sauder 413123 User manual

Sauder Palladia Collection 412902 User manual

Sauder

Sauder Palladia Collection 412902 User manual

Sauder Shoal Creek 411201 User manual

Sauder

Sauder Shoal Creek 411201 User manual

Sauder Carson Forge 416969 User manual

Sauder

Sauder Carson Forge 416969 User manual

Popular Indoor Furnishing manuals by other brands

Vivo DESK-V120EB instruction manual

Vivo

Vivo DESK-V120EB instruction manual

Leitmotiv LM1897 Assembly instruction

Leitmotiv

Leitmotiv LM1897 Assembly instruction

DHP 3136096CA manual

DHP

DHP 3136096CA manual

Better Homes and Gardens Canton BHS0025004002 Assembly instructions

Better Homes and Gardens

Better Homes and Gardens Canton BHS0025004002 Assembly instructions

LTL AMORE Glace Series installation instructions

LTL

LTL AMORE Glace Series installation instructions

Tennsco Z Series Assembly Instructions/Parts Manual

Tennsco

Tennsco Z Series Assembly Instructions/Parts Manual

Pegasus Gazette GAEA2418 Specification sheet

Pegasus

Pegasus Gazette GAEA2418 Specification sheet

Arthauss Furniture PULA K2D3SZ Assembly instruction

Arthauss Furniture

Arthauss Furniture PULA K2D3SZ Assembly instruction

KidKraft 16701F Assembly instructions

KidKraft

KidKraft 16701F Assembly instructions

Core Products Ayr AY233 Assembly instructions

Core Products

Core Products Ayr AY233 Assembly instructions

emob Elvis 3 Doors Wardrobe with Mirror WR... Assembly instruction

emob

emob Elvis 3 Doors Wardrobe with Mirror WR... Assembly instruction

John Lewis ercol Shalstone 80311511 manual

John Lewis

John Lewis ercol Shalstone 80311511 manual

Castleton Home Barstool 2 Product instructions

Castleton Home

Castleton Home Barstool 2 Product instructions

Ameriwood HOME 3417335COM Instruction booklet

Ameriwood HOME

Ameriwood HOME 3417335COM Instruction booklet

BK RESOURCES BKWS-1224-PR Assembly instructions

BK RESOURCES

BK RESOURCES BKWS-1224-PR Assembly instructions

Onespace JNFF Assembly instructions

Onespace

Onespace JNFF Assembly instructions

beaux meubles BHO 29 Assembly instructions

beaux meubles

beaux meubles BHO 29 Assembly instructions

Ethnicraft OAK NORDIC II BED WITH SLATS Assembly Instruction for Installation

Ethnicraft

Ethnicraft OAK NORDIC II BED WITH SLATS Assembly Instruction for Installation

manuals.online logo
manuals.online logoBrands
  • About & Mission
  • Contact us
  • Privacy Policy
  • Terms and Conditions

Copyright 2025 Manuals.Online. All Rights Reserved.