manuals.online logo
Brands
  1. Home
  2. •
  3. Brands
  4. •
  5. Sauder
  6. •
  7. Indoor Furnishing
  8. •
  9. Sauder Dakota Pass 420410 User manual

Sauder Dakota Pass 420410 User manual

NOTE: THIS INSTRUCTION
BOOKLET CONTAINS IMPORTANT
SAFETY INFORMATION.
PLEASE READ AND KEEP FOR
FUTURE REFERENCE.
English pg 1-41
Français pg 42-46
Español pg 47-51
Lot # 389671 05/02/16
Purchased: __________________
Be sure to give us a ring before
making any returns. 1-800-523-3987
Need help? Visit Sauder.com to view video assembly tips or chat with a live rep.
Prefer the phone? Call 1-800-523-3987.
Share your journey!
sauder.com
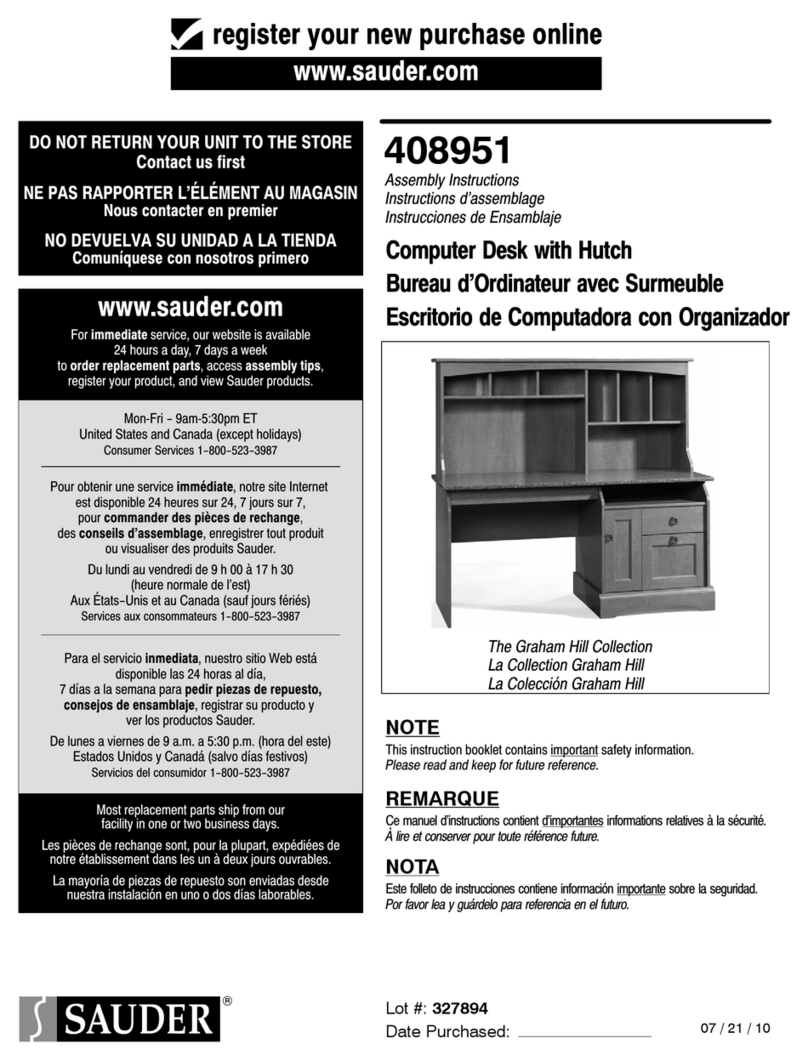
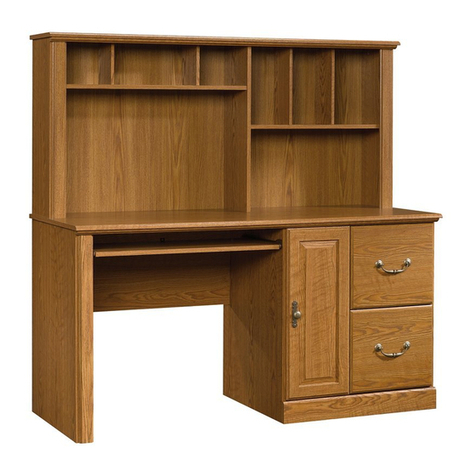
Computer Desk with Hutch
Dakota Pass Collection | Model 420410
For all your
newfangled gadgetry.
Table of Contents Assembly Tools Required
2-3
4-5
6-41
42-46
47-51
52-54
55
Part Identification
Hardware Identification
Assembly Steps
Français
Español
Safety
Warranty
Hammer
Not actual size
No. 2 Phillips Screwdriver
Tip Shown Actual Size
Skip the power trip.
This time.
420410 www.sauder.com/servicesPage 2
Part Identification
åWhile not all parts are labeled, some of the parts will have a label or an inked letter on the edge
to help distinguish similar parts from each other. Use this part identification to help identify similar parts.
A RIGHT END (1)
B LEFT END (1)
C HUTCH RIGHT END (1)
D HUTCH LEFT END (1)
E UPRIGHT (1)
F SMALL UPRIGHT (1)
G HUTCH UPRIGHT (1)
H TOP (1)
I RIGHT LEG (1)
J LEFT LEG (1)
K CENTER LEG (1)
L BACK LEG (3)
M HUTCH TOP (1)
N BOTTOM (1)
O MODESTY PANEL (1)
P SHELF (1)
Q LARGE SHELF (1)
R LARGE BACK (1)
S BACK (1)
T DOOR (1)
U ADJUSTABLE SHELF (1)
V HUTCH RIGHT LEG (1)
W HUTCH LEFT LEG (1)
X HUTCH BACK LEG (2)
Y LARGE DIVIDER (2)
Z DIVIDER (2)
AA DRAWER FRONT (1)
BB LARGE DRAWER FRONT (1)
CC SHELF MOLDING (1)
DD LARGE SHELF MOLDING (1)
EE TOP MOLDING (2)
FF BOTTOM MOLDING (1)
D12 DRAWER RIGHT SIDE (1)
D13 DRAWER LEFT SIDE (1)
D14 LARGE DRAWER RIGHT SIDE (1)
D15 LARGE DRAWER LEFT SIDE (1)
D150 DRAWER BACK (1)
D151 LARGE DRAWER BACK (1)
D953 DRAWER BOTTOM (2)
Short Screwdriver
Part Identification Now you know
our ABCs.
420410www.sauder.com/services Page 3
A
B
C
D
E
F
G
H
I
J
K
L
M
N
O
P
Q
R
S
T
V
W
X
Y
Z
AA
BB
CC
DD
EE
FF
EE
D12
D150
D953
D13
D14
D151
D953
D15
L
L
X
Y
Z
U
Hardware Identification
åYou may receive extra hardware with your unit.
420410 www.sauder.com/servicesPage 4
FILE GLIDE - 2
4B
(EXTENSION SET SHOWN SEPARATED)
EXTENSION RAIL - 2
GG EXTENSION SLIDE - 2
HH FILE ROD - 2
7B
35GA CABINET RIGHT - 1 35GB CABINET LEFT - 1 35GC DRAWER RIGHT - 1 35GD DRAWER LEFT - 1
CARD SHEET - 1
38M
ADJUSTABLE
FOOT - 1
34E
CAM COVER - 9
13P
10F TWIST-LOCK®
FASTENER - 31
MOLDING
CONNECTOR - 4
17F
METAL PIN - 20
1R
HOLE PLUG - 1
41P
10A SLIDE
CAM - 4
CAM SCREW - 23
8F
DOOR STOP - 1
4I
WOOD DOWEL - 3
15F
28K KNOB- 4 NAIL - 80
1N
HIDDEN CAM - 23
1F
CARD HOLDER - 2
35M
RUBBER SLEEVE - 4
2R
40H HINGE - 2
Hardware Identification
åScrews are shown actual size. You may receive extra hardware with your unit.
420410www.sauder.com/services Page 5
GOLD 1" MACHINE SCREW - 4
50S
BLACK 9/16" LARGE HEAD SCREW - 4
1S
15S SILVER 5/8" MACHINE SCREW - 4
BLACK 2-1/4" FLAT HEAD SCREW - 15
26S
3S GOLD 5/16" FLAT HEAD SCREW - 16
BLACK 1/2" FLAT HEAD SCREW - 4
11S
BLACK 1-15/16" FLAT HEAD SCREW - 10
113S
30S BLACK 1-9/16" FLAT HEAD SCREW - 8
Step 1 Look for this icon. It means a
video assembly tip is available at
www.sauder.com/services/tips
å Assemble your unit on a carpeted floor or on the empty
carton to avoid scratching your unit or the floor.
å To begin assembly, push a SAUDER TWIST-LOCK®
FASTENER (10F) into the large holes in the ENDS (A and B)
and UPRIGHT (E).
å Repeat this step for the HUTCH ENDS (C and D), SMALL
UPRIGHT (F), HUTCH UPRIGHT (G), BOTTOM (N),
MODESTY PANEL (O), SHELF (P), and LARGE SHELF (Q).
420410 www.sauder.com/servicesPage 6
(31 used)
10F
Do not tighten the TWIST-LOCK® FASTENERS in this step.
A
B
E
å Push twenty-three HIDDEN CAMS (1F) into the ENDS (A and B),
HUTCH ENDS (C and D), UPRIGHT (E), TOP (H), and HUTCH TOP (M).
Step 2
420410www.sauder.com/services Page 7
C
D
H
M
Arrow
The arrow in the HIDDEN
CAM must point toward the
hole in the edge of the board.
Hole
A
B
E
1F
Arrow
Arrow
1F
(23 used)
Step 3
å Turn twenty-three CAM SCREWS (8F) into the TOP MOLDINGS (EE),
LEGS (I, J, and K), and HUTCH LEGS (V and W).
å NOTE: Use the exact holes shown.
420410 www.sauder.com/servicesPage 8
8F
J
K
V
W
EE
EE
I
(23 used)
Do not use these holes.
å Separate the EXTENSION SLIDES (HH) from the EXTENSION RAILS (GG) as shown in
the upper diagram below. Be prepared, the parts are greasy.
å Fasten the EXTENSION RAILS (GG) to the RIGHT END (A) and SMALL UPRIGHT (F).
Use four GOLD 5/16" FLAT HEAD SCREWS (3S).
å NOTE: For each EXTENSION RAIL, turn a SCREW into the hole shown in the enlarged
diagram. Then, slide the inner cartridge of the EXTENSION RAIL in to find the other hole
that lines up with the hole in the END/SMALL UPRIGHT. Turn a SCREW into this hole.
å NOTE: The EXTENSION SLIDES (HH) will be used later for the DRAWERS.
Step 4
420410www.sauder.com/services Page 9
Open end
Open end
GOLD 5/16" FLAT HEAD SCREW
(4 used in this step)
3S
Push the black lever in and pull the SLIDE from the RAIL.
HH GG
A
F
Surface with
TWIST-LOCK®
FASTENERS
Surface without
TWIST-LOCK®
FASTENERS
Edge with
TWIST-LOCK®
FASTENERS
GG
GG
NOTE: The end of this
EXTENSION RAIL will
set in from the edge
of the RIGHT END.
Step 5
å Fasten the CABINET RIGHT (35GA) to the RIGHT
END (A) and the CABINET LEFT (35GB) to the SMALL
UPRIGHT (F). Use four GOLD 5/16" FLAT HEAD
SCREWS (3S) through holes #1 and #3.
1
2
3
1
2
3
Roller end
Roller end
GOLD 5/16" FLAT HEAD SCREW
(4 used in this step)
3S
A
F
GG
GG
Edge with
TWIST-LOCK®
FASTENERS
420410 www.sauder.com/servicesPage 10
å Slide the BOTTOM MOLDING* (FF) onto the notched
edge of the BOTTOM (N).
å Slide the LARGE SHELF MOLDING* (DD) onto the
notched edge of the LARGE SHELF (Q).
å Slide the SHELF MOLDING* (CC) onto the notched edge
of the SHELF (P).
å *U.S. Patent No. 5,499,886
Step 6
Notched edge
Slide the BOTTOM
MOLDING (FF) onto
the notched edge.
CC
DD
Q
P
N
FF
420410www.sauder.com/services Page 11
Surface with
TWIST-LOCK®
FASTENERS
Surface with
TWIST-LOCK®
FASTENERS
Surface with
TWIST-LOCK®
FASTENERS
Notched edge
Notched edge
Groove
Slide the SHELF
MOLDING (CC) onto
the notched edge.
Slide the LARGE
SHELF MOLDING (DD)
onto the notched edge.
Groove
Step 7
å Fasten the CARD HOLDERS (35M) to the SHELF MOLDINGS (CC and DD). Use four
SILVER 5/8" MACHINE SCREWS (15S)
.
å NOTE: Be sure to position the CARD HOLDERS exactly as shown with the CARD slot
facing the top edges of the MOLDINGS.
35M
DD
CC
SILVER 5/8" MACHINE SCREW
(4 used in this step)
15S
420410 www.sauder.com/servicesPage 12
Card slot
Top edge
Top edge
Q
P
StepStep 8
420410www.sauder.com/services Page 13
BLACK 2-1/4" FLAT HEAD SCREW
(9 used in this step)
26S
A
L
L
L
B
E
å Fasten the BACK LEGS (L) to the ENDS (A and B)
and UPRIGHT (E). Use nine BLACK 2-1/4" FLAT
HEAD SCREWS (26S).
Angled edge
Angled edge
Surface with
TWIST-LOCK®
FASTENERS
Surface with
TWIST-LOCK®
FASTENERS
Surface with
TWIST-LOCK®
FASTENERS
Edge with
TWIST-LOCK®
FASTENERS
Edge with
TWIST-LOCK®
FASTENERS
Edge with
TWIST-LOCK®
FASTENERS
These surfaces
should be even.
These surfaces
should be even.
These surfaces
should be even.
Angled edge
Step 9
420410 www.sauder.com/servicesPage 14
BLACK 2-1/4" FLAT HEAD SCREW
(6 used in this step)
26S
X
X
C
D
å Fasten the HUTCH BACK LEGS (X) to the HUTCH ENDS (C
and D). Use six BLACK 2-1/4" FLAT HEAD SCREWS (26S).
Surface with
TWIST-LOCK®
FASTENERS
Surface with
TWIST-LOCK®
FASTENERS
Edge with
TWIST-LOCK®
FASTENERS
Edge with
TWIST-LOCK®
FASTENERS
These surfaces
should be even.
These surfaces
should be even.
Step 10
å Fasten the HUTCH RIGHT END (C) to the HUTCH
TOP (M). Tighten two TWIST-LOCK® FASTENERS.
How to use the SAUDER TWIST-LOCK®FASTENER
1. Insert the dowel end of the FASTENER into the hole of the
adjoining part.
NOTE: The dowel end of the FASTENER must remain fully
inserted in the hole of the adjoining part while locking
the FASTENER.
2. Tighten the FASTENER with a Phillips screwdriver as tight
as possible.
Dowel end
C
M
Surface with
TWIST-LOCK®
FASTENERS
Surface with HIDDEN CAMS
Do not stand the unit upright without the
BACK fastened. The unit may collapse.
Caution
420410www.sauder.com/services Page 15
X
Edge with HIDDEN CAMS
Step 11
å Insert eight METAL PINS (1R) into the short edges of the
LARGE DIVIDERS (Y).
å Push the PINS in the LARGE DIVIDERS (Y) into the holes in the
HUTCH TOP (M).
å Fasten the SHELF (P) to the HUTCH RIGHT END (C). Tighten
two TWIST-LOCK® FASTENERS.
å NOTE: Be sure the METAL PINS in the LARGE DIVIDERS (Y)
insert into the holes in the SHELF (P).
1R
1R
Finished edge
C
P
Y
Y
Surface with TWIST-LOCK®
FASTENERS
M
420410 www.sauder.com/servicesPage 16
1R
CC
Step 12
å Fasten the HUTCH UPRIGHT (G) to the HUTCH TOP (M) and
SHELF (P). Tighten four TWIST-LOCK® FASTENERS.
å NOTE: Use your short screwdriver to tighten the TWIST-LOCK®
FASTENERS in the HUTCH UPRIGHT (G).
å Insert eight METAL PINS (1R) into the short edges of
the DIVIDERS (Z).
å Push the PINS in the DIVIDERS (Z) into the holes in the
HUTCH TOP (M).
1R
1R
Finished edge
Finished edge
M
Z
Z
G
P
420410www.sauder.com/services Page 17
Surface with
TWIST-LOCK®
FASTENERS
Use your short screwdriver to tighten
these two TWIST-LOCK® FASTENERS.
å Fasten the LARGE SHELF (Q) to the HUTCH UPRIGHT (G).
Tighten two TWIST-LOCK® FASTENERS.
å NOTE: Be sure the METAL PINS in the DIVIDERS (Z) insert into the
holes in the LARGE SHELF (Q).
å Fasten the HUTCH LEFT END (D) to the LARGE SHELF (Q) and
HUTCH TOP (M). Tighten four TWIST-LOCK® FASTENERS.
Step 13
G
Q
D
420410 www.sauder.com/servicesPage 18
M
Z
Z
DD
Surface with TWIST-LOCK® FASTENERS
Surface with
TWIST-LOCK®
FASTENERS
X
Step 14
å Using your hammer, tap four MOLDING
CONNECTORS (17F) into the notches in the
TOP MOLDINGS (EE).
å Then, fasten one of the TOP MOLDINGS (EE)
to the HUTCH TOP (M). Tighten four
HIDDEN CAMS.
1
2
Flat end
Flat end
17F
17F
M
EE
EE
EE
420410www.sauder.com/services Page 19
Surface without CAM SCREWS
These edges
should be even.
Step 15
å Using your hammer, gently tap the HUTCH LEGS (V and W) onto the
MOLDING CONNECTORS in the TOP MOLDING (EE).
å NOTE: Be sure the CAM SCREWS in the HUTCH LEGS (V and W)
insert into the holes in the HUTCH ENDS (C and D).
å Fasten the HUTCH LEGS (V and W) to the HUTCH ENDS (C and D).
Tighten six HIDDEN CAMS.
å NOTE: You may need to gently tap the MOLDING CONNECTORS
back into the TOP MOLDING and HUTCH LEGS once the HIDDEN
CAMS are tightened.
D
C
V
W
Now might be a
good time to refresh
your drink.
420410 www.sauder.com/servicesPage 20
EE
NOTE: You may need to
gently tap the MOLDING
CONNECTORS back into the
TOP MOLDING and HUTCH
LEGS once the HIDDEN
CAMS are tightened.

Other Sauder Indoor Furnishing manuals
Sauder beginnings 413324 User manual

Sauder

Sauder beginnings 413324 User manual

Sauder 418213 User manual

Sauder

Sauder 418213 User manual

Sauder 414356 User manual

Sauder

Sauder 414356 User manual

Sauder Pinwheel Collection 422600 User manual

Sauder

Sauder Pinwheel Collection 422600 User manual

Sauder Harbor View 414942 User manual

Sauder

Sauder Harbor View 414942 User manual

Sauder 408761 User manual

Sauder

Sauder 408761 User manual

Sauder Bookcase 414726 User manual

Sauder

Sauder Bookcase 414726 User manual

Sauder Palladia 413998 User manual

Sauder

Sauder Palladia 413998 User manual

Sauder East Canyon Series User manual

Sauder

Sauder East Canyon Series User manual

Sauder Lateral File User manual

Sauder

Sauder Lateral File User manual

Sauder 411312 User manual

Sauder

Sauder 411312 User manual

Sauder Beginnings 424257 User manual

Sauder

Sauder Beginnings 424257 User manual

Sauder Shoal Creek 411236 User manual

Sauder

Sauder Shoal Creek 411236 User manual

Sauder Pinwheel 421885 User manual

Sauder

Sauder Pinwheel 421885 User manual

Sauder 411885 User manual

Sauder

Sauder 411885 User manual

Sauder 415546 User manual

Sauder

Sauder 415546 User manual

Sauder Camden 101730 User manual

Sauder

Sauder Camden 101730 User manual

Sauder Office Works Affirm 431916 User manual

Sauder

Sauder Office Works Affirm 431916 User manual

Sauder 423731 User manual

Sauder

Sauder 423731 User manual

Sauder Anda Norr 427707 User manual

Sauder

Sauder Anda Norr 427707 User manual

Sauder Harbor View 400742 User manual

Sauder

Sauder Harbor View 400742 User manual

Sauder 419517 User manual

Sauder

Sauder 419517 User manual

Sauder International Lux 421434 User manual

Sauder

Sauder International Lux 421434 User manual

Sauder Clifford Place 429501 User manual

Sauder

Sauder Clifford Place 429501 User manual

Popular Indoor Furnishing manuals by other brands

VERTBAUDET 62003-0268 quick start guide

VERTBAUDET

VERTBAUDET 62003-0268 quick start guide

BOMBAY Compass 2032461 quick start guide

BOMBAY

BOMBAY Compass 2032461 quick start guide

GFW KESWIC 5 DRAWER CHEST Assembly instructions

GFW

GFW KESWIC 5 DRAWER CHEST Assembly instructions

Next SEVILLE 656882 Assembly instructions

Next

Next SEVILLE 656882 Assembly instructions

porada MYRIA Myria Bookcase Composition E Assembly instruction

porada

porada MYRIA Myria Bookcase Composition E Assembly instruction

BluDot Lid Storage Bed LI1-KSTORG-SD manual

BluDot

BluDot Lid Storage Bed LI1-KSTORG-SD manual

Argos 3279515 Assembly instructions

Argos

Argos 3279515 Assembly instructions

OYPLA DIY Heavy Duty 5 3661 user manual

OYPLA DIY

OYPLA DIY Heavy Duty 5 3661 user manual

Home affaire Nekso 239095 manual

Home affaire

Home affaire Nekso 239095 manual

Home affaire Provence 32 Assembly instructions

Home affaire

Home affaire Provence 32 Assembly instructions

Atlantic Furniture BORDEAUX Assembly instructions

Atlantic Furniture

Atlantic Furniture BORDEAUX Assembly instructions

Peka Magic Corner Standard 300.0826 900 li Series Assembly instruction

Peka

Peka Magic Corner Standard 300.0826 900 li Series Assembly instruction

Noble House Home Furnishings Ottoman Assembly instructions

Noble House Home Furnishings

Noble House Home Furnishings Ottoman Assembly instructions

Dream On Me MAPLE DOUBLE DRESSER owner's manual

Dream On Me

Dream On Me MAPLE DOUBLE DRESSER owner's manual

JDW At Home TRANQUIL JS374 Assembly instructions

JDW

JDW At Home TRANQUIL JS374 Assembly instructions

ODYN LeetDesk 1337-1 Assembly & instruction manual

ODYN

ODYN LeetDesk 1337-1 Assembly & instruction manual

Target windham WNSIDTBLRD Assembly instructions

Target

Target windham WNSIDTBLRD Assembly instructions

VIPACK ERIK ERK01214 Assembly instructions

VIPACK

VIPACK ERIK ERK01214 Assembly instructions

manuals.online logo
manuals.online logoBrands
  • About & Mission
  • Contact us
  • Privacy Policy
  • Terms and Conditions

Copyright 2025 Manuals.Online. All Rights Reserved.