manuals.online logo
Brands
  1. Home
  2. •
  3. Brands
  4. •
  5. Sauder
  6. •
  7. Indoor Furnishing
  8. •
  9. Sauder Cannery Bridge 426140 User manual

Sauder Cannery Bridge 426140 User manual

sauder.com
NOTE: THIS INSTRUCTION
BOOKLET CONTAINS IMPORTANT
SAFETY INFORMATION.
PLEASE READ AND KEEP FOR
FUTURE REFERENCE.
sauder.com
CONTACT US FIRST
BEFORE MAKING ANY RETURNS TO THE STORE.
sauder.com
CONTACT US FIRST
BEFORE MAKING ANY RETURNS TO THE RETAILER.
Visit sauder.com/service to order replacement parts, view video assembly tips, or chat with a live rep.
Prefer the phone? Give us a ring at 1-800-523-3987.
Customer Service is available Monday-Friday - 9 a.m. to 5:30 p.m. EST (except holidays)
Sauder.com
Share your journey!
Enlish p 1-39
Français p 40-43
Español p 44-48
Lot # 540279 02/27/20
Purchased: __________________
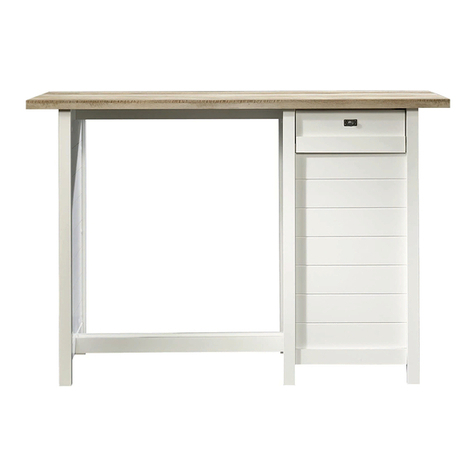
Desk
Cannery Bride Collection | Model 426140
Sit and surf.
Table of Contents Assembly Tools Required
Part Identification
Hardware Identification
Assembly Steps
Français
Español
Safety
Warranty
Hammer
Not actual size
No. 2 Phillips Screwdriver
Tip Shown Actual Size
3
4-5
6-39
40-43
44-48
49-50
51
426140 www.sauder.com/servicePae 2
Part Identification
åWhile not all parts are labeled, some of the parts will have a label or an inked letter on the edge
to help distinguish similar parts from each other. Use this part identification to help identify similar parts.
Now you know
our ABCs.
A RIGHT END (1)
B LEFT END (1)
B52 PENCIL DRAWER BOTTOM (1)
C UPRIGHT (1)
D MODESTY PANEL (1)
D12 RIGHT DRAWER SIDE (1)
D13 LEFT DRAWER SIDE (1)
D28 LARGE RIGHT DRAWER SIDE (1)
D29 LARGE LEFT DRAWER SIDE (1)
D150
DRAWER BACK (1)
D151 LARGE DRAWER BACK (1)
D542
PENCIL DRAWER BOX FRONT (1)
D543
PENCIL LEFT DRAWER SIDE (1)
D544
PENCIL RIGHT DRAWER SIDE (1)
D545
PENCIL DRAWER BACK (1)
D953
DRAWER BOTTOM (1)
D954
LARGE DRAWER BOTTOM (1)
E BOTTOM (1)
F END MOLDING (2)
G EXTENSION BLOCK (1)
H PENCIL DRAWER FRONT (1)
J TOP (1)
K BACK (1)
L FRONT LEG (3)
M BACK LEG (2)
M70
DRAWER BRACE (1)
N DRAWER FRONT (1)
O LARGE DRAWER FRONT (1)
Q BOTTOM MOLDING (1)
A
B
B52
C
D
E
F
F
G
H
J
K
L
L
L
M
M
N
O
Q
D12
D29
D13
D28
D542
D543
D544
D150
D151
D545
D953
D954
M70
426140www.sauder.com/service Pae 3
Hardware Identification
35GA CABINET RIGHT - 1 35GB CABINET LEFT - 1 35GC DRAWER RIGHT - 1 35GD DRAWER LEFT - 1
40CA CABINET RIGHT - 1 40CB CABINET LEFT - 1 40CC DRAWER RIGHT - 1 40CD DRAWER LEFT - 1
FILE ROD - 2
7B
(EXTENSION SET SHOWN SEPARATED)
EXTENSION RAIL - 2
35MA EXTENSION SLIDE - 2
35MC 10A SLIDE CAM - 4
10F TWIST-LOCK®FASTENER - 4CAM SCREW - 9
8F WOOD DOWEL - 3
15F
FILE GLIDE - 2
15B HIDDEN CAM - 19
1F CAM DOWEL - 10
2F
426140 www.sauder.com/servicePae 4
Hardware Identification
åScrews are shown actual size. You may receive extra hardware with your unit.
15S SILVER 5/8" MACHINE SCREW - 4 BLACK 7/8" LARGE HEAD SCREW - 2
17S
100S BLACK 2-3/4" FLAT HEAD SCREW - 6
BLACK 9/16" FLAT HEAD SCREW - 4
32S
BLACK 1-1/8" MACHINE SCREW - 2
21S 30S BLACK 1-9/16" FLAT HEAD SCREW - 14
PULL - 3
101K NAIL - 16
1N CAM COVER - 2
13P
BLACK 1-1/8" PAN HEAD SCREW - 2
9S
3S GOLD 5/16" FLAT HEAD SCREW - 24
BLACK 1-15/16" FLAT HEAD SCREW - 2
113S
426140www.sauder.com/service Pae 5
Step 1 Look for this icon. It means a video assembly tip is
available at www.sauder.com/service/tips
Find the numbered video or scan the QR code. 0
å Assemble your unit on a carpeted floor or on the empty
carton to avoid scratchin your unit or the floor.
å Turn two BLACK 9/16" FLAT HEAD SCREWS (32S) into
the LEFT END (B) until the shoulders of the SCREWS rest
on the surface of the LEFT END.
å NOTE: Do not overtihten the SCREWS.
å Slide a END MOLDING (F) onto the LEFT END (B). Line
up the rooves in the MOLDINGS over the heads of the
SCREWS in the LEFT END.
å NOTE: The MOLDING should be even on both edes of
the ENDS.
å NOTE: If the MOLDING comes up o of the SCREWS,
remove it and slide it on aain.
B
BLACK 9/16" FLAT HEAD SCREW
(2 used in this step)
32S
F
Shoulder
Apply pressure with your hands
as you uide the MOLDINGS over
the SCREWS and onto the ENDS.
426140 www.sauder.com/servicePae 6
Hardware Usage Guide
HOW TO USE A HIDDEN CAM & CAM DOWEL
Cam Screw
Hidden Cam
Arrow
Push a HIDDEN CAM into
the part. The arrow in the
HIDDEN CAM must point
toward the hole in the
edge of the board.
Hole
2. 3.
1
2
Insert the CAM SCREW into the HIDDEN CAM.
Tighten the HIDDEN CAM.
HOW TO USE A HIDDEN CAM & CAM SCREW
Turn the CAM SCREW until
the shoulder is against the
surface of the part.
1.
Start Tighten
Arrow
Minimum
190 degrees
Caution
Risk of damage or
injury. HIDDEN CAMS
must be completely
tightened. HIDDEN
CAMS that are not
completely tightened
may loosen, and parts
may separate. To
completely tighten:
Arrow
Maximum
210 degrees
3.
2. Insert the metal end of the CAM
DOWEL into the HIDDEN CAM.
1. Push a HIDDEN CAM into
the part. The arrow in the
HIDDEN CAM must point
toward the hole in the ede
of the board.
Hole
Arrow
Metal end
Hidden Cam
Cam Dowel
426140www.sauder.com/service Pae 7
å Push five HIDDEN CAMS (1F) into the LEFT END (B).
å Turn three CAM SCREWS (8F) into one of the FRONT LEGS (L).
å Insert one WOOD DOWEL (15F) into one of the FRONT LEGS (L).
Step 2
B
1F
Arrow
1F
Arrow
L
1
8F
15F
426140 www.sauder.com/servicePae 8
Just think. The sooner
you do this, the sooner
you do somethin else.
å Fasten the LEFT END (B) to a FRONT LEG (L). Tihten
three HIDDEN CAMS.
å NOTE: Be sure the WOOD DOWEL in the FRONT LEG
insert into the LEFT END.
å Fasten a BACK LEG (M) to the LEFT END (B). Use three
BLACK 2-3/4" FLAT HEAD SCREWS (100S).
Step 3
B
L
M
Surface with HIDDEN CAMS
These surfaces
should be even.
The LEGS will
overhan this ede.
1
BLACK 2-3/4" FLAT HEAD SCREW
(3 used in this step)
100S
426140www.sauder.com/service Pae 9
å Fasten a CABINET LEFT (35GB) to the LEFT END (B).
Use two GOLD 5/16" FLAT HEAD SCREWS (3S) throuh
holes #1 and #3.
Step 4
3
2
1
B
426140 www.sauder.com/servicePae 10
5
Roller end
GOLD 5/16" FLAT HEAD SCREW
(2 used for the RAILS)
3S
Hardware Usage Guide
1. Insert the dowel end of the FASTENER into the
hole of the adjoining part.
NOTE: The dowel end of the FASTENER must
remain fully inserted in the hole of the adjoining
part while locking the FASTENER.
2. Tighten the FASTENER with a Phillips
screwdriver as tight as possible.
Dowel end
2.
Push a TWIST-LOCK® FASTENER
into the large hole in the part.
1.
HOW TO USE A TWIST-LOCK®FASTENER
Step 5
å To bein assembly, push four SAUDER TWIST-LOCK® FASTENERS (10F)
into the lare holes in the MODESTY PANEL (D).
2
10F
Do not tihten the TWIST-LOCK® FASTENERS in this step.
D
10F
426140www.sauder.com/service Pae 11
å Fasten the MODESTY PANEL (D) to the LEFT END (B).
Tihten two TWIST-LOCK® FASTENERS.
Step 6
D
Surface with
TWIST-LOCK®
FASTENERS
Surface with
HIDDEN CAMS
B
2
426140 www.sauder.com/servicePae 12
Do not stand the unit upriht without the
BACK fastened. The unit may collapse.
Caution
å Insert the metal end of a CAM DOWEL (2F) into each
HIDDEN CAM on the short ede of the LEFT END (B).
å Fasten the LEFT END (B) to the TOP (J). Tihten two
HIDDEN CAMS.
å Fasten the MODESTY PANEL (D) to the TOP (J). Tihten
two TWIST-LOCK® FASTENERS.
Step 7
B
D
Surface without TWIST-LOCK® FASTENERS
Surface with
HIDDEN CAMS
2F
J
Surface with holes
12
426140www.sauder.com/service Pae 13
Meet Part (J). This component has
been enineered to be lihter, stroner,
faster… well ok. Not technically faster.
But definitely makes for a sturdier desk
that’s easier to assemble and friendlier
to the environment.
1
2
å Push five HIDDEN CAMS (1F) into the UPRIGHT (C).
å Turn three CAM SCREWS (8F) into one of the FRONT LEGS (L).
å Insert a WOOD DOWEL (15F) into the FRONT LEG (L).
Step 8
C
L
1
1F
Arrow
1F
Arrow
8F
426140 www.sauder.com/servicePae 14
15F
å Fasten the UPRIGHT (C) to the FRONT LEG (L). Tihten
three HIDDEN CAMS.
å NOTE: Be sure the WOOD DOWEL in the FRONT LEG
insert into the UPRIGHT.
Step 9
Surface with HIDDEN CAMS
L
C
These surfaces
should be even.
The LEGS will
overhan this ede.
1
426140www.sauder.com/service Pae 15
Step 10
å Fasten the CABINET LEFT (40CB) to the UPRIGHT (C).
Use two GOLD 5/16" FLAT HEAD SCREWS (3S) throuh
holes #1 and #3.
C
5
1
2
3
Roller end
4
GOLD 5/16" FLAT HEAD SCREW
(2 used for the RAILS)
3S
426140 www.sauder.com/servicePae 16
Step
å Separate the EXTENSION SLIDES (40MC) from the EXTENSION RAILS (40MA) as shown in the upper diaram below. Be
prepared, the parts are reasy.
å Fasten a EXTENSION RAIL (40MA) to the UPRIGHT (C). Use two GOLD 5/16" FLAT HEAD SCREWS (3S) throuh
holes #1 and #4.
å NOTE: For each EXTENSION RAIL, turn a SCREW into the hole shown in the enlared diaram. Then, slide the inner
cartride of the EXTENSION RAIL in to find the other hole that lines up with the hole in the UPRIGHT. Turn a SCREW into
this hole.
å NOTE: The EXTENSION SLIDES will be used later for the DRAWERS.
Step 11
C
GOLD 5/16" FLAT HEAD SCREW
(4 used for the RAILS)
3S
7
Push the black lever in and pull the SLIDE from the RAIL.
40MA40MC
Open end
3
2
1
4
426140www.sauder.com/service Pae 17
å Flip over over the UPRIGHT (C).
å Fasten the EXTENSION BLOCK (G) to the UPRIGHT (C). Use two BLACK 1-1/8" PAN HEAD SCREWS (9S).
å Fasten a CABINET RIGHT (35GA) to the UPRIGHT (C). Use two GOLD 5/16" FLAT HEAD SCREWS (3S)
throuh holes #1 and #3.
Step 12
G
GOLD 5/16" FLAT HEAD SCREW
(2 used for the RAILS)
3S
5
1
2
3
Roller end
C
9S
BLACK 1-1/8" PAN HEAD SCREW
(2 used in this step)
426140 www.sauder.com/servicePae 18
å Insert the metal end of a CAM DOWEL (2F) into each
HIDDEN CAM on the short ede of the UPRIGHT (C).
å Fasten the UPRIGHT (C) to the TOP (J). Tihten two
HIDDEN CAMS.
å Fasten the UPRIGHT (C) to the MODESTY PANEL (D). Use
two BLACK 1-15/16" FLAT HEAD SCREWS (113S).
Step 13
Surface with HIDDEN CAMS
C
J
1
426140www.sauder.com/service Pae 19
2F
D
BLACK 1-15/16" FLAT HEAD SCREW
(2 used in this step)
113S
Roller end
å Push four HIDDEN CAMS (1F) into the BOTTOM (E).
Then, insert the metal end of a CAM DOWEL (2F) into
each HIDDEN CAM.
Step 14
E
1
Do not tihten the HIDDEN CAMS in this step.
Arrow
1F
2F
Metal end
Arrow
1F
2F
Metal end
426140 www.sauder.com/servicePae 20

Other Sauder Indoor Furnishing manuals
Sauder Parklane Series User manual

Sauder

Sauder Parklane Series User manual

Sauder Studio RTA 408531 User manual

Sauder

Sauder Studio RTA 408531 User manual

Sauder 414254 User manual

Sauder

Sauder 414254 User manual

Sauder Boulevard Cafe 420645 User manual

Sauder

Sauder Boulevard Cafe 420645 User manual

Sauder Shoal Creek 422191 User manual

Sauder

Sauder Shoal Creek 422191 User manual

Sauder 422893 User manual

Sauder

Sauder 422893 User manual

Sauder 423033 User manual

Sauder

Sauder 423033 User manual

Sauder 418735 User manual

Sauder

Sauder 418735 User manual

Sauder Steel River Credenza 427849 User manual

Sauder

Sauder Steel River Credenza 427849 User manual

Sauder 409937 User manual

Sauder

Sauder 409937 User manual

Sauder Palladia 420519 User manual

Sauder

Sauder Palladia 420519 User manual

Sauder Aspen Post 427163 User manual

Sauder

Sauder Aspen Post 427163 User manual

Sauder Boulevard Cafe 420667 User manual

Sauder

Sauder Boulevard Cafe 420667 User manual

Sauder Barrister Lane 414108 User manual

Sauder

Sauder Barrister Lane 414108 User manual

Sauder Shoal Creek 408750 User manual

Sauder

Sauder Shoal Creek 408750 User manual

Sauder Via 401443 User manual

Sauder

Sauder Via 401443 User manual

Sauder 422290 User manual

Sauder

Sauder 422290 User manual

Sauder Orchard Hills 418650 User manual

Sauder

Sauder Orchard Hills 418650 User manual

Sauder Edge Water 419100 User manual

Sauder

Sauder Edge Water 419100 User manual

Sauder Office Port Series User manual

Sauder

Sauder Office Port Series User manual

Sauder 422197 User manual

Sauder

Sauder 422197 User manual

Sauder Primary Street 418388 User manual

Sauder

Sauder Primary Street 418388 User manual

Sauder worksense MASON PEAK 427807 User manual

Sauder

Sauder worksense MASON PEAK 427807 User manual

Sauder Computer Credenza 404944 User manual

Sauder

Sauder Computer Credenza 404944 User manual

Popular Indoor Furnishing manuals by other brands

Am Tigers instruction manual

Am

Am Tigers instruction manual

Steelcase 458 Replacement manual

Steelcase

Steelcase 458 Replacement manual

DecorQuip Dream Range user guide

DecorQuip

DecorQuip Dream Range user guide

fantastic furniture Carlotta Sofa 2 STR manual

fantastic furniture

fantastic furniture Carlotta Sofa 2 STR manual

ATIM T-ABLE+39 411/39.1920.25X Assembly instructions

ATIM

ATIM T-ABLE+39 411/39.1920.25X Assembly instructions

SEI Knox OC220400TX Assembly instructions

SEI

SEI Knox OC220400TX Assembly instructions

Strictly Beds & Bunks Avalon Assembly instructions

Strictly Beds & Bunks

Strictly Beds & Bunks Avalon Assembly instructions

Sister Bay Hudson 25-1 manual

Sister Bay

Sister Bay Hudson 25-1 manual

Nuu Garden RS001-LS instruction manual

Nuu Garden

Nuu Garden RS001-LS instruction manual

OSP Designs MET807 operating instructions

OSP Designs

OSP Designs MET807 operating instructions

Ameriwood HOME 5955222COM Instruction booklet

Ameriwood HOME

Ameriwood HOME 5955222COM Instruction booklet

Mantion SLIDSOFT NM V212 Instructions for assembly

Mantion

Mantion SLIDSOFT NM V212 Instructions for assembly

modway MOD-6248 quick start guide

modway

modway MOD-6248 quick start guide

Core Products MANHATTAN MN902 quick start guide

Core Products

Core Products MANHATTAN MN902 quick start guide

Powell 881-315A Assembly instructions

Powell

Powell 881-315A Assembly instructions

Costway HW67681 user manual

Costway

Costway HW67681 user manual

fantastic furniture LONGREACH Tallboy 6 Drawer Maple Assembly instructions

fantastic furniture

fantastic furniture LONGREACH Tallboy 6 Drawer Maple Assembly instructions

Forte MADRANO MEGS711L Assembling Instruction

Forte

Forte MADRANO MEGS711L Assembling Instruction

manuals.online logo
manuals.online logoBrands
  • About & Mission
  • Contact us
  • Privacy Policy
  • Terms and Conditions

Copyright 2025 Manuals.Online. All Rights Reserved.