manuals.online logo
Brands
  1. Home
  2. •
  3. Brands
  4. •
  5. Sauder
  6. •
  7. Indoor Furnishing
  8. •
  9. Sauder Manhattan Gate 429257 User manual

Sauder Manhattan Gate 429257 User manual

sauder.com
NOTE: THIS INSTRUCTION
BOOKLET CONTAINS IMPORTANT
SAFETY INFORMATION.
PLEASE READ AND KEEP FOR
FUTURE REFERENCE.
sauder.com
CONTACT US FIRST
BEFORE MAKING ANY RETURNS TO THE STORE.
sauder.com
CONTACT US FIRST
BEFORE MAKING ANY RETURNS TO THE RETAILER.
Visit sauder.com/service to order replacement parts, view video assembly tips, or chat with a live rep.
Prefer the phone? Give us a ring at 1-800-445-1527.
Customer Service is available Monday-Friday - 9 a.m. to 5:30 p.m. EST (except holidays)
Sauder.com
Share your journey!
English pg 1-28
Français pg 29-32
Español pg 33-36
Lot # 565093 04/09/21
Purchased: __________________
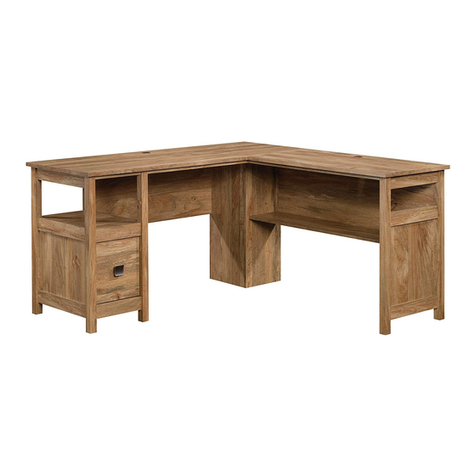
L-Desk
Manhattan Gate Collection | Model 429257
Sit and surf.
Part Identification
Hardware Identification
Hardware Usage Guide
Assembly Steps
Français
Español
Safety
Warranty
No. 2 Phillips Screwdriver
Tip Shown Actual Size
Table of Contents Assembly Tools Required
Hammer
Not actual size
3
4-5
6
7-28
29-32
33-36
37-38
39
Page 2 www.sauder.com/service 429257
Part Identification
åWhile not all parts are labeled, some of the parts will have a label or an inked letter on the edge
to help distinguish similar parts from each other. Use this part identification to help identify similar parts.
Now you know
our ABCs.
A LARGE TOP (1)
B CORNER PANEL (1)
C LEFT END (1)
D MODESTY PANEL (1)
E UPRIGHT (1)
F SMALL TOP (1)
G BRACE (1)
H SMALL DRAWER FRONT (1)
J SMALL LEFT DRAWER SIDE (1)
K SMALL DRAWER BACK (1)
L LARGE DRAWER BOTTOM (1)
M LARGE DRAWER FRONT (1)
N LARGE RIGHT DRAWER SIDE (1)
P LARGE LEFT DRAWER SIDE (1)
Q LARGE DRAWER BACK (1)
R DRAWER BOX FRONT (1)
S DRAWER PULL (2)
T RIGHT END (1)
U MODESTY PANEL BRACE (1)
V TIE PLATE (1)
W SMALL RIGHT DRAWER SIDE (1)
X SMALL DRAWER BOTTOM (1)
Y END BRACE (1)
Z ANGLE BRACKET (1)
Page 3www.sauder.com/service429257
A
B
C
D
E
G
F
T
W
J
K
X
M
N
P
Q
U
R
H
L
V
YZ
S
Hardware Identification
åScrews are shown actual size. You may receive extra hardware with your unit.
Page 4 www.sauder.com/service 429257
(EXTENSION SET SHOWN SEPARATED)
5EXTENSION RAIL - 2 6EXTENSION SLIDE - 2 7LONG FILE
GLIDE - 2
SHORT FILE
GLIDE - 2
8
WOOD DOWEL - 14
11
CAM SCREW - 31
9HIDDEN CAM - 31
10
L-WRENCH - 1
16
LOCK SET - 1
15
SMALL WOOD
DOWEL - 4
12 APPLIQUE CARD - 2
14
GROMMET - 2
13
1RIGHT CABINET
RAIL - 1 3RIGHT DRAWER
SLIDE - 1
2LEFT CABINET
RAIL - 1 4LEFT DRAWER
SLIDE - 1
LARGE WOOD
DOWEL - 8
17
Hardware Identification
åScrews are shown actual size. You may receive extra hardware with your unit.
Page 5www.sauder.com/service429257
2-3/8" HEX HEAD SCREW - 4
18
5/8" HEX HEAD SCREW - 22
21
1" FLAT HEAD SCREW - 2
20
3/8" PAN HEAD SCREW - 12
23
1-1/2" FLAT HEAD SCREW - 8
19
1/2" FLAT HEAD SCREW - 18
22
Hardware Usage Guide
HOW TO USE A HIDDEN CAM & CAM SCREW OR CAM DOWEL
NOTE: Various CAM SCREWS or a CAM DOWEL may be used.
Cam Screws Cam Dowel
Turn the CAM SCREW or
gently tap the CAM DOWEL
until the shoulder is against
the surface of the part.
1.
Hidden Cam
Arrow
Push a HIDDEN CAM into
the part. The arrow in the
HIDDEN CAM must point
toward the hole in the
edge of the board.
Hole
2.
3.
1
2
Insert the CAM SCREW or CAM DOWEL into the
HIDDEN CAM. Tighten the HIDDEN CAM.
Page 6 www.sauder.com/service 429257
Look for this icon. It means a video assembly tip is
available at www.sauder.com/service/tips
Find the numbered video or scan the QR code.
å Assemble your unit on a carpeted floor or on the empty
carton to avoid scratching your unit or the floor. Save some
packing material for support to be used later in assembly.
å Turn two CAM SCREWS (9) into the UPRIGHT (E).
å Push five HIDDEN CAMS (10) into the UPRIGHT (E).
å Fasten the RIGHT CABINET RAIL (1) to the UPRIGHT (E).
Use three 1/2" FLAT HEAD SCREWS (22) in the exact
holes shown.
Step 1
Page 7www.sauder.com/service429257
9
E
1
1
Arrow
10
10
Arrow
Roller end
CR
1
1/2" FLAT HEAD SCREW
(3 used in this step)
22
Pro Tip: You will need
someone's help later
in assembly.
Step 2
Page 8 www.sauder.com/service 429257
å Separate the EXTENSION SLIDES (6) from the EXTENSION RAILS (5) as shown in the
upper diagram below. Be prepared, the parts are greasy.
å Fasten one EXTENSION RAIL (5) to the UPRIGHT (E). Use three 3/8" PAN HEAD
SCREWS (23) in the exact holes shown.
å NOTE: For each EXTENSION RAIL, turn a SCREW into the hole shown in the enlarged
diagram. Then, slide the inner cartridge of the EXTENSION RAIL in to find the other
holes that line up with the holes in the UPRIGHT. Turn a SCREW into these holes.
å NOTE: The EXTENSION SLIDES will be used later for the LARGE DRAWER.
Open end
Push the lever and pull the SLIDE from the RAIL.
7
3/8" PAN HEAD SCREW
(3 used in this step)
23
E
6 5
5
Open end
å Push four HIDDEN CAMS (10) into the BRACE (G).
å Insert one WOOD DOWEL (11) into the UPRIGHT (E).
å Fasten the BRACE (G) to the UPRIGHT (E). Tighten two
HIDDEN CAMS.
å NOTE: Be sure the WOOD DOWEL in the UPRIGHT
inserts into the BRACE.
Step 3
Page 9www.sauder.com/service429257
1
G
E
10
Arrow
Arrow
10
11
G
Surface with
HIDDEN CAMS
å Push eight HIDDEN CAMS (10) into the MODESTY PANEL (D).
å Turn two CAM SCREWS (9) into the MODESTY PANEL (D).
å Fasten the MODESTY PANEL BRACE (U) to the MODESTY
PANEL (D). Tighten four 2-3/8" HEX HEAD SCREWS (18) using
the L-WRENCH (16).
å NOTE: You should start each SCREW a few turns before
completely tightening any of them.
Step 4
Page 10 www.sauder.com/service 429257
1
Arrow
10
10
Arrow
Arrow
10
(8 used)
9
16
2-3/8" HEX HEAD SCREW
(4 used in this step)
18
U
D
You will need to lift
up slightly on the
MODESTY PANEL
to line up the holes.
å Insert two WOOD DOWELS (11) into the MODESTY PANEL (D).
å Fasten the UPRIGHT (E) to the MODESTY PANEL (D). Tighten
two HIDDEN CAMS.
å NOTE: Be sure the WOOD DOWELS in the MODESTY PANEL
insert into the UPRIGHT.
å Remove the WASHER from the LOCK SET (15). Fasten the LOCK
to the UPRIGHT (E). Use two 1/2" FLAT HEAD SCREWS (22).
Place the WASHER over the end of the LOCK, and press the
prongs into the UPRIGHT.
Step 5
Page 11www.sauder.com/service429257
1
E
D
The prongs must press
into the UPRIGHT. You
may need to gently tap the
prongs into the UPRIGHT.
WASHER 15 1/2" FLAT HEAD SCREW
(2 used in this step)
22
11
LOCK
å Push six HIDDEN CAMS (10) into the CORNER PANEL (B)
and LEFT END (C).
å NOTE: Be sure the HIDDEN CAMS are inserted completely
into the holes.
å Turn six CAM SCREWS (9) into the CORNER PANEL (B)
and LEFT END (C).
Step 6
Page 12 www.sauder.com/service 429257
B
1
10
Arrow
9
Meet Part (B). This component has
been engineered to be lighter, stronger,
faster… well ok. Not technically faster.
But definitely makes for a sturdier
L-Desk that’s easier to assemble and
friendlier to the environment.
Be sure the HIDDEN
CAMS are inserted
completely into the holes.
C
Part (C). Another
sturdier, easier,
friendlier component!
10
Arrow 9
Be sure the HIDDEN
CAMS are inserted
completely into the holes.
Just think. The sooner
you do this, the sooner
you do something else.
å Insert two WOOD DOWELS (11) into the CORNER PANEL (B).
å Fasten the CORNER PANEL (B) to the MODESTY PANEL (D). Tighten
two HIDDEN CAMS.
å NOTE: Be sure the WOOD DOWELS in the CORNER PANEL insert into
the MODESTY PANEL.
å Fasten the MODESTY PANEL BRACE (U) to the CORNER PANEL (B).
Tighten two 5/8" HEX HEAD SCREWS (21) using the L-WRENCH (16).
Step 7
Page 13www.sauder.com/service429257
1
B
U
D
For support, place packing
foam and books here.
11
16
5/8" HEX HEAD SCREW
(2 used in this step)
21
For support, place packing
foam and books here.
Step 8
Page 14 www.sauder.com/service 429257
C
Open end
å Fasten the LEFT CABINET RAIL (2) to the LEFT END (C). Use three 1/2" FLAT HEAD
SCREWS (22) in the exact holes shown.
å Fasten one EXTENSION RAIL (5) to the LEFT END (C). Use three 3/8" PAN HEAD
SCREWS (23) in the exact holes shown.
å NOTE: For each EXTENSION RAIL, turn a SCREW into the hole shown in the enlarged
diagram. Then, slide the inner cartridge of the EXTENSION RAIL in to find the other
holes that line up with the holes in the END. Turn a SCREW into these holes.
5
Roller end
5
2
CL
2
1/2" FLAT HEAD SCREW
(3 used in this step)
22
3/8" PAN HEAD SCREW
(3 used in this step)
23
Open end
Step 9
Page 15www.sauder.com/service429257
1
å Insert three WOOD DOWELS (11) into the LEFT END (C).
å Fasten the LEFT END (C) to the MODESTY PANEL (D) and BRACE (G).
Tighten four HIDDEN CAMS.
å NOTE: Be sure the WOOD DOWELS in the LEFT END insert into the
MODESTY PANEL and BRACE.
å Fasten the MODESTY PANEL BRACE (U) to the LEFT END (C). Tighten
two 5/8" HEX HEAD SCREWS (21) using the L-WRENCH (16).
C
U
D
11
16
5/8" HEX HEAD SCREW
(2 used in this step)
21
G
å With someone's help, carefully stand your assembly upright.
å Turn thirteen CAM SCREWS (9) into the LARGE TOP (A).
å Fasten the TIE PLATE (V) to the LARGE TOP (A). Tighten four 5/8" HEX HEAD SCREWS (21) using the L-WRENCH (16)
.
å NOTE: The TIE PLATE will overhang the LARGE TOP.
å Insert four LARGE WOOD DOWELS (17) into the CORNER PANEL (B) and LEFT END (C).
å Insert six WOOD DOWELS (11) into the MODESTY PANEL (D) and UPRIGHT (E).
å With someone's help, fasten the LARGE TOP (A) to the CORNER PANEL (B), LEFT END (C), MODESTY PANEL (D), and
UPRIGHT (E). Tighten thirteen HIDDEN CAMS.
å NOTE: Be sure the WOOD DOWELS in the CORNER
PANEL, LEFT END, MODESTY PANEL, and
UPRIGHT insert into the TOP.
Step 10
Page 16 www.sauder.com/service 429257
16
9
C
D
E
B
A
A
V
11
17
17
(13 used)
5/8" HEX HEAD SCREW
(4 used in this step)
21
Part (A). Another
sturdier, easier,
friendlier component!
å Insert two LARGE WOOD DOWELS (17) into the SMALL
TOP (F) as shown.
å Push the RIGHT END (T) onto the WOOD DOWELS in the
SMALL TOP (F).
å Fasten the ANGLE BRACKET (Z) to the SMALL TOP (F) and
RIGHT END (T). Tighten eight 5/8" HEX HEAD SCREWS (21)
using the L-WRENCH (16).
å NOTE: You should start each SCREW a few turns before
completely tightening any of them.
Step 11
Page 17www.sauder.com/service429257
T
F
16
Surface with holes
Edge with holes
5/8" HEX HEAD SCREW
(8 used in this step)
21
T
F
Z
17
Part (H). Another
sturdier, easier,
friendlier component!
Part (G). Another
sturdier, easier,
friendlier component!
å Fasten the END BRACE (Y) to the SMALL TOP (F) and
RIGHT END (T). Tighten two 5/8" HEX HEAD SCREWS (21)
using the L-WRENCH (16).
Step 12
Page 18 www.sauder.com/service 429257
16
5/8" HEX HEAD SCREW
(2 used in this step)
21
T
F
Y
å Insert two LARGE WOOD DOWELS (17) into the LARGE
TOP (A) as shown.
å Push the SMALL TOP (F) onto the WOOD DOWELS in the
LARGE TOP (A).
å Fasten the TIE PLATE on the LARGE TOP (A) to the SMALL
TOP (F). Tighten four 5/8" HEX HEAD SCREWS (21) using
the L-WRENCH (16).
å NOTE: You should start each SCREW a few turns before
completely tightening any of them.
Step 13
Page 19www.sauder.com/service429257
17
F
16
A
5/8" HEX HEAD SCREW
(4 used in this step)
21
Hey! It's starting to look
like something!
å Fasten the EXTENSION SLIDES (6) to the LARGE
DRAWER SIDES (N and P). Use six 3/8" PAN HEAD
SCREWS (23) in the exact holes shown.
Step 14
Page 20 www.sauder.com/service 429257
6
3/8" PAN HEAD SCREW
(6 used in this step)
23
6
Open end
Edge with more holes
P
N
6
Open end

Other Sauder Indoor Furnishing manuals

Sauder 422197 User manual

Sauder

Sauder 422197 User manual

Sauder Carson Forge 414444 User manual

Sauder

Sauder Carson Forge 414444 User manual

Sauder Registry Row Series User manual

Sauder

Sauder Registry Row Series User manual

Sauder Carson Forge 412920 User manual

Sauder

Sauder Carson Forge 412920 User manual

Sauder Hudson Court 425833 User manual

Sauder

Sauder Hudson Court 425833 User manual

Sauder Carson Forge Series User manual

Sauder

Sauder Carson Forge Series User manual

Sauder North Avenue 420042 User manual

Sauder

Sauder North Avenue 420042 User manual

Sauder Studio RTA 408531 User manual

Sauder

Sauder Studio RTA 408531 User manual

Sauder Manhattan Gate 429256 User manual

Sauder

Sauder Manhattan Gate 429256 User manual

Sauder OfficeWorks AFFIRM 427442 User manual

Sauder

Sauder OfficeWorks AFFIRM 427442 User manual

Sauder Carson Forge 415520 User manual

Sauder

Sauder Carson Forge 415520 User manual

Sauder Harbor View 403793 User manual

Sauder

Sauder Harbor View 403793 User manual

Sauder Center City 425653 User manual

Sauder

Sauder Center City 425653 User manual

Sauder County Line 415995 User manual

Sauder

Sauder County Line 415995 User manual

Sauder 429430 User manual

Sauder

Sauder 429430 User manual

Sauder 427470 User manual

Sauder

Sauder 427470 User manual

Sauder 408995 User manual

Sauder

Sauder 408995 User manual

Sauder Credenza International Lux 420631 User manual

Sauder

Sauder Credenza International Lux 420631 User manual

Sauder 415978 User manual

Sauder

Sauder 415978 User manual

Sauder Worksense BERGEN CIRCLE 426288 User manual

Sauder

Sauder Worksense BERGEN CIRCLE 426288 User manual

Sauder 412996 Installation guide

Sauder

Sauder 412996 Installation guide

Sauder Pinwheel 421888 User manual

Sauder

Sauder Pinwheel 421888 User manual

Sauder Costa 428724 User manual

Sauder

Sauder Costa 428724 User manual

Sauder project 62 User manual

Sauder

Sauder project 62 User manual

Popular Indoor Furnishing manuals by other brands

Bell'O WAVS335 Assembly instructions

Bell'O

Bell'O WAVS335 Assembly instructions

Children's Products Simmons Kids SlumberTime 310210-499 Assembly instructions

Children's Products

Children's Products Simmons Kids SlumberTime 310210-499 Assembly instructions

Wilding Wallbeds Brittany Installation booklet

Wilding Wallbeds

Wilding Wallbeds Brittany Installation booklet

Crate&Barrel Warren manual

Crate&Barrel

Crate&Barrel Warren manual

GEM SHORT BED WITH SIDES KIT quick start guide

GEM

GEM SHORT BED WITH SIDES KIT quick start guide

Lehner Versand Lea 58729 Assembly instruction

Lehner Versand

Lehner Versand Lea 58729 Assembly instruction

OAKWORKS Spa Clinician Adjustable Lift-Assist Salon Top user manual

OAKWORKS Spa

OAKWORKS Spa Clinician Adjustable Lift-Assist Salon Top user manual

HENN 102-10 Assembly instructions

HENN

HENN 102-10 Assembly instructions

DAYCO DM0906 quick start guide

DAYCO

DAYCO DM0906 quick start guide

Forte SEWK522 Assembling Instruction

Forte

Forte SEWK522 Assembling Instruction

Jorgenson Lockers Gladiator Assembling instructions

Jorgenson Lockers

Jorgenson Lockers Gladiator Assembling instructions

Global Contract Compile installation manual

Global Contract

Global Contract Compile installation manual

Niche Flip Flop FF2822 Series Assembly instructions

Niche

Niche Flip Flop FF2822 Series Assembly instructions

Extremis Marina bistro manual

Extremis

Extremis Marina bistro manual

NORMBAU NY.466.110 Fixing instructions

NORMBAU

NORMBAU NY.466.110 Fixing instructions

BLACK RED WHITE STYLIUS NBIU 170 Assembly manual

BLACK RED WHITE

BLACK RED WHITE STYLIUS NBIU 170 Assembly manual

Kidco BR202 user guide

Kidco

Kidco BR202 user guide

LumiSource BOOMCHAIR SVC owner's manual

LumiSource

LumiSource BOOMCHAIR SVC owner's manual

manuals.online logo
manuals.online logoBrands
  • About & Mission
  • Contact us
  • Privacy Policy
  • Terms and Conditions

Copyright 2025 Manuals.Online. All Rights Reserved.