manuals.online logo
Brands
  1. Home
  2. •
  3. Brands
  4. •
  5. Sauder
  6. •
  7. Indoor Furnishing
  8. •
  9. Sauder Office Port Series User manual

Sauder Office Port Series User manual

Need help? Visit Sauder.com to view video assembly tips or chat with a live rep.
Prefer the phone? Call 1-800-523-3987.
Share your journey!
sauder.com
NOTE: THIS INSTRUCTION
BOOKLET CONTAINS IMPORTANT
SAFETY INFORMATION.
PLEASE READ AND KEEP FOR
FUTURE REFERENCE.
English pg 1-31
Français pg 32-35
Español pg 36-40
Lot # 363436 07/11/14
Purchased: __________________
Be sure to give us a ring before
making any returns. 1-800-523-3987
For all your
newfangled gadgetry.
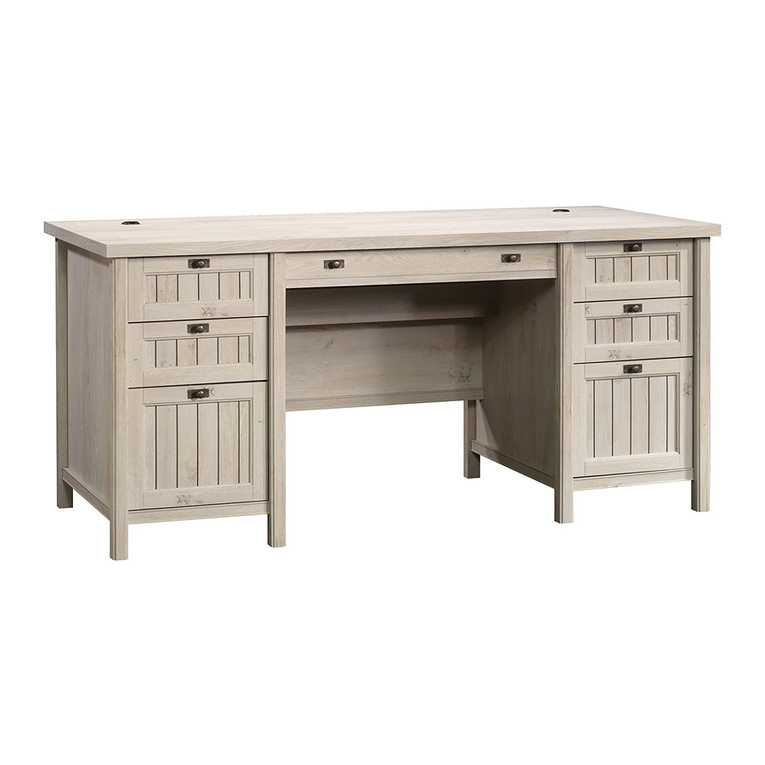
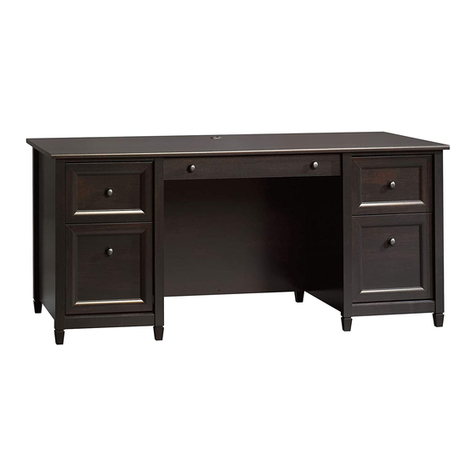
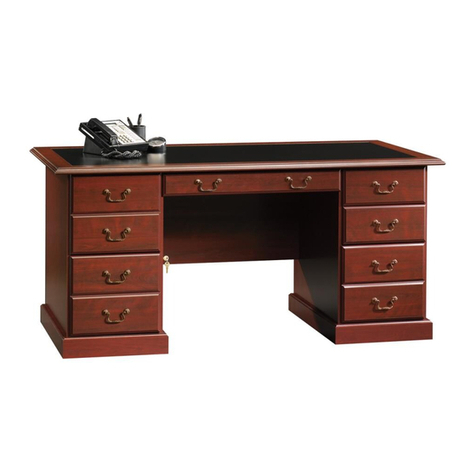
Credenza
Oce Port Collection | Model 408291
Table of Contents Assembly Tools Required
Part Identification
Hardware Identification
Assembly Steps
Français
Español
Safety
Warranty
Hammer
Not actual size
No. 2 Phillips Screwdriver
Tip Shown Actual Size
Skip the power trip.
This time.
3
4-5
6-31
32-35
36-40
41-42
43
408291 www.sauder.com/servicesPage 2
Part Identification
åWhile not all parts are labeled, some of the parts will have a label or an inked letter on the edge
to help distinguish similar parts from each other. Use this part identification to help identify similar parts.
Now you know
our ABCs.
A RIGHT END (1)
B LEFT END (1)
C RIGHT UPRIGHT (1)
D LEFT UPRIGHT (1)
D10 RIGHT DRAWER SIDE (1)
D11 LEFT DRAWER SIDE (1)
D18 SMALL RIGHT DRAWER SIDE (1)
D19 SMALL LEFT DRAWER SIDE (1)
D74 SMALL DRAWER BACK (1)
D78 LARGE DRAWER BACK (1)
D86 DRAWER BACK (1)
D87 LARGE RIGHT DRAWER SIDE (1)
D88 LARGE LEFT DRAWER SIDE (1)
D707 DRAWER BOTTOM (2)
D708 LARGE DRAWER BOTT0M (1)
E TOP (1)
F BOTTOM (1)
G MODESTY PANEL (1)
H BRACE (2)
I EXTENSION BLOCK (2)
J BASE (1)
K LARGE BACK (1)
L DOOR (1)
M ADJUSTABLE SHELF (1)
N SMALL BASE (1)
O SMALL BACK (1)
P KEYBOARD SHELF (1)
T LARGE DRAWER FRONT (1)
V DRAWER FRONT (1)
Y BOTTOM MOLDING (1)
Z END MOLDING (2)
CC SMALL DRAWER FRONT (1)
GG SMALL BOTTOM MOLDING (1)
A
B
C
D
E
F
G
H
H
J
K
L
M
N
O
P
CC
Y
Z
Z
T
V
GG
I
D10D10
D18
D19
D74
D78 D87
D88
D86
D11
D707
D707
D708
408291www.sauder.com/services Page 3
Hardware Identification
(EXTENSION SET SHOWN SEPARATED)
EXTENSION RAIL - 2
HH EXTENSION SLIDE - 2
II
NN SHORT RIGHT
CABINET RAIL - 2 OO SHORT LEFT
CABINET RAIL - 2
QQ SHORT LEFT
DRAWER SLIDE - 2
PP SHORT RIGHT
DRAWER SLIDE - 2 FILE ROD - 2
RR
LEFT DRAWER
SLIDE - 1
MM
RIGHT DRAWER
SLIDE - 1
LL
LEFT CABINET
RAIL - 1
KK
RIGHT CABINET
RAIL - 1
JJ
FILE GLIDE - 2
6B
RAIL BRACKET - 8
ZZ
PULL - 4
CCC
TT TWIST-LOCK®FASTENER - 18
BBB CORD CLIP - 1 EEE GROMMET - 1
CAM SCREW - 4
8F XX HINGE - 2HIDDEN CAM - 4
1F
FFF GROMMET CAP - 1
408291 www.sauder.com/servicesPage 4
METAL BRACKET - 7
AAA
Hardware Identification
åScrews are shown actual size. You may receive extra hardware with your unit.
FELT DISC CARD - 1
HHH
BLACK 9/16" LARGE HEAD SCREW - 30
PPP
MMM BLACK 1-7/8" FLAT HEAD SCREW - 4
LLL SILVER 2" FLAT HEAD SCREW - 4
OOO BROWN 1" FLAT HEAD SCREW - 4
RRR GOLD 5/16" FLAT HEAD SCREW - 28
III METAL PIN - 8
GGG SLIDE CAM - 6
BLACK 1/2" FLAT HEAD SCREW - 4
QQQ
NNN BLACK 1" PAN HEAD SCREW - 8
SSS NAIL - 35
JJJ RUBBER SLEEVE - 4
408291www.sauder.com/services Page 5
30S BLACK 1-9/16" FLAT HEAD SCREW - 12
Step 1 Look for this icon. It means a
video assembly tip is available at
www.sauder.com/services/tips
å Assemble your unit on a carpeted floor or on the empty
carton to avoid scratching your unit or the floor.
å To begin assembly, push a SAUDER TWIST-LOCK®
FASTENER (TT) into the large holes in the RIGHT END (A)
and LEFT END (B).
å Repeat this step for the UPRIGHTS (C and D), BOTTOM (F),
MODESTY PANEL (G), and both BRACES (H).
(18 used)
TT
Do not tighten the TWIST-LOCK® FASTENERS in this step.
A
B
408291 www.sauder.com/servicesPage 6
Scan this QR code or go to this address:
http://qr.sauder.com/?ID=1564
to watch a video on how to assemble your unit.
å Push four HIDDEN CAMS (1F) into the BOTTOM (F)
and one of the BRACES (H).
å Turn four CAM SCREWS (8F) into the
BOTTOM MOLDINGS (Y and GG).
Step 2
Y
GG
8F
Arrow
Arrow
1F
The arrow in the HIDDEN
CAM must point toward the
hole in the edge of the board.
Hole
F
H
408291www.sauder.com/services Page 7
(4 used)
å Fasten eight RAIL BRACKETS (ZZ) to the RIGHT END (A)
and RIGHT UPRIGHT (C). Use sixteen BLACK 9/16" LARGE
HEAD SCREWS (PPP).
Step 3
BLACK 9/16" LARGE HEAD SCREW
(16 used in this step)
PPP
(8 used)
ZZ
A
C
408291 www.sauder.com/servicesPage 8
Remember:
Righty tighty.
Lefty loosey.
å Fasten the EXTENSION BLOCKS (I) to the RIGHT END (A)
and RIGHT UPRIGHT (C). Use four SILVER 2" FLAT
HEAD SCREWS (LLL).
Step 4
A
C
SILVER 2" FLAT HEAD SCREW
(4 used in this step)
LLL
I
I
408291www.sauder.com/services Page 9
Step 5
å Fasten the SHORT CABINET RAILS (NN and OO) to
the RAIL BRACKETS on the RIGHT END (A) and RIGHT
UPRIGHT (C). Use eight GOLD 5/16" FLAT HEAD
SCREWS (RRR) through holes #1 and #4.
å NOTE: The CABINET RAILS are marked "CABINET
RIGHT" and "CABINET LEFT" for easy identification.
A
C
NN
NN
OO
OO
1
1
2
2
3
3
4
4
4
4
3
3
2
2
1
1
Roller end
Roller end
Notched edge
Notched edge
GOLD 5/16" FLAT HEAD SCREW
(8 used in this step)
RRR
408291 www.sauder.com/servicesPage 10
å Separate the EXTENSION SLIDES (II) from the
EXTENSION RAILS (HH) as shown in the upper diagram
below. Be prepared, the parts are greasy.
å Fasten the EXTENSION RAILS (HH) to the EXTENSON
BLOCKS on the RIGHT END (A) and RIGHT UPRIGHT (C).
Use four GOLD 5/16" FLAT HEAD SCREWS (RRR).
å NOTE: For each EXTENSION RAIL, turn a SCREW into the
hole shown in the enlarged diagram. Then, slide the inner
cartridge of the EXTENSION RAIL out to find the other
hole that lines up with the hole in the END. Turn a SCREW
into this hole.
Step 6
GOLD 5/16" FLAT HEAD SCREW
(4 used in this step)
RRR
Open end
Push the black lever in and pull the SLIDE from the RAIL.
Open end
A
C
HH
HH
HH
II
408291www.sauder.com/services Page 11
Notched edge
Notched edge
å Fasten the CABINET RAILS (JJ and KK) to the
UPRIGHTS (C and D). Use four GOLD 5/16" FLAT
HEAD SCREWS (RRR).
å NOTE: The CABINET RAILS are marked "CABINET
RIGHT" and "CABINET LEFT" for easy identification.
Step 7
C
D
JJ
KK
Roller end
Roller end
Notched edge
Finished edge
GOLD 5/16" FLAT HEAD SCREW
(4 used in this step)
RRR
408291 www.sauder.com/servicesPage 12
å Fasten the LEFT END (B) to the TOP (E). Tighten two
TWIST-LOCK®FASTENERS.
å Fasten the BOTTOM (F) to the LEFT END (B). Tighten two
TWIST-LOCK®FASTENERS.
Step 8
How to use the SAUDER TWIST-LOCK®FASTENER
1. Insert the dowel end of the FASTENER into the hole of the
adjoining part.
NOTE: The dowel end of the FASTENER must remain fully
inserted in the hole of the adjoining part while locking
the FASTENER.
2. Tighten the FASTENER with a Phillips screwdriver as tight
as possible.
Dowel end
Do not stand the unit upright without the
BACK fastened. The unit may collapse.
Caution
B
E
F
Long finished edge
Unfinished surface
Finished edge
Edge with HIDDEN CAM holes
408291www.sauder.com/services Page 13
å Fasten the LEFT UPRIGHT (D) to the TOP (E) and BOTTOM (F).
Tighten four TWIST-LOCK® FASTENERS.
å Fasten the MODESTY PANEL (G) to the LEFT UPRIGHT (D). Use
two BLACK 1 -7/8" FLAT HEAD SCREWS (MMM).
å NOTE: Be sure the TWIST-LOCK® FASTENERS in the
MODESTY PANEL insert into the holes in the TOP (E). Do not
tighten the TWIST-LOCK® FASTENERS at this time.
Step 9
D
E
F
G
Notch
Finished edge
Finished surface
408291 www.sauder.com/servicesPage 14
BLACK 1-7/8" FLAT HEAD SCREW
(2 used in this step)
MMM
These two TWIST-LOCK®
FASTENERS will be
tightened in Step 15.
å Fasten the RIGHT UPRIGHT (C) to the TOP (E). Tighten two
TWIST-LOCK® FASTENERS.
å Fasten the RIGHT UPRIGHT (C) to the MODESTY PANEL (G).
Use two BLACK 1-7/8" FLAT HEAD SCREWS (MMM).
å Insert four METAL PINS (III) into the BRACES (H).
å Fasten the BRACES (H) to the RIGHT UPRIGHT (C). Tighten
two TWIST-LOCK® FASTENERS.
å NOTE: Pay close attention to the positioning of the BRACES.
The BRACE without HIDDEN CAMS should be located at the
bottom. Be sure the METAL PINS in the BRACES insert into
the holes in the RIGHT UPRIGHT.
Step 10
III
C E
G
H
H
Edge without holes
Edge with holes
Surface with
TWIST-LOCK®
FASTENERS
Surface with
TWIST-LOCK®
FASTENERS
Notched edge
408291www.sauder.com/services Page 15
BLACK 1-7/8" FLAT HEAD SCREW
(2 used in this step)
MMM
III
å Fasten the RIGHT END (A) to the TOP (E) and BRACES (H).
Tighten four TWIST-LOCK® FASTENERS.
å NOTE: Be sure the METAL PINS in the BRACES insert into
the holes in the RIGHT END.
Step 11
Notched edge
A
H
H
408291 www.sauder.com/servicesPage 16
E
å Slide the END MOLDINGS* (Z) onto the notched edges of
the RIGHT END (A) and RIGHT UPRIGHT (C).
å * U.S. Patent No. 5,499,886
Step 12
A
C
Slide the END MOLDINGS (Z)
onto the notched edges.
Z
Z
408291www.sauder.com/services Page 17
These edges must be even.
Groove
Groove
å Fasten the BOTTOM MOLDINGS (Y and GG) to
the BOTTOM (F) and BRACE (H). Tighten four
HIDDEN CAMS.
Step 13
F
H
Y
GG
408291 www.sauder.com/servicesPage 18
1
2
å Fasten seven METAL BRACKETS (AAA) to the ENDS (A and B),
UPRIGHTS (C and D), BOTTOM (F), and BRACE (H). Use seven
BLACK 9/16" LARGE HEAD SCREWS (PPP).
å NOTE: Be sure the edges of the ANGLE BRACKETS are even
with the edges of the ENDS and UPRIGHTS.
å Next, fasten the BASES (J and N) to the ENDS (A and B),
UPRIGHTS (C and D), BOTTOM (F), and BRACE (H). Use seven
BLACK 9/16" LARGE HEAD SCREWS (PPP).
Step 14
A
B
C
D
F
H
N
J
(7 used)
BLACK 9/16" LARGE HEAD SCREW
(14 used for the METAL BRACKETS)
PPP
408291www.sauder.com/services Page 19
AAA
AAA
AAA
å Carefully turn your unit over onto its front edges. Lay the
BACKS (K and O) over your unit.
å Make equal margins along all four edges of the BACKS (K
and O). Push on opposite corners of your unit if needed to
make it "square".
å Fasten the BACKS (K and O) to your unit using the NAILS (SSS).
å NOTE: Perforations have been provided for access through the
BACK. Carefully cut out the holes needed.
å Tighten the TWIST-LOCK® FASTENERS in the MODESTY
PANEL (G) at this time.
Step 15
G
K
O
Do not stand the unit upright without the
BACK fastened. The unit may collapse.
Caution
NAIL
(35 used in this step)
SSS
Cut-out for lifting the desk
408291 www.sauder.com/servicesPage 20
Tighten two
TWIST-LOCK®
FASTENERS.

Other manuals for Office Port Series

1

This manual suits for next models

1

Other Sauder Indoor Furnishing manuals

Sauder County 418529 User manual

Sauder

Sauder County 418529 User manual

Sauder Edge Water Series User manual

Sauder

Sauder Edge Water Series User manual
Sauder Barrister Lane Storage Credenza 414721 User manual

Sauder

Sauder Barrister Lane Storage Credenza 414721 User manual

Sauder OfficeWorks AFFIRM 426277 User manual

Sauder

Sauder OfficeWorks AFFIRM 426277 User manual

Sauder 413854 User manual

Sauder

Sauder 413854 User manual

Sauder HomePlus Series User manual

Sauder

Sauder HomePlus Series User manual

Sauder HomePlus 411965 User manual

Sauder

Sauder HomePlus 411965 User manual

Sauder County Line 417771 User manual

Sauder

Sauder County Line 417771 User manual

Sauder 408726 User manual

Sauder

Sauder 408726 User manual

Sauder Storage Cabinet 419496 User manual

Sauder

Sauder Storage Cabinet 419496 User manual

Sauder Barrister Lane 414723 User manual

Sauder

Sauder Barrister Lane 414723 User manual

Sauder Carson Forge 416967 User manual

Sauder

Sauder Carson Forge 416967 User manual

Sauder Shoal Creek Series User manual

Sauder

Sauder Shoal Creek Series User manual

Sauder Soft Modern 414969 User manual

Sauder

Sauder Soft Modern 414969 User manual

Sauder Shoal Creek 409937 User manual

Sauder

Sauder Shoal Creek 409937 User manual

Sauder Harbor View 402902 User manual

Sauder

Sauder Harbor View 402902 User manual

Sauder 409942 User manual

Sauder

Sauder 409942 User manual

Sauder Primary Street 418388 User manual

Sauder

Sauder Primary Street 418388 User manual

Sauder Craft Table 421417 User manual

Sauder

Sauder Craft Table 421417 User manual

Sauder Hammond 431249 User manual

Sauder

Sauder Hammond 431249 User manual

Sauder County Line 416977 User manual

Sauder

Sauder County Line 416977 User manual

Sauder 419188 User manual

Sauder

Sauder 419188 User manual

Sauder Center City 425653 User manual

Sauder

Sauder Center City 425653 User manual

Sauder Craft Armoire User manual

Sauder

Sauder Craft Armoire User manual

Popular Indoor Furnishing manuals by other brands

Habitat Lulu 819254 manual

Habitat

Habitat Lulu 819254 manual

Whalen MainStays Parsons manual

Whalen

Whalen MainStays Parsons manual

INSPIREDHOME Kamille King Assembly instructions

INSPIREDHOME

INSPIREDHOME Kamille King Assembly instructions

Coaster 301405Q Assembly instructions

Coaster

Coaster 301405Q Assembly instructions

Teknik Elstree L-Shaped Desk 5426914 manual

Teknik

Teknik Elstree L-Shaped Desk 5426914 manual

Powell 14J2001BL Assembly instructions

Powell

Powell 14J2001BL Assembly instructions

Seconique BERGEN TALL SIDEBOARD Assembly instructions

Seconique

Seconique BERGEN TALL SIDEBOARD Assembly instructions

imovr OMEGA DENALI installation manual

imovr

imovr OMEGA DENALI installation manual

Noble House Home Furnishings PLANTER Assembly instructions

Noble House Home Furnishings

Noble House Home Furnishings PLANTER Assembly instructions

ExBrite DHJSMC2026V3DKLDX Installation and operating manual

ExBrite

ExBrite DHJSMC2026V3DKLDX Installation and operating manual

Kettler Charlbury 0195532-6009 Assembly instructions

Kettler

Kettler Charlbury 0195532-6009 Assembly instructions

Forte INGS821 Assembling Instruction

Forte

Forte INGS821 Assembling Instruction

pottery barn kids GEMMA CRIB quick start guide

pottery barn kids

pottery barn kids GEMMA CRIB quick start guide

Dorel Living DA8274 manual

Dorel Living

Dorel Living DA8274 manual

bbf 3 Drawer Mobile Pedestal Assembly guide

bbf

bbf 3 Drawer Mobile Pedestal Assembly guide

Henley 614/3222 Assembly instructions

Henley

Henley 614/3222 Assembly instructions

Forte NIKS81 Assembling Instruction

Forte

Forte NIKS81 Assembling Instruction

Fursys Sidiz T50 Series Assembly instructions

Fursys

Fursys Sidiz T50 Series Assembly instructions

manuals.online logo
manuals.online logoBrands
  • About & Mission
  • Contact us
  • Privacy Policy
  • Terms and Conditions

Copyright 2025 Manuals.Online. All Rights Reserved.