manuals.online logo
Brands
  1. Home
  2. •
  3. Brands
  4. •
  5. Sauder
  6. •
  7. Indoor Furnishing
  8. •
  9. Sauder Rock Glen 425773 User manual

Sauder Rock Glen 425773 User manual

sauder.com
NOTE: THIS INSTRUCTION
BOOKLET CONTAINS IMPORTANT
SAFETY INFORMATION.
PLEASE READ AND KEEP FOR
FUTURE REFERENCE.
sauder.com
CONTACT US FIRST
BEFORE MAKING ANY RETURNS TO THE STORE.
Share your journey!
sauder.com
CONTACT US FIRST
BEFORE MAKING ANY RETURNS TO THE RETAILER.
Visit sauder.com/service to order replacement parts, view video assembly tips, or chat with a live rep.
Prefer the phone? Give us a rin at 1-800-445-1527.
Customer Service is available Monday-Friday - 9 a.m. to 5:30 p.m. EST (except holidays)
Sauder.com Enlish p 1-26
Français p 27-29
Español p 30-32
Lot # 537116 11/27/19
Purchased: __________________
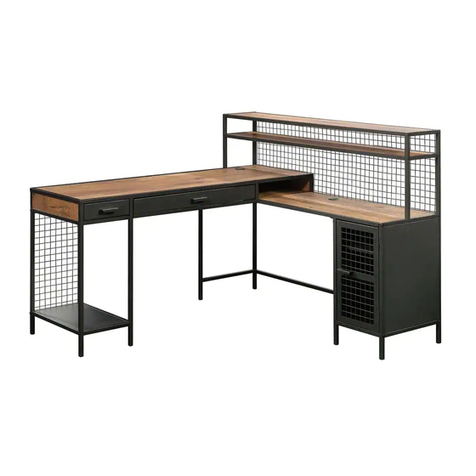
L-Desk
Rock Glen Collection | Model 425773
Sit and surf.
Part Identification
Hardware Identification
Assembly Steps
Français
Español
Safety
Warranty
Hammer
Not actual size
No. 2 Phillips Screwdriver
Tip Shown Actual Size
Skip the power trip.
This time.
Table of Contents Assembly Tools Required
3
4-5
6-26
27-29
30-32
33-34
35
Pae 2 www.sauder.com/service 425773
Part Identification
åWhile not all parts are labeled, some of the parts will have a label or an inked letter on the ede
to help distinuish similar parts from each other. Use this part identification to help identify similar parts.
Now you know
our ABCs.
A UPRIGHT (1)
B RIGHT END (1)
C SMALL BACK (1)
D SHELF (2)
E SMALL DRAWER FRONT (1)
F DRAWER BOX FRONT (1)
G DRAWER BOX BACK (1)
H LARGE LEFT DRAWER SIDE (1)
J LARGE RIGHT DRAWER SIDE (1)
K SMALL LEFT DRAWER SIDE (1)
L SMALL RIGHT DRAWER SIDE (1)
M SMALL DRAWER BACK (1)
N SMALL DRAWER BOTTOM (1)
O LARGE DRAWER BOTTOM (1)
P LARGE DRAWER FRONT (1)
Q LARGE TOP (1)
R SMALL TOP (1)
S BACK (1)
T LARGE BACK (1)
U LEG (1)
V BRACE (1)
W LEFT END (1)
A
B
C
D
D
E
F
G
H
J
O
N
K
L
M
P
Q
R
S
T
U
V
W
Pae 3www.sauder.com/service425773
Hardware Identification
åScrews are shown actual size. You may receive extra hardware with your unit.
CAM SCREW - 19
8
CABINET LEFT - 1
3
DRAWER RIGHT - 1
2
DRAWER LEFT - 1
1CABINET RIGHT - 1
4
(EXTENSION SET SHOWN SEPARATED)
5EXTENSION RAIL - 2 6EXTENSION SLIDE - 2 HIDDEN CAM - 19
7
11 FILE GLIDE - 2
12 PULL - 2
LARGE WOOD DOWEL - 8
9SMALL WOOD DOWEL - 8
10
APPLIQUE CARD - 1
13 L-WRENCH - 1
14
Pae 4 www.sauder.com/service 425773
Hardware Identification
åScrews are shown actual size. You may receive extra hardware with your unit.
BLACK 1/2" FLAT HEAD SCREW - 24
15 BLACK 1-3/16" FLAT HEAD SCREW - 12
16
17 SILVER 1316" MACHINE SCREW  4 SILVER 3" HEX HEAD SCREW - 8
18
BLACK 1" PAN HEAD SCREW - 4
19 SILVER 1/2" HEX HEAD SCREW - 2
20
BLACK 1-3/8" HEX HEAD SCREW - 11
21
Pae 5www.sauder.com/service425773
Hardware Usae Guide
HOW TO USE A HIDDEN CAM & CAM SCREW OR CAM DOWEL
NOTE: Various CAM SCREWS or a CAM DOWEL may be used.
Cam Screws Cam Dowel
Turn the CAM SCREW or
ently tap the CAM DOWEL
until the shoulder is aainst
the surface of the part.
1.
Hidden CamHidden Cam
Arrow
Push a HIDDEN CAM into
the part. The arrow in the
HIDDEN CAM must point
toward the hole in the
ede of the board.
Hole
2.
3.
1
2
Insert the CAM SCREW or CAM DOWEL into the
HIDDEN CAM. Tihten the HIDDEN CAM.
Pae 6 www.sauder.com/service 425773
Step 1 Look for this icon. It means a
video assembly tip is available at
www.sauder.com/service/tips
å Assemble your unit on a carpeted floor or on the empty
carton to avoid scratchin your unit or the floor.
å Turn eiht CAM SCREWS (8) into the UPRIGHT (A) and
RIGHT END (B).
A
B
8
(8 used)
Pae 7www.sauder.com/service425773
å Fasten the CABINET RIGHT (4) to the RIGHT END (B) and
the CABINET LEFT (3) to the UPRIGHT (A). Use six BLACK
1/2" FLAT HEAD SCREWS (15) into the holes shown in the
enlared diarams.
Step 2
A
B
Roller end
Roller end
CL CR
Roller end
Roller end
3 4
3
4
BLACK 1/2" FLAT HEAD SCREW
(6 used in this step)
15
Pae 8 www.sauder.com/service 425773
BLACK 1/2" FLAT HEAD SCREW
15
Some assembly
(and snacks) required.
å Separate the EXTENSION SLIDES (6) from the EXTENSION RAILS (5) as shown in the upper diaram below. Be
prepared, the parts are reasy.
å Fasten the EXTENSION RAILS (5) to the UPRIGHT (A) and RIGHT END (B). Use six BLACK 1/2" FLAT
HEAD SCREWS (15) throuh the holes shown in the enlared diaram.
å NOTE: The EXTENSION SLIDES will be used later for the DRAWERS.
Step 3
A
B
Open end
Open end
5
6
Push the black lever down and pull the SLIDE from the RAIL.
Pae 9www.sauder.com/service425773
BLACK 1/2" FLAT HEAD SCREW
(6 used in this step)
15
å Push eiht HIDDEN CAMS (7) into the SHELVES (D).
å Insert four LARGE WOOD DOWELS (9) into the UPRIGHT (A).
å Fasten the SMALL BACK (C) and SHELVES (D) to the UPRIGHT (A).
Tihten four HIDDEN CAMS.
å NOTE: Be sure the LARGE WOOD DOWELS in the UPRIGHT insert
into the SMALL BACK and SHELVES.
Step 4
A
D
D
C
Arrow 7
(8 used)
9
7
Arrow
(4 used)
The pads should be here.
Surface with
HIDDEN CAMS
Surface with
HIDDEN CAMS
Pae 10 www.sauder.com/service 425773
å Insert four LARGE WOOD DOWELS (9) into the
SMALL BACK (C) and SHELVES (D).
å Fasten the RIGHT END (B) to the SMALL BACK (C) and
SHELVES (D). Tihten four HIDDEN CAMS.
å NOTE: Be sure the LARGE WOOD DOWELS in the
UPRIGHT insert into the SMALL BACK and SHELVES.
Step 5
D
D
C
9
(4 used)
B
The pads should be here.
Pae 11www.sauder.com/service425773
Step
å Push two HIDDEN CAMS (7) into the BACK (S).
å Fasten the LEG (U) to the BACK (S). Tihten two SILVER 3"
HEX HEAD SCREWS (18) usin the L-WRENCH (14).
å NOTE: You should start each SCREW a few turns before
completely tihtenin any of them.
Step 6
7
Arrow
(2 used)
S
U
SILVER 3" HEX HEAD SCREW
(2 used in this step)
18
14
Pae 12 www.sauder.com/service 425773
Step
å Carefully stand your unit upriht.
å Fasten the BACK (S) to the UPRIGHT (A). Tihten two SILVER 3"
HEX HEAD SCREWS (18) usin the L-WRENCH (14).
å NOTE: You should start each SCREW a few turns before
completely tihtenin any of them.
Step 7
A
S
14
SILVER 3" HEX HEAD SCREW
(2 used in this step)
18
Pae 13www.sauder.com/service425773
Surface with HIDDEN CAMS
Step
å Push five HIDDEN CAMS (7) into the LARGE TOP (T).
å Fasten the LARGE BACK (T) to the LEFT END (W).
Tihten two SILVER 3" HEX HEAD SCREWS (18)
usin the L-WRENCH (14).
å NOTE: You should start each SCREW a few turns before
completely tihtenin any of them.
Step 8
T
W
Arrow
(5 used)
14
SILVER 3" HEX HEAD SCREW
(2 used in this step)
18
Pae 14 www.sauder.com/service 425773
Surface with HIDDEN CAMS
The pads should be here.
Step
å Carefully stand the LARGE BACK assembly upriht.
å Fasten the LARGE BACK (T) to the LEG (U). Tihten two
SILVER 3" HEX HEAD SCREWS (18) usin the L-WRENCH (14).
å NOTE: You should start each SCREW a few turns before
completely tihtenin any of them.
Step 9
14
T
U
Pae 15www.sauder.com/service425773
Surface with HIDDEN CAMS
SILVER 3" HEX HEAD SCREW
(2 used in this step)
18
Step
å Fasten the BRACE (V) to the BACK (S) and LEFT END (W). Tihten
two SILVER 1/2" HEX HEAD SCREWS (20) usin the L-WRENCH (14).
å NOTE: You should start each SCREW a few turns before completely
tihtenin any of them.
Step 10
W
S
V
14
SILVER 1/2" HEX HEAD SCREW
(2 used in this step)
20
Pae 16 www.sauder.com/service 425773
Now miht be a
ood time to refresh
your drink.
Step
å Turn seven CAM SCREWS (8) into the TOPS (Q and R).
Step 11
Q
R
8(7 used)
Pae 17www.sauder.com/service425773
Meet Parts (Q and R). These components
have been enineered to be lihter,
stroner, faster… well ok. Not technically
faster. But definitely makes for a sturdier
l-desk that’s easier to assemble and
friendlier to the environment.
å Fasten the TOPS (Q and R) to the BACKS (S and T). Tihten
seven HIDDEN CAMS.
å Fasten the TOPS (Q and R) to the UPRIGHT (A), RIGHT END (B),
BRACE (V), and LEFT END (W). Tihten eleven BLACK 1-3/8"
HEX HEAD SCREWS (21) usin the L-WRENCH (14).
å NOTE: You should start each SCREW a few turns before
completely tihtenin any of them.
Step 12
Q
R
TVA
B
S
W
14
BLACK 1-3/8" HEX HEAD SCREW
(11 used in this step)
21
Pae 18 www.sauder.com/service 425773
StepStep 13
å Turn four CAM SCREWS (8) into the SMALL DRAWER FRONT (E).
å Fasten the SMALL DRAWER FRONT (E) to the SMALL DRAWER SIDES (K and L). Tihten four HIDDEN CAMS.
å NOTE: Be sure the DRAWER BOTTOM (N) inserts into the roove of the DRAWER FRONT (E).
12
3
å Fasten the SMALL DRAWER SIDES (L and K) to the
SMALL DRAWER BACK (M). Use four BLACK 1-3/16" FLAT
HEAD SCREWS (16).
å Slide a SMALL DRAWER BOTTOM (N) into the
rooves in the SMALL DRAWER SIDES (L and K) and
SMALL DRAWER BACK (M).
K
K
N
N
L
L
E
M
M
K
L
Finished
surface
Be sure the DRAWER
BOTTOM inserts into the
DRAWER FRONT roove.
Groove
BLACK 1-3/16" FLAT HEAD SCREW
(4 used in this step)
16
Pae 19www.sauder.com/service425773
E
8(4 used)
Step
å Fasten the PULL (12) to the SMALL DRAWER FRONT (E).
Use two SILVER 13/16" MACHINE SCREWS (17).
Step 14
E
12
Pae 20 www.sauder.com/service 425773
SILVER 13/16" MACHINE SCREW
(2 used in this step)
17

Other Sauder Indoor Furnishing manuals

Sauder New Grange 419142 User manual

Sauder

Sauder New Grange 419142 User manual

Sauder Shoal Creek 422191 User manual

Sauder

Sauder Shoal Creek 422191 User manual

Sauder 423408 User manual

Sauder

Sauder 423408 User manual

Sauder OfficeWorks AFFIRM 427439 User manual

Sauder

Sauder OfficeWorks AFFIRM 427439 User manual

Sauder 411904 User manual

Sauder

Sauder 411904 User manual

Sauder North Avenue User manual

Sauder

Sauder North Avenue User manual

Sauder 2-Door Wardrobe/Armoire Clothes Storage Cabinet With Hanger Rod & Shelves... User manual

Sauder

Sauder 2-Door Wardrobe/Armoire Clothes Storage Cabinet With Hanger Rod & Shelves... User manual

Sauder Sewing/Craft Cart User manual

Sauder

Sauder Sewing/Craft Cart User manual

Sauder Pacific View 427044 User manual

Sauder

Sauder Pacific View 427044 User manual

Sauder Carson Forge 412920 User manual

Sauder

Sauder Carson Forge 412920 User manual

Sauder Camden 101730 User manual

Sauder

Sauder Camden 101730 User manual

Sauder OfficeWorks AFFIRM 427444 User manual

Sauder

Sauder OfficeWorks AFFIRM 427444 User manual

Sauder Carson Forge Series User manual

Sauder

Sauder Carson Forge Series User manual

Sauder 401822 User manual

Sauder

Sauder 401822 User manual

Sauder Hudson Court 425833 User manual

Sauder

Sauder Hudson Court 425833 User manual

Sauder worksense MASON PEAK 427807 User manual

Sauder

Sauder worksense MASON PEAK 427807 User manual

Sauder 422357 User manual

Sauder

Sauder 422357 User manual

Sauder Whitaker Point Hutch 429371 User manual

Sauder

Sauder Whitaker Point Hutch 429371 User manual

Sauder Worksense BERGEN CIRCLE 426288 User manual

Sauder

Sauder Worksense BERGEN CIRCLE 426288 User manual

Sauder Portage Park 426294 User manual

Sauder

Sauder Portage Park 426294 User manual

Sauder County Line 415996 User manual

Sauder

Sauder County Line 415996 User manual

Sauder 401442 User manual

Sauder

Sauder 401442 User manual

Sauder OfficeWorks AFFIRM 427422 User manual

Sauder

Sauder OfficeWorks AFFIRM 427422 User manual

Sauder Barrister Lane 422268 User manual

Sauder

Sauder Barrister Lane 422268 User manual

Popular Indoor Furnishing manuals by other brands

dg casa 12350-Q Assembly instruction

dg casa

dg casa 12350-Q Assembly instruction

Seville Classics NSF ULTRADURABLE SHE24605/Z quick start guide

Seville Classics

Seville Classics NSF ULTRADURABLE SHE24605/Z quick start guide

Costway HV10016 user manual

Costway

Costway HV10016 user manual

CONSET SQ147250 Assembly instruction

CONSET

CONSET SQ147250 Assembly instruction

OSP Designs AURORA AR30 Assembly instructions

OSP Designs

OSP Designs AURORA AR30 Assembly instructions

Telford CORNER DESK Assembly instructions

Telford

Telford CORNER DESK Assembly instructions

Bali MOTORIZED SHADES owner's manual

Bali

Bali MOTORIZED SHADES owner's manual

Starspace BTX-289 instruction manual

Starspace

Starspace BTX-289 instruction manual

Home Decorators FRA60624ALVW Use and care guide

Home Decorators

Home Decorators FRA60624ALVW Use and care guide

RiverRidge ASHLAND SINGLE DOOR / 3 DRAWER CABINET Assembly instructions

RiverRidge

RiverRidge ASHLAND SINGLE DOOR / 3 DRAWER CABINET Assembly instructions

Bon Pergola Villa Pergola Double Bay User instructions

Bon Pergola

Bon Pergola Villa Pergola Double Bay User instructions

Wellis WB00376 Instruction guide

Wellis

Wellis WB00376 Instruction guide

PREMIER POLYSTEEL Champion 924-507 manual

PREMIER POLYSTEEL

PREMIER POLYSTEEL Champion 924-507 manual

Cooper Lighting Lumiere Westwood 913 Specification sheet

Cooper Lighting

Cooper Lighting Lumiere Westwood 913 Specification sheet

Okamura CYNARA Instructions for use

Okamura

Okamura CYNARA Instructions for use

FourStarGroup 11223182F Assembly instructions

FourStarGroup

FourStarGroup 11223182F Assembly instructions

Teknion height-adjustable bench Installation guides

Teknion

Teknion height-adjustable bench Installation guides

INNER STRENGHT Tech Series Setup guide

INNER STRENGHT

INNER STRENGHT Tech Series Setup guide

manuals.online logo
manuals.online logoBrands
  • About & Mission
  • Contact us
  • Privacy Policy
  • Terms and Conditions

Copyright 2025 Manuals.Online. All Rights Reserved.