manuals.online logo
Brands
  1. Home
  2. •
  3. Brands
  4. •
  5. Sauder
  6. •
  7. Indoor Furnishing
  8. •
  9. Sauder 411312 User manual

Sauder 411312 User manual

NOTE: THIS INSTRUCTION
BOOKLET CONTAINS IMPORTANT
SAFETY INFORMATION.
PLEASE READ AND KEEP FOR
FUTURE REFERENCE.
English pg 1-21
Français pg 22-24
Español pg 25-28
Lot # 524681 12/21/18
Purchased: __________________
Be sure to give us a ring before
making any returns. 1-800-523-3987
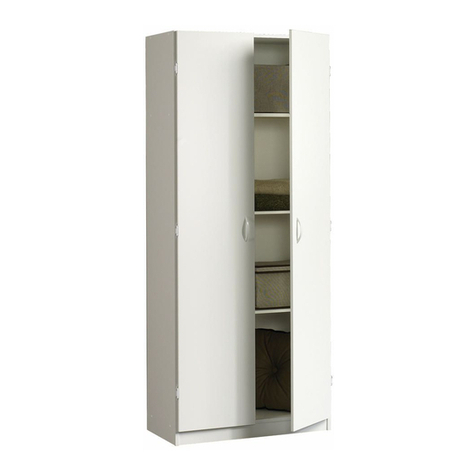
Wardrobe/Storage Cabinet
HomePlus Collection | Model 411312
Need help? Visit Sauder.com to view video assembly tips or chat with a live rep.
Prefer the phone? Call 1-800-523-3987.
Share your journey!
sauder.com
Store behind
closed doors.
Table of Contents Assembly Tools Required
2-3
4-5
6-21
22-24
25-28
29-30
31
Part Identification
Hardware Identification
Assembly Steps
Français
Español
Safety
Warranty
Hammer
Not actual size
No. 2 Phillips Screwdriver
Tip Shown Actual Size
Skip the power trip.
This time.
411312 www.sauder.com/servicesPage 2
A2 RIGHT END (1)
B2 LEFT END (1)
C2 TOP (1)
D3 BOTTOM (1)
D50 RIGHT DRAWER SIDE (1)
D51 LEFT DRAWER SIDE (1)
D175 DRAWER BACK (1)
D983 DRAWER BOTTOM (1)
E BACK (1)
F SHELF (1)
H DOOR (2)
I ADJUSTABLE SHELF (1)
J FRONT SKIRT (1)
K SIDE SKIRT (2)
L DRAWER FRONT (1)
M65 DRAWER BRACE (1)
P TOP MOLDING (1)
VV LARGE BALLAST (2)
WW SMALL BALLAST (2)
Part Identification
åWhile not all parts are labeled, some of the parts will have a label or an inked letter on the edge
to help distinguish similar parts from each other. Use this part identification to help identify similar parts.
Part Identification
åWhile not all parts are labeled, some of the parts will have a label or an inked letter on the edge
to help distinguish similar parts from each other. Use this part identification to help identify similar parts.
Now you know
our ABCs.
411312www.sauder.com/services Page 3
A2
B2
C2
D3
H
J
F
E
H
I
K
P
D175
D983
LM65
K
VV
VV
WW
WW
D51
D50
Hardware Identification
411312 www.sauder.com/servicesPage 4
ROD - 1
21A
7F TWIST-LOCK®
FASTENER - 10
ROD HANGER - 2
7A
HIDDEN CAM - 1
1F
DOOR STOP - 1
4I
18E ADJUSTABLE
GLIDE - 4
PROPEL
NUT - 4
14M
FOOT - 2
32E
SIDE FOOT - 2
31E
PULL - 1
34K
METAL PIN - 4
1R RUBBER
SLEEVE - 4
2R
NAIL - 52
1N
CABINET LEFT - 1
40CB
CABINET RIGHT - 1
40CA DRAWER RIGHT - 1
40CC DRAWER LEFT - 1
40CD
CAM SCREW - 1
8F
HINGE - 6
13H
DRAWER FRONT
BRACKET - 1
9G
LARGE PULL - 2
97K
FURNITURE TIPPING RESTRAINT KIT - 1
97
Hardware Identification
åScrews are shown actual size. You may receive extra hardware with your unit.
411312www.sauder.com/services Page 5
BLACK 7/8" MACHINE SCREW - 6
37S
BLACK 9/16" LARGE HEAD SCREW - 6
1S
BLACK 9/16" WAFER HEAD SCREW - 4
33S
BLACK 1/2" FLAT HEAD SCREW - 12
11S
GOLD 5/16" FLAT HEAD SCREW - 8
3S
BLACK 3" PAN HEAD SCREW - 2
84S
30S BLACK 1-9/16" FLAT HEAD SCREW - 5
BLACK 1-15/16" FLAT HEAD SCREW - 4
113S
Step 1 Look for this icon. It means a
video assembly tip is available at
www.sauder.com/services/tips
å Assemble your unit on a carpeted floor or on the empty
carton to avoid scratching your unit or the floor.
å To begin assembly, push a SAUDER TWIST-LOCK®
FASTENER (7F) into the large holes in the TOP (C2)
and SHELF (F).
411312 www.sauder.com/servicesPage 6
7F
7F
7F
C2
F
Do not tighten the TWIST-LOCK® FASTENERS in this step.
Scan this QR code or go to this address:
http://qr.sauder.com/?ID=2400
to watch a video on how to assemble your unit.
StepStep 2
411312www.sauder.com/services Page 7
GOLD 5/16" FLAT HEAD SCREW
(4 used for the RAILS)
3S
Remember:
Righty tighty.
Lefty loosey.
A2
B2
7A
BLACK 9/16" LARGE HEAD SCREW
(2 used for the ROD HANGERS)
1S
Long finished edge
Roller end
Long finished edge
å Fasten the CABINET RIGHT (40CA) and CABINET
LEFT (40CB) to the ENDS (A2 and B2). Use four GOLD
5/16" FLAT HEAD SCREWS (3S).
å Fasten the ROD HANGERS (7A) to the ENDS (A2 and B2).
Use two BLACK 9/16" LARGE HEAD SCREWS (1S).
Roller end
Step
å Open the FURNITURE TIPPING RESTRAINT KIT (97)
and fasten the SAFETY STRAP to the TOP (C2). Use
the provided BLACK 9/16" LARGE HEAD SCREW.
å Fasten the LEFT END (B2) to the TOP (C2) and
SHELF (F). Tighten four TWIST-LOCK® FASTENERS.
Step 3
411312 www.sauder.com/servicesPage 8
B2
C2
C2
How to use the SAUDER TWIST-LOCK®FASTENER
1. Insert the dowel end of the FASTENER into the
hole of the adjoining part.
NOTE: The dowel end of the FASTENER must
remain fully inserted in the hole of the adjoining
part while locking the FASTENER.
2. Tighten the FASTENER with a Phillips
screwdriver as tight as possible.
Finished edge
Edge with
TWIST-LOCK®
FASTENERS
Dowel end
Long finished edge
Do not stand the unit upright without the
BACK fastened. The unit may collapse.
Caution
F
Surface with
TWIST-LOCK®
FASTENERS
Surface with four
TWIST-LOCK®
FASTENERS
BLACK 9/16" LARGE HEAD SCREW
(1 used in this step)
Safety strap
97
StepStep 4
å Fasten the RIGHT END (A2) to the TOP (C2) and SHELF (F).
Tighten four TWIST-LOCK® FASTENERS.
å Fasten the TOP MOLDING (P) to the TOP (C2). Tighten two
TWIST-LOCK® FASTENERS.
411312www.sauder.com/services Page 9
C2
FA2
P
Long finished edge
Wide edge
Step
å Push the DOOR STOP (4I) into the hole in the TOP (C2).
å Fasten the BOTTOM (D3) to the ENDS (A2 and B2). Use
four BLACK 1-15/16" FLAT HEAD SCREWS (113S).
Step 5
411312 www.sauder.com/servicesPage 10
D3
C2
4I
A2
B2
Rounded edge
BLACK 1-15/16" FLAT HEAD SCREW
(4 used in this step)
113S
Surface with more holes
Step 6
å Slide the FEET (31E and 32E) into the notches in the
SKIRTS (J and K).
å Use a hammer to drive a PROPEL NUT (14M) into
the holes in the FEET (31E and 32E). Now, turn an
ADJUSTABLE GLIDE (18E) into each PROPEL NUT.
411312www.sauder.com/services Page 11
J
K
K
18E
14M
31E
31E
32E
32E
(4 used)
Step
å Fasten the SKIRTS (J and K) to the BOTTOM (D3). Use
four BLACK 9/16" WAFER HEAD SCREWS (33S) through
the FEET and into the BOTTOM.
Step 7
411312 www.sauder.com/servicesPage 12
D3
J
K
K
A2
B2
BLACK 9/16" WAFER HEAD SCREW
(4 used in this step)
33S
StepStep 8
411312www.sauder.com/services Page 13
å Carefully turn your unit over onto its front edges.
å Insert the ADJUSTABLE SHELF (I) between the ENDS (A2 and B2)
to allow for proper space between the ENDS. Then, remove it before
fastening the BACK (E).
å Unfold the BACK (E) and lay it over your unit. Make equal margins along
all four edges of the BACK (E). Push on opposite corners of your unit if
needed to make it "square".
å Fasten the BACK (E) to your unit using the NAILS (1N).
å NOTE: Be sure to tap NAILS into the holes that line up over the SHELF (F).
å NOTE: A perforation has been provided for access through the BACK.
Carefully cut out the hole if needed.
å Fasten the BALLASTS (VV and WW) to the BOTTOM (D3). Use two
BLACK 3" PAN HEAD SCREWS (84S).
Do not stand the unit upright without the
BACK fastened. The unit may collapse.
Caution
NAIL
(52 used for the BACK)
1N
These holes must line up over the SHELF (F).
BLACK 3" PAN HEAD SCREW
(2 used for the BALLASTS)
84S
Insert the ADJUSTABLE
SHELF (I) between the
ENDS (A2 and B2) to
allow for proper space
between the ENDS.
Then, remove it before
fastening the BACK (E).
E
I
VV
VV
WW
WW
D3
A2
B2
F
Printed
information
must be
facing up.
StepStep 9
411312 www.sauder.com/servicesPage 14
å Fasten three HINGES (13H) to each DOOR (H). Use twelve
BLACK 1/2" FLAT HEAD SCREWS (11S).
H
H
BLACK 1/2" FLAT HEAD SCREW
(12 used in this step)
11S
13H
13H
Step
å Carefully stand your unit upright.
å Before fastening the DOOR to your unit, be sure the
mounting screw is against the stops as shown in the right
diagram. If it isn't, loosen the mounting screw to slide it
against the stops. Then tighten the mounting screw.
å Fasten a DOOR (H) to the LEFT END (B2). Use the screws
in the HINGES. See the next step for adjustments.
å Fasten a LARGE PULL (97K) to the DOOR (H). Use two
BLACK 7/8" MACHINE SCREWS (37S).
å Repeat this step for the other door.
Step 10
411312www.sauder.com/services Page 15
H
B2
Pro Tip: Lift with your
legs. And, you know,
your arms.
Stop
Hinge
Mounting
screw
BLACK 7/8" MACHINE SCREW
(4 used in this step)
37S
97K
StepStep 11
411312 www.sauder.com/servicesPage 16
å Refer to the enlarged diagram to identify the parts on the HINGES.
å The DOORS may need some adjustments. Follow the text below to
make needed adjustments.
å DOOR ADJUSTMENTS:
To adjust the DOORS from side to side (horizontal), turn the
adjusting screw in or out.
å To adjust the DOORS up and down (vertical), loosen both vertical
adjustment screws. Move the DOORS up or down to the desired
location. Tighten the screws after making adjustments.
å To adjust the DOORS in or out (depth), loosen the mounting screw
one turn and move the DOORS in or out, as needed. Tighten the
mounting screw after making adjustments.
Adjusting screw (horizontal) Mounting screw (depth)
(vertical adjustment)
Step
å Turn a CAM SCREW (8F) into the DRAWER FRONT (L).
å Push a HIDDEN CAM (1F) into the DRAWER BRACE (M65).
Step 12
411312www.sauder.com/services Page 17
M65
L
Arrow
The arrow in the HIDDEN
CAM must point toward the
hole in the edge of the board.
Hole
8F
Arrow
1F
StepStep 13
411312 www.sauder.com/servicesPage 18
VIEW THE T-SLOT BOX VIDEO
1
3
2
4
Push down
å Pull the DRAWER FRONT BRACKETS (9G) apart and slide them
into the grooves in the DRAWER SIDES (D50 and D51). You may
need to gently tap them in with a hammer.
å NOTE: The DRAWER FRONT BRACKETS are marked "RH" and
"LH" for easy identification.
å Fasten the DRAWER FRONT (L) to the DRAWER FRONT
BRACKETS (9G). Use four BLACK 9/16" LARGE HEAD SCREWS (1S).
å Slide the DRAWER BOTTOM (D983) into the grooves in the
DRAWER SIDES (D50 and D51) and DRAWER FRONT (L).
å Fasten the DRAWER BRACE (M65) to the DRAWER
FRONT (L). Tighten one HIDDEN CAM. å Fasten the DRAWER BACK (D175) to the DRAWER
SIDES (D50 and D51) and DRAWER BRACE (M65).
Use five BLACK 1-9/16" FLAT HEAD SCREWS (30S).
BLACK 9/16" LARGE HEAD SCREW
(4 used in this step)
1S
D983
D175
L
L
M65
M65
L
Be sure the DRAWER
BOTTOM inserts into the
DRAWER FRONT groove.
Be sure the
DRAWER
BOTTOM
inserts into
the DRAWER
BACK groove.
With the palm of your hand,
tap the DRAWER BOTTOM
down into the groove.
30S
Start each screw a few turns before
completely tightening any of them.
BLACK 1-9/16" FLAT HEAD SCREW
(5 used in this step)
1
2
Unfinished surface
Surface with
HIDDEN CAM
D50
D50
D50
D51
D51
D51
9G
StepStep 14
411312www.sauder.com/services Page 19
Almost time to
celebrate! With a nap.
å Fasten the DRAWER RIGHT (40CC) and DRAWER LEFT (40CD)
to the DRAWER SIDES (D50 and D51). Use four GOLD 5/16"
FLAT HEAD SCREWS (3S) through holes #2 and #4.
å Fasten the PULL (34K) to the DRAWER FRONT (L). Use two
BLACK 7/8" MACHINE SCREWS (37S).
L
34K
Roller end
Roller end
1
2
3
4
1
2
3
4
GOLD 5/16" FLAT HEAD SCREW
(4 used for the SLIDES)
3S
D50
D51
BLACK 7/8" MACHINE SCREW
(2 used for the PULL)
37S
Step
WARNING AVERTISSEMENT ADVERTENCIA
occurfromfurnituretip-over. To help
preventtip-over:
•Installtip-overrestraint prov ided.
•Placeheaviestitemsin thelower
drawers.
•Do not set TV’s or other heavy objects on
topof this product, unless the product is
drawers,d oors, or shelves.
•Neveropenmore thanonedrawer
ata time.
Useoftip-overrestraintsmayonly
reduce,butnot eliminate, therisk
oftip-over.
This is a permanent label. Donot remove!
écrasementpeuvent survenir si le mobilier
bascule.Po urprévenirle basculement:
•Installerle dispositif anti-basculement fourni.
•Placerlesar ticlespluslourdsdansles
tiroirsinférieurs.
•Nepasmettredetéléviseur oud’autre objets
lourdssurle dessusdecemeuble, s auf si le
•Nejamaisouvrir plusd’untiroir à la fois.
L’utilisationdedispositifsanti-basculement
peutréduirele risquedebasculement, m ais
pasl’éliminer.
Cette étiquette est permanente. Nepas
l’enlever!
puedenocurrirporel volcar delosmuebles.
Paraayudaraprevenir quesevolqué:
•Instalarlacontenciónbrindadaparaevitar
quesevolqué.
•Coloquelosartículosmáspesadosenlos
cajonesinferiores.
•Nocoloquetelevisoresuotrosobjetos
pesadosenlaparte superior deeste producto,
diseñadoparaacomodarlos.
•Nuncapermitaquelosniñossesubanose
•Nuncaabramásdeuncajónala vez.
Elusodela contenciónpuedesolamente
Esta esunaetiqueta permanente. ¡Noremover!
å Place your unit into its final position against a wall.
å Push the RUBBER SLEEVES (2R) over the METAL PINS (1R). Insert the METAL PINS into the hole locations of your choice
in the ENDS (A2 and B2). Set the ADJUSTABLE SHELF (I) onto the METAL PINS.
å Set the ROD (21A) onto the ROD HANGERS on the ENDS (A2 and B2).
å To insert the drawer into your unit, tip the front of the drawer down and drop the rollers on the drawer behind the rollers on
the unit. Lift the front of the drawer up and slide it into the unit.
å To make adjustments to the drawer, loosen the SCREWS in the DRAWER FRONT BRACKETS, make needed adjustments,
and tighten the SCREWS.
Step 15
1R
2R
(4 used)
411312 www.sauder.com/servicesPage 20
Serious or fatal crushing injuries can
occur from furniture tip-over. To help
prevent tip-over:
• Install tip-over restraint provided.
• Place heaviest items in the lowest drawers.
• Do not set TV’s or other heavy objects on
top of this product, unless the product is
specifi cally designed to accommodate them.
• Never allow children to climb or hang on
drawers, doors, or shelves.
•
Never open more than one drawer at a time.
Use of tip-over restraints may only reduce,
but not eliminate, the risk of tip-over.
This is a permanent label. Do not remove!
WARNING
A2
B2
I
21A
H

Other manuals for 411312

1

Other Sauder Indoor Furnishing manuals
Sauder Harbor View Armoire 415003 User manual

Sauder

Sauder Harbor View Armoire 415003 User manual

Sauder 423450 User manual

Sauder

Sauder 423450 User manual

Sauder 407468 User manual

Sauder

Sauder 407468 User manual

Sauder 408726 User manual

Sauder

Sauder 408726 User manual

Sauder 413118 User manual

Sauder

Sauder 413118 User manual

Sauder 417244 User manual

Sauder

Sauder 417244 User manual

Sauder Palladia Credenza 415025 User manual

Sauder

Sauder Palladia Credenza 415025 User manual

Sauder Shoal Creek 417678 User manual

Sauder

Sauder Shoal Creek 417678 User manual

Sauder Pinwheel 421885 User manual

Sauder

Sauder Pinwheel 421885 User manual

Sauder Shoal Creek 418662 User manual

Sauder

Sauder Shoal Creek 418662 User manual

Sauder Edge Water 408696 User manual

Sauder

Sauder Edge Water 408696 User manual

Sauder Briarbrook 430077 User manual

Sauder

Sauder Briarbrook 430077 User manual

Sauder Summer Home Pantry 401867 User manual

Sauder

Sauder Summer Home Pantry 401867 User manual

Sauder HomePlus 411591 User manual

Sauder

Sauder HomePlus 411591 User manual

Sauder Shoal Creek 411201 User manual

Sauder

Sauder Shoal Creek 411201 User manual
Sauder 414724 User manual

Sauder

Sauder 414724 User manual

Sauder Nova Loft 425510 User manual

Sauder

Sauder Nova Loft 425510 User manual

Sauder 420567 User manual

Sauder

Sauder 420567 User manual

Sauder Harvey Park 421933 Installation and operation manual

Sauder

Sauder Harvey Park 421933 Installation and operation manual

Sauder Worksense BERGEN CIRCLE 427476 User manual

Sauder

Sauder Worksense BERGEN CIRCLE 427476 User manual

Sauder 416519 User manual

Sauder

Sauder 416519 User manual

Sauder 423033 User manual

Sauder

Sauder 423033 User manual

Sauder Boulevard Cafe 429410 User manual

Sauder

Sauder Boulevard Cafe 429410 User manual

Sauder 411985 User manual

Sauder

Sauder 411985 User manual

Popular Indoor Furnishing manuals by other brands

Birlea FRANKLIN Assembly instructions

Birlea

Birlea FRANKLIN Assembly instructions

Next 892725 Assembly instructions

Next

Next 892725 Assembly instructions

Bush Business Furniture AJR 22SD40AC Assembly instructions

Bush Business Furniture

Bush Business Furniture AJR 22SD40AC Assembly instructions

SEI HE401100TX Assembly instructions

SEI

SEI HE401100TX Assembly instructions

Poundex F6533 Assembly instruction

Poundex

Poundex F6533 Assembly instruction

Furniture of America CM1738T-4 Assembly instructions

Furniture of America

Furniture of America CM1738T-4 Assembly instructions

modway EEI-5862 Assembly instructions

modway

modway EEI-5862 Assembly instructions

KEUCO Edition 400 Series Instructions for use

KEUCO

KEUCO Edition 400 Series Instructions for use

Twin-Star International TRESANTI EC6449RW22 instruction manual

Twin-Star International

Twin-Star International TRESANTI EC6449RW22 instruction manual

Costway HW57016 user manual

Costway

Costway HW57016 user manual

HULALA HOME SBHM0682 manual

HULALA HOME

HULALA HOME SBHM0682 manual

Mosaic FSMVPT2034 Assembly instructions & user manual

Mosaic

Mosaic FSMVPT2034 Assembly instructions & user manual

BATHCO LAUNDRY installation instructions

BATHCO

BATHCO LAUNDRY installation instructions

INOSIGN Mister Assembly instructions

INOSIGN

INOSIGN Mister Assembly instructions

TERRY TRANSFORMING 2M Assembly instructions

TERRY

TERRY TRANSFORMING 2M Assembly instructions

CONFORAMA DT 80X80 B Assembly instructions

CONFORAMA

CONFORAMA DT 80X80 B Assembly instructions

Sorelle Westley 4 Drawer Chest Assembly instruction

Sorelle

Sorelle Westley 4 Drawer Chest Assembly instruction

Cooper Lighting Sure-Lites EAC Exit Series installation instructions

Cooper Lighting

Cooper Lighting Sure-Lites EAC Exit Series installation instructions

manuals.online logo
manuals.online logoBrands
  • About & Mission
  • Contact us
  • Privacy Policy
  • Terms and Conditions

Copyright 2025 Manuals.Online. All Rights Reserved.