manuals.online logo
Brands
  1. Home
  2. •
  3. Brands
  4. •
  5. Sensopart
  6. •
  7. Accessories
  8. •
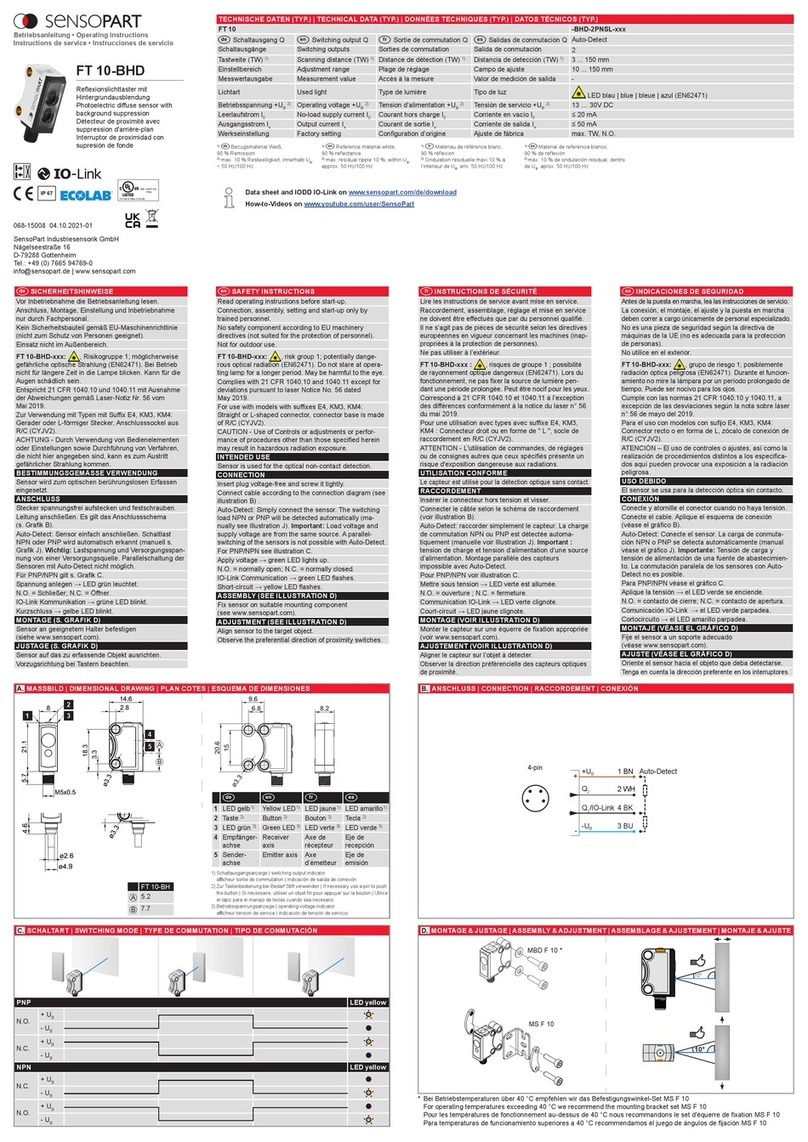
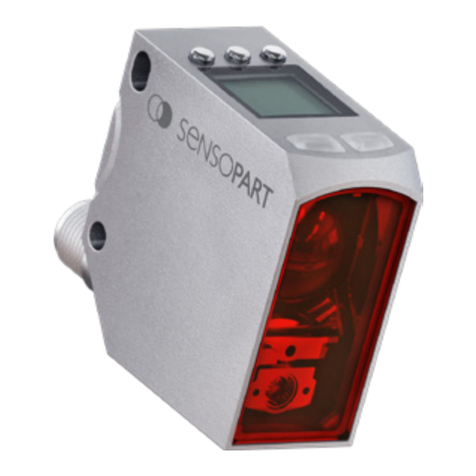
  9. Sensopart FR 55-RLAP-70-2PNSI Series User manual

Sensopart FR 55-RLAP-70-2PNSI Series User manual

TECHNISCHE DATEN | TECHNICAL DATA | DONNÉES TECHNIQUES | DATOS TÉCNICOS (TYP.)
FR 55 -RLAP-70-2PNSI-xx -RLP-70-2PNS-xx
DSchaltausgang Q Switching output Q FSortie de commutation Q ESalida de conmutación Q Auto-Detect 2x Auto-Detect
Messbereich 1) Measurement range 1) Étendue de mesure 1) Campo de medida 1) 0,3 ... 70 m 0,3... 70 m
Lichtart Used light Type de lumière Tipo de luz Laser, class 1 (IEC 60825-1)
Betriebsspannung +UB2) Operating voltage +UB2) Tension d’alimentation +UB2) Tensión de servicio +UB2) 18 … 30 V DC
Leerlaufstrom I0No-load supply current I0Courant hors charge I0Corriente en vacío I0≤ 60 mA
Ausgangsstrom Ie Q Output current Ie Q Courant de sortie Ie Q Corriente de salida Ie Q≤ 100 mA
Analogausgang QAAnalogue output QASortie analogique QASalida analógica QA4 ... 20 mA
Steuereingang IN 1 / IN 2 3) Control input IN 1 / IN 2 3) Entrée de contrôle IN 1 / IN 2 3) Entrada de control IN 1 / IN 2 3) IN 1: 3)
IN 2: 3)
+UB= Teach-in
-UB=
open = normal function
IN: 3)
+UB= Teach-in
-UB=
open = normal function
Steuereingang IN 3 Control input IN 3 Entrée de contrôle IN 3 Entrada de control IN 3 IN 3:
+UB= Laser OFF
-UB= Laser ON
open = Laser ON
Werkseinstellung Factory setting Conguration d’origine Ajuste de fábrica
QA: 4 mA = 0,3 m / 20 mA = 70 m
Q1: 2 ... 6 m
Q2: 2 ... 6 m
Q: 2 ... 6 m
1) DBezugsmaterial
Reexionsfolie RF250
1) Reference material
reective foil RF250
1) FMatériau de référence
réecteur souple RF250
1) EMaterial de referencia
lámina reectora RF 250
D= Taste verriegelt = button locked F= bouton verrouillée E= tecla bloqueado
2) max. 10% Restwelligkeit,
innerhalb UB, ~50Hz/100Hz
2) max. residual ripple 10%,
within UB, approx. 50Hz/100Hz
2) Ondulation résiduelle maxi
10 % à l’intérieur de UB, env.
50Hz/100Hz
2) máx. 10% de ondulación
residual, dentro de UB, aprox.
50Hz/100Hz
3) siehe Grak J; Rückseite 3) see illustration J; back 3) voir illustration J; verso 3) véase el gráco J; reverso
FR 55-RLAP
FR 55-RLP
Abstandssensor (Reektor)
Distance sensor (reector)
Capteur de distance (réecteur)
Sensor de distancia (reector)
Betriebsanleitung • Operating instructions
Instructions de service • Instrucciones de servicio
068-14719 18.02.2016-02
www.sensopart.com
DSICHERHEITSHINWEISE
Vor Inbetriebnahme die Betriebsanleitung lesen.
Anschluss, Montage, Einstellung und Inbetriebnahme
nur durch Fachpersonal.
Kein Sicherheitsbauteil gemäß EU-Maschinenrichtlinie
(nicht zum Schutz von Personen geeignet).
Einsatz nicht im Aussenbereich.
FR 55-RLAP-xxx: , Klasse 1; Wellenlänge: 655nm;
Frequenz: 45kHz; Pulsbreite: 8ns; Grenzwert Puls:
< 930mW (IEC 60825-1).
FR 55-RLP-xxx: , Klasse 1; Wellenlänge: 655nm;
Frequenz: 45kHz; Pulsbreite: 8ns; Grenzwert Puls:
< 930mW (IEC 60825-1).
Entspricht 21 CFR 1040.10 und 1040.11 mit Ausnahme
der Abweichungen gemäß Laser Notiz Nr. 50 vom 24.
Juni 2007.
Zur Verwendung mit Typen mit Sufx L4, L5, L8: Gerader
oder L-förmiger M12 Metallstecker, Anschlusssockel aus
R/C (CYJV2).
ACHTUNG - Durch Verwendung von Bedienelementen
oder Einstellungen sowie Durchführung von Verfahren,
die nicht hier angegeben sind, kann es zum Austritt
gefährlicher Strahlung kommen.
BESTIMMUNGSGEMÄSSE VERWENDUNG
Sensor wird zum optischen berührungslosen Erfassen
und Messen von eingelernten Abständen zum Reektor
eingesetzt.
MONTAGE
Sensor an geeignetem Halter befestigen, s. Grak C
(Halter s. www.sensopart.com).
ANSCHLUSS
Stecker spannungsfrei aufstecken und festschrauben.
Leitung anschliessen. Es gilt das Anschlussschema
(s. Grak B).
Auto-Detect: Sensor einfach anschliessen. Schaltlast
NPN oder PNP wird automatisch erkannt (manuell s.
Grak H). Wichtig: Lastspannung und Versorgungs-
spannung von einer Versorgungsquelle. Parallel-
schaltung der Sensoren mit Auto-Detect nicht möglich.
Für manuelle Einstellung Auto-Detect / PNP/NPN s.
Grak K; Rückseite.
Spannung anlegen → LED grün leuchtet.
Umschaltung N.O. ↔ N.C. (s. Grak I; Rückseite).
N.O. = Schließer; N.C. = Öffner.
JUSTAGE (S. GRAFIK C)
Sensor auf den zu erfassenden Reektor ausrichten.
Vorzugsrichtung bei Tastern beachten.
SAFETY INSTRUCTIONS
Read operating instructions before start-up.
Connection, assembly, setting and start-up only by
trained personnel.
No safety component according to EU machinery directi-
ves (not suited for the protection of personnel).
Not for outdoor use.
FR 55-RLAP-xxx: , class 1; wavelength: 655nm;
frequency: 45kHz; pulse duration: 8ns; limit value pulse:
< 930mW (IEC 60825-1).
FR 55-RLP-xxx: , class 1; wavelength: 655nm;
frequency: 45kHz; pulse duration: 8ns; limit value pulse:
< 930mW (IEC 60825-1).
Complies with 21 CFR 1040.10 and 1040.11 except for
deviations pursuant to laser Notice No. 50 dated June
24, 2007.
For use with models with sufxes L4, L5, L8: Straight or
L-shaped M12 metal connector, connector base is made
of R/C (CYJV2).
CAUTION - Use of Controls or adjustments or perfor-
mance of procedures other than those specied herein
may result in hazardous radiation exposure.
INTENDED USE
Sensor is used for the optical non-contact detection and
measurement of taught-in distances to the reector.
ASSEMBLY
Fix sensor on suitable mounting component , see
illustration C (see www.sensopart.com).
CONNECTION
Insert plug tension-free and screw it tightly.
Connect cable according to the connection diagram (see
illustration B) .
Auto-Detect: Simply connect the sensor. The switching
load NPN or PNP will be detected automatically (ma-
nually see illustration H). Important: Load voltage and
supply voltage are from the same source. A parallel-
switching of the sensors is not possible with Auto-Detect
For manual setting of Auto-Detect / PNP/NPN see
illustration K; back.
Apply voltage → green LED lights up.
Switching N.O. ↔ N.C. (see illustration I; back).
N.O. = normally open; N.C. = normally closed.
ADJUSTMENT (SEE ILLUSTRATION C)
Align sensor to the target reector.
Observe the preferential direction of proximity switches.
FINSTRUCTIONS DE SÉCURITÉ
Lire les instructions de service avant mise en service.
Raccordement, assemblage, réglage et mise en service
ne doivent être effectués que par du personnel qualié.
Il ne s’agit pas de pièces de sécurité selon les directives
européennes en vigueur concernant les machines (inap-
propriées à la protection de personnes).
Nepas utiliser à l’extérieur.
FR 55-RLAP-xxx : , classe 1 ; longueur d’onde :
655nm ; fréquence : 45kHz ; largeur d’impulsion : 8ns ;
valeur limite impulsion : < 930mW (IEC 60825-1).
FR 55-RLP-xxx : , classe 1 ; longueur d’onde :
655nm ; fréquence : 45kHz ; largeur d’impulsion : 8ns ;
valeur limite impulsion : < 930mW (IEC 60825-1).
Correspond à 21 CFR 1040.10 et 1040.11 à l’exception
des différences conformément à la notice du laser n° 50
du 24 juin 2007.
Pour une utilisation avec types avec sufxe L4, L5, L8:
Connecteur métallique M12 droit ou en forme de " L ",
socle de raccordement en R/C (CYJV2).
ATTENTION - L'utilisation de commandes, de réglages
ou de consignes autres que ceux spéciés présente un
risque d'exposition dangereuse aux radiations.
UTILISATION CONFORME
Le capteur est utilisé pour la détection et mesure optique
sans contact de distances apprises au réecteur.
MONTAGE
Monter le capteur sur une équerre de xation appropri-
ée, voir illustration C (voir www.sensopart.com).
RACCORDEMENT
Insérer le connecteur hors tension et visser.
Connecter le câble selon le schéma de raccordement
(voir illustration B).
Auto-Detect : raccorder simplement le capteur. La
charge de commutation NPN ou PNP est détectée auto-
matiquement (manuelle voir illustration H). Important :
tension de charge et tension d’alimentation d’une source
d’alimentation. Montage parallèle des capteurs avec
Auto-Detect impossible.
Pour réglage manuel Auto-Detect / PNP/NPN voir illust-
ration K ; verso.
Mettre sous tension → LED verte est allumée.
Inversion N.O. ↔ N.C. (voir illustration I ; verso).
N.O. = ouverture ; N.C. = fermeture.
AJUSTEMENT (VOIR ILLUSTRATION C)
Aligner le capteur sur le réecteur à détecter.
Observer la direction préférencielle des capteurs optiques
de proximité.
EINDICACIONES DE SEGURIDAD
Antes de la puesta en marcha, lea las instrucciones de servicio.
La conexión, el montaje, el ajuste y la puesta en marcha
deben correr a cargo únicamente de personal especializado.
No es una pieza de seguridad según la directiva de
máquinas de la UE (no es adecuada para la protección
de personas).
No utilice en el exterior.
FR 55-RLAP-xxx: , clase 1; longitud de onda:
655nm; frecuencia: 45kHz; amplitud de pulso: 8ns; valor
límite de pulso: < 930mW (IEC 60825-1).
FR 55-RLP-xxx: , clase 1; longitud de onda: 655nm;
frecuencia: 45kHz; amplitud de pulso: 8ns; valor límite de
pulso: < 930mW (IEC 60825-1).
Cumple las normas 21 CFR 1040.10 y 1040.11, a excep-
ción de las desviaciones según la nota sobre láser n° 50
del 24 de junio de 2007.
Para el uso con modelos con sujo L4, L5, L8: Con-
nector metálico M12 recto o en forma de L, zócalo de
conexión de R/C (CYJV2).
ATENCIÓN – El uso de controles o ajustes, así como la
realización de procedimientos distintos a los especica-
dos aquí pueden provocar una exposición a la radiación
peligrosa.
USO DEBIDO
El sensor se usa para la detección óptica sin contacto y
la medición de distancias aprendidas al reector.
MONTAJE
Fije el sensor a un soporte adecuado,
véase el gráco
C
(para el soporte véase www.sensopart.com).
CONEXIÓN
Conecte y atornille el conector cuando no haya tensión.
Conecte el cable. Aplique el esquema de conexión
(véase el gráco B).
Auto-Detect: Conecte el sensor. La carga de conmuta-
ción NPN o PNP se detecta automáticamente (manual
véase el gráco H)
. Importante: Tensión de carga y
tensión de alimentación de una fuente de abastecimien-
to. La conmutación paralela de los sensores con Auto-
Detect no es posible.
Para ajuste manual Auto-Detect / PNP/NPN véase el
gráco K
; reverso
.
Aplique la tensión → el LED verde se enciende.
Conmutación N.O. ↔ N.C. (véase el gráco
I
; reverso).
N.O. = contacto de cierre; N.C. = contacto de apertura.
AJUSTE (VÉASE EL GRÁFICO C)
Oriente el sensor hacia el reector que deba detectarse.
Tenga en cuenta la dirección preferente en los interruptores.
D  F E
1LED gelb
1)
Yellow LED
1) LED jaune
1) LED amarillo
1)
2LED gelb 2)
LED grün 3)
Yellow LED
2)
Green LED
3)
LED jaune 2)
LED verte 3)
LED amarillo 2)
LED verde 3)
3Tasten 4)
QA/ Q1/Q2
Buttons 4)
QA/ Q1/Q2
Boutons 4)
QA/ Q1/Q2
Teclas 4)
QA/ Q1/Q2
4Sender-
achse
Emitter axis Axe
d’émetteur
Eje de
emisión
5Empfänger-
achse
Receiver
axis
Axe de
récepteur
Eje de
recepción
1) Schaltausgangsanzeige Q | switching output indicator Q
afcheur sortie de commutation Q | indicación de salida de conexión Q
2) Analogausgangsanzeige QA| analogue output indicator QA
afcheur sortie analogique QA| indicación de la salida analógica QA
3) Betriebsspannungsanzeige | operating voltage indicator
afcheur tension de service | indicación de tensión de servicio
4) QA: Analogausgang / Q: Schaltausgang
QA: analogue output / Q: switching output
QA: sortie analogique / Q: afcheur sortie de commutation
QA: salida analógica / Q:indicación de salida de conexión
FR 55
A8.6
B28.4
FR 55 - RL(A)P - PNS(I) - L8 Example
FR 55 - xxxx - xxxx - L8 8-pin
FR 55 - xxx - xxx - L5 5-pin
12
Mx1
23
50
13.95
16
44
46
4.3
50.08
5.8
13
2
4
5
A
B
8-pin*
+
-
-UB3 BU
Q14 BK
QA5 GY
-
+UB
Q2
1
2
BN
WH
IN 2 7 VT
IN 1 6 PK
IN 3 8 OG
+Auto-Detect
* Colour assignment in accordance to 60947-5-2/IEC=2007
-UB3 BU
Q14 BK
IN
-
+UB
Q2
1
2
BN
WH
5 GY
+Auto-Detect
5-pin
1 3
2
Q1/Q2
QA
FR 55-RLAP
1 3
2
Q1
Q2
FR 55-RLP
5 m
2.8 m
1.4 m
0.7 m
10 m 20 m 40 m 70 m
5 m
2.8 m
1.4 m
0.7 m
10 m 20 m 40 m 70 m
B. ANSCHLUSS | CONNECTION | RACCORDEMENT | CONEXIÓNA. MASSBILD | DIMENSIONAL DRAWING | PLAN COTES | ESQUEMA DE DIMENSIONES
C. JUSTAGE | ADJUSTMENT | AJUSTEMENT | AJUSTE
Einstellung der Lichteckposition über optionale Halterung MA F55 / 579-50007
Adjustment of light spot postion with optional mounting angle MA F55 / 579-50007
Réglage de la position du spot lumineux par l'équerre de montage MA F55 / 579-50007 qui est disponible en option
Ajuste de la posición del punto luminoso mediante el ángulo de montaje opcional MA F55 / 579-50007
Vermeidung weiterer Lichtecke in schrafertem Bereich
Prevention of further light spots in the hatched area
Blocage de spots lumineux supplémentaires en zone hachurée
Evitación de puntos luminosos adicionales en el área sombreada
Auto-Detect
DEINSTELLUNG
FR 55-RLAP: Der Sensor verfügt über einen Analog-
ausgang (QA) und zwei Schaltausgänge (Q1/Q2), die
unabhängig voneinander eingestellt werden können.
Analogausgang: Die beiden Teachpunkte kennzeich-
nen Anfang und Ende des Messbereichs und skalieren
den Analogausgang (s. Grak F).
Teach 1 = 4 mA.
Teach 2 = 20 mA.
Schaltausgang: Die zwei Teachpunkte Teach 1 und
Teach 2 kennzeichnen Anfang und Ende des Schaltfens-
ters (s. Grak G).
Einstell-Modi:Teachreihenfolge und Objektabstand
bestimmen die Kennlinie des Analogausgangs QAund
die Fensterbreite des Schaltausgangs Q (s. Grak H).
FR 55-RLP: Der Sensor verfügt über 2 Schaltausgänge
(Q1/Q2), die unabhängig voneinander eingestellt werden
können.
Die zwei Teachpunkte Teach 1 und Teach 2 kennzeich-
nen Anfang und Ende des Schaltfensters (s. Grak F
und G).
WERKSEINSTELLUNG
S. Grak E
WARTUNG
SENSOPART-Sensoren sind wartungsfrei. Es wird em-
pfohlen in regelmäßigen Intervallen die optischen Flä-
chen zu reinigen und Verschraubungen und Steckverbin-
dungen zu überprüfen.
SETTING
FR 55-RLAP: The sensor has an analogue (QA) and two
switching (Q1/Q2) outputs, which can be set indepen-
dently of each other.
Analogue output: The two teach points identify the
beginning and end of the measuring area and scale the
analogue output (see illustration F).
Teach 1 = 4 mA.
Teach 2 = 20 mA.
Switching output: The two teaching points identify
the beginning and end of the switching window (see
illustration G).
Setting modes:The teach sequence and object
distance determine the characteristics of the analogue
output QAand the window width of the switching output
Q(see illustration H).
FR 55-RLP: The sensor has two switching outputs (Q1/
Q2) which can be set independently of each other.
The two teach points Teach 1 and Teach 2 mark the
beginning and the end of the switching window (see
illustration F and G).
FACTORY SETTING
See illustration E
MAINTENANCE
SENSOPART sensors are maintenance-free. We recom-
mend to cyclically clean the optical surfaces and check
the screw connections and plug connections.
FRÉGLAGE
FR 55-RLAP : Le capteur dispose d'une sortie analo-
gique (QA) et de 2 sorties TOR (Q1/Q2) qui peuvent être
réglées indépendamment l'une de l'autre.
Sortie analogique :Les deux points d'apprentissage
marquent le début et la n de l'étendue de mesure et ils
mettent la sortie analogique à l'échelle (voir illustration F).
Teach 1 = 4 mA.
Teach 2 = 20 mA.
Sortie à seuil :Les deux points d'apprentissage
marquent le début et la n de la fenêtre de commutation
(voir illustration G).
Modes de réglage :L'ordre d'apprentissage et la
distance de l'objet déterminent la ligne caractéristique de
la sortie analogique QAet la largeur de la fenêtre de la
sortie à seuil Q (voir illustration H).
FR 55-RLP : Le capteur a deux sorties de commutation
(Q1/Q2) réglables indépendamment l'une de l'autre.
Les deux points d'apprentissage Teach 1 et Teach 2
marquent les limites de la fenêtre de commutation (voir
illustration F et G).
CONFIGURATION D'ORIGINE
Voir illustration E
ENTRETIEN
Les capteurs SENSOPART ne demandent aucun
entretien. Nous recommandons de nettoyer les surfaces
optiques et vérier les raccordements et les xations
régulièrement.
ECONFIGURACIÓN
FR 55-RLAP: El sensor dispone de una salida analógica
(QA) y dos salidas de conmutación (Q1/Q2) ajustables de
forma independiente la una de la otra.
Salida analógica (véase Gráco F):Los dos puntos de
programación identican el principio y el nal del rango
de medición y escalan la salida analógica (véase el
gráco F).
Teach 1 = 4 mA.
Teach 2 = 20 mA.
Salida de conmutación: Los dos puntos de programa-
ción identican el principio y el nal de la ventana de
conmutación (véase el gráco G).
Modos de conguración:La secuencia de programaci-
ón y la distancia al objeto determinan la línea caracterí-
stica de la salida analógica QAy la anchura de ventana
de la salida de conmutación Q (véase el gráco H).
FR 55-RLP: El sensor dispone de dos salidas de con-
mutación (Q1/Q2) ajustables de forma independiente la
una de la otra. Los dos puntos Teach, Teach 1 y Teach 2
marcan los límites de la ventana de conmutación (véase
gráco F y G).
AJUSTE DE FÁBRICA
Véase el gráco E
MANTENIMIENTO
Los sensores SENSOPART no necesitan manteni-
miento. Se recomienda limpiar las supercies ópticas a
intervalos regulares y comprobar las uniones atornilla-
das y conexiones.
Änderungen vorbehalten | subject to change | sous réserve de modications | salvo modicaciónwww.sensopart.com
QA
Q1/Q2
J. EXTERNAL TEACH-IN
DEinstellung über Steuereingang IN: Schließ- und Öffnungsdauer
gemäß den jeweiligen Angaben in Übersicht D.
 Setting via control input IN: Closing and opening times according
to the respective information stated in the overview D.
F Réglage par entrée de contrôle IN: Temps de fermeture et
d’ouverture selon les spécications données dans l'aperçu D.
E Conguración mediante la entrada de control IN: Tiempos de
cierre y apertura según las indicaciones respectivas en el resumen D.
until green & yellow LED ash at the same time until green & yellow LED ash at the same time
Teach 1 = Teach 2
Teach 1 = Teach 2
Teach 1 Teach 1Teach 2 Teach 2
Teach 1 Teach 2
Measurement range
Q
High
Low
Q
High
Low
Teach 1 Teach 2
Measurement range
Q
High
Low
Q
High
Low
Measurement range
Q
High
Low
Q
High
Low
QAQA
QA
3.6 mA 3.6 mA3.6 mA
4 mA 4 mA4 mA
20 mA 20 mA
12 mA
20 mA
21.1 mA 21.1 mA21.1 mA
min. 500 mm
External Teach-in → J . External Teach-in → J .
Teach 1: press QA> 3 s Teach 1: press Q > 3 sTeach 2: press QA> 1 s Teach 2: press Q > 1 s
press Q press Q...
until green & yellow LED
ash alternately
until green & yellow LED
ash at the same time
antivalent 2) N.O.
press Q > 10 s
press Q > 13 s
green LED ashes
yellow LED ON
N.O.
green LED ashes
yellow LED OFF
green & yellow LED
ash at the same time
N.C.
wait 10 s
ok
green & yellow LED ash
at the same time
wait 10 s
ok
wait 10 s wait 10 s
ok ok
press Q press Q press Q ...
Auto-Detect
NPN
ok
green LED ashes
wait 10 s
PNP
ok
yellow LED ashes
wait 10 s
Function FR 55-RLAP: Action Step 1 1) FR 55-RLP: Action Step 1 1) See illustr.
Teach-button External teach Teach-button External teach
Switching window Q1press Q1/Q2> 3 s connect IN 1 > 3 s press Q1> 3 s connect IN > 3 s G.
Switching window Q2press Q1/Q2> 6 s connect IN 1 > 6 s press Q2> 3 s connect IN > 6 s G.
Analogue characteristic press QA> 3 s connect IN 2 > 3 s - - F.
N.O. / N.C. press Q > 10 s connect IN 1 > 10 s press Q > 10 s connect IN > 10 s I.
Auto-Detect / NPN / PNP press Q > 13 s connect IN 2 > 13 s press Q > 13 s connect IN > 13 s K.
Laser ON / OFF 2) - connect IN 3 - - -
1) Step 2: press Q (or QA) / connect IN > 1 s
2) s. Technische Daten Seite 1 / see technical data page 1 / voir données techniques page 1 / véase datos técnicos página 1
Keep (QA) or Q pressed and
Power ON > 10 s
Teach 1 = 4 mA Teach 1 Teach 2Teach 2 = 20 mA






green LED OFF green LED ashes
until both yellow LEDs ash
3x at the same time
1) Min. Schaltfenster ± 250 mm I Min. switching window ± 250 mm I Fenêtre de commutation ± 250 mm min. I Min. ventana de conmutación ± 250 mm
1)
Power OFF
green LED OFF
press (QA) or Q
Power OFF Power ON
 
GY IN
+UB
BN




2) Q1= N.O. / Q2 = Q1= N.C.
alle FR 55-RLP-70-2PNS-xx I all FR 55-RLP-70-2PNS-xx I tous les FR 55-RLP-70-2PNS-xx I todos los FR 55-RLP-70-2PNS-xx
Umstellung antivalent auf N.O. (N.C.): Q1/Q2 übernehmen letzte Schaltpunkteinstellungen l Inversion antivalent to N.O. (N.C.): Q1/Q2accept most recent switching point settings l Inversion N.O. (N.C.) antivalent à N.O. (N.C.) : Q1/Q2sauvegardent les derniers réglages des points de commutation l Cambio antivalente a N.O. (N.C.):
Q1/Q2aplican los últimos ajustes de los puntos de conmutación
E. WERKSEINSTELLUNG | FACTORY SETTING | CONFIGURATION D'ORIGINE | AJUSTE DE FÁBRICA
D. ÜBERSICHT | OVERVIEW | APERÇU | VISIÓN GENERAL
F. ANALOGAUSGANG | ANALOGUE OUTPUT | SORTIE ANALOGIQUE | SALIDA ANALÓGICA
Step 1: Reector position 1 Step 2: Reector position 2
G. SCHALTAUSGANG | SWITCHING OUTPUT | SORTIE DE COMMUTATION | SALIDA DE CONMUTACIÓN
Step 1: Reector position 1 Step 2: Reector position 2
H. EINSTELL-MODI | SETTING MODES | MODES DE RÉGLAGE | MODOS DE CONFIGURACIÓN
Teach 1
Teach 2
QA
Q1/Q2
N.O.
Q1/Q2
N.C.
I. UMSCHALTUNG N.O. / N.C. | SWITCHING N.O. / N.C. | INVERSION N.O. / N.C. | CONMUTACIÓN N.O. / N.C.
K. UMSCHALTUNG AUTO-DETECT / NPN / PNP | SWITCHING AUTO-DETECT / NPN / PNP | INVERSION AUTO-DETECT / NPN / PNP | CONMUTACIÓN AUTO-DETECT / NPN / PNP
G.
F.
ok
ok
ok

This manual suits for next models

1

Other Sensopart Accessories manuals

Sensopart FT 50 C-2-GIO-L5 Service manual

Sensopart

Sensopart FT 50 C-2-GIO-L5 Service manual

Sensopart FT 50 RLA Series Service manual

Sensopart

Sensopart FT 50 RLA Series Service manual

Sensopart FT 10-BHD User manual

Sensopart

Sensopart FT 10-BHD User manual

Sensopart SensoClip MBD F 25ST2 User manual

Sensopart

Sensopart SensoClip MBD F 25ST2 User manual

Sensopart FT 55-RLHM User manual

Sensopart

Sensopart FT 55-RLHM User manual

Sensopart FZS 1024 User manual

Sensopart

Sensopart FZS 1024 User manual

Sensopart FT 50 RLA 70-L8 Service manual

Sensopart

Sensopart FT 50 RLA 70-L8 Service manual

Sensopart FT 92 ILA - PSL5 Service manual

Sensopart

Sensopart FT 92 ILA - PSL5 Service manual

Sensopart FT 50 RLA Series Service manual

Sensopart

Sensopart FT 50 RLA Series Service manual

Sensopart Visor Use and care manual

Sensopart

Sensopart Visor Use and care manual

Sensopart FA 45 Service manual

Sensopart

Sensopart FA 45 Service manual

Sensopart FA 45 Series Service manual

Sensopart

Sensopart FA 45 Series Service manual

Sensopart FA 45 Series User manual

Sensopart

Sensopart FA 45 Series User manual

Sensopart FA 46 Series Service manual

Sensopart

Sensopart FA 46 Series Service manual

Sensopart FT 55-RLAP User manual

Sensopart

Sensopart FT 55-RLAP User manual

Sensopart FT 80 RLA Series Service manual

Sensopart

Sensopart FT 80 RLA Series Service manual

Sensopart FT 50 RLA-70 Service manual

Sensopart

Sensopart FT 50 RLA-70 Service manual

Sensopart FT 50 C S1 Series Service manual

Sensopart

Sensopart FT 50 C S1 Series Service manual

Sensopart FT 50 C S1 Series Service manual

Sensopart

Sensopart FT 50 C S1 Series Service manual

Sensopart FA 45 Service manual

Sensopart

Sensopart FA 45 Service manual

Sensopart FA 45 User manual

Sensopart

Sensopart FA 45 User manual

Popular Accessories manuals by other brands

Vega VEGADIS 61 operating instructions

Vega

Vega VEGADIS 61 operating instructions

Meister D-591P-E operating instructions

Meister

Meister D-591P-E operating instructions

Hudora 65138 INSTRUCTIONS ON ASSEMBLY AND USE

Hudora

Hudora 65138 INSTRUCTIONS ON ASSEMBLY AND USE

Emerson Micro Motion ELITE CMF200A installation manual

Emerson

Emerson Micro Motion ELITE CMF200A installation manual

Huawei BTS3900A Commissioning Guide

Huawei

Huawei BTS3900A Commissioning Guide

Carel AS Series user guide

Carel

Carel AS Series user guide

Favero MILLENNIUM REEL technical information

Favero

Favero MILLENNIUM REEL technical information

Artidor AR-024 installation manual

Artidor

Artidor AR-024 installation manual

Bogen MIC2X install guide

Bogen

Bogen MIC2X install guide

Waterpik Waterflosser WF-02 quick start guide

Waterpik

Waterpik Waterflosser WF-02 quick start guide

EVOline Port manual

EVOline

EVOline Port manual

MOB MO9209 user manual

MOB

MOB MO9209 user manual

Renkus-Heinz X3-M1 Operation manual

Renkus-Heinz

Renkus-Heinz X3-M1 Operation manual

Di-soric CS 50 Quick start instructions

Di-soric

Di-soric CS 50 Quick start instructions

LEGRAND adorne ARPTR151 installation instructions

LEGRAND

LEGRAND adorne ARPTR151 installation instructions

Festo SMPO-I -H-B operating instructions

Festo

Festo SMPO-I -H-B operating instructions

Vega VEGAPULS 67 operating instructions

Vega

Vega VEGAPULS 67 operating instructions

Elkron EIR200 manual

Elkron

Elkron EIR200 manual

manuals.online logo
manuals.online logoBrands
  • About & Mission
  • Contact us
  • Privacy Policy
  • Terms and Conditions

Copyright 2025 Manuals.Online. All Rights Reserved.