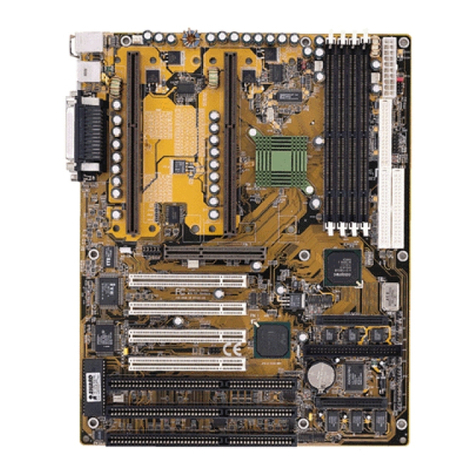
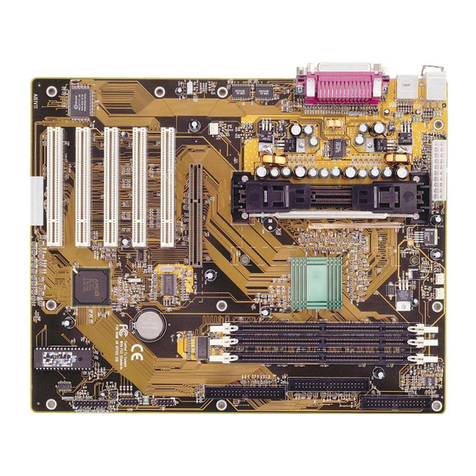
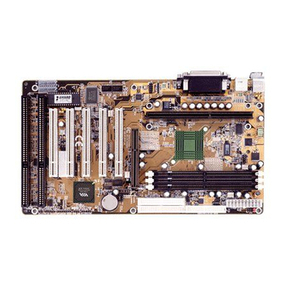
Shuttle HOT-637 User manual

HOT-637
Pentium™IIprocessor
Based AGPMAINBOARD
User's Manual

FCC Notice:
This equipment has been tested and found to comply with the limits for a Class B digital device, pursuant to Part 15 of FCC
Rules. These limits are designed to provide reasonable protection against harmful interference in a residential installation.
This equipment generates, uses and can radiate radio frequency energy. If not installed and used properly, in strict accor-
dance with the manufacturer’s instructions, may cause harmful interference to radio communications. However, there is no
guarantee that interference will not occur in a particular installation. If this equipment does cause interference to radio or
television reception, which can be determined by turning the equipment off and on, the user is encouraged to try to correct
the interference by one or more of the following measures :
Reorient or relocate the receiving antenna.
Increase the separation between the equipment and receiver.
Connect the equipment into an outlet on a circuit different from that to which the receiver is connected.
Consult the dealer or an experienced radio/television technician for help and for additional suggestions.
The user may find the following booklet prepared by the Federal Communications Commission helpful “How to Identify
and Resolve Radio-TV Interference Problems.” This booklet is available from the U.S. Government Printing Office.
Washington, DC 20402, Stock 004-000-00345-4
FCCWarning
The user is cautioned that changes or modifications not expressly approved by the manufacturer could void the user’s
authority to operate this equipment.
Note: InorderforaninstallationofthisproducttomaintaincompliancewiththelimitsforaClassBdevice,shielded
cablesandpowercordmustbeused.
CE Notice:
Following standards were applied to this product, in order to achieve compliance with the electromagnetic
compatibility :
- Immunity in accordance with EN 50082-1: 1992
- Emissions in accordance with EN 55022: 1987 Class B.
NOTICE
Copyright 1997.
All Right Reserved
Manual Ver 1.0
All information, documentation, and specifications contained in this manual are subject to change without prior
notification by the manufacturer.
The author assumes no responsibility for any errors or omissions which may appear in this document nor does
it make a commitment to update the information contained herein.
TRADEMARKS
Intel is a registered trademark of Intel Corporation
PentiumII Processor is a registered trademark of Intel Corporation
PC/AT is a registered trademark of International Business Machine Corporation.
PS/2 is a registered trademark of IBM Corporation.
All other brand and product names referred to in this manual are trademarks or registered trademarks of their
respective holders.
2
TABLEOFCONTENTS
T
T
PREFACE ...................................................................................................................3
CHAPTER 1 INTRODUCTION ...........................................................................................4
Specification ....................................................................................................................................... 4
Accessories of HOT-637 .................................................................................................................... 6
CHAPTER 2HARDWARE CONFIGURATION........................................................................7
ThePentiumII &Celeron Processor ................................................................................................. 7
Whatdoesthe RM(RetentionMechanism) consistof .....................................................................8
InstalltheRetention MechanismandHeat SinkSupport .................................................................9
InstallPentiumIIProcessor ............................................................................................................. 11
Celeron Processor S.E.P.P only RM Assembly Procedure .............................................................12
WhatdoesCeleron Processor RMconsistof .................................................................................. 13
InstallCeleronProcessor.................................................................................................................. 14
Jumpers.............................................................................................................................................. 15
ClearCMOS- J19............................................................................................................................. 17
FlashEEPROMVpp - J17................................................................................................................ 17
Keyboard PS/2Mouse Power-on setting -J44, JP8 ........................................................................17
Connectors & Sockets ...................................................................................................................... 18
CHAPTER 3MEMORY CONFIGURATION .........................................................................21
CHAPTER 4 FLASH UTILITY ........................................................................................22
CHAPTER 5 AWARD BIOS SETUP ..............................................................................24
The Main Menu................................................................................................................................. 25
StandardCMOSSetup...................................................................................................................... 27
BIOS Features Setup......................................................................................................................... 29
ChipsetFeatures Setup ..................................................................................................................... 32
PowerManagementSetup ................................................................................................................ 36
PCIConfigurationSetup .................................................................................................................. 39
IntegratedPeripherals ....................................................................................................................... 41
PasswordSetting............................................................................................................................... 44

3
PREFACE
P
P
HOT-637isa highly integratedIBMPC/AT compatiblesystemboard
designed to meet the industry's most demanding desktop applications.
Basedonthe Intel 82440LXAGPsetchipset, theIntelPentiumTMIIprocessor with
MMXtechnologyfeatured, and256KBor 512KB Level2 high-performance pipelined
burstsecondary168-pin DIMM socketandsupports up to512MBof EDO RAMand
SDRAM.
HOT-637isequipped withan AcceleratedGraphicsPort(A.G.P.), ahigh-performance
interconnectforgraphic-intensiveapplication,such as3D applications.TheA.G.P. is
independentofthe PCI busandis designedtoexclusively use withgraphical-display
devices.TheHOT-637 supports3.3V A.G.P.deviceswith datatransferrates upto133
MHz,allowingdata throughputof500 MB/sec.
TheIntel's82440LX AGPset chipsetprovides an integratedBusMastering IDEcontrol-
lerwithtwo highperformance IDEinterfaceswhich allowsupto fourIDE devices
connectionandup to 33MB/secof datatransferrates.
Theon-boardGiga I/Ocontroller providesstandardPC I/Ofunctions:
floppydriveinterface, two FIFOserialports, an InDAdeviceport and aSPP/EPP/ECP
capable parallel port.
HOT-637isbuilt with fourPCIlocal busslotsproviding a highbandwidthdata path for
data-movementintensivefunctions such asgraphics,and with threeISAslots.
HOT-637provides thefoundation forcost effective,high performanceand highly
expandableplatforms,whichdeliversthelatestin theIntel PentiumTM IIprocessor and
newadvancedchipsettechnology.

4
SPECFICATION
1
1
TheHOT-637Mainboard iscarefully designedforthe demandingPC userwhowants highperfor-
manceandmany intelligent featuresin a compactpackage:
IntelChipset:
FeaturesIntel's440LX AGPset withI/Osubsystems.
CPUSupport:
Intel Pentium®IIandCeleron processor233 ~333MHz.
VersatileMemorySupports:
Equipped with four DIMM sockets support168-pin3.3V SDRAM andEDODRAM memory
modules,totalmemory size upto512MB.
Configurablesupportfor ECC(Error CheckingandCorrecting)
PCIandISAExpansionSlots:
Providesfour32-bit PCI slotsandthree 16-bitISAslots.
AGPSlot:
SupportsAccelerated GraphicsPortcardsforhighperformance,component levelinterconnect
targeted at 3D graphical display applications.
OnboardGiGA-I/O:
ProvidesoneFloppyport;oneoptionalPS/2 mouseconnector; two high-speedUART compatible
serial ports and one parallel port with ECP and EPP capabilities. Serial Port 2 can also be directed
fromCOM2to the Infrared Moduleforwireless connections.
OnboardPCIBusMasterIDEController:
Two UltraDMA/33 BusMaster IDE Portssupportsfour IDEdevicesup to 33MB/sec IDE trans-
fersandsupports Enhanced PIOModes 3 and4and BusMasterIDE DMA Mode2 devices.
Onboard20-pinATXPower Supply:
ProvidesATXpower connectoronboardsupports soft-on/offfunction.
SystemBIOS:
ProvideslicensedAwardV4.51PGBIOSonFlashEEPROM.
SupportsGreenPC, DMIand BundledwithNCR SCSIBIOS.
ACPI:
Support ACPI(AdvancedConfigurationandPower Interface) function. ACPI provide more
EnergySavingFeatures forthe futureoperatingsystemsupportingOS DirectPowerManagement
(OSPM)functionality.

5
BoardSize:
ATX form factor 305mm x 170mm.
AdvancedFeatures:
CPUPlug& Play--HOT-637 featuringCPUPlug & Playfunction, the userneedn'tto adjust
onboardsystemclock andCPUmultiplier. When the systemfirst power-on, BIOSwillset CPU
clock speed to 233 MHz automatically. If your CPU speed higher than 233 MHz., one thing you
only have to do is entry BIOS to set CPU speed to the higher one.
LowEMI--Spread Spectrumbuiltin - ±1.5%modulation and automaticclockshut-off of unused
PCI/SDRAMSslotstoreducethe EMI.
DualFunctionPowerButton-- Thesystem can beoneof twostates, oneis Suspend modeand
the other is the Soft-off mode. Pushing the power button for less than 4 seconds will place the
systemintoSuspend mode. Whenpushthe powerbuttonfor morethan4 seconds,thesystem
enterstheSoft-off mode.
Wake-ON-LAN --The systemwill power-onautomatically byactivating ofLAN.
(Thisfunctionsupport Intel LANcardonly).
ModemRingPower-on --Thesystem willpower-onautomatically byactivatingof modemring.
PS/2Keyboard& Mouse Power-on --Thesystem will power-onautomaticallyby strokekey-
boardordouble clickPS/2mouse.
MoreAdvancedFeatures(option):
VoltagesMonitoring--Systemvoltages levelsare monitoredtoensure stablecurrentto main
boardcomponents.
Systemvoltagesinclude VCORE and VL2 for CPU, and +5V, +12V, -5V, -12V for system.
FANStatusMonitoring-- Toprevent CPUoverheat,CPU fansismonitored forRPMand failure.
(CPUCoolingFAN withRPM sensorisrequired)

6
ACCESSORIESOF HOT-637

7
HARDWARECONFIGURATION
2
2
The Pentium™ II & Celeron™ Processor
ThePentiumII and Celeron processoristhe next memberofthe P6 processorfamily. It
combinesthearchitecturaladvancesinthePentium Proprocessor withthe instructionset
extensionsofMMX technology. It isfullycompatible withthehuge base ofIntelarchitec-
ture-basedPCsoftware. Additional, the PentiumII processor deliversnewlevels ofperfor-
manceforadvance mediaand communicationssoftwareincluding powerful,realistic
graphicsandimaging capabilities, videoconference,and theabilityto run full-screen,full-
motionvideo. Thecombination oftheseadvanced technologiesmakes thePentiumII
processortheideal choicefoeexecuting modem 32-bitcompute-intensive and multimedia-
enhancedapplication workloads usingadvanced32-bitoperatingsystems.
ThePentiumII and Celeronprocessor both haveaseparate, 32KB,on-chip,non-blocking L1
cachewhichrun at theprocessorfrequency, Pentium IIprocessoralso has a512KBor
256KB on-board L2 non-blocking cache runs at half the processor speed.
ThePentiumII processor usingSingle Edge Contact(S.E.C.)cartridge packagingtechnol-
ogywhichenables highvolumeavailability, improvedhandling protection.
TheCeleronprocessor usingSingle EdgeProcessorPackage. (S.E.P.P.)
Figure2-1shows the front,rearand topviewsof Pentium IIprocessor(without heat sink
mounted).
Figure2-2shows theprimaryand non-primarysideof Celeronprocessorwithout heatsink
mounted and with heat sink mounted.
Figure 2-2
Figure 2-1

8
What does the RM (Retention Mechanism) consist of
PentiumIIprocessor requiresthe RetentionMechanism(RM) andoptional HeatSink
Support(HSS)to holdthebase processor inthe S.E.C. cartridge.
Followinginstallationprocedure willdisplay howtoinstall thesemechanism.
RetentionMechanismpackage consists of2separate partsandoptional Heat SinkSupport
consistsof3 separateparts.
Normally,dependon the typeofheat sink, HeatSinkSupport isnotalways available. For
someheatsink attachedon pentiumIIprocessor mightnotfit toinstall theHeatSink
Support.TheintroductionofHeatSinkSupport installationon thismanual onlyfor your
reference.
RetentionMechanism(RM) -
PlasticGuidewith captivenuts thatholdthe
S.E.C. Cartridge in the Slot1 connector.
(RefertoFigure 2-3)
RMAttachMount (RMAM)-
Bolt/Bridgeassemblies insertedupthrough
thebottomof the mainboard. Thensecures the
RMtoRMAM (twoRMAM requiredperRM).
(RefertoFigure 2-4)
Heat Sink Support Base (HSSBASE) -
Plasticsupportbarmountedtothemainboard
undertheATX heat sink.
(RefertoFigure 2-5)
HSSPin(HSSPIN) -
Plasticpinsinserted through theHSSBASEto secure
ittothe mainboard(tworequired perAssembly).
(RefertoFigure 2-6)
HSSTopBar (HSSTOP) -
PlasticbarthatclipsontotheHSSBASE
throughthefins on theATXheat sink.
(RefertoFigure 2-7)
Figure 2-3
Figure 2-4
Figure 2-5
Figure 2-6
Figure 2-7

9
Install the Retention Mechanism and Heat Sink Support
Placethemainboard on aworkbench (not inachassis). Besurethat the mainboardis bare
(thatis,no SIMMs, cables,or cards areinstalled).
Figure 2-8
Figure 2-9
InstalltheRetentionMechanism:
1.Findsout the RetentionMechanism(RM)
MountingHolesand "Pin 1" markofSlot 1
onHOT-661/Pmainboard.(RefertoFigure
2-8)
2.Installtwo RetentionMechanismAttach
Mounts(RMAM)with Bolt/Bridgeassem-
bliesinsertedup throughthebottom ofthe
mainboard.(Noticethe RMAM's bridge
orientationasFigure2-9)
3.Insertthe RetentionMechanism(RM)
around theSlot 1. Besure the SquareCut
Mark ofRM(Refer toFigure2-10) havethe
sameorientationof Slot1pin 1.(Referto
Figure2-9)
4. Screw the four captivenuts (Referto
Figure 2-10) on the RM by a screw drive to
secureRMto two RMANs.
Figure2-10

10
InstalltheHeatSinkSupport:
Beforeyouinstall the HeatSinkSupport, please check yourPentiumII processor,ifyou have
anIntelboxed processor (Referto Figure 2-11),youcan ignorethissection. In Intelboxed
processorkit,it will includesit'sown Heat SinkSupportaccessories and installmanual,you
canInstallthe Heat SinkSupportonto the mainboardbyfollowing the Intelprocessorkit's
instructions.
Figure2-12shows theOEMtype PentiumIIprocessor with activeheat sink.
1.Findsout theHeatSink Support(HSS)
MountingHoleson HOT-637 main
board.Noticethat one holeislarger than
the other hole.
2.Thereare two plasticpegson the
bottom of Heat Sink Support Base
(HSSBASE) bar. Mount the two black
plastic pegs onto the mainboard. Notice
that one hole and the bar of one peg are
largerthanthe other holeandpeg. (Refer
to Figure 2-13)
3.Insertthe Heat SinkPins(HSSPIN)
throughtheHSSBASE to secureitto the
mainboard.(Referto Figure2-13)
4.Insertthe Pentium IIintothe RM
firmly(Pleaserefer to"InstallPentium II
processor" section), Slide the Heat Sink
TopBar(HSSTOP)onthe supports
forwardtoclip ontotheHSSBASE
throughthefins ofHeatSink. (Referto
Figure 2-14)
Figure2-11 Figure 2-12
Figure2-13
Figure2-14

11
Install Pentium™ II Processor
Figure2-15
Pushthelatches onthe processortowardthe centerof theprocessoruntil theyclick intoplace.
Holdtheprocessor so thatthefan shroud isfacingtoward the HeatSinkSupport Base baron
themainboard. Slidethe processor intothe Retention Mechanism.Ensurethat thealignment
notchinthe processor fitsoverthe pluginSlot 1. Pushthe processor downfirmly,with even
pressureonboth sides ofthetop, until itisseated.
Pushthelatches on theprocessoroutward untiltheyclick into placeinthe Retention Mecha-
nism.Thelatches must be securedfor proper electrical connectionofthe processor. Slide the
HeatSinkTop Bar(HSSTOP)on thesupportsforward toclip onto theHSSBASE through the
finsofHeat Sink. (Alsorefer to "InstallHeatSink Support"section)
Attach the end of the power cable to the three-pin connector on the mainboard or to the power
cordofATX power supply(dependon powercabletype of Fan/HeatSink).

12
Celeron™Processor S.E.P.P.Only Retention MechanismAssembly
Procedures
Theseprocedureshave beenincludedto help assemblethe S.E.P.P. (Single
EdgeProcessor Package)only RetentionMechanism.
Pleasefollowthem exactly:
RequiredComponents
SEPP(Figure 2-16)
Heatsink(Figure2-17)
HeatsinkRetentionClip (Figure2-18)
Primary Side
Figure 2-17
Figure 2-18
Procedures
Assembleallparts on a staticfreebench using
properoperatorgrounding and anESDmat.
Carefullyinsertall four heatsinkcliplegs into
SEPP.(Figure2-19)
Clip basemust belocated onthe non-primary
side.(Figure 2-20) FYI - The side of the clip plate
whichtouchesthe substrateis coveredwitha
mylarinsulator. Thisinsulatorpreventstheclip
from shorting lines on the substrate.
Beforeyoufully engage twolegsof theclipinto
theheatsink(Figure 2-21),make sureyouremove
thebluefilm coveringthethermal interface. The
blue film protects the thermal interface from
damageduringshipping.
Grasptheheatsink clipassemblybetween theclip
base and the heatsink. Do not bend or apply
pressuredirectlytoSEPP.
Usinganonmetallic stockorscrew driver,push
theremainingtwo cliplegs intotheheatsink.
Caution: Takecarenot tocontactpassively or
scratchSEPPwhen using screwdriveror bar
stock.
Verifythatall thefeeton the clipare fully en-
gagedandseated ontheheatsink. (Figure2-22)
Non-primarySide
Non-primarySide
Primary Side
Figure 2-22
Figure 2-21
Figure 2-20
Figure 2-19
Figure 2-16

13
What does the Celeron™ Processor RM consist of
RetentionMechanismforIntelCeleron™ Processor
TheIntelCeleron™ ProcessorrequiresRetention Mechanism(RM) toholdthe baseprocessor
inthe SingleEdge Processor Package(S.E.P.P).Contact your supplierforthe mechanism.
TheRetentionMechanism packageconsistsof twoseparate setsofcomponents.
Each set consists of two RM and two RMAM.
RetentionMechanism(RM) -
Two Plastic Guides that hold the S.E.P.P in the Slot 1
connector.(Referto Figure 2-23)
RMAttachMount (RMAM) -
Bolt/Bridgeassemblyinsertedupthrough the.. bottom
ofthemainboard, then secures theRMto RMAM
(twoRMAMrequired perRM).(Referto Figure2-23)
Place the mainboard on a workbench (not in a chassis). Be sure that the mainboard is bare
(thatis,no SIMMs, cables,or cards areinstalled).
1. LocatetheRetention Mechanism (RM) MountingHolesof Slot 1onmain board.
(RefertoFigure 2-24)
2. Insert two Retention Mechanisms (RM) face to face on opposite sides of Slot 1.
(RefertoFigure 2-24)
3. Screwthefour captive nuts (RefertoFigure 2-24) ontheRM with ascrewdriver to
ecureRMto two RMAMs.
Install the Celeron™ Processor RM Figure 2-23
Figure 2-24

14
Install Celeron™ Processor
Holdtheprocessor unit so thattheHeat sink facestowardthe DIMM socketsonthe mainboard.
Inserttheprocessor into theRetentionMechanism. Press theprocessordown firmly witheven
pressure on both sides of the top until it is seated. (Refer to Figure 2-25 and Figure 2-26)
Figure 2-26Figure 2-25

15
Jumpers
CPU Clock Speed Selection - JP39 and JP37
HOT-637featuringCPU Plug &Playfunction, theuserneedn't to adjustonboard system clock
and CPU multiplier. When the system power-on first time, BIOS will set CPU clock
speed to233MHz automatically. IfyourCPU speed higherthan233 MHz.,youonly have
to entry BIOS to set CPU speed to the higher one.
HOT-637mainboardfeatures a clockgenerator to provideadjustablesystem clockfrequency.
JP39isa 6-pin jumperswhichdetermine thesystemclock frequency 50MHzto 83 MHz.
CPU Plug & Play function is supported by66MHz.
HOT-637mainboardprovides Jumper groupofJP37 to figuretheCPU core clockmultiplier.
Byinsertingmini jumpers onMANUALgroup, the usercanfigure the HostBusClock/CPU
CoreClockratio (multiplier)manually.
CPU Plug & Play function is supported when an Jumper Pack inserted on
AUTOgroup.
Figure2-27
Listeddiagramson right sideshow the samplepositionon jumpergroupof JP37:
1) SettingCPUClock fromBIOS
-jumperpack on AUTO.
(Factorydefault)
2) Adjustmultipliermanually fromhardware
-jumperpack on MANUAL,multiplierset to4.5Xmanually.
Figure2-27shows the positionof JP39 andJP37on themainboard.
Severalhardwaresettings are madethroughthe useofjumper caps toconnectjumper pins on
the main board. The jumper's pin 1 on main board will be on the top or on the left when hold-
ingthemainboardwith thekeyboard connectorawayfrom yourself.
Jumpers with two pins will be shown as for Close (On) and for Open (Off).
To connect the pins, simply place a plastic jumper cap over the two pins.

16
MultiplierJP37
AUTO
2
2.5
3
3.5
4
4.5
5
5.5
CPUClockConfiguration Tableshowsthe PentiumII233MHz, 266MHz, 300MHzand 333MHz
quicksettingon the mainboard.
SystemClockTable (Table2-2)shows allofthe systembusclocks thatthemainboard canoffer.
MultiplierTable(Table 2-3) showsall of themultipliersthat themainboardcan support.
PentiumII
ProcessorSystem
Clock Multiplier
233 MHz 66 MHz 3.5 x
266 MHz 66 MHz 4 x
300 MHz 66 MHz 4.5 x
333 MHz 66 MHz 5 x
System
Clock PCIBus
Clock JP39
50 MHz25 MHz
60 MHz30 MHz
66 MHz33 MHz
75 MHz37.5MHz
83 MHz41.5MHz
Table 2-2
Table 2-1
System Clock Configuration Table
CPU Configuration Table Multiplier Table
Table 2-3
NOTE: 75&83MHzareforover-clockusage,itisnotarecommended
generalpractice.
Support
CPUPlug&Play
Support
CPUPlug&Play

17
Clear CMOS - JP19
Flash EEPROM Vpp - J17
HOT-637mainboard supportstwotypes
ofFlashEEPROM: 5voltand 12volt.
By setting up jumper J17, the main
boardcanuse both 5Vor12V flash
EEPROMwith newsystem BIOSfiles
astheycomeavailable.
J17Pin 2-3Close
for5VFlashEEPROM
J17Pin 1-2Close
for12VFlashEEPROM
HOT-637mainboardprovides an easypower-on function bykeyboardand PS/2mouse.
Theusermay power onsystem by simplystrokeany key(orhot-key) on keyboardor double
clickPS/2mouse. (Note: Power-onbyserialmouseis notsupported )
JP38andJ44 arejumpersto setthefunctions ofkeyboard & PS/2mouse power-on Enabled
or Disabled.
K/B&PS/2Mouse Power-OnJ44,JP38
Keyboard&
PS/2Mouse
Power-On
Disabled
PS/2Mouse
Power-On
Enabled
Keyboard&
PS/2Mouse
Power-On
Enabled
Keyboard
Power-On
Enabled
Keyboard & PS/2 Mouse Power-On Setting - J44, JP38
HOT-637 mainboard supports jumper JP19fordischargingmainboard'sCMOSmemory.
This jumper can clear the CMOS data stored in the Giga I/O chip. To clear the CMOS data
pleasefollowlisted steps:
1) Turn off the PC,
2)Removemini jumperfromJP19 pin1-2,
3)Insertmini jumper toJP19pin 2-3 forabrief while,
4)Removemini jumper fromJP19in 2-3,
5)Reinsertmini jumper to
JP19 pin 1-2,
6) Turn on the PC.
Whenyouenabled K/B&PS/2
MousePower-ONfunction, you
also have to set the proper item
on POWERONfunction
category of IntegratedPeriph-
eralsof BIOSsetup.(please
refertopage 38)
Table 2-4
Figure2-28

18
Connectors
Front Panel Connectors
Hardware Reset Connector - J32
Attach 2-pin hardware reset switch to it. Closing the
resetswitch restartsthesystem.
KeyLock Connector - J27
KeyLock&Power LED connector isa5-pin connec-
torfora lock thatmay be installedonthe systemcase
forenablingor disablingthekeyboard. It also
attached to the case's Power LED. Pin 1 and 3 are for
power LED and pin 4 and 5 are for keylock, pin 2 is
empty.
Speaker Connector - JP24
PCspeakerconnector mayattacha 4-pinPC speaker
cablefromthe case tothisconnector.
HD LED Connector - S3
Attacha2-pin IDE driveLEDcable to thisconnector. TheLED lightswhenan IDE deviceisactive.
ATX Power On/Off Switch Connector - S1
Attacha2-pin momentarytypeswitch tothisconnector forturning on oroff yourATXpower supply.
Figure2-29

19
Back Panel Connectors
COM1/COM2Connectors
AttachCOM1/COM2device cablestothese connectors.
PS/2 Keyboard & PS/2 Mouse Connector
Two6-pinfemale PS/2 keyboard&Mouse Connectors islocatedat therearof the mainboard.
PS/2Mouseon top ofconnectorand PS/2 Keyboardonthe bottom ofconnector. Plugthe PS/2
keyboardandmouse jack intothisconnector.
Parallel Port Connector
A 25-pin female connector is located at the rear of the main board. Plug the parallel port device
cableintothisconnector.
USB1/USB2PortConnectors
Twofemaleconnectors are located attherear of theboard. Plug
theUSBdevices jack intothisconnector.
OtherConnectors
ATX Power Supply Connector - J31
Itisa twenty-pin maleheaderconnector. Plug the connectorfrom
thepowerdirectly ontotheboard connectorwhile makingsurethe
pin1is in itsposition. Themain board requiresapower supply
withatleast 200wattsand powergood signal.
IR Connector - JP4
Infrareddeviceconnector mayattach a5-pininfrared
device cable to this connector for enabling the infrared
transferfunction. Thismainboard meetsthespecification
of ASKIR and HPSIR. Figure 2-31 shows JP4's
pinassignmentand Figure2-32 showJP4location.
Figure2-31
Figure2-32
Figure2-30
Table of contents
Other Shuttle Motherboard manuals

Shuttle
Shuttle Spacewalker AV41 User manual

Shuttle
Shuttle MV21 User manual

Shuttle
Shuttle HOT-675V User manual

Shuttle
Shuttle AT30 User manual

Shuttle
Shuttle HOT-673 User manual

Shuttle
Shuttle AN35 Ultra User manual

Shuttle
Shuttle ME21 User manual

Shuttle
Shuttle FB95 User manual

Shuttle
Shuttle Spacewalker AB30 User manual

Shuttle
Shuttle MT63 User manual

Shuttle
Shuttle Spacewalker AB40 User manual

Shuttle
Shuttle HOT-603 User manual

Shuttle
Shuttle MB48 User manual

Shuttle
Shuttle HOT-617 User manual

Shuttle
Shuttle AB49 User manual

Shuttle
Shuttle FN41U User manual

Shuttle
Shuttle ME62 User manual

Shuttle
Shuttle HOT-591 User manual

Shuttle
Shuttle FN95 User manual

Shuttle
Shuttle Spacewalker FE22 User manual