1Sensing range on black, 6% remission
2Sensing range on gray, 18% remission
3Sensing range on white, 90% remission
7.3 Settings
Sensing range setting
Sensor which it is not possible to set: The sensor is adjusted and ready for operation.
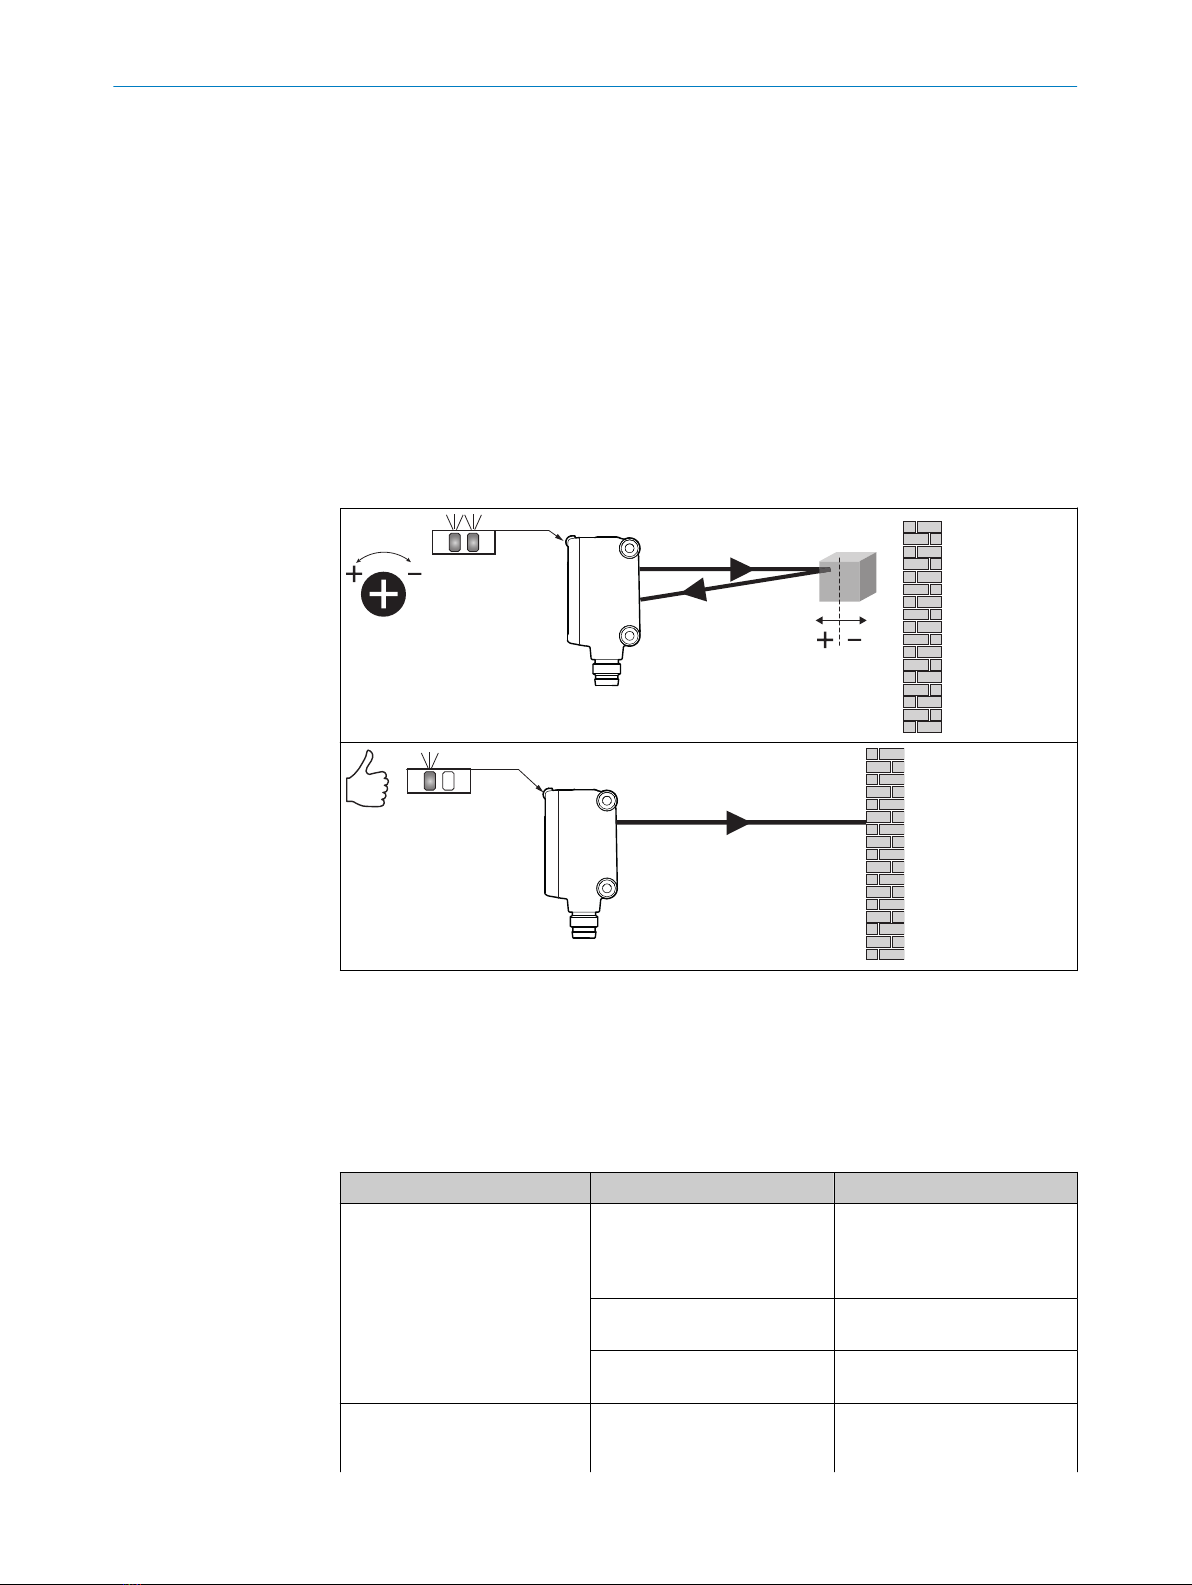
The sensitivity (sensing range) is adjusted with the potentiometer (type: 5-turn). Clock‐
wise rotation: sensitivity (sensing range) increased; counterclockwise rotation: sensitiv‐
ity (sensing range) reduced. We recommend placing the object within the sensing
range, e.g. see figure 3. Once the sensitivity is set, remove the object from the beam
path. The switching output changes.
Table 3: Adjustment sensing range
The sensor is adjusted and ready for operation.
8 Troubleshooting
The Troubleshooting table indicates measures to be taken if the sensor stops working.
Table 4: Troubleshooting
LED indicator/fault pattern Cause Measures
Yellow LED does not light up
even though the light beam is
aligned to the object and the
object is within the set sensing
range
No voltage or voltage below
the limit values
Check the power supply,
check all electrical connec‐
tions (cables and plug connec‐
tions)
Voltage interruptions Ensure there is a stable power
supply without interruptions
Sensor is faulty If the power supply is OK,
replace the sensor
Yellow LED flashes Sensor is still ready for oper‐
ation, but the operating condi‐
tions are not ideal
Check the operating condi‐
tions: Fully align the beam
of light (light spot) with the
7 COMMISSIONING
10 8025471.1AR6 / 21.02.2021 | SICK
Subject to change without notice