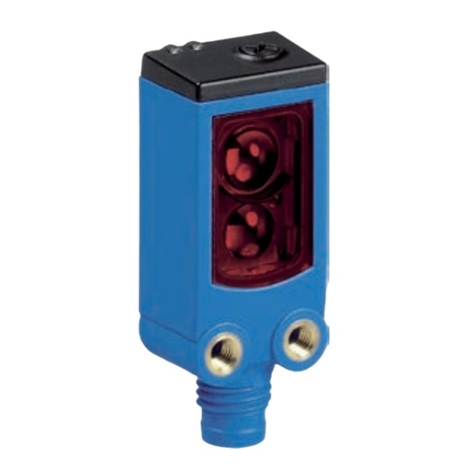
SICK WI130 User manual

Quickstart
2006/42/EC
NO
SAFETY
Q U I C K S T A R T
en:
These instructions are only valid in connection with operating instructions
8020160. You can find the operating instructions at www.sick.com.
Connection, mounting, and configuration may only be performed by trained speci‐
alists.
Not a safety component in accordance with the EU Machinery Directive.
Do not install the sensor in places exposed to direct sunlight or other weather
conditions unless this is expressly permitted in the operating instructions.
de:
Diese Anleitung ist ausschließlich in Verbindung mit der Betriebsanleitung
8020148 gültig. Die Betriebsanleitung finden Sie unter www.sick.com.
Anschluss, Montage und Einstellung nur durch Fachpersonal.
Kein Sicherheitsbauteil gemäß EU-Maschinenrichtlinie.
Installieren Sie den Sensor nicht an Orten, die direkter Sonneneinstrahlung oder
sonstigen Wettereinflüssen ausgesetzt sind, ausser dies ist in der Betriebsanlei‐
tung ausdrücklich erlaubt.
it:
Le presenti istruzioni sono valide esclusivamente unitamente alle istruzioni per
l’uso 8020160. Le istruzioni per l’uso sono disponibili all’indirizzo www.sick.com.
Collegamento, montaggio e regolazione solo a cura di personale tecnico specializ‐
zato.
Non è un componente di sicurezza ai sensi della direttiva macchine UE.
Non installare il sensore in luoghi esposti all’irraggiamento solare diretto o ad altri
influssi meteorologici, se non espressamente consentito nelle istruzioni per l’uso.
fr:
Cette notice est valable exclusivement en liaison avec la notice d'instructi‐
ons 8020160. La notice d’instructions est disponible sur le site Internet
www.sick.com.
Confier le raccordement, le montage et le réglage uniquement au personnel
qualifié.
Il ne s’agit pas d’un composant de sécurité au sens de la directive machines CE.
N’installez pas le capteur à des endroits directement exposées aux rayons du
soleil ou à d’autres conditions météorologiques, sauf si cela est explicitement
autorisé dans la notice d’instructions.
es:
Estas instrucciones únicamente son válidas junto con las instrucciones de uso
8020160. Puede encontrar las instrucciones de uso en www.sick.com.
La conexión, el montaje y el ajuste deben efectuarlos exclusivamente técnicos
especialistas.
No se trata de un componente de seguridad según la Directiva de máquinas de la
UE.
No instale el sensor en lugares directamente expuestos a la radiación solar o
a otras influencias climatológicas, salvo si las instrucciones de uso lo permiten
expresamente.
zh:
本指南仅在配合使用 8020160 操作指南时有效。查看操作指南可访问
www.sick.com 网页。
仅允许由专业人员进行连接、安装和设置。
非欧盟机械指令中定义的安全组件。
请勿将传感器安装在阳光直射或受其它气候影响的位置,除非操作指南中明确
允许。
1 Operating and status indicators
Bedien- und Anzeigeelemente Elementos de mando y visualización
Elementi di comando e di visualizzazione 操作及显示元件
Éléments de commande et d'affichage
OUT 1
2
LSR ON
OUT
SET RUN
T
1
2
12 3 4 5 6 7 8
àá ß 9
1 LSR ON
Supply voltage active
Versorgungsspannung aktiv
Tensione di alimentazione attiva
Tension d’alimentation active
Tensión de alimentación activa
工作电压激活
8
Teach-in button
Teach-in-Taste
Pulsante teach-in
Bouton d’apprentissage
Tecla teach-in
示教键
2 OUT 1
Output display Q1 (orange)
Ausgangsanzeige Q1 (orange)
Visualizzazione uscita Q1 (arancione)
Affichage de la sortie Q1 (orange)
Indicador de salida Q1 (naranja)
输出指示灯 Q1(橙色)
9
Settings/operation
Einstellungen / Betrieb
Impostazioni/funzionamento
Réglages/fonctionnement
Ajustes y funcionamiento
设置/运行
3
Secondary indicator (green)
Nebenanzeige (grün)
Display secondario (verde)
Affichage secondaire (vert)
Indicación secundaria (verde)
辅助指示灯(绿色)
ß
Mode pushbutton
Mode-Taste
Pulsante modalità
Touche Mode
Tecla de modo
模式按键
4
Main indicator (red)
Hauptanzeige (rot)
Display principale (rosso)
Affichage principal (rouge)
Indicación principal (rojo)
主指示灯(红色)
à + á
LED for the current channel (1 or 2)
LED für den aktuellen Kanal (1 oder 2)
LED per il canale attuale (1 o 2)
LED pour le canal actuel (1 ou 2)
LED para el canal actual (1 o 2)
当前通道(1 或 2)的 LED
5
Teach-in-LED
Teach-in-LED
LED Teach-in
LED d'apprentissage
LED de aprendizaje
教导式LED
â OUT 2
Output display Q2 (orange)
Ausgangsanzeige Q2 (orange)
Visualizzazione uscita Q2 (arancione)
Affichage de la sortie Q2 (orange)
Indicador de salida Q2 (naranja)
输出指示灯 Q2(橙色)
6 + 7
UP + DOWN
2 Montage
–25°C ... +55 °C
–13°F ... +131 °F
Mounting / Montage / Montaggio / Montage / Montaje / 安装
1
2
en: Hook the WI130 into the mounting rail 1, press 2 to lock.
de: WI130 in die Montageschiene einhaken 1, zum Arretieren drücken 2.
it: Agganciare WI130 alla guida di montaggio 1, premere per arrestare 2.
fr : Accrocher WI130 sur le rail de montage 1, enfoncer pour bloquer 2.
es: Enganchar la WI130 en el carril de montaje 1, para su enclavamiento, pulsar
2.
zh: 将 WI130 钩入安装导轨 1,按压以锁止 2。
8028371/0537572/
2023/05/16/de
WI130 | SICK 1
8028371/0537572/
2023/05/16
www.sick.com
WI130
SICK AG
E
rwin-Sick-Straße 1
DE-79183 Waldkirch

Disassembly / Demontage / Smontaggio / Démontage / Desmontaje / 拆卸
1
2
en: Press the WI130 in the direction 1, pull upwards out of the mounting rail 2.
de: WI130 in Richtung 1 drücken, nach oben aus der Montageschiene ziehen 2.
it: Premere WI130 in direzione 1, tirare verso l’alto dalla guida di montaggio 2.
fr : Appuyer sur WI130 vers 1, retirer vers le haut du rail de montage 2.
es: Pulsar la WI130 en dirección 1 y sacarla hacia arriba del carril de montaje 2.
zh: 沿 1 方向按压 WI130,将其向上从安装导轨中拉出 2。
2.1 Connecting the sensor heads
Sensorköpfe anschließen Conexión de los cabezales sensores
Collegamento delle teste ottiche 连接传感器头
Raccorder les têtes de capteur
1
en:
Open the protective cover. Connect the sensor head to the evaluation unit. Listen
for the click. When removing, press down the pin 1 and pull out the connector.
Do not attach sensor heads other than those of the W130L series. Do not pull the
cable when removing the sensor head.
de:
Schutzabdeckung öffnen. Den Sensorkopf mit der Auswerteeinheit anschließen.
Auf das Klicken achten. Beim Entfernen Zapfen 1 herunterdrücken. Den Ver‐
binder herausziehen. Keine anderen Sensorköpfe als die der W130L-Baureihe
anbringen. Beim Entfernen des Sensorkopfs nicht an der Leitung ziehen.
it:
Aprire la copertura protettiva e collegare la testa ottica all’unità di controllo. Assi‐
curarsi che faccia clic. Durante la rimozione, premere il perno 1 verso il basso ed
estrarre il connettore. Non collegare teste di rilevamento diverse da quelle della
serie W130L. Non tirare il cavo quando si rimuove la testa del sensore.
fr :
Ouvrir le cache de protection et raccorder la tête de capteur avec l’unité d'évalu‐
ation. Il faut entendre un clic. En retirant le connecteur, enfoncer l’ergot 1 et
retirer le connecteur. Ne pas installer d'autres têtes de capteur que celles de la
série W130L. Ne pas tirer sur le câble lors du retrait de la tête de capteur.
es:
Abrir la cubierta protectora y conectar el cabezal sensor con la unidad de evalua‐
ción. Debe escucharse un clic. Para retirarla, presionar hacia abajo los pivotes 1
y extraer el conector. No conecte cabezales de sensor distintos de los de la serie
W130L. No tire del cable al extraer el cabezal del sensor.
zh:
打开保护盖板,将传感器头与评价单元连接。注意需听到咔嗒声。移除时,向下
按压销 1,拉出连接器。请不要安装 W130L 系列以外的传感器头。拆卸传感器
头时,不要拉动电缆。
3 Electrical installation
Elektrische Installation Instalación eléctrica
Installazione elettrica 电气安装
Installation électrique
The sensors must be connected in a voltage-free state.
Anschluss der Sensoren muss spannungsfrei erfolgen.
Il collegamento dei sensori deve avvenire in assenza di tensione.
Le raccordement des capteurs doit s'effectuer hors tension.
Los sensores deben conectarse sin tensión.
必须在无电压状态 连接传感器。
3.1 DC
UB: 12 ... 24 V DC
DC
WI130T
1 = BN + (L+)
2 = WH External input /
Externer Eingang /
Ingresso esterno /
Entrée externe /
Entrada externa /
外部输入
3 = BU - (M)
4 = BK Q
4
3
2
1
WI130T-N720:
3
4
5
6
7
1
2 2
BN
BK
WH
BU
BK/WH
GY
Load Load
12 ... 24 V DC
0 V
WI130T-P720:
2 2
3
4
5
6
7
1
BN
BK
WH
BU
BK/WH
GY
Load Load
12 ... 24 V DC
0 V
WI130T-N340:
1
2
3
7
Load
BN
BK
BU
GY
12 ... 24 V DC
0 V
8028371/0537572/
2023/05/16/de
WI130 | SICK 2

WI130T-P340:
3
7
1
2
BN
BK
BU
GY
12 ... 24 V DC
0 V
Load
1Power circuit /
Hauptstromkreis /
Circuito elettrico principale /
Circuit principal /
Circuito de corriente principal /
主电路
2Circuit protection /
Schutzschaltung /
Circuito di protezione /
Circuit de protection /
Circuito de protección /
保护电路
3Control output 1 CH /
Steuerungsausgang 1 CH /
Uscita di controllo 1 CH /
Sortie de commande 1 CH /
Salida de control 1 CH /
控制输出 1 CH
4Control output 2 CH /
Steuerungsausgang 2 CH /
Uscita di controllo 2 CH /
Sortie de commande 2 CH /
Salida de control 2 CH /
控制输出 2 CH
5Analog output /
Analogausgang /
Uscita analogica /
Sortie analogique /
Salida analógica /
模拟输出
6Analog neutral conductor /
Analoger Nullleiter /
Conduttore neutro analogico /
Conducteur neutre analogique /
Conductor neutro analógico /
模拟零线
7External input /
Externer Eingang /
Ingresso esterno /
Entrée externe /
Entrada externa /
外部输入
4 Inbetriebnahme
4.1 Sensitivity adjustment
Einstellung Empfindlichkeit Ajuste de la sensibilidad
Regolazione della sensibilità 设置灵敏度
Réglage de la sensibilité
SET RUN
1 P t
WSE/WL:
Set with existing object. /
Mit vorhandenem Objekt einstellen. /
Impostare con l'oggetto esistente. /
Ajuster avec un objet existant. /
Ajustar con objeto existente. /
与现有对象设置。
WT:
Set without object. /
Ohne Objekt einstellen. /
Conjunto sin objeto. /
Ajuster sans objet. /
Conjunto sin objeto. /
设置无对象。
1 P t
1 P t g o o d
SET RUN
Maximum sensitivity is set. /
Maximale Empfindlichkeit ist einge‐
stellt. /
La sensibilità massima è impostata. /
La sensibilité maximale est réglée. /
Se ajusta la sensibilidad máxima. /
最大的灵敏度被设定。
4.2 Other adjustments
Weitere Einstellmöglichkeiten Otros ajustes
Ulteriori regolazioni possibili 更多可调性
Autres possibilités de réglages
Other variants of the setting: /
Weitere Varianten der Einstellung: /
Altre varianti di impostazione: /
Autres variantes du réglage: /
Otras variantes de ajuste: /
其他的设置方式:
•Single Value Teach-in
•Two Value Teach-in
•Auto Teach-in
•Zone teach-in /
Zonen-Teach-in /
Teach-in a zone /
Apprentissage par zones /
Aprendizaje por zonas /
区段示教功能
•Teach-in of transparent objects /
Teach-in transparenter Objekte /
Teach-in di oggetti trasparenti /
Apprentissage des objets transparents /
Aprendizaje de objetos transparentes /
透明物体示教功能
8028371/0537572/
2023/05/16/de
WI130 | SICK 3

•Teach-in Lnth mode /
Teach-in Lnth-Modus /
Teach-in modalità Lnth /
Mode Lnth apprentissage /
Modo de aprendizaje Lnth /
Lnth 模式示教功能
•Manual adjustments /
Manuelle Anpassungen /
Adattamenti manuali /
Adaptations manuelles /
Ajustes manuales /
手动调整
See operating instructions. /
Siehe Betriebsanleitung. /
Vedere le istruzioni per l'uso. /
Voir la notice d’instructions. /
Consulte las instrucciones de uso. /
参见操作指南。
5 Troubleshooting
Störungsbehebung Resolución de problemas
Eliminazione difetti 故障排除
Élimination des défauts
en:
LED/fault pattern Cause
Err1
Indicates the light intensity is too low.
Err2
Indicates an undetected moving object.
Err3
Indicates a calculation error.
not cPLt
Indicates an interruption of the teach-in.
de:
LED / Fehlerbild Ursache
Err1
Weist auf zu geringe Lichtintensität hin.
Err2
Weist auf ein nicht erfasstes bewegtes Objekt hin.
Err3
Weist auf einen Rechenfehler hin.
not cPLt
Weist auf eine Unterbrechung des Teach-in hin.
it:
LED / figura di errore Causa
Err1
Indica un’intensità di luce troppo bassa.
Err2
Indica un oggetto in movimento non rilevato.
Err3
Indica un errore di calcolo.
not cPLt
Indica un’interruzione del teach-in.
fr:
LED / image du défaut Cause
Err1
Indique une intensité de la lumière trop réduite.
Err2
Indique un objet en mouvement non détecté.
Err3
Indique une erreur de calcul.
not cPLt
Indique une interruption de la procédure d’apprentissage.
es:
LED / imagen de error Causa
Err1
Indica una intensidad luminosa insuficiente.
Err2
Indica un objeto móvil no detectado.
LED / imagen de error Causa
Err3
Indica un error de cálculo.
not cPLt
Indica una interrupción del aprendizaje.
zh-CN:
LED / 故障界面 原因
Err1
表示光强度过低。
Err2
表示有未检测到的移动物体。
Err3
表示计算错误。
not cPLt
表示示教功能中断。
8028371/0537572/
2023/05/16/de
WI130 | SICK 4
Other manuals for WI130
1
Other SICK Accessories manuals

SICK
SICK deTec4 Core User manual

SICK
SICK DME4000 User manual

SICK
SICK WTB26 User manual

SICK
SICK WS34 User manual

SICK
SICK DL100 Pro User manual

SICK
SICK LRS4000 User manual

SICK
SICK PowerProx WTT12L-A Series User manual

SICK
SICK Flexi Loop User manual

SICK
SICK LMS5 Series User manual

SICK
SICK CQF16 User manual