manuals.online logo
Brands
  1. Home
  2. •
  3. Brands
  4. •
  5. SMC Networks
  6. •
  7. Control Unit
  8. •
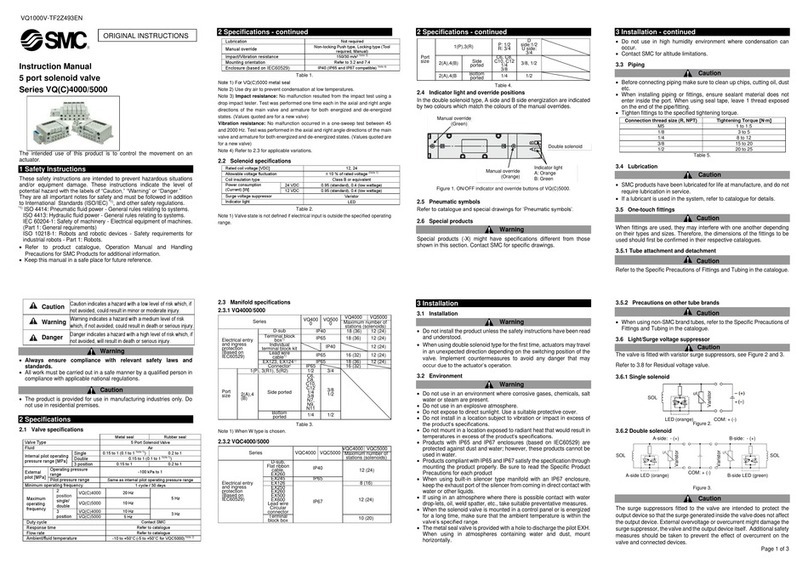
  9. SMC Networks VF1000 Series User manual

SMC Networks VF1000 Series User manual

VF1000-TF2Z509EN
Page 1 of 3
Instruction Manual
5 Port Solenoid Valve
Series VF1000/3000/5000
The intended use of this valve is to control the movement of an actuator.
1 Safety Instructions
These safety instructions are intended to prevent hazardous situations
and/or equipment damage. These instructions indicate the level of
potential hazard with the labels of “Caution,” “Warning” or “Danger.”
They are all important notes for safety and must be followed in addition
to International Standards (ISO/IEC)*1), and other safety regulations.
*1) ISO 4414: Pneumatic fluid power - General rules relating to systems.
ISO 4413: Hydraulic fluid power - General rules relating to systems.
IEC 60204-1: Safety of machinery - Electrical equipment of machines.
(Part 1: General requirements)
ISO 10218-1: Robots and robotic devices - Safety requirements for
industrial robots - Part 1: Robots.
•Refer to product catalogue, Operation Manual and Handling
Precautions for SMC Products for additional information.
•Keep this manual in a safe place for future reference.
Caution
Caution indicates a hazard with a low level of risk which, if
not avoided, could result in minor or moderate injury.
Warning
Warning indicates a hazard with a medium level of risk
which, if not avoided, could result in death or serious injury.
Danger
Danger indicates a hazard with a high level of risk which, if
not avoided, will result in death or serious injury.
Warning
•Always ensure compliance with relevant safety laws and
standards.
•All work must be carried out in a safe manner by a qualified person in
compliance with applicable national regulations.
•If this equipment is used in a manner not specified by the
manufacturer, the protection provided by the equipment may be
impaired. Caution
•The product is provided for use in manufacturing industries only. Do
not use in residential premises.
2 Specifications
2.1 Valve specifications
Model
VF1000
VF3000
VF5000
Fluid
Air
Operating
pressure
range
[MPa]
Standard
2 position single/3 position
0.15 to 0.7
2 position double
0.1 to 0.7
High
pressure
2 position single/3 position
0.15 to 1.0
2 position double
0.1 to 1.0
Ambient and fluid temperature [°C]
-10 to 50 (No freezing)
Flow characteristics
Refer to catalogue
Response time [ms]
Refer to catalogue
Duty cycle
Contact SMC
Min. operating frequency
1 cycle / 30 days
Max. operating
frequency [Hz]
2 position single/double
10
5
3 position
-
3
Low wattage
type
2 position
5
-
3 position
-
3
2 Specification - continued
Manual override
Non-locking push type,
Push-turn locking (slotted/lever) type
Lubrication
Not required
Impact/Vibration resistance [m/s2] Note 1)
300/50 (150/30 for Low wattage type)
Enclosure (based on IEC60529)
IP40 (IP65 Note 2) for D, Y, T)
Mounting orientation
Unrestricted
Weight
Refer to catalogue
Table 1.
Note 1) Impact resistance: No malfunction occurred when it was tested with a drop
tester in the axial direction and at right angles to the main valve and
armature; in both energized and de-energised states and for every time in
each condition. (Values quoted are for a new valve)
Vibration resistance: No malfunction occurred in a one-sweep test between
45 and 2000 Hz. Tests are performed at both energized and de-energized
states in the axial direction and at right angles to the main valve and
armature. (Values quoted are for a new valve).
Note 2) When using IP65, select main/pilot valve common exhaust type.
2.2 Solenoid specifications
Type/Pilot valve
G/H, L/M(N/O)
V211##-###
D(O), Y(O), T
V212##-#
Low wattage
specification
Coil rated
voltage
DC [VDC]
12, 24
AC [VAC]
24
24, 100, 110,
200, 220, 240
100, 110, 200, 220
Electrical entry
Grommet,
L/M-type
plug connector
DIN/Conduit
terminal
Grommet,
L/M-type
plug
connector
DIN terminal
Coil insulation class
Class B
Allowable voltage
fluctuation
±10% of rated voltage Note 1) Note 2) Note 3)
Apparent
power [VA]
Note 4)
24 VAC
1.5 (1.55)
1.5 (1.75)
-
100 VAC
-
1.55 (1.7)
-
0.78 (0.87)
110 VAC
0.86 (0.89)
115 VAC
0.94 (1.07)
200 VAC
1.15 (1.30
220 VAC
1.27 (1.46)
230 VAC
1.39 (1.60)
240 VAC
-
Power
consumption
[W] Note 4)
Standard
1.5 (1.55)
1.5 (1.75)
0.35 (0.4)
0.35 (0.45)
With power
saving
circuit
0.55 Note 5)
Starting 1.55,
Holding 0.55
0.75 Note 5)
Starting 1.75,
Holding 0.75
-
Surge voltage suppressor
Diode (Non-polar type: Varistor)
Indicator light
AC
LED
Neon light
-
Neon light
DC
LED
Table 2.
Note 1) Common solenoid between 110 VAC and 115 VAC, and between 220 VAC
and 230 VAC.
Note 2) Allowable voltage fluctuation is –15% to +5% of the rated voltage for 115
VAC or 230 VAC.
Note 3) Since voltage drops due to the internal circuit in S, Z, T types (with power
saving circuit), the allowable voltage fluctuation should be within the
following range. 24 VDC: –7% to +10% 12 VDC: –4% to +10%.
Note 4) Bracketed values (#) refers to with indicator light.
Note 5) Refer to Specific Product Precautions 4 in catalogue.
2.3 Manifold specifications
2.3.1 Body ported valve manifold
Series
VF1000
VF3000
VF5000
Manifold
VV5F1-30
VV5F1-31
VV5F3-30
VV5F5-20
VV5F5-21
EXH port type
Common
Individual
Common
Common
Common
1(P) size
1/8
1/4
3/8
1/2
2(B), 4(A) size
1/8
1/8, 1/4
1/4, 3/8
1/4, 3/8
3(R/EB),
5 (R/EA) size
1/8
M5 x 0.8
1/4
3/8
1/2
Applicable
valve model
VF1#30
VF1#33
VF3#30
VF3#33
VF5#20
VF5#23
Stations
2 to 20
2 to 10
2 to 15
Table 3.
2.3.2 Base mounted valve manifold
Series
VF3000
VF5000
Manifold
VV5F3-40
VV5F5-40
EXH port type
Common
Common
1(P) size
1/4
3/8
2 Specification - continued
2(B), 4(A) size
1/4
1/4
3(R/EB), 5 (R/EA) size
1/4
3/8
Pilot exhaust (PE) size
-
M5 x 0.8
Applicable valve model
VF3#40, VF3#43
VF5#44
Stations Note 1)
2 to 20
2 to 10-
Table 4.
Note 1) Supply pressure to 1(P) ports and exhaust pressure from R ports on both
sides for 10 or more station for VF3000, or for 5 or more stations for
VF5000.
2.4 Pneumatic symbol
Refer to catalogue.
2.5 Indicator light
Refer to catalogue for indicator light location.
2.6 Special products Warning
Special products (-X) might have specifications different from those
shown in this section. Contact SMC for specific drawings.
3 Installation
3.1 Installation Warning
•Do not install the product unless the safety instructions have been read
and understood.
3.2 Environment Warning
•Do not use in an environment where corrosive gases, chemicals, salt
water or steam are present.
•Do not use in an explosive atmosphere.
•Do not expose to direct sunlight. Use a suitable protective cover.
•Do not install in a location subject to vibration or impact in excess of
the product’s specifications.
•Do not mount in a location exposed to radiant heat that would result in
temperatures in excess of the product’s specifications.
•Products compliant with IP65 enclosures are protected against dust
and water, however, these products cannot be used in water.
•Products compliant with IP65 enclosures satisfy the specifications by
mounting each product properly. Be sure to read the Specific Product
Precautions for each product.
3.3 Piping Caution
•Before connecting piping make sure to clean up chips, cutting oil, dust
etc.
•When installing piping or fittings, ensure sealant material does not
enter inside the port. When using seal tape, leave 1 thread exposed
on the end of the pipe/fitting.
•Tighten fittings to the specified tightening torque.
Model
Port
Thread
Tightening
torque [N·m]
Body ported VF1000
(Low wattage specification)
1(P), 2(B), 3(EB),
4(A), 5(EA)
M5
1 to 1.5
Body ported VF1000 (Standard)
3(EB), 5(EA)
1(P), 2(B), 4(A)
1(P), 2(B), 4(A)
1/8
3 to 5
Body ported VF3000
(Standard/Low wattage specification)
3(EB), 5(EA)
1(P), 2(B), 4(A)
1(P), 2(B), 4(A)
1/4
8 to 12
Base mounted VF3000 sub-plate
(Standard/Low wattage specification),
Body ported/Base mounted VF5000
sub-plate
1(P), 2(B), 3(EB),
4(A), 5(EA)
1(P), 2(B), 3(EB),
4(A), 5(EA)
3/8
15 to 20
Base mounted VF5000 sub-plate
1(P), 2(B), 3(EB),
4(A), 5(EA)
1/2
20 to 25
Table 5.
•Refer to 2.3 for manifold port sizes.
3 Installation - continued
3.3.1 One-touch fittings Caution
When fittings are used, they may interfere with one another depending
on their types and sizes. Therefore, the dimensions of the fittings to be
used should first be confirmed in their respective catalogues. Refer to
catalogue for fittings compliant with VF series. If the fitting within the
applicable range is selected, there will not be any interference.
3.3.2 Precautions on other tube brands
Caution
Refer to the Specific Product Precautions in the fittings and tubing
catalogue.
3.4 Lubrication Caution
•SMC products have been lubricated for life at manufacture, and do not
require lubrication in service.
•If a lubricant is used in the system, refer to catalogue for details.
3.5 Air supply Warning
•Use clean air. If the compressed air supply includes chemicals,
synthetic materials (including organic solvents), salinity, corrosive gas
etc., it can lead to damage or malfunction.
Caution
•Install an air filter upstream of the valve. Select an air filter with a
filtration size of 5 μm or smaller.
3.6 Manual override Warning
•Regardless of an electric signal for the valve, the manual override is
used for switching the main valve. Since connected equipment will
operate when the manual override is activated, confirm that conditions
are safe prior to activation.
•Locked manual overrides might prevent the valve responding to being
electrically de-energised or cause unexpected movement in the
equipment.
•Refer to the catalogue for details of manual override operation.
•Do not apply excessive torque when turning the locking type manual
override (0.1 N·m or less).
3.7 Mounting Caution
•Ensure gaskets are in good condition, not deformed and are dust and
debris free.
•When mounting valves ensure gaskets are present, aligned and
securely in place and tighten the M4 (M4 x 39.5 for VF1000/3000, M4
x 48 for VF5000) mounting screws to a torque of 1.4 N∙m.
3.8 Electrical circuits Caution
•Surge suppression should be specified by using the appropriate part
number. If a valve type without suppression (Type ‘Nil’) is used,
suppression must be provided by the host controller as close as
possible to the valve.
•Please connect correctly the lead wires to + (positive) and –(negative)
indications on the connector. (For non-polar type, the lead wires can
be connected to either one.)
•When the valve with polarity protection diode is used, the voltage will
drop by approx. 1 V. Therefore, pay attention to the allowable voltage
fluctuation (For details, refer to thesolenoid specifications of each type
of valve).
•Solenoids, whose lead wires have been pre-wired: + (positive) side red
and –(negative) side black.
ORIGINAL INSTRUCTIONS
VF1000-TF2Z509EN
Page 2 of 3
3 Installation - continued
3.8.1 DC - Polar type
Figure 1. With surge voltage
suppressor (#S)
Figure 3. DIN or Conduit terminal with light/surge voltage suppressor
(Standard type #Z)
3.8.2 DC - Non-polar type
Figure 4. With surge voltage suppressor
(Standard #R/Low wattage type #R, #S)
Figure 6. DIN or Conduit terminal with light/surge voltage suppressor
(Standard #U/Low wattage type #Z)
3.8.3 Power saving
Figure 7. Power saving circuit
Note) Effective energizing time is over 40 ms at 24 VDC. Refer to catalogue for
details of the electrical power waveform.
3 Installation - continued
3.8.4 AC
Figure 8. Grommet or L/M-type plug
with light/surge voltage suppressor (#Z)
3.9 Electrical connectors Caution
3.9.1 DIN terminal
•Refer to catalogue for how to use DIN connector.
•Refer to catalogue for how to change DIN connector direction.
•Applicable cable diameter O.D.: ø3.5 to ø7.
3.9.2 DIN (EN175301-803) terminal
Y type DIN terminal corresponds to the DIN connector with terminalpitch
10 mm, which complies with EN175301-803B. Since the terminal pitch is
different from the D type DIN connector, these two types are not
interchangeable.
Y Type D type
Figure 10. D/Y type DIN terminal diagram
Figure 11. DIN connector assembly (Standard type)
Figure 12. DIN connector assembly (Low wattage specification)
3 Installation - continued
Figure 13. DIN connector pin wiring diagram
3.9.3 Conduit terminal
•Refer to catalogue for how to use Conduit terminal.
•For polar type refer to terminal polarity shown in figure 14.
•Applicable cable diameter O.D.: ø4.5 to ø7.
Figure 14. Conduit terminal assembly
3.9.4 L/M-Type plug connector
Refer to catalogue for how to order and how to use plug connector
assembly
Figure 15. Connector attachment/detachment (standard type)
Figure 16. Connector attachment/detachment (low wattage type)
3 Installation - continued
Figure 17. Crimping lead wire and socket connection
Standard type
Figure 18. Socket with lead wire attachment/detachment
3.10 Residual voltage Caution
•If a diode or varistor voltage suppressor is used, the suppressor arrests
the back EMF voltage from the coil to the level indicated in Table 6.
•Ensure the transient voltage is within the specification of the host
controller.
•Valve response time is dependent on surge suppression method
selected.
Surge voltage
suppressor
DC
AC
24 V
12 V
Diode
Approx. 1 V
Approx. 1 V
Varistor
Approx. 47 V
Approx. 32 V
-
Table 6.
3.11 Countermeasure for surge voltage
Caution
•At times of sudden interruption of the power supply, the energy stored
in a large inductive device may cause non-polar type valves in a de-
energised state to switch.
•When installing a breaker circuit to isolate the power, consider a valve
with polarity (with polarity protection diode), or install a surge
absorption diode across the output of the breaker.
3.12 Extended period of continuous energization
Warning
•If a valve will be continuously energized for an extended period of time,
the temperature of the valve will increase due to the heat generated by
the coil assembly. This will likely adversely affect the performance of
the valve and any nearby peripheral equipment. Therefore, if the valve
is to be energized for periods of longer than 30 minutes at a time or if
during the hours of operation the energized period per day is longer
than the de-energized period, we advise using a valve with
specifications listed below.
•Pilot operated: A 0.4 W or lower valve, such as the SY series, or a
valve with a power-saving circuit.
3.13 Effect of back pressure when using a manifold
Warning
•Use caution whenvalves are used on a manifold, because an actuator
may malfunction due to back-pressure.
•Special caution must be taken when using 3 position exhaust centre
valve or when driving a single acting cylinder. To prevent a
malfunction, implement counter measures such as using a single EXH
spacer assembly or an individual exhaust manifold.
4 How to Order
Refer to catalogue for ‘How to Order’.
5 Outline Dimensions
Refer to catalogue for outline dimensions.
Polarity protection diode
Red
Red
Polarity protection diode
LED
Coil
Coil
Diode
Diode
Black
Black
Polarity protection diode
Diode
Coil
For DIN type, installed in the connector
LED
Coil
Varistor
Varistor
Coil
LED
For DIN type, installed in the connector
Polarity protection diode
Coil
LED
Diode
PWM circuit
Varistor
Coil
Varistor
Coil
LED
Neon light
(LED for 24 VAC)
For DIN type, installed
in the connector
Figure 2. Grommet or L/M-type plug
with light/surge voltage suppressor (#Z)
Figure 5. Grommet or L/M-type plug
with light/surge voltage suppressor (#U)
Coil
Varistor
LED
Figure 9. DIN or Conduit terminal with
light/surge voltage suppressor (#Z)
Ground nut
Tightening torque
2.5 to 3.75 N∙m
Washer
Grommet
Voltage
symbol
Location for
mounting light
Polarity indication
Terminal screw 3 locations
Tightening torque
0.4 to 0.5 N∙m
Terminal block
Housing
Set screw
Tightening torque
0.5 to 0.6 N∙m
+ -
1 2
1 2
Ground
LED
LED
NL
R
R
R
D
D: Protective diode R: Resistor NL: Neon light
Washer
Set screw
Tightening torque
0.5 to 0.6 N∙m
Terminal block
cover
Grommet
(Rubber)
Ground nut
Tightening torque
2.5 to 3.75 N∙m
Ground terminal screw
Tightening torque
0.5 to 0.6 N∙m
Terminal screw
2 locations
Tightening torque
0.5 to 0.6 N∙m
(+) (-)
Ground
Ground
Grommet
Washer
Rating
symbol
Gland nut
Tightening torque
1.65 to 2.5 N∙m
Holding screw
Tightening torque
0.4 N∙m
Housing
Terminal block
Location for
mounting light
Notch
Figure of notch
Terminal screw 3 locations
Tightening torque
0.2 to 0.25 N∙m
Pin
Lead wire
Socket
Connector
Lever
Groove
Cover
Cover
Groove
Pin
DC polarity
indication
Lever
Core wire crimping area
Crimping area
Hook
Core wire
Lead wire
0.2 to 0.33 mm2
Max. cover diameter: ø1.9 mm (standard type)
Max. cover diameter: ø1.7 mm (low wattage type)
Socket
(DXT170-71-1)
Covering
Cover
Groove
Connector
DC polarity
indication
Socket
Part no. DXT170-71-1
Lead wire
Hook
Lever
Cover
Groove
Pin
Pin
Socket
Lead wire
Connector
Hook
Insert a socket into square hole
Not in use
Connector
Hook
Lead wire
Socket
Low wattage
AC (#Z / Low
wattage type)
DC (#Z)
DC (#U / Low
wattage type)
VF1000-TF2Z509EN
Page 3 of 3
6 Maintenance
6.1 General maintenance Caution
•Not following proper maintenance procedures could cause the product
to malfunction and lead to equipment damage.
•If handled improperly, compressed air can be dangerous.
•Maintenance of pneumatic systems should be performed only by
qualified personnel.
•Before performing maintenance, turn off the power supply and be sure
to cut off the supply pressure. Confirm that the air is released to
atmosphere.
•After installation and maintenance, apply operating pressure and
power to the equipment and perform appropriate functional and
leakage tests to make sure the equipment is installed correctly.
•If any electricalconnections are disturbed during maintenance, ensure
they are reconnected correctly and safety checks are carried out as
required to ensure continued compliance with applicable national
regulations.
•Do not make any modification to the product.
•Do not disassemble the product, unless required by installation or
maintenance instructions.
6.2 Mounting Caution
Refer to 3.7 Mounting for how to mount valve to sub-plate or manifold.
6.3 Maintainable parts Caution
•Refer to catalogue for how to order pilot for how to order and replace
pilot valves (Not available for Low wattage specification valves).
Recommended tightening torque for M2.5 pilot valve mounting screws:
0.32 N∙m.
•Refer to catalogue for how to order gaskets, mounting screws,
manifold accessories, electrical connector assemblies and sub-plates.
7 Limitations of Use
7.1 Limited warranty and disclaimer/compliance requirements
Caution
Refer to Handling Precautions for SMC Products.
Warning
7.2 Effect of energy loss on valve switching
Single solenoid
Double solenoid
3 Position
Air supply
present,
electrical
supply cut
Spool returns to the
OFF position by air
and spring force
Spool stops moving
after electricity cut
(Position cannot be
defined)
Spool returns to the
OFF position by
spring force
Electrical
supply
present, air
supply cut
Spool stops moving
after air pressure cut
(Position cannot be
defined)
Spool stops moving
after air pressure cut
(Position cannot be
defined)
Spool returns to the
OFF position by
spring force
Table 7.
Note) Applies to when the spool is at the end position and at an intermediate
position.
7.3 Cannot be used as an emergency shut-off valve
This product is not designed for safety applications such as an
emergency shut-off valve. If the valves are used in this type of system,
other reliable safety assurance measures should be adopted.
7.4 Intermediate stopping
Refer to Handling Precautions for 3/4/5 port Solenoid Valves.
7.5 Holding of pressure
Since valves are subject to air leakage, they cannot be used for
applications such as holding pressure (including vacuum) in a system.
Caution
7.6 Leakage voltage
Ensure that any leakage voltagecaused by the leakage current when the
switching element is OFF causes ≤ 3% (for DC coils) or ≤ 8% (for AC
coils) of the rated voltage across the valve.
7 Limitations of Use - continued
7.7 Low temperature operation
Unless otherwise indicated in the specifications for each valve, operation
is possible to -10˚C, but appropriate measures should be taken to avoid
solidification or freezing of drainage and moisture, etc.
7.8 Momentary energization
If a double solenoid valve is operated with momentary energization, it
should be energized for at least 0.1 second. However, depending on the
secondary load conditions, it should be energized until the cylinder
reaches the stroke end position, as there is a possibility of malfunction
otherwise.
8 Product Disposal
This product shall not be disposed of as municipal waste. Check your
local regulations and guidelines to dispose this product correctly, in order
to reduce the impact on human health and the environment.
9 Contacts
Refer to www.smcworld.com or www.smc.eu for your local
distributor/importer.
URL : https:// www.smcworld.com (Global) https:// www.smc.eu (Europe)
SMC Corporation, 4-14-1, Sotokanda, Chiyoda-ku, Tokyo 101-0021, Japan
Specifications are subject to change without prior notice from the manufacturer.
© 2022 SMC Corporation All Rights Reserved.
Template DKP50047-F-085M

This manual suits for next models

2

Other SMC Networks Control Unit manuals

SMC Networks SY3000 SERIES Installation manual

SMC Networks

SMC Networks SY3000 SERIES Installation manual

SMC Networks VF1000 Series Manual

SMC Networks

SMC Networks VF1000 Series Manual

SMC Networks VKF300 Series Manual

SMC Networks

SMC Networks VKF300 Series Manual

SMC Networks VX21 Manual

SMC Networks

SMC Networks VX21 Manual

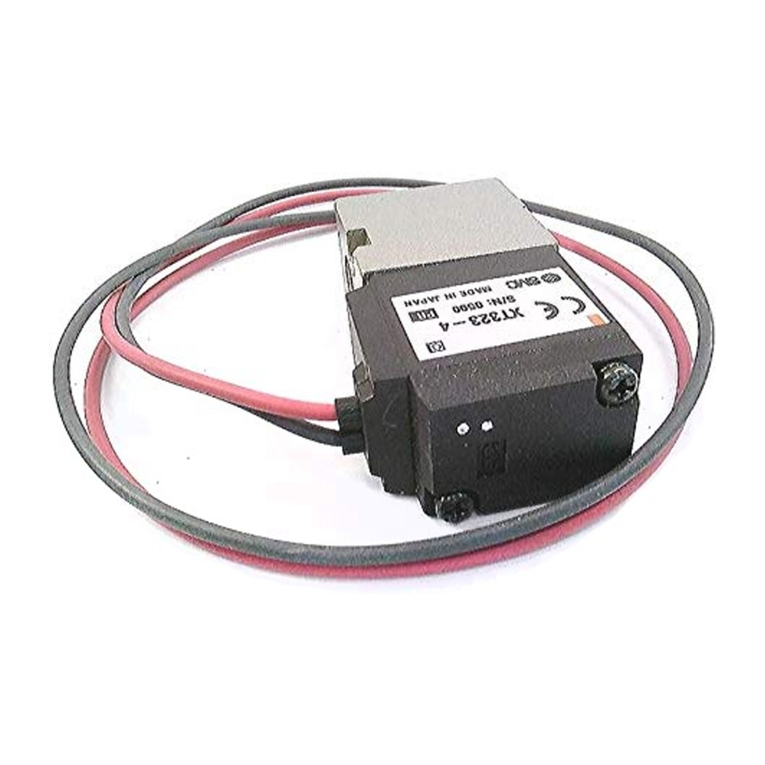
SMC Networks XT323-4 User manual

SMC Networks

SMC Networks XT323-4 User manual

SMC Networks S070 Series Manual

SMC Networks

SMC Networks S070 Series Manual

SMC Networks IL220 Series User manual

SMC Networks

SMC Networks IL220 Series User manual

SMC Networks VDW 10 Manual

SMC Networks

SMC Networks VDW 10 Manual

SMC Networks 56-VQC1000 Series Manual

SMC Networks

SMC Networks 56-VQC1000 Series Manual

SMC Networks LLB1 Series User manual

SMC Networks

SMC Networks LLB1 Series User manual

SMC Networks AVA2000 Series User manual

SMC Networks

SMC Networks AVA2000 Series User manual

SMC Networks EX260 Series User manual

SMC Networks

SMC Networks EX260 Series User manual

SMC Networks LLB4 User manual

SMC Networks

SMC Networks LLB4 User manual

SMC Networks VT325 Series User manual

SMC Networks

SMC Networks VT325 Series User manual

SMC Networks VHS20 Series User manual

SMC Networks

SMC Networks VHS20 Series User manual

SMC Networks SYJA300 Series User manual

SMC Networks

SMC Networks SYJA300 Series User manual

SMC Networks XGTP31 50336 Series User manual

SMC Networks

SMC Networks XGTP31 50336 Series User manual

SMC Networks VFS2100 Manual

SMC Networks

SMC Networks VFS2100 Manual

SMC Networks VXF2 Series User manual

SMC Networks

SMC Networks VXF2 Series User manual

SMC Networks 50-VFE User manual

SMC Networks

SMC Networks 50-VFE User manual

SMC Networks SYA5000 Series User manual

SMC Networks

SMC Networks SYA5000 Series User manual

SMC Networks VTA301 Series User manual

SMC Networks

SMC Networks VTA301 Series User manual

SMC Networks EX140-SMJ1 Series User manual

SMC Networks

SMC Networks EX140-SMJ1 Series User manual

SMC Networks SY3000 SERIES User manual

SMC Networks

SMC Networks SY3000 SERIES User manual

Popular Control Unit manuals by other brands

Omron 3G3FV-PPG Series instruction sheet

Omron

Omron 3G3FV-PPG Series instruction sheet

Power Gear 909510000 quick start guide

Power Gear

Power Gear 909510000 quick start guide

GREE ELECTRIC GRJWB65-J manual

GREE ELECTRIC

GREE ELECTRIC GRJWB65-J manual

Siemens SINAMICS PM230 Getting started guide

Siemens

Siemens SINAMICS PM230 Getting started guide

Burkert 2006 operating instructions

Burkert

Burkert 2006 operating instructions

Acromag IP511 Series user manual

Acromag

Acromag IP511 Series user manual

IEI Technology IVC-168G Quick installation guide

IEI Technology

IEI Technology IVC-168G Quick installation guide

Siemens SINUMERIK 840D sl operating manual

Siemens

Siemens SINUMERIK 840D sl operating manual

RadioPopper L-358 quick start guide

RadioPopper

RadioPopper L-358 quick start guide

Winsen MH-Z19 user manual

Winsen

Winsen MH-Z19 user manual

CALEFFI 676 Seies manual

CALEFFI

CALEFFI 676 Seies manual

urmet domus Yokis MEP2000E manual

urmet domus

urmet domus Yokis MEP2000E manual

jbc NAU instruction manual

jbc

jbc NAU instruction manual

Honeywell VS8510 manual

Honeywell

Honeywell VS8510 manual

Kilsen KAL714C Installation sheet

Kilsen

Kilsen KAL714C Installation sheet

Saunum leil plus Instructions for use and installation

Saunum

Saunum leil plus Instructions for use and installation

TECOM TS0820 Installation sheet

TECOM

TECOM TS0820 Installation sheet

Watts LFM110-10 manual

Watts

Watts LFM110-10 manual

manuals.online logo
manuals.online logoBrands
  • About & Mission
  • Contact us
  • Privacy Policy
  • Terms and Conditions

Copyright 2025 Manuals.Online. All Rights Reserved.