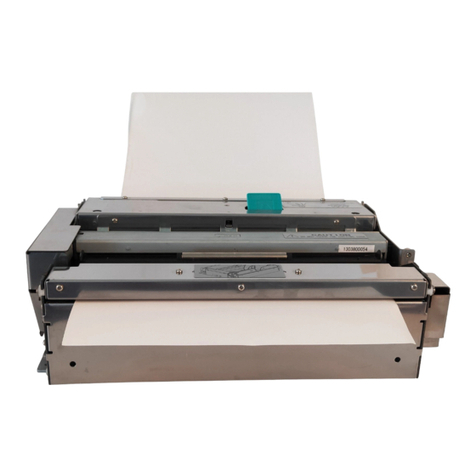
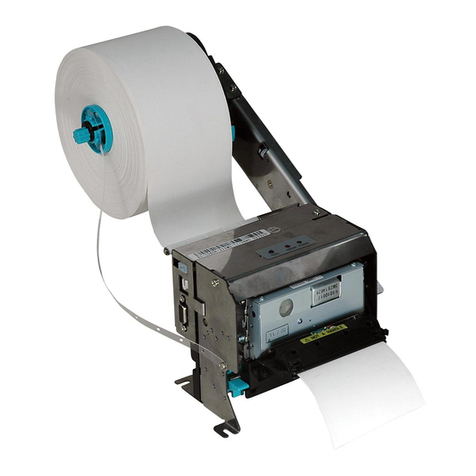
SNBC BT-UC056III User manual

USER’S MANUAL
Thermal Printer
BT-UC056Ⅲ
Shandong New Beiyang Information Technology Co., Ltd.

BT-UC056ⅢUser’s Manual
1
Declaration
Information in this document is subject to change without notice. SHANDONG NEW BEIYANG
INFORMATION TECHNOLOGY CO., LTD. (hereinafter referred to as “SNBC”) reserves the right to
improve product as new technology, components, software, and firmware become available. If users need
further data about this product or have any doubt about safety issues that might arise from using it, please
feel free to contact your dealer.
No part of this document may be reproduced or transmitted in any form or by any means, electronic or
mechanical, for any purpose without the express written permission of SNBC.
Copyright
Copyright © 2013 by SNBC.
Printed in China.
Version 1.0.
Trademarks
Our registered trademark is .
Warnings and Cautions
Warning: Items shall be strictly followed to avoid damages to body and equipment;
Caution: Items with important information and prompts for operating the printer.
SNBC has passed following certifications:
ISO9001 Quality Control System Certification
ISO14001 Environmental Management System Certification
OHSAS18001 Occupational Health and Safety Management System Certification
IECQ QC 080000 Hazardous Substance Process Management System Certification

BT-UC056ⅢUser’s Manual
2
General Safety Information
Pay attention to the following instructions before using the printer.
1. Safety Instructions
Caution: The print head is calorific and its temperature is high when printing or just after operation, so
please don’t touch it or its peripherals for safety purpose;
Warning: The print head is an ESD-sensitive device. To avoid damage, do not touch either its printing
parts or connecting parts.
2. Caution
1) Install the printer on a flat and stable surface.
2) Reserve adequate space around the printer so that the operation and maintenance can be performed
conveniently.
3) Keep the printer far away from water source.
4) Do not locate or reserve the printer in an environment with high temperature, humidity and highly
polluted. Keep printer out of direct sunlight, highlight and heat source.
5) Do not place the printer in a place exposed to vibration and impact.
6) No dew condensed on the printer. If there is, do not turn on the printer until the dew has boiled away.
7) Plug power cord into a suitable ground outlet. Avoid sharing one electrical outlet with large power
motors and other devices that may cause the fluctuation of voltage.
8) Unplug the power cord when the printer will be laid aside for a long time.
9) Prevent water or conductive substance goes into the printer. In case this happens, switch off the
electricity immediately.
10) Never print if there is no recording paper to avoid damaging platen roller and print head.
11) It is suggested to use the recommended print media or equivalent media to ensure quality print and
printer lifetime.
12) Adjust the print density as light as possible to keep the print head durable.
13) Do not disassemble the print unit of your own, even for repairing purpose.

BT-UC056ⅢUser’s Manual
3
CONTENTS
1 Introduction................................................................................................................................................ 1
1.1 Outline................................................................................................................................................. 1
1.2 Main Features ..................................................................................................................................... 1
2 Main Specifications.................................................................................................................................... 2
2.1 Technical Specifications ...................................................................................................................... 2
2.2 Media Specifications............................................................................................................................ 2
3 Physical Appearance and Dimension ........................................................................................................ 3
3.1 Appearance ......................................................................................................................................... 3
3.2 Printer Unit Description ....................................................................................................................... 4
3.3 LED and Buzzer Description ............................................................................................................... 5
3.4 Printer Physical Dimension ................................................................................................................. 6
4 Printer Operation ....................................................................................................................................... 7
4.1 Paper Loading ..................................................................................................................................... 7
4.2 Paper Calibration................................................................................................................................11
4.3 Print Configuration Page ....................................................................................................................11
5 Routine Maintenance .............................................................................................................................. 12
5.1 Cleaning the Print Head .................................................................................................................... 12
5.2 Cleaning the Sensors ........................................................................................................................ 12
5.3 Cleaning Platen Roller....................................................................................................................... 12
6 Troubleshooting....................................................................................................................................... 13
6.1 LED and Buzzer ................................................................................................................................ 13
6.2 Problems during printing ................................................................................................................... 13
6.3 Printer does not work ........................................................................................................................ 13

BT-UC056ⅢUser’s Manual
1
1 Introduction
1.1 Outline
BT-UC056 printer is a kind of high-performance thermal printer which supports liner-free label. It has
following features: high-speed, low-noise, reliable performance and easy maintenance, etc, and it can be
widely used in various fields requiring real-time label or receipt printing, such as electronic scale and so on.
1.2 Main Features
¾Easy operation, low maintenance
¾Durable metal frame structure
¾Compact size
¾High speed, low noise
¾Large paper roll capacity with Max. roll OD 100mm
¾Equipped with anti-jam paper sensor
¾Supports on-line updating

BT-UC056ⅢUser’s Manual
2
2 Main Specifications
2.1 Technical Specifications
Item Specifications
Model BT-UC056Ⅲ
Print mode Direct thermal line
Print speed 75mm/s
Print width 56mm
Paper width 60mm (Max.)
Resolution 203DPI
Paper type Thermal paper and liner-free label paper
Paper out method Tear off
Print head temperature detection Thermistor
Print head position detection Microswitch
Paper detection Photoelectric sensor
Max. paper roll OD 100mm
Paper roll ID 25.4mm
Print head lifetime 50km (40×60mm liner-free label, default print density, duty ratio:
12.5%)
Power supply +24V±7%
Average current 1.1A(duty ratio: 12.5%)
Operating temperature +5℃~45℃
Operating humidity 20-90%RH
2.2 Media Specifications
¾Media type: liner-free label paper
¾Paper width: Max. 60mm
¾Paper roll OD: Max. 100mm
¾Thermal surface: Outside
¾Paper roll core OD: Min. 25.4mm
Caution:
Please use the recommended paper type or its equivalents. Using the lower quality paper types might
affect the print quality and shorten print-head life;
Never glue paper to paper supply reel or base paper rewinder reel;
If the paper is contaminated by chemical or oil, it may discolor or lose heat sensitivity at the polluted
spot, which will affect the print affect;
Do not rub the paper surface strongly against hard objects, otherwise it may discolor;
When the temperature goes up to 70℃, paper will discolor, thus don’t use or store paper under high
temperature, high humidity and strong light conditions.

BT-UC056ⅢUser’s Manual
3
3 Physical Appearance and Dimension
3.1 Appearance
1-Power LED 2-Error LED 3- Button
4-Top cover module 5-Tear-off bar 6-Paper exit
7-Top cover open spanner 8-Paper roll release axis 9-Circuit board module
10-Button circuit board 11-Print head micro switch 12-Tension spring for top cover opening
13-Transmission gear 14-Step motor 15-Serial interface socket
16-Power socket 17-Rotation roller 18-Paper end sensor
19-Paper jam sensor 20-Platen roller 21-Print head
22-Top cover locking hook 23-Hook locking axis
Obverse side view Reverse side view
Print head lift up

BT-UC056ⅢUser’s Manual
4
3.2 Printer Unit Description
1) Paper End Sensor (18): Paper presence/absence detection
2) Paper jam Sensor (19): Paper jam detection
3) Key Function (3):
Continuous paper feed mode
zIn standby mode, printer feeds paper after pressing this button;
zPress this button and turn on the printer, the printer will perform paper calibration.
zIf occurs paper feeding or calibration error, press this button to clear the errors.
4) Power Status Indicator (1)
Display power on/off status
5) Alarm LED (2)
Display printer status. Under normal status, alarm LED is off; under error status (like paper end, etc.),
alarm LED will flash.
6) Serial Interface Socket (see the picture below)
Interface cable is customized and interface connector is 4P single row with 2.54 double-end cable. Pin
assignments are as following.
Pin Signal Direction Function
1 RTS/DTR output Serial handshaking signal
2 TXD Output Serial data output port
3 RXD Input Serial data input port
4 GND ―― Signal ground
7) Power Socket
2P 3.96 socket is used on printer port. (The upper one is Pin 1 for normally placed printer).
Figure below displays the cable wiring.
Pin Signal Direction Function
1 +24V Input Power supply+24V
2 GND Output Power supply GND

BT-UC056ⅢUser’s Manual
5
3.3 LED and Buzzer Description
Error messages displayed by alarm LED and buzzer are described as below.
Problem
Status LED
Buzzer
Solution or Reason
Print head
overheated
Self- recover when print head
cool down.
Voltage
abnormal
Self-recover when voltage back
to normal.
Print head lift up
Reserved function. Self-recover
when print head is pressed down.
Paper out
Self-recover after loading paper
Calibration error
Press the button to continue or
repower the printer.
Label positioning
error
Press the button to continue or
repower the printer.
Paper jam
Lift up the print head and clear
the jammed paper, then printer
recovers after pressing down the
print head.
The temperature of print head is detected by a thermal resistor. If the print head is overheating, the
protective circuit will shut off the power and force the printer to stop printing; the temperature of print head
when printing is stopped is 65 .℃

BT-UC056ⅢUser’s Manual
6
3.4 Printer Physical Dimension
Printer Physical Dimension

BT-UC056ⅢUser’s Manual
7
4 Printer Operation
4.1 Paper Loading
1) Pull paper roll guide out of paper roll supply reel as displayed in the figure below.
Attention: Hold fast the bottom of paper roll guide.
2) Rotate the paper roll guide to horizontal condition as shown in the figure below.
3) Load the proper paper roll to the paper roll supply reel.

BT-UC056ⅢUser’s Manual
8
Attention: Paper roll should be pushed to the end of paper roll supply reel. Paper roll rotates in
the direction as shown in the above figure. Pay attention to its direction while loading the paper
roll.
4) Rotate the paper roll guide to vertical status as shown in the figure below. Hold fast the bottom of
paper roll guide and push it to side of paper roll, and ensure the roll would not move back and forth
along the paper roll supply reel.
5) Move the adjustable paper guide to horizontal stutus as shown in the figure below.

BT-UC056ⅢUser’s Manual
9
6) Lift up the top cover as shown in the figure below.
7) Lead the liner-free label paper through the paper path from the side.

BT-UC056ⅢUser’s Manual
10
Attention: Paper will distort when feeds it, thus be careful not to tear off the paper and make
sure the front end of paper pass the platen roller.
8) Press down the print head as shown in the figure below.
Attention: Hold the middle inner part of top cover while pressing down the print head to avoid
deformation of top cover rotation shaft and affecting print output.
9) Move adjustable paper guide to vertical status and push to proper position according paper width as
shown in the figure below.

BT-UC056ⅢUser’s Manual
11
Caution:
Make sure the paper type setup before loading. Printer default paper type is liner-free paper with mark
at its back (see command set).
Label heat sensitive side should face print head. Label width could not wider than paper path. Label
should close to sensor with no skew.
Anytime when label stick to paper path, clear it immediately to avoid paper jam.
4.2 Paper Calibration
Paper calibration should be performed when following cases occur.
¾Printer is used for the first time;
¾Load new type paper roll;
¾Marks cannot be identified correctly;
¾No alarm when paper out;
¾Print discontinued because of wrong paper end detection.
Follow the below steps for paper calibration:
1) Load paper roll according to continuous paper loading method.
2) Hold feed button when power on the printer until printer starts printing.
Attention: If printer alarms after calibration, it means calibration error, then you should check if the
paper roll type and loading method are correct or not.
4.3 Print Configuration Page
Method for printing configuration page is the same with paper calibration.
Hold feed button when power on the printer, if the current printer setting is marked paper, the printer will
perform paper calibration firstly, and then it will start to print configuration page if keep holding the feed
button at this time; if the current printer setting is continuous paper, printer will directly print configuration
page.

BT-UC056ⅢUser’s Manual
12
5 Routine Maintenance
5.1 Cleaning the Print Head
When one or more of the following cases occur, clean the print head:
¾Printout is not clear.
¾One of the printed columns is not clear.
¾Paper feeds and retracts with big noise.
Follow the steps given below to clean the print head.
1) Turn off the printer and lift up the print head.
2) Wait for print head to cool down completely when it has just finished the printing.
3) Wipe off dust and stains on the surface of print head with soft cotton cloth dipped with pure alcohol (it
should be wrung out).
5.2 Cleaning the Sensors
When one or more of the following cases occur, clean the sensors:
¾Printer occasionally discontinued printing task and alarm wrong error message for paper end.
¾Paper end without alarm.
¾Marks cannot be identified correctly.
Follow the steps given below to clean the sensors.
1) Turn off the printer.
2) Wipe off dust and stains on the surface of sensor with soft cotton cloth dipped with pure alcohol (it
should be wrung out).
5.3 Cleaning Platen Roller
When one or more of the following cases occur, clean the platen roller.
¾Printout is not clear.
¾One of the printed columns is not clear.
¾Paper feeds and retracts with big noise.
Follow the steps given below to clean the platen roller.
1) Turn off the printer.
2) Wait for print head to cool down completely when it has just finished the printing.
3) Wipe off dust and stains on the surface of platen roller with soft cotton cloth dipped with pure alcohol (it
should be wrung out).
Caution:
Make sure the printer is turned off before routine maintenance.
Never touch the print head with hands or metal objects. Never use sharp instruments, like tweezers, to
scratch print head or platen roller.
Never use organic solvent, like gasoline, acetone, etc. to clean the print head.
Wait until the alcohol evaporated, then turn on the printer to continue the printing.

BT-UC056ⅢUser’s Manual
13
6 Troubleshooting
Refer to this chapter for solution when a problem occurs. If the problem still cannot be solved, please
contact your local dealer or SNBC for assistance.
6.1 LED and Buzzer
Problems Reason Solution
Paper end Reload new paper roll.
Paper calibration error Check if the paper type is correct or not.
Marks cannot be identified
correctly Perform paper calibration again.
Top cover lifts up. Close top cover.
LED flashes and buzzer beeps
Print head is overheated Turn off the printer, and wait the print head to cool
down.
Buzzer beeps once Initializing
Alarm LED flashes and buzzer
beeps Serious problem occurs Please contact your local distributor or SNBC.
6.2 Problems during printing
Problems Reason Solution
Paper output is abnormal Paper jam Open top cover. Check paper path and clear
jammed paper.
Printing suspended Paper jam Open top cover. Check paper path and clear
jammed paper.
Paper roll is not loaded
properly. Check if the paper roll is loaded properly.
Paper used is not correct. Change for recommended paper roll.
Printout is unclear or dirty.
Print head or platen roller is
dirty. Clean print head or platen roller.
Print head or platen roller is
dirty. Clean print head or platen roller.
Column printing missed
Print head error. Please contact your local distributor or SNBC.
6.3 Printer does not work
Problems Reason Solution
Power switch is turned on, but
printer does not work. Printer is not turned on.
Check if the both ends of power cord are
connected well or not; check if both the printer and
power supply is turned on.
Table of contents
Other SNBC Printer manuals
SNBC
SNBC BK-T6112 User manual
SNBC
SNBC BTP-P36 User manual

SNBC
SNBC BTP-2002NP User manual
SNBC
SNBC BTP-P33 User manual
SNBC
SNBC BTP-M300 User manual

SNBC
SNBC BT-UC156 User manual

SNBC
SNBC BTP-R880NPI User manual
SNBC
SNBC BTP-L580IIC User manual

SNBC
SNBC BTP-M300 Owner's manual

SNBC
SNBC BTP-R180II User manual
SNBC
SNBC BTP-R681 User manual

SNBC
SNBC BTP-R580 User manual
SNBC
SNBC BTP-R990 User manual

SNBC
SNBC BTP-M280 User manual

SNBC
SNBC BTP-R180II Owner's manual

SNBC
SNBC BTP-2002NP User manual

SNBC
SNBC BTP-R580II Owner's manual
SNBC
SNBC BTP-R880NP Owner's manual
SNBC
SNBC BTP-R180II User manual
SNBC
SNBC BT-T080 Owner's manual

