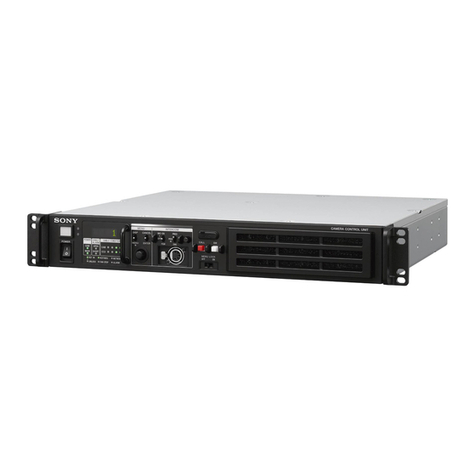
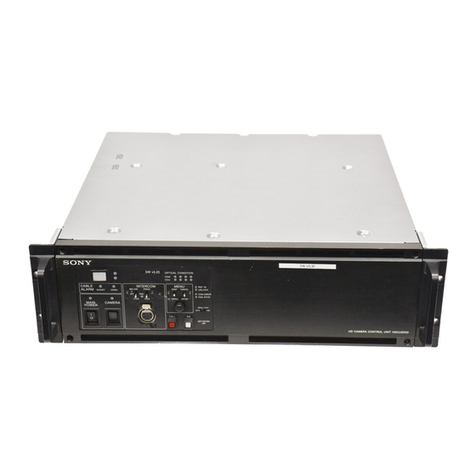
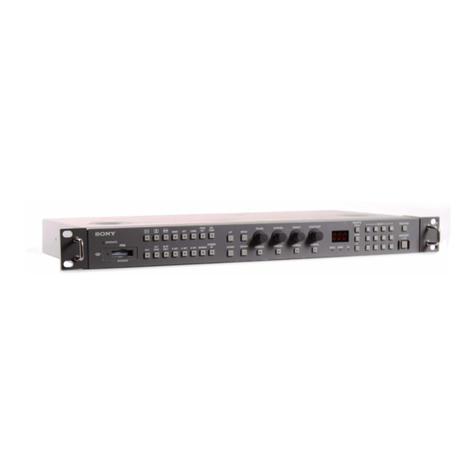
Sony SVRM-911 User manual

1997 by Sony Corporation
3-861-355-03(1)
取扱説明書 2ページ J
Operating Instructions Page 14 EN
Mode d’emploi Page 23 F
Bedienungsanleitung Seite 31 D
Istruzioni per l’uso Pagina 39 I
SVRM-911
Serial Remote
Control Unit
電気製品は、安全のための注意事項を守らないと、火災
や人身事故になることがあります。
この取扱説明書には、事故を防ぐための重要な注意事項と製品の取り扱い
かたを示しています。この取扱説明書をよくお読みのうえ、製品を安全に
お使いください。お読みになったあとは、いつでも見られるところに必ず
保管してください。
警告

目次
2
ソニー製品は安全に充分配慮して設計されています。しかし、電気製品は、まち
がった使いかたをすると、火災や感電などにより死亡や大けがなど人身事故につ
ながることがあり、危険です。
事故を防ぐために次のことを必ずお守りください。
安全のための注意事項を守る
4〜5ページの注意事項をよくお読みください。製品全般の注意事項が記されてい
ます。
定期点検をする
長期間、安全にお使いいただくために、定期点検をすることをおすすめします。点
検の内容や費用については、お買い上げ店またはソニーのサービス窓口にご相談
ください。
故障したら使わない
すぐに、お買い上げ店またはソニーのサービス窓口にご連絡ください。
万一、異常が起きたら
安全のために
•煙が出たら
•異常な音、においが
したら
•内部に水、異物が
入ったら
•製品を落としたり
キャビネットを破損
したときは
1電源を切る。
2電源コードや接続コードを抜く。
3お買い上げ店またはソニーのサービ
ス窓口に連絡する。
/
警告表示の意味
取扱説明書および製品では、次の
ような表示をしています。表示の
内容をよく理解してから本文をお
読みください。
警告
この表示の注意事項を守らない
と、火災や感電などにより死亡や
大けがなど人身事故につながるこ
とがあります。
注意
この表示の注意事項を守らない
と、感電やその他の事故によりけ
がをしたり周辺の物品に損害を与
えたりすることがあります。
注意を促す記号
注意
火災 感電
行為を禁止する記号
禁止
分解禁止
行為を指示する記号
プラグをコン
セントから抜く
強制
日本語

3
警告................................................................................................. 4
注意................................................................................................. 5
電池についての安全上のご注意........................................................ 5
概要..................................................................................................... 6
各部の名称と働き .............................................................................. 6
準備..................................................................................................... 9
リチウム電池を使う.....................................................................................9
ラックに取り付ける......................................................................................9
電源とデュプリケーターを接続する.......................................................... 10
操作...................................................................................................11
日付と時刻を設定する .............................................................................11
ユーザーIDを設定する............................................................................12
仕様...................................................................................................13
お手入れ ...........................................................................................13
保証書とアフターサービス .............................................................13
目次
J
日
本
語

目次
4
警告
感電火災
下記の注意を守らないと、
火災や感電により死亡や大けがにつながることがあります。
電源コードを傷つけない
電源コードを傷つけると、火災や感電の原因となることがあります。
•設置時に、製品と壁やラック(棚)などの間に、はさみ込んだりしない。
•電源コードを加工したり、傷つけたりしない。
•重いものをのせたり、引っ張ったりしない。
•熱器具に近づけたり、加熱したりしない。
•電源コードを抜くときは、必ずプラグを持って抜く。
万一、電源コードが傷んだら、お買い上げ店またはソニーのサービス窓口に交換を
ご依頼ください。
油煙、湯気、湿気、ほこりの多い場所では設置・使用しない
上記のような場所で設置・使用すると、火災や感電の原因となることがあります。取
扱説明書に記されている仕様条件以外の環境での使用は、火災や感電の原因と
なることがあります。
内部に水や異物を入れない
水や異物が入ると火災や感電の原因となることがあります。
万一、水や異物が入ったときは、すぐに電源を切り、電源コードや接続コードを抜い
て、お買い上げ店またはソニーのサービス窓口にご相談ください。
内部を開けない
内部には電圧の高い部分があり、キャビネットや裏ぶたを開けたり改造したりする
と、火災や感電の原因となることがあります。内部の調整や設定、点検、修理はお買
い上げ店またはソニーのサービス窓口にご依頼ください。
本機は日本国内用です
交流100Vでお使いください。
海外などで、異なる電圧で使うと、火災や感電の原因となることがあります。
禁止
禁止
禁止
分解禁止
強制

5
下記の注意を守らないと、
けがをしたり周辺の物品に損害を与えることがあります。
ぬれた手で電源プラグをさわらない
ぬれた手で電源プラグを抜き差しすると、感電の原因となることがあります。
付属の電源コード、および指定の接続コードを使う
付属の電源コード、および指定された接続コードを使わないと、感電や故障の原因
となることがあります。
不安定な場所に設置しない
ぐらついた台の上や傾いたところに設置すると、倒れたり落ちたりしてけがの原因
となることがあります。
また、設置・取り付け場所の強度を充分にお確かめください。
転倒、移動防止の処置をする
大型の製品をラックに取り付け・取りはずしするときは、転倒・移動防止の処置をし
ないと、倒れたり、動いたりして、けが の 原 因となることがあります。
安定した姿勢で注意深く作業してください。
また、ラックの設置状況、強度を充分にお確かめください。
製品の上に乗らない、重い物を載せない
倒れたり、落ちたり、壊れたりして、けがの原因となることがあります。
禁止
禁止
注意
禁止
注意
注意
電池についての安全上のご注意
漏液、発熱、発火、破裂、誤飲などを避けるため、下記の注意事項を必ずお守りください。
警告
•ボタン型電池は幼児の手の届かないところに置いてください。
万一飲み込んだ場合は、すぐに医師に相談してください。
•指定された種類の電池を使ってください。

6
概要
シリアルリモートコントロールユニットSVRM-911は、SVO-965などの
デュプリケーターを、シリアルコントロール信号を使ってリモートコン
トロールします。
本機には次のような特長があります。
デュプリケーターを2000台までコントロール可能
デュプリケーターを接続する端子を4個装備しています。各端子に
最大500台、合わせて最大2000台のデュプリケーターを接続でき
ます。
データの設定や保存が可能
ユーザーIDや時刻などのデータや、オーディオリミッターのON/
OFF、ビデオAGC回路のON/OFFなどのデュプリケーターの動
作条件を簡単に設定することができます。設定したユーザーIDや
時刻のデータは、電源を切っても付属のリチウム電池により保持さ
れます。
各部の名称と働き
EJECT
POWER STOP
CHANGER START
PAUSEREW F FWDPLAY
REC
U ID SET
VIDEO AGC ID REC Hi-Fi REC AUDIO NR LIMITER
SHIFT INC DEC
CLOCK SET
DATE
/U ID
U ID
TEST
REV
SEARCH
FWD
ON
ON
OFF
OFF
ON
OFF
ON
OFF
ON
OFF
ON
OFF
AUDIO OUT
Hi-Fi
NORMAL
⁄AC IN
REMOTE
BATTERY
ON
OFF
DATE
M/D/Y
D/M/Y
6
0
0
p
“
r
4LED表示部
1POWER
スイッチ
2LED表示セットボタン
3CLOCK SETボタン
5LED表示切り換えスイッチ
6TESTボタン
9テープ走行ボタン
8EJECTボタン
!º CHANGER START
ボタン
!¡ SEARCHボタン
!™ AUDIO OUTスイッチ
7記録/再生機能設定スイッチ
!∞ REMOTE
端子
!§ 電池装着部
!£ DATEスイッチ
!¢ BATTERYスイッチ
前面
後面 !¶ y端子
!• ⁄AC IN端子

7
8EJECT (イジェクト)ボタン
デュプリケーターからカセットを取り出すとき押します。押すと点灯
します。
9テープ走行ボタン
以下のボタンを使って、テープ走行をコントロールします。それぞれ
押すと点灯します。
!º CHANGER START(カセットチェンジャースタート)
ボタン
オートカセットチェンジャーSVCC-960を動作させるとき押します。
!¡ SEARCH(サーチ)ボタン
正方向のサーチをする(画像を見ながらテープを早送りする) とき
はFWDボタンを押します。逆方向のサーチをする(画像を見なが
らテープを巻き戻す)ときはREVボタンを押します。いずれのボタ
ンも押すと点灯します。
!™ AUDIO OUT (音声出力切り換え)スイッチ
デュプリケーターのAUDIOSELECTスイッチがREMOTEに設定
されているとき、デュプリケーターの音声出力を切り換えます。
Hi-Fi
:Hi-Fi録音された音声だけを出力する。
NORMAL
:ノーマル録音された音声だけを出力する。
!£ DATE(日付表示切り換え)スイッチ
日付の表示方法を切り換えます。
D/M/Y:日/月/年の順に表示する。
M/D/Y:月/日/年の順に表示する。
!¢ BATTERY(バッテリー)スイッチ
リチウム電 池を使うときはONにします。(リチウム電池を装着しない
でこのスイッチを ON にすると、LED表示が点滅します。)
ボタン 働き
U ID SET
(ユーザーID設定)ユーザーIDを設定するとき押すと、左端の桁が
点滅する。
SHIFT(シフト)日付/時刻またはユーザーIDを設定するとき、
数値を変更する表示を選択する。SHIFTボタン
を押すたびに、点滅する表示が移動する。
INC
(インクリメント) 押すと、点滅している表示の数値が1ずつ増加
する。
DEC
(ディクリメント)押すと、点滅している表示の数値が1ずつ減少
する。
ボタン 働き
STOP(ストップ)テープを止めるとき押す。
REW(巻き戻し)テープを巻き戻すとき押す。
再生中に押すと逆方向のサーチになり、手を離
すと再生に戻る。
PLAY(再生)再生するとき押す。
REC ボタンと同時に押すと、記録が始まる。
REC(記録)記録するとき、PLAYボタンと同時に押す。
F FWD(早送り)テープを早送りするとき押す。
再生中に押すと、正方向のサーチになり、手を
離すと再生に戻る。
PAUSE
(一時停止)録画または再生を一時停止するとき押す。再度
押すと、一時停止が解除される。
1POWER(電源)スイッチ
ON側を押すと本機に電源が供給されます。
2LED表示設定ボタン
以下のボタンを使ってLED表示を設定します。
3CLOCK SET(日付/時刻設定)ボタン
日付/時刻を設定するとき、ボールペンなどを使って押します。
4LED表示部
日付/時刻およびユーザーIDを表示します。
5LED表示切り換えスイッチ
LED 表示を次のように切り換えます。
DATE/U ID:日付/時刻とユーザーID (2桁)を表示する。
U ID:ユーザーID (12桁) を表示する。
6TEST (テスト)ボタン
デュプリケーターで自動チェックを行うとき、2つのボタンを同時に
押します。
7記録/再生機能設定スイッチ
記録/再生の目的に合わせて以下のスイッチを切り換えます。
スイッチ 働き
VIDEO AGC(ビ
デオAGC) ビデオのAGC回路を動作させるときONにする。
ID-REC (ID記録)IDをテープに記録するときONにする。
Hi-Fi REC
(ハイファイ記録)Hi-Fi音声記録するときONにする。
AUDIO-NR
(オーディオノイズ
リダクション)
オーディオノイズリダクションで録音または再生
するときONにする。
LIMITER
(リミッター)ノーマル音声記録時、リミッター回路を働かせる
とき O N に する。

8
!∞ REMOTE(リモート)端子
シリアルコントロール信号の出力端子です。ピンプラグ付きの接続
ケーブル (別売り) で、SVO-965などのCTRLPIN端子と接続しま
す。
!§ 電池装着部
データのバックアップ用リチウム電池を装着します。(リチウム電池
は出荷時に装着されています。)
!¶ y(信号用アース)端子
信号用のアース端子です。必要に応じて、システムの接地線に接
続します。
!• ⁄AC IN (電源入力)端子
付属のAC電源コードで、AC電源に接続します。
各部の名称と働き

9
4新しい電池を入れ、ふたを閉める。
5BATTERYスイッチを ON にする。
ラックに取り付ける
本機を市販のEIA標準19インチラックに取り付けるには、付属の
ラックマウント金具を使います。
1付属のラックマウント金具を、付属のネジ (+B、4mm (M4))
で本機の両側面に取り付けます。
2ラックマウント金具をラックにネジ止めする。
◆ 使用できるラックについて詳しくは、お買い上げ店またはソニーのサー
ビス窓口にお問い合わせください。
準備
ご注意
本機の設置は、お買い上げ店にご依頼ください。
リチウム電池を使う
リチウム電池は、本機に内蔵された時計を動作させるために、出荷
時に本機に装着されています。日付やユーザーIDなどのデータを
保存するときは、あらかじめ次の手順を行います。
1本機の電源を入れ、データ表示部のLED表示が点灯すること
を確認する。
2後面パネルのBATTERYスイッチを ON にする。
電池を使わないときは
データを保存する必要がないときは、BATTERYスイッチをOFFに
したり、電池を入れないで本機を使用することもできます。電池が
入っていなくても、デュプリケーターのコントロールには影響しませ
ん。(本機に電池を入れないでBATTERYスイッチをONにすると、
LED表示が点滅します。)
◆ 電池の取り出しかたについては、次項「電池を交換するには」をご覧く
ださい。
電池を交換するには
電池の寿命が近づくとLED表示が点滅します。新しい電池に交換
してください。電池の寿命は、通常約1年です。
1本機の電源を切る。
2BATTERYスイッチをOFFにする。
3電池ホルダーのふたを開け、電池を取り出す。
電池ホルダー
電池
ふた
新しい電池
ふた
ラックマウント金具

10
電源とデュプリケーターを接続する
本機と電源およびデュプリケーター(SVO-965)の接続例を下図に
示します。
◆ デュプリケーターの接続について詳しくは、使用しているデュプリケー
ターの取扱説明書をご覧ください。
⁄AC IN
⁄AC IN
REMOTE
REMOTE
CTRL P IN
CTRL P IN CTRL P OUT
CTRL P OUT
AC電源へ
AC電源コード
(付属)
SVRM-911
ピンプラグ付きケーブル (別売り)
ピンプラグ付きケーブル (別売り)
ピンプラグ付きケーブル (別売り)
ピンプラグ付きケーブル (別売り)
ピンプラグ付きケーブル (別売り)
1台目
SVO-965
SVO-965
2台目
500 台まで接続可能
500 台まで接続可能
500 台まで接続可能
500 台まで接続可能
準備

11
本機を使ってデュプリケーターをコントロール するときは、以下の点
にご注意ください。
•POWERスイッチをOFFにすると、時計以外の機能は働きませ
ん。
•本機の機能のうち、コントロールするデュプリケーターに装備され
ていない機能は働きません。
•本機はデュプリケーターからのステータス信号を受け取っていま
せん。(本機とデュプリケーターの間では双方向通信を行ってい
ません。)したがって、本機の操作ボタンが点灯していても、デュ
プリケーターがその表示どおりの動作を行っているとは限りませ
ん。
日付と時刻を設定する
1以下の点を確認してからPOWERスイッチを ON にする。
LED表示部に日付/時刻の表示が現れます (DATEスイッチ
がM/D/Yの場合)。
操作
表示が点滅しているときは
電池の寿命が近づいています。新しい電池と交換してくださ
い。電池が完全に消耗すると、設定した日付と時刻のデータ
が消えてしまいます。
2ボールペンなどを使ってCLOCKSETボタンを押す。
時計が停止し、「年」の表示 (西暦の下2桁) が点滅します。
3INCまたはDECボタンを押して、「年」の表示を希望の数値
に設定する。
4SHIFTボタンを押し、他の表示を点滅させる。
SHIFTボタンを押すたびに、「月」、「日」、「時」、「分」の順で
点滅する表示が変わります。
5INCまたはDECボタンを押して、点滅している表示を希望の
数値に設定する。
6手順4と5を繰り返し、すべての表示を希望の値に設定する。
7再度CLOCKSETボタンを押す。
設定した日付と時刻が登録され、時計が動き始めます。
実在しない日付または時刻を設定すると
例えば2月30日などを設定すると、手順1の表示に戻ります。
正しい日付または時刻に修正してください。
数値を修正したいときは
手順7でCLOCKSETボタンを押す前に、SHIFTボタンを押して
修正したい表示を点滅させ、INCボタンとDECボタンを使って正し
い数値に設定します。
設定を取り消すときは
手順7でCLOCKSETボタンを押す代わりに、UIDSETボタンま
たはテープ走行ボタン、EJECTボタン、TESTボタン、サーチボタン
のいずれかを押します。
確認する場所 確認する内容
リチウム電池装着部 リチウム電池が正しく装着されていること
(9ページ参照)
BATTERYスイッチ 設定した日付/時刻のデータを保存すると
きは ON にする。
LED表示切り換えス
イッチ DATE/UIDになっていること
DATEスイッチ 希望の設定 (M/D/YまたはD/M/Y) に
なっていること
前面
後面
月 日 年 時 分 ユーザーIDa)
a) ユーザーIDの設定は次ページ参照。
4,6 3,5,6 12,7
1
6
0
0
p
“
r

12
ユーザーIDを設定する
1以下の点を確認してからPOWERスイッチを ON にする。
LED表示部に次のような表示が現れます。
表示が点滅しているときは
電池の寿命が近づいています。新しい電池と交換してくださ
い。電池が完全に消耗すると、設定したユーザーIDのデータ
が消えてしまいます。
2UIDSETボタンを押す。
ユーザーIDの左端の桁が点滅します。
3INCまたはDECボタンを押して、点滅している桁を希望の数
値に設定する。
4SHIFTボタンを押し、点滅している桁を変える。
5手順3と4を繰り返し、すべての桁を希望の値に設定する。
6再度UIDSETボタンを押す。
設定したユーザーIDが登録されます。
数値を修正したいときは
手順6でUIDSETボタンを押す前に、SHIFTボタンを押して修正
したい桁を点滅させ、INCボタンとDECボタンを使って正しい数値
に設定します。
設定を取り消すときは
手順6でUIDSETボタンを押す代わりに、CLOCKSETボタンま
たはテープ走行ボタン、EJECTボタン、TESTボタン、サーチボタン
のいずれかを押します。
2,6 3,5 1
1
4,5
6
0
0
p
“
r
確認する場所 確認する内容
リチウム電池装着部 リチウム電池が正しく装着されていること
(9ページ参照)
BATTERYスイッチ 設定したユーザーIDを保存するときは ON
にする。
LED表示切り換え
スイッチ 希望の設定 (DATE/UIDまたはUID) に
なっていること
日付/時刻a) ユーザーID
(2桁)
ユーザーID (12桁)
DATE/U IDモードのとき
U IDモードのとき
a) 日付/時刻の設定は前ページ参照。
前面
後面
操作

13
仕様
リモートコントロール ピンジャック4 個
シリアル信号
電源電圧 AC100V、50Hz/60Hz
消費電力 5W
保存温度 −20℃〜+60℃
動作温度 5℃〜40℃
外形寸法 (幅/高さ/奥行き)
424×88×351mm
質量 5.5kg
付属品 リチウム電池CR2025 (本機内部に装着
済み) (1)
AC電源コード (1)
ラックアングル (1式)
取扱説明書 (1)
保証書 (1)
仕様および外観は、改良のため予告なく変更することがあります
が、ご了承ください。
保証書について
•この製品には保証書が添付されていますので、お買い上げの際
お受け取りください。
•所定事項の記入および記載内容をお確かめのうえ、大切に保存
してください。
アフターサービスについて
調子が悪いときはまずチェックを
この説明書をもう一度ご覧になってお調べください。
それでも具合の悪いときはサービスへ
お買い上げ店またはお近くのソニーサービス窓口にご相談くださ
い。
保証期間中の修理は
保証書の記載内容に基づいて修理させていただきます。詳しくは
保証書をご覧ください。
保証期間経過後の修理は
修理によって機能が維持できる場合は、ご要望により有料修理さ
せていただきます。
保証期間中の修理など、アフターサービスについてご不明な点は、
お買い上げ店またはお近くのソニーのサービス窓口にお問い合わ
せください。
保証書とアフターサービス
お手入れ
キャビネットのクリーニング
キャビネットやパネルの汚れは、乾いた布で軽く拭きとります。
汚れがひどいときは、中性洗剤溶液を少し含ませた布で拭きとり、
乾いた布でからぶきしてください。アルコール、シンナー、ベンジ
ン、殺虫剤など、揮発性の薬品をかけると、変質したり塗料がはげ
たりすることがあります。

14
Owner’s Record
The model and serial numbers are located at the rear.
Record the serial number in the space provided below.
Refer to these numbers whenever you call upon your Sony
dealer regarding this product.
Model No. SVRM-911 Serial No. ____________________
WARNING
To prevent fire or shock hazard, do not
expose the unit to rain or moisture.
This symbol is intended to alert the user to
the presence of uninsulated “dangerous
voltage” within the product’s enclosure that
may be of sufficient magnitude to constitute
a risk of electric shock to persons.
This symbol is intended to alert the user to
the presence of important operating and
maintenance (servicing) instructions in the
literature accompanying the appliance.
For the customers in the USA
This equipment has been tested and found to comply with
the limits for a Class A digital device, pursuant to Part 15 of
the FCC Rules. These limits are designed to provide
reasonable protection against harmful interference when the
equipment is operated in a commercial environment. This
equipment generates, uses, and can radiate radio frequency
energy and, if not installed and used in accordance with the
instruction manual, may cause harmful interference to radio
communications. Operation of this equipment in a
residential area is likely to cause harmful interference in
which case the user will be required to correct the
interference at his own expense.
You are cautioned that any changes or modifications not
expressly approved in this manual could void your authority
to operate this equipment.
This device requires shielded interface cables to comply with
FCC emission limits.
CAUTION
Danger of explosion if battery is incorrectly replaced.
Replace only with the same or equivalent type
recommended by the manufacturer.
Discard used batteries according to the manufacturer’s
instructions.
ADVARSEL!
Lithiumbatteri - Eksplosionsfare ved fejlagtig
håndtering.
Udskiftning må kun ske med batteri af samme
fabrikat og type.
Levér det brugte batteri tilbage til laverandøren.
ADVARSEL
Eksplosjonsfare ved feilaktig skifte av batteri.
Benytt samme batteritype eller en tilsvarende type
anbefalt av apparatfabrikanten.
Brukte batterier kasseres i henhold til fabrikantens
instruksjoner.
VARNING
Explosionsfara vid felaktigt batteribyte.
Använd samma batterityp eller en ekvivalent typ
som rekommenderas av apparattillverkaren.
Kassera använt batteri enligt fabrikantens
instruktion.
VAROITUS
Paristo voi räjähtää, jos se on virheellisesti asennettu.
Vaihda paristo ainoastaan valmistajan
suosittelemaan tyyppiin.
Hävitä käytetty paristo valmistajan ohjeiden
mukaisesti.
Voor de klanten in Nederland
Bij dit produkt zijn batterijen geleverd.
Wanneer deze leeg zijn, moet u ze niet
weggooien maar inleveren als KCA.
English

15
Overview ..........................................................................15
Location and Function of Parts and Controls ..............16
Preparations ....................................................................18
Using a Lithium Battery.................................................... 18
Mounting the Unit in a Rack ............................................. 18
Connecting to the Power Source and Duplicators............. 19
Operation .........................................................................20
Setting the Date and Time ................................................. 20
Setting the User ID............................................................ 21
Notes on Use ...................................................................22
Specifications..................................................................22
Table of Contents
The SVRM-911 Serial Remote Control Unit is used to
control duplicators, such as the SVO-965/915/915L (or
SVO-965P/915P/915PL), using serial control signals.
This unit has the following features.
Overview
Controlling up to 2,000 duplicators
This unit is equipped with four terminals for
connecting duplicators. Up to 500 duplicators can be
connected to each terminal for a total maximum of
2,000.
Date setting and storing
You can easily set user ID or time data in addition to
operation status of the duplicators such as on/off
setting of the video AGC circuit or audio limiter
circuit. The User ID or time data can be stored with
the supplied lithium battery even when the power is
turned off.
English
EN

16
EJECT
POWER STOP
CHANGER START
PAUSEREW F FWDPLAY
REC
U ID SET
VIDEO AGC ID REC Hi-Fi REC AUDIO NR LIMITER
SHIFT INC DEC
CLOCK SET
DATE
/U ID
U ID
TEST
REV
SEARCH
FWD
ON
ON
OFF
OFF
ON
OFF
ON
OFF
ON
OFF
ON
OFF
AUDIO OUT
Hi-Fi
NORMAL
⁄AC IN
REMOTE
BATTERY
ON
OFF
DATE
M/D/Y
D/M/Y
6
0
0
p
“
r
Location and Function of Parts and Controls
1POWER switch
2LED display setting buttons
3CLOCK SET button
4LED display
5LED display switch
6TEST buttons
7Record/playback functions
setting switches
8EJECT button
9Tape transport buttons
!™ AUDIO OUT switch
!¡ SEARCH buttons
0CHANGER START button
!£ DATE switch
!¢ BATTERY switch !∞ REMOTE connectors
!§ Battery compartment
!• ⁄AC IN connector
!¶ y(Signal ground) terminal
Front
Rear
1POWER switch
Power is supplied to the unit when the ON side of the
switch is pressed.
2LED display setting buttons
LED display is set using the buttons below.
3CLOCK SET (date and time settings) button
Using a ball point pen, etc., press this to set the date
and time.
4LED display
Displays the date/time and the User ID.
5LED display switch
Switches the LED display as indicated below.
DATE/U ID: Displays the date/time and the User ID
(2 digits).
U ID: Displays the User ID (12 digits).
6TEST buttons
Press these buttons simultaneously to perform an
automatic check with duplicators.
Button Function
U ID SET (User
ID setting) Press this to set the User ID and the
leftmost digit begins to blink.
SHIFT Press this to select the display which you
want to change. Each press shifts the
display which is blinking.
INC
(Increment) Press this to increase the blinking display
by 1.
DEC
(decrement) Press this to decrease the blinking
display by 1.

17
7Record/playback functions setting switches
Set the switches below according to the recording or
playback function desired.
8EJECT button
Press to eject the cassette from the duplicator. The
button will light when pressed.
9Tape transport buttons
Control tape transport using the buttons below. Each
button will light when pressed.
0CHANGER START (cassette changer start)
button
Press to start operation of an SVCC-960 Auto Cassette
Changer.
!¡ SEARCH buttons
Press the FWD button to search in forward direction
(fast forward the tape while viewing the picture). Press
the REV button to search in reverse direction (rewind
the tape while viewing the picture). Either button will
light when pressed.
!™ AUDIO OUT (audio output) switch
When the AUDIO SELECT switch of a duplicator is
set to REMOTE, the audio output of the duplicator can
be switched.
Hi-Fi: Outputs only Hi-Fi recorded audio.
NORMAL: Outputs only normal recorded audio.
!£ DATE switch
Switches date display mode.
D/M/Y: Displays date in day/month/year order.
M/D/Y: Displays date in month/day/year order.
!¢ BATTERY switch
Set to ON when using a lithium battery. (If a lithium
battery is not installed and this switch is set to ON, the
LED display will blink.)
!∞ REMOTE connectors (Phono jacks)
Output serial control signals. Connect to the CTRL P
IN connector of the SVO-965/915/915L (or SVO-
965P/915P/915PL) with a connecting cord with phono
plugs (not supplied).
!§ Battery compartment
Install a lithium battery for data back-up.
!¶ y(Signal ground) terminal
When necessary, connect to the system ground.
!• ⁄AC IN (power input) connector
Connect to AC power supply using the supplied AC
power cord.
Switch Function
VIDEO AGC Set to ON to activate the video AGC
circuit.
ID-REC (ID
recording) Set to ON to record ID on tape.
Hi-Fi REC (Hi-
Fi recording) Set to ON for Hi-Fi audio recording.
AUDIO-NR
(noise
reduction)
Set to ON to activate the audio noise
reduction at recording or playback.
LIMITER Set to ON to activate the limiter circuit
during normal audio recording.
Button Function
STOP Press to stop the tape.
REW (rewind) Press to rewind the tape. If pressed
during playback, search will begin in
reverse direction. Release to resume
playback.
PLAY
(playback) Press to play back the tape.
Press simultaneously with the REC
button to begin recording.
REC (record) Press simultaneously with the PLAY
button to begin recording.
F FWD (fast
forward) Press to fast forward tape.
If pressed during playback, search will
begin in forward direction. Release to
resume playback.
PAUSE Press to pause recording or playback.
Press again to cancel pause.

18
Note
Please consult your Sony dealer for installation of the
unit.
Using a Lithium Battery
A lithium battery is preinstalled in the unit at shipping.
Perform the steps below to store the date and User ID
data.
1Turn on the unit and check to see that the LED
display lights up.
2Set the BATTERY switch on the rear panel to ON.
When a lithium battery is not used
When it is not necessary to save any data, this unit can
also be used without inserting a lithium battery or with
the BATTERY switch set to OFF. Control of
duplicators will not be affected if a lithium battery is
not installed. (If the BATTERY switch is set to ON
when no battery is installed, the LED display will
blink.)
See “Replacing the battery” for instructions on how to
remove the battery.
Replacing the battery
When the lithium battery becomes weak, the LED
display blinks. In this case, replace the battery with a
Sony CR2025 lithium battery. Use of another battery
may present a risk of fire or explosion. The normal
battery life is about 1 year.
WARNING
Battery may explode if mistreated.
Do not recharge, disassemble or dispose of in fire.
Keep the lithium battery out of the reach of children.
Should the battery be swallowed, consult a doctor
immediately.
1Turn off the unit.
2Set the BATTERY switch to OFF.
Preparations
3Open the cover of the battery compartment and
remove the battery.
4Insert a new battery and close the cover.
5Set the BATTERY switch to ON.
Mounting the Unit in a Rack
To mount the unit in an EIA standard 19-inch rack, use
the supplied rack mount angles.
1Attach the supplied rack mount angles to the unit
using the supplied screws (+B, M4) (4 mm or
3/16 inches).
2Screw the rack mount angles to the rack.
For more information about usable racks, contact your Sony
dealer.
New battery
Cover
Cover
Battery
Battery
compartment
Rack mount angles

19
Connecting to the Power Source and Duplicators
The illustration below shows an example of how this
unit is connected to the power source and to
duplicators (SVO-965/965P).
For details on connecting duplicators refer to the operating
instructions of the duplicators.
⁄AC IN
⁄AC IN
REMOTE
REMOTE
CTRL P IN
CTRL P IN CTRL P OUT
CTRL P OUT
To AC power
supply
AC power cord
(supplied)
SVRM-911
Connecting cord with
phono plugs (not supplied)
Connecting cord with phono
plugs (not supplied)
Connecting cord with phono
plugs (not supplied)
Connecting cord with phono
plugs (not supplied)
Connecting cord with phono
plugs (not supplied)
SVO-965/
965P
SVO-965/
965P
Up to 500 units can
be connected
Up to 500 units
can be connected
Up to 500 units
can be connected
Up to 500 units can
be connected
2nd unit 1st unit

20
Please note the following when controlling a
duplicator using this unit.
•When the POWER switch is turned OFF, no
functions will operate except for the clock.
•Functions which are not supported on the duplicator
will be disabled.
•This unit does not accept status signals from a
duplicator. (There is no 2-way communication
between this unit and the duplicator.) Consequently,
even if an operation button on this unit is lit, this does
not mean that the duplicator is operating as indicated.
Setting the Date andTime
1After checking the points below, turn the POWER
switch ON.
The date and time will appear in the LED display
as shown below (when the DATE switch is set to
M/D/Y).
Operation
When the LEDs are blinking
The battery is exhausted. Replace it with a new
battery. If the battery’s power is completely used
up, the date and time data that has been saved will
be lost.
2Press the CLOCK SET button using a ball point
pen, etc.
The clock stops and the “Year” display (last two
digits of the year) begins to blink.
3Pressing the INC or DEC button, set the “Year”
display to the value desired.
4Press the SHIFT button to have another display
blink.
Each time you press the SHIFT button, “Month”,
“Day”, “Hour” and “Minute” displays blink in this
order.
5Pressing the INC or DEC button, set the blinking
display to the value desired.
6Set all displays to the values desired by repeating
steps 4and 5.
7Press the CLOCK SET button again.
The date and time that have been set will be stored
and the clock will begin operating.
When a non-existent date or time is set
For example, if February 30 is set, the date and time
will return to that which is shown in step 1.Set to the
correct time and date.
To correct the values
Before pressing the CLOCK SET button in step 7,
press the SHIFT button to have the desired display
blink, then correct the value using the INC and DEC
buttons.
Front
Rear
Where to check What to check for
Lithium battery
compartment That the lithium battery is properly
installed.
(See page 18.)
BATTERY switch Set to ON if the date and time
settings are to be saved.
LED display switch That it is set to DATE/U ID.
DATE switch That desired mode (M/D/Y or D/M/
Y) is selected.
4,6 3,5,6 12,7
1
6
0
0
p
“
r
Month
a) See next page to set User ID.
Day Year Hour Minute User IDa)
Table of contents
Languages:
Other Sony Control Unit manuals
Popular Control Unit manuals by other brands

PRO TUNE
PRO TUNE PR-4 product manual

WAM
WAM VFS ACCOMPANIMENT TO THE INSTALLATION, OPERATION AND MAINTENANCE MANUAL

Mircom
Mircom RB-MD-950 Replacement instructions

Burkert
Burkert AirLINE 8652 operating instructions

Valon
Valon 5009 Operation manual

metso automation
metso automation IMO-R8 Installation maintenance and operating instructions