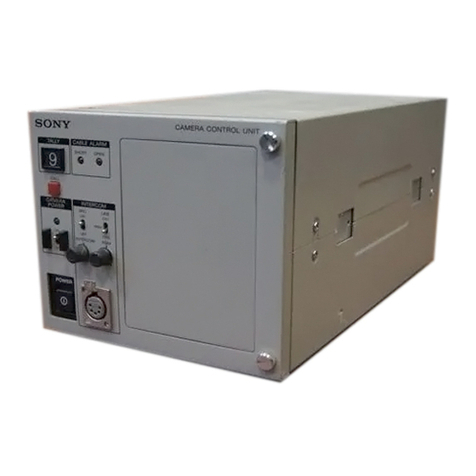
Sony HSCU-300 User manual

HD CAMERA CONTROL UNIT
HSCU-300
OPERATION MANUAL [English]
1st Edition (Revised 1)

2
Before operating the unit, please read this manual thoroughly
and retain it for future reference.
To reduce the risk of fire or electric shock, do
not expose this apparatus to rain or moisture.
To avoid electrical shock, do not open the
cabinet. Refer servicing to qualified personnel
only.
THIS APPARATUS MUST BE EARTHED.
WARNING: THIS WARNING IS APPLICABLE FOR USA
ONLY.
If used in USA, use the UL LISTED power cord specified
below.
DO NOT USE ANY OTHER POWER CORD.
Plug Cap Parallel blade with ground pin (NEMA 5-15P
Configuration)
Cord Type SJT, three 16 or 18 AWG wires
Length Minimum 1.5 m (4 ft. 11in.), Less than 2.5 m
(8 ft. 3 in.)
Rating Minimum 10A, 125V
Using this unit at a voltage other than 120V may require the
use of a different line cord or attachment plug, or both. To
reduce the risk of fire or electric shock, refer servicing to
qualified service personnel.
WARNING: THIS WARNING IS APPLICABLE FOR OTHER
COUNTRIES.
1. Use the approved Power Cord (3-core mains lead)/
Appliance Connector/Plug with earthing-contacts that
conforms to the safety regulations of each country if
applicable.
2. Use the Power Cord (3-core mains lead)/Appliance
Connector/Plug conforming to the proper ratings (Voltage,
Ampere).
If you have questions on the use of the above Power Cord/
Appliance Connector/Plug, please consult a qualified service
personnel.
For kundene i Norge
Dette utstyret kan kobles til et IT-strømfordelingssystem.
For the customers in the U.S.A.
This equipment has been tested and found to comply with the
limits for a Class A digital device, pursuant to Part 15 of the
FCC Rules. These limits are designed to provide reasonable
protection against harmful interference when the equipment is
operated in a commercial environment. This equipment
generates, uses, and can radiate radio frequency energy and,
if not installed and used in accordance with the instruction
manual, may cause harmful interference to radio
communications. Operation of this equipment in a residential
area is likely to cause harmful interference in which case the
user will be required to correct the interference at his own
expense.
You are cautioned that any changes or modifications not
expressly approved in this manual could void your authority to
operate this equipment.
All interface cables used to connect peripherals must be
shielded in order to comply with the limits for a digital device
pursuant to Subpart B of Part 15 of FCC Rules.
This device complies with Part 15 of the FCC Rules. Operation
is subject to the following two conditions: (1) this device may
not cause harmful interference, and (2) this device must
accept any interference received, including interference that
may cause undesired operation.
For the customers in Canada
This Class A digital apparatus complies with Canadian ICES-
003.
For the customers in Europe
This product with the CE marking complies with both the EMC
Directive and the Low Voltage Directive issued by the
Commission of the European Community.
Compliance with these directives implies conformity to the
following European standards:
• EN60950-1:Product Safety
• EN55103-1: Electromagnetic Interference (Emission)
• EN55103-2: Electromagnetic Susceptibility (Immunity)
This product is intended for use in the following
Electromagnetic Environment: E4 (controlled EMC
environment, ex. TV studio).
For the customers in Europe, Australia and
New Zealand
WARNING
This is a Class A product. In a domestic environment, this
product may cause radio interference in which case the user
may be required to take adequate measures.
This symbol is intended to alert the user to
the presence of important operating and
maintenance (servicing) instructions in the
literature accompanying the appliance.
WARNING

3
For the customers in Europe
The manufacturer of this product is Sony Corporation, 1-7-1
Konan, Minato-ku, Tokyo, Japan.
The Authorized Representative for EMC and product safety is
Sony Deutschland GmbH, Hedelfinger Strasse 61, 70327
Stuttgart, Germany. For any service or guarantee matters
please refer to the addresses given in separate service or
guarantee documents.
This apparatus shall not be used in a residential area.
For the State of California, USA only
Perchlorate Material - special handling may apply, See
www.dtsc.ca.gov/hazardouswaste/perchlorate
Perchlorate Material : Lithium battery contains perchlorate.
For the customers in Taiwan only

4Table of Contents
Table of Contents
Overview .................................................................... 5
Features .......................................................................... 5
System Configuration Example ...................................... 7
Locations and Functions of Parts ........................... 8
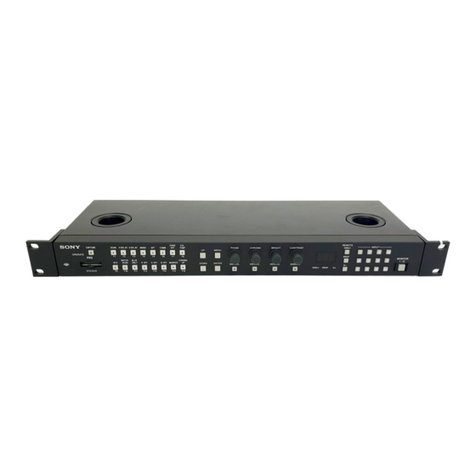
Front Panel ..................................................................... 8
Rear Panel ...................................................................... 9
Status Display ......................................................... 11
Displaying the Status Screen ........................................ 11
Status Display Screen .................................................. 11
Setup Menu.............................................................. 14
Changing Menu Item Settings ...................................... 14
Menu List ...................................................................... 16
Appendix.................................................................. 24
Notes on Use ................................................................ 24
Digital Triax Transmission ............................................ 24
Error Messages ............................................................ 24
Return Signal Combinations ......................................... 25
License Declarations .................................................... 25
Specifications ................................................................ 25

5
Overview
Overview
The HSCU-300 Camera Control Unit connects to a Sony
HSC-300/HXC-1001) HD color camera. It performs signal
processing, provides an interface for external equipment, and
supplies power to the camera.
The CCU features a down converter which converts HD
signals2) from a camera to SD signals3), and a simplified return
video up converter which converts SD signals to HD signals. It
is compatible with both HD camera system and SD camera
system formats, making it flexible to use.
1) An HXC-100 and HSCU-300 can be connected if both units are of
version 1.10 or later.
2) HD (High Definition) signal: Name for 1125/750-line HDTV signals
3) SD (Standard Definition) signal: Name for NTSC/PAL, 525/625
component, and 525/625 composite signals
The CCU can be combined with an RCP-1000-series Remote
Control Panel (optional) to form a camera control system. The
CCU can also be combined with an MSU-1000/1500 Master
Setup Unit (optional) over a LAN (Local Area Network) to form
a multi-camera application system controlling multiple
cameras.
Features
Multi-system input/output interface
The HSCU-300 is equipped with the following input and output
signal connectors as standard equipment.
Video outputs
• SDI (main), 2-system (HD/SD selectable, embedded digital
audio)
• SDI (monitor), 2-system (HD/SD selectable, embedded
digital audio, superimposed character and marker display)
• Analog composite (VBS 2-system, PIX 1-system,
WF 1-system)
• Analog component, 1-system (HD Y/Pb/Pr, HD R/G/B,
SD Y/R-Y/B-Y, SD R/G/B 4-format selectable)
• Sync, 1-system (HD/SD selectable)
Video inputs
• Reference input (HD/SD selectable)
• SDI return input, 2-system (HD/SD selectable)
• VBS return input, 2-system
• VBS teleprompter input, 2-system
When an HXC-100 is connected, 1-system of a VBS
teleprompter input is available.
Audio input/outputs
• Microphone (analog) output, 2-system (XLR-3-pin)
• Intercom input/output, 2-system (D-sub 25-pin)
• PGM (program audio) input, 2-system (D-sub 25-pin)
Other input/outputs
• Tally (R/G)
• Microphone remote (D-sub 15-pin)
• WF (waveform monitor) remote output (D-sub 15-pin)
• WF (waveform monitor) mode output (4-pin)
• Trunk (D-sub 9-pin)
• REMOTE (8-pin)
• LAN (RJ-45, 8-pin)
External sync signals
The CCU can be locked to an external sync signal. Either an
HD tri-level sync signal or an SD sync (black burst) signal can
be used as the sync signal.
Digital triax transmission
The CCU and camera are connected using the industry-
standard double-shielded triaxial camera cable (commonly
referred to as triax). The camera and CCU are equipped with
the latest Sony-developed digital transmission technology
which can transmit high-resolution pictures between the
camera and CCU, regardless of the cable length.
Built-in down converter
HD signals from the camera can be converted to high-
resolution SD component SDI output signals using the
wideband down converter. The output signal aspect ratio can
be set to 4:3 edge crop, 16:9 squeeze, or letterbox. The down
converted SD signal has independent image enhancement,
gamma, and matrix functions that can be controlled externally.
Built-in simplified up converter
SD signal return video is displayed in the HD viewfinder using
a simple up converter. The return video aspect ratio can be set
to 4:3 edge crop, 16:9 squeeze, or letterbox.
Electric shock prevention
A safety function cuts the high-voltage supply from the CCU if
the connection to the camera becomes unsafe.
When power is applied, low-voltage power is first supplied to
the camera. After the connected camera is correctly identified
using tone signal detection, the regular DC180 V high-voltage
power is supplied to the camera. Power is not supplied to
cameras not connected via the triax cable.
Alarm indicators are also fitted to indicate cable open-circuit
and short-circuit conditions.
Wide range of audio functions
The CCU is fitted with two-channel microphone output, video
signals with embedded audio, and PGM (program) audio
input/output connectors. It also features an intercom system
with two independent channels, and supports four-wire and
RTS/Clear-Com intercom systems.
For information on support for RTS/Clear-Com systems,
contact a Sony service or sales representative.
Microphone volume control
The camera’s microphone volume can be controlled via the
MIC REMOTE connector.
Note

7
Overview
System Configuration Example
Zoom Lens
(for ENG/EFP)
“Memory Stick”
VCT-14
Tripod Adaptor
Tr i p o d f o r
portable
camera
RCP-1000-series
Remote Control
Panel
CCA-5 cable
HDVF-200/C35W
Viewfinder
CAC-12
Microphone
Holder
Microphone
HDVF-550/C550W/C730W
Viewfinder
Zoom Lens
(for studio use)
HDLA1500-series
Large Lens Adaptor
HDVF-550/C550W/C730W
Viewfinder
CAC-6
Return Video Selector
MSU-1000/1500
Master Setup Unit
HSCU-300/
Camera Control
Unit
BNC BNC
Picture
Monitor
Waveform
Monitor
Video router
BKP-7911
Script Holder
HSC-300
HD Color Camera
VF attachment shoe a)
Camera hangers d)
VF attachment shoe a)
General-purpose power supply
DC 12 V (Max. 5A) e)
Power supply for a script light
DC 12 V (Max. 1.5 A)
Power supply
for a script light
DC 12 V
(Max. 0.5 A)
AC power
Video output
HD-SDI/SD-SDI/VBS
AC power
Intercom headset
Sync input
Return video input
Prompter video input
Hub
LAN cable
LAN cable
to router/switcher
Triax cable c)
Triax cable c)
RCP-1000-series
Remote Control
Panel
HSCU-300
Camera Control Unit
LAN cable
AC power
CCA-5 cable
HSC-300 is connected)” (page 24) or “Triax transmission
distances (when an HXC-100 is connected)” (page 24).
d) Supplied with the HDLA1500/1505, Part No.: A-1128-405-A
e) For general-purpose DC 12 V output, the serial number must be
the following or higher:
HDLA1500: 13001 or 43001, HDLA1503: 52001,
HDLA1505: 11001 or 41001 or 401001, HDLA1507: 401001
a) Supplied with the HDVF-550/C550W/C730W, Part No.: A-7612-405-E
b) An HXC-100 and HSCU-300 can be connected if both units are of version
1.10 or later.
c) 900 m (2953 ft) when an HSC-300 is connected or 600 m (1969 ft) when an
HXC-100 is connected at maximum and 50 m (164 ft) at minimum when using
Fujikura 8.5-mm dia. cables.
For information of other cables, see “Triax transmission distances (when an
HSC-300/HXC-100
HD Color Camera
b)

8Locations and Functions of Parts
Locations and Functions of Parts
Front Panel
aTally light
Turns on red to indicate a red tally signal is being received
(such as when the picture from the camera connected to the
CCU is being used). When the CALL button on the camera,
the MSU-1000/1500 Master Setup Unit, or the RCP-1000-
series Remote Control Panel is pressed, the light turns off if lit
or turns on if not lit.
Turns on green to indicate a green tally signal is being
received.
A number plate supplied with the CCU can be attached here
(see the following figure).
bCABLE ALARM indicators
OPEN: Turns on when a camera is not connected (open
circuit) to the CAMERA connector on the rear panel via a
triax cable. While on, the CCU does not supply any power
to the camera.
It flashes when there is a problem with the transmission
between the camera and the CCU.
It may also turn on when using the camera with an external DC
supply.
SHORT: Turns on when there is an overcurrent condition
(short circuit) on the triax cable. While on, the CCU does
not supply any power to the camera.
cINTERCOM audio input/output and control block
• INTERCOM (intercom adjustment) knob
Adjusts the headset audio level.
• MIC/PGM (microphone/program) switch
ON: Turns the headset microphone on.
OFF: Turns the headset microphone off.
PGM: Selects program audio output. In this mode, the
INTERCOM knob adjusts the headset program audio level.
• INTERCOM (intercom select) switch
Selects the intercom signal input/output connection source for
the INTERCOM connector on the rear panel.
PROD: Connects the producer line.
PRIV: Disconnects both the producer line and engineer line,
allowing private communication between CCU and camera
only.
ENG: Connects the engineer line.
• INTERCOM connector (XLR 5-pin)
Intercom headset connection.
a
ef g
bc d
Note
INTERCOM (intercom adjustment) knob
MIC/PGM (microphone/program) switch
INTERCOM (intercom select) switch
INTERCOM
connector

9
Locations and Functions of Parts
dMENU control block
• DISP/MENU (display/menu) lever and indicator
Selects the status display or setup menu display. In setup
menu mode, the indicator turns on.
• CANCEL/ENTER lever
In setup menu mode, used to cancel and enter settings.
• CONTROL knob (rotary encoder)
In status screen mode, used to change the displayed page.
In setup menu mode, used to move the cursor on a page and
to change menu settings. Pressing the CONTROL knob
performs the same function as setting the CANCEL/ENTER
lever to the ENTER position.
ePOWER switch
Switches the power for the entire system on and off, including
the CCU, camera, and the RCP-1000-series Remote Control
Panel connected to the REMOTE connector on the rear panel.
Pressing the “?” side turns the camera system on, and
pressing the “a” side turns it off.
fPOWER indicator
CAM: Turns on when power is supplied to the camera.
MAIN: Turns on when the CCU power supply is turned on. It
flashes when there is a problem with the fan.
gNETWORK indicator
Displays the network system connection status.
On: Indicates that external control equipment (MSU-
1000/1500 Master Setup Unit, RCP-1000-series Remote
Control Panel, or other device) is connected.
Flashing: Indicates a connection problem with the external
control equipment (MSU-1000/1500 Master Setup Unit,
RCP-1000-series Remote Control Panel, or other device).
Off: Indicates that a LAN cable is not connected or that the
network system connection parameters have not been set.
See “Network diagnostics” on page 12 and “NETWORK
SETTINGS menu” on page 22.
Rear Panel
aSDI OUTPUT 1 to 4 connectors (BNC type)
Outputs the camera signals in HD SDI or SD SDI signal
format.
The SDI OUTPUT 3 and SDI OUTPUT 4 connectors can also
output signals with superimposed character or marker display.
bVBS OUTPUT 1, 2 (composite video signal 1, 2)
connectors (BNC type)
Outputs (2-system) the camera signals in composite signal
format.
cLAN jack (RJ-45, 8-pin)
Connects to a LAN hub (10BASE-T/100BASE-TX), when
using a network connection, via a LAN cable (shielded type,
category 5 or higher).
• For safety, do not connect the connector for peripheral device wiring
that might have excessive voltage to this port. Follow the
instructions for this port.
• When you connect the LAN cable of the unit to peripheral device,
use a shielded-type cable to prevent malfunction due to radiation
noise.
dPROMPTER (teleprompter input 1, 2) connectors
(BNC type)
Inputs the VBS signals for the teleprompter.
When an HXC-100 is connected, only the PROMPTER 1
connector is enabled.
ePIX (picture monitor output) connector (BNC type)
Outputs a video signal for a picture monitor. It can also output
a signal with superimposed character display.
fWF (waveform monitor output) connector (BNC type)
Outputs a video signal for a waveform monitor.
gSYNC (sync signal output) connector
Outputs a sync signal for connection to the sync signal input
connector of a waveform monitor or picture monitor.
hREMOTE connector (8-pin)
Transmits and receives control signals from a MSU-1000/1500
Master Setup Unit, CNU-700 Camera Command Network
Unit, or RCP-1000-series Remote Control Panel via a CCA-5
cable (optional). It also supplies power when connected to an
RCP-1000-series Remote Control Panel.
DISP/MENU (display/menu) lever and indicator
CANCEL/ENTER lever
CONTROL knob
a
lm no pqr s
bc d efgh i j k
CAUTION
Note

10 Locations and Functions of Parts
iMIC OUT1, MIC OUT2 (microphone output 1, 2)
connectors (XLR 3-pin)
Outputs the camera microphone signals.
jCAMERA connector (triax connector)
Connects to the camera via a triax cable. The camera sends
all video and audio signals to the CCU, and the CCU sends
control signals, return video and audio signals, as well as
power, to the camera over a single triax cable.
kAC supply input connector
Connects to the AC supply via the specified power cord
(optional). A plug holder (optional) can be used to secure the
power cord to the CCU.
lREFERENCE (reference input) connectors (BNC type)
Inputs an HD tri-level reference sync signal or SD reference
sync signal (black burst signal) on either of the two connectors.
The input signal is output from the other connector as-is (loop-
through output). If the loop-through output is not used, connect
it to a 75 Ωterminator.
mINTERCOM/TALLY/PGM (intercom/tally/program
audio) connector (D-sub 25-pin)
Transmits and receives the various intercom, tally, and
program audio signals. It connects to the intercom/tally/
program audio connector of the intercom system.
nRETURN INPUT (return video input) connector block
• SDI 1/3, 2/4 (SDI return video 1/3, 2/4 input) connectors
(BNC type)
• VBS 1/3, 2/4 (VBS return video 1/3, 2/4 input) connectors
(BNC type)
Inputs the HD SDI return video signals and SD SDI return
video signals (2-system), and the VBS return video signals
(2-system).
The SDI 1/3 and 2/4 connectors can also be set to function as
an HD/SD SDI teleprompter input.
When an HXC-100 is connected, an SDI teleprompter input
cannot be used.
For information on the return video signal combinations, see
“Return Signal Combinations” on page 25.
oMIC REMOTE (microphone remote) connector
(D-sub 15-pin)
Connects to an external control device, such as an audio
mixer, which can select the camera microphone gain to one of
five values (20/30/40/50/60 dB) in response to the audio
conditions when shooting.
This connector can also output a red tally signal and green
tally signal.
pWF REMOTE (waveform monitor remote) connector
(D-sub 15-pin)
Outputs signals for a waveform monitor when controlling the
waveform monitor display remotely from the MSU-1000/1500
Master Setup Unit or RCP-1000-series Remote Control Panel.
It connects to a recall-type waveform monitor.
For connection details, refer to the waveform monitor manual.
qPr/R/R-Y, Y/G/Y, Pb/B/B-Y (component signals)
connectors (BNC type)
Outputs the HD component signals, SD component signals,
HD RGB signals, or SD RGB signals from the corresponding
connectors.
rTRUNK connector (D-sub 9-pin, RS-422A standard)
Connects to an external device to provide a communication
path via the CCU between that device and another external
device connected to the REMOTE connector on the camera.
sWF MODE (waveform monitor mode output) connector
(4-pin)
Connects to a waveform monitor and is used when monitoring
each of the 3 R/G/B waveforms simultaneously in sequential
mode.
When the SEQ button on the MSU-1000/1500 Master Setup
Unit or RCP-1000-series Remote Control Panel is pressed,
the video signal output from the WF connector changes to a
sequence signal.
Note
11
Status Display
Status Display
The CCU system status can be monitored using a picture
monitor connected to the PIX output.
For information on monitoring and changing settings, see
“Setup Menu” on page 14.
Displaying the Status Screen
The status screen is controlled using the knob and levers in
the MENU control block on the front panel.
To display the status screen
Set the DISP/MENU lever to the DISP position.
The most recently viewed status screen page is displayed
(when first powered on, the camera settings page is
displayed).
Turning the CONTROL knob changes the displayed page.
To exit the status screen display
In status screen display mode, set the DISP/MENU lever to the
DISP position.
Status Display Screen
The following information is displayed on the status display
screen.
• Camera settings
• System status
• CCU hardware diagnostics
• Camera system diagnostics
• Network diagnostics
• CCU SY board diagnostics
• CCU DPR board diagnostics
• Camera hardware diagnostics
• ROM version information for major components
Camera settings
Page 1
aMaster gain value
Video output signal gain (dB units)
bShutter speed/Clear scan frequency
Shutter speed value. When ECS is on, the clear scan
frequency is displayed.
cShutter/ECS
Shutter/ECS on/off indicator
dCamera auto control information area
Top: Displays the Auto Setup category and execution status
Bottom: Displays the execution item
eND filter
Current ND filter selection
fF-stop value
Lens f-stop value (iris value)
gEX (lens extender)
Lens extender indicator
hCC filter
Current CC filter selection
When an HXC-100 is conncted, a.“-” mark is displayed for the CC filter.
• Items that are turned off using the <DISPLAY> page settings of the
CCU CONFIGURATION menu are not displayed.
• A “-” mark is displayed for each item when a camera is not
connected.
Page 2
White: White balance R/G/B value
Black: Black balance R/G/B/Master value
BLK γ: Black gamma value
DISP/MENU lever
CONTROL knob
Note
Notes
6
dB
1/2000 OFF
ND:1 F:4.7 EX CC:A
a
efg h
b
cd
6
dB
1/2000 OFF
White Black
R: 0 R: 0
G: 0 G: 0
B: 0 B: 0
M: 0
BLK γFlare
: 0 R: 0
DTL G: 0
: 0 B: 0
ND:1 F:4.7 EX CC:A

12 Status Display
Flare: Flare balance R/G/B value
DTL: Detail level
The items along the bottom edge are common to both pages 1 and 2.
System status
The camera model name and signal format are displayed at
the top of the page (a “-” mark is displayed instead when a
camera is not connected).
Reference: Reference signal format and lock status
SDI-1/2: SDI OUTPUT 1/2 connector output format setting
SDI-3/4: SDI OUTPUT 3/4 connector output format setting
Component: Component signal connector output format
setting
Return1: Return 1 return signal format setting
Return2: Return 2 return signal format setting
Return3: Return 3 return signal format setting
Return4: Return 4 return signal format setting
CCU hardware diagnostics
The camera Auto Setup category, and the corresponding
setup item and status are displayed at the top of the page.
DPR: DPR board status
SDI: SDI board status
SY: SY board status
VIF: VIF board status
Camera system diagnostics
Page 1
TRIAX Type: Triax transmission mode
TRIAX Cable: CCU triax cable connection status
TRIAX Comp.: Triax cable compensation mode selection
TRIAX Step: Triax cable compensation step (internal circuit
step display)
Fan Power: CCU power supply fan status
Timer: Elapsed time since power-on
CCU Power: CCU power supply type and status
SerialNo: CCU serial number
Page 2
CAMERA Cable: Camera cable connection status
CAMERA Data: Camera data transmission status
CAMERA Power: Camera power supply status
CAMERA Tone: Camera identification tone detection status
REMOTE Cable: Remote device cable connection status
REMOTE Data: Remote device data transmission status
REMOTE Power: Remote device power supply status
Page 3
Intercom CCU: CCU intercom selection
Intercom CAMERA CH1: Camera intercom channel 1
selection and microphone status
Intercom CAMERA CH2: Camera intercom channel 2
selection and microphone status
CAM MIC Gain: Camera microphone circuit control selection
CAM MIC CH1: Camera microphone channel 1 amplifier gain
CAM MIC CH2: Camera microphone channel 2 amplifier gain
Network diagnostics
Page 1
Note
*System Status* 1/12
HSC-300 1080/59.94I
Reference:Free Lock
SDI-1/2 :1080/59.94I
SDI-3/4 :525/59.94I
Component:SD YCD
Return1 :1080/59.94I
Return2 :525/59.94I
Return3 :NTSC
Return4 :NTSC
*Diagnosis* 2/12
DPR :OK SDI :OK
SY :OK VIF :OK
*System Diag 1/3* 3/12
TRIAX Type Digital
Cable Connect
Comp. Auto
Step 4
Fan Power OK
Timer 96H
CCU Power AC OK
SerialNo 100001
*System Diag 2/3* 4/12
CAMERA Cable Connect
Data OK
Power OK
Tone Detect
REMOTE Cable Connect
Data OK
Power OK
*System Diag 3/3* 5/12
Intercom
CCU Private
CAMERA CH1 ENG
MIC OFF
CH2 ENG
MIC OFF
CAM MIC Gain Local
CH1 60
dB
CH2 60
dB
*Network Diag 1/3* 6/12
MacAddress:000000-000000
Auto Negotiation: ON
Auto MDI/MDIX : ON
Connection Speed:100M
Duplex Mode :HALF
MDI/MDIX :MDIX
Link Status :OK

13
Status Display
MacAddress: MAC address stored in CCU EEPROM
Auto Negotiation: Auto negotiation setting
Auto MDI/MDIX: Auto-MDIX setting
Connection Speed: Connection speed setting
Duplex Mode: Communication method setting
MDI/MDIX: Communications port wiring configuration
selection
Link Status: Network connection status
Page 2
CNS Mode: REMOTE and LAN connectors mode setting
CCU No.: CCU number setting
Master IP Address: MCS-mode master device IP address
Page 3
IP Address: CCU IP address setting
Subnet Mask: CCU subnet mask setting
Default Gateway: CCU default gateway setting
CCU SY board diagnostics
Reference: Reference signal setting
HD-SD Delay: HD to SD delay setting
PLD Status: PLD status
PLD SY: SY-PLD version
PLD RET: RET-PLD version
SY PWR: SY board power supply status
VIF PWR: VIF board power supply status
CCU DPR board diagnostics
HD CB: HD color bar setting
SD CB: SD color bar setting
SEQ ON: SEQ ON polarity
PLD Status: PLD status
PLD DE-MUX: DEMUX-PLD version
PLD ANALOG: ANALOG-PLD version
PLD POST: POST-PLD version
PLD MAP: MAP-PLD version
IIC: IIC bus control status
DPR PWR: DPR board power supply status
SDI PWR: SDI board power supply status
Camera hardware diagnostics
Displays the camera hardware status.
ROM Version Information
CAMERA: Camera model name and ROM version
CCU: CCU model name and ROM version
REMOTE: REMOTE connector device model name and ROM
version
*Network Diag 2/3* 7/12
CNS Mode :BRIGDE
CCU No. :1
Master IP Address
0. 0. 0. 0
*Network Diag 3/3* 8/12
IP Address
0. 0. 0. 0
Subnet Mask
0. 0. 0. 0
Default Gateway
0. 0. 0. 0
*SY Diag* 9/12
Reference :HD
HD-SD Delay:Line(90H)
PLD Status :OK
SY :1.00
RET :1.00
SY PWR:OK VIF PWR:OK
*DPR Diag* 10/12
HD CB :BAR 16:9(100%)
SD CB :SMPTE
SEQ ON:NPN
PLD Status:OK
DE-MUX:1.00
ANALOG:1.00
POST :1.00
MAP :1.00
IIC :OK
DPR PWR:OK SDI PWR:OK
*CAMERA Diag* 11/12
ALL BOARD OK
*ROM Version* 12/12
CAMERA HSC-300
1.00 09.01.01
CCU HSCU-300
1.00 09.01.01
REMOTE RCP-920
1.20 09.01.01

14 Setup Menu
Setup Menu
The CCU system and peripheral settings can be modified
using a picture monitor connected to the PIX output.
Changing Menu Item Settings
The menu screen is controlled using the knob and levers in the
MENU control block on the front panel.
Setting the CANCEL/ENTER lever to the ENTER position and
pressing the CONTROL knob perform the same function.
To display a menu page
Set the DISP/MENU lever to the MENU position.
When first powered on, the CCU MENU page is displayed.
To display the CCU MENU page
In menu display mode, turn the CONTROL knob to move the
,arrow to TOP in the upper right corner of the menu page,
then press the CONTROL knob.
The CCU MENU showing the menu configuration is displayed.
To select an item in the CCU MENU
Turn the CONTROL knob to move the ,arrow up/down to the
desired menu item, then press the CONTROL knob.
The most recently viewed page in the selected menu is
displayed.
To change the displayed page
1Turn the CONTROL knob to move the ,arrow to the
page number, then press the CONTROL knob.
The ,arrow changes to a flashing ?question mark.
2Turn the CONTROL knob to change the displayed
page to the desired page, then press the CONTROL
knob.
The ?question mark changes back to the ,arrow. Items
on the page can now be selected and changed.
To change a menu item setting
If a ?question mark is displayed beside the page number,
press the CONTROL knob to restore the ,arrow. Items on
the page can now be selected and changed.
1Turn the CONTROL knob to move the ,arrow to the
desired item, then press the CONTROL knob.
The ,arrow changes to a flashing ?question mark.
2Turn the CONTROL knob to change the setting.
To cancel a changed setting
Set the CANCEL/ENTER lever to the CANCEL position
before pressing the CONTROL knob. The item is restored
to its current setting.
To suspend menu changes
Set the DISP/MENU lever to the MENU position to exit the
menu screen.
The DISP/MENU lever can be set to the MENU position
again to restart the operation.
3Press the CONTROL knob.
The ?question mark changes back to the ,arrow, and
the item setting is registered.
4Repeat steps 1 to 3 to change other settings on the
same page.
Menu name Description
SYSTEM OPERATION Input/output signal format and
system-related settings
CCU CONFIGURATION CCU configuration settings
NETWORK SETTINGS Network-related settings
DISP/MENU lever and indicator
CANCEL/ENTER lever
CONTROL knob
** CCU MENU **
cSYSTEM OPERATION
CCU CONFIGURATION
NETWORK SETTINGS
<OUTPUT SELECT> ?S01 TOP
OUTPUT:*CAMERA
BAR
TEST1
TEST2
PIX:*ENC R G B
R&B G&B R&B RGB
WF :*ENC R G B SEQ
R&B G&B R&B RGB
Flashing

15
Setup Menu
To change a menu item with multiple input
fields
Some menus have items with multiple input fields.
Moving the ,arrow to an item with multiple input fields and
pressing the CONTROL knob displays the input fields. Each
field needs to be set separately. Turning the CONTROL knob
moves the cursor between input fields.
The following menu item has multiple input fields:
• NETWORK SETTINGS menu →<CNS SETTINGS> page
→MASTER IP ADDRESS
1Turn the CONTROL knob to move the ,arrow to the
desired item, then press the CONTROL knob.
The ,arrow changes to a flashing *asterisk. The input
fields are displayed. A second ,arrow is displayed for
the input fields.
2Turn the CONTROL knob to move the ,arrow to the
desired input field, then press the CONTROL knob.
The ,arrow changes to a flashing ?question mark.
3Turn the CONTROL knob to change the setting.
To cancel a changed input field setting
Set the CANCEL/ENTER lever to the CANCEL position
before pressing the CONTROL knob. The field is restored
to its current setting. Other changed input fields are not
restored to their previous setting.
To suspend menu changes
Set the DISP/MENU lever to the MENU position to exit the
menu screen.
The DISP/MENU lever can be set to the MENU position
again to restart the operation.
4Press the CONTROL knob.
The ?question mark changes back to the ,arrow, and
the input field setting is registered.
5Repeat steps 2 to 4 to change other input fields.
6Turn the CONTROL knob to move the ,arrow to
END, then press the CONTROL knob.
The *asterisk changes back to the ,arrow, and all item
input field settings are registered.
To cancel all changed item settings
Turn the CONTROL knob to move the ,arrow to ESC,
then press the CONTROL knob.
The *asterisk changes back to the ,arrow, and all
changes are discarded.
To enter a character string
Some menu items require a character string input.
Moving the ,arrow to an item with a character string input
and pressing the CONTROL knob displays a rectangular
cursor and a list of selectable characters. Turning the
CONTROL knob moves the cursor between characters.
The following menu item has character strings:
• CCU CONFIGURATION menu →<BAR CHARACTER>
page →BAR CHARACTER
1Move the text cursor to the input position, then press
the CONTROL knob.
A second cursor is displayed in the character list.
2Turn the CONTROL knob to move the cursor to the
desired character, then press the CONTROL knob.
Repeat steps 1and 2to enter other characters.
• Select INS to insert a space character at the cursor
position.
• Select DEL to delete the character at the cursor
position.
• Select RET to return to step 1without changing the
string.
• Entering the maximum number of characters (up to the
right edge) moves the cursor to ESC on the lower right
of the character list.
3Turn the CONTROL knob to move the cursor to END,
then press the CONTROL knob.
The new input string is registered.
To cancel the character string setting
Turn the CONTROL knob to move the cursor to ESC, then
press the CONTROL knob.
To exit the menu display
In menu display mode, set the DISP/MENU lever to the MENU
position.

16 Setup Menu
Menu List
The following conventions are used in the menu list table.
Settings column values (e.g. ON, OFF, 0): Default settings
ENTER to execute: Press the CONTROL knob or move the
CANCEL/ENTER lever to the ENTER position to execute.
SYSTEM OPERATION menu
Note
Page name
Page No.
Item Settings
<OUTPUT
SELECT>
S01
OUTPUT
Output signal
selection
CAMERA, BAR, TEST1,
TEST2
TEST1 and TEST2 are
not selectable if there is
no communication with
the camera.
PIX
PIX connector
output signal
selection
ENC, R, G, B, R&G, G&B,
R&B, RGB
WF
WF connector
output signal
selection
ENC, R, G, B, SEQ, R&G,
G&B, R&B, RGB
<GENLOCK
PHASE>
S02
REFERENCE (NONE), (EXT IN)
Reference signal input
status (read only)
GENLOCK
External reference
signal lock mode
selection, lock
status, and signal
format
HD, SD
(OK), (NG)
External reference signal
lock status (read only)
(OK): Locked
(NG): Unlocked
External reference signal
format
Displayed only when a
reference signal is
present (read only)
Reference signal lock phase adjustments
H STEP When GENLOCK is HD:
–3.01 to 3.45 µs 0.00
When GENLOCK is SD:
–8.29 to 9.48 µs 0.00
COARSE –99 to 99 0
SC PHASE 0to 359
V PHASE 0to 7
SYNC OUT
SYNC connector
output signal
selection
HD SYNC, SD SYNC
<MULTI
FORMAT>
S03
Note
FREQUENCY
or CAMERA
FORMAT
mode setting
changes take
effect only
after the CCU
power supply
is turned off
and then on
again.
FREQUENCY
Operating frequency selection
HD 1.001, 1.000
Note
The default setting is
different among the
sales areas.
United States and
Canada: 1.001
Other areas: 1.000
SD (525 NTSC), (625 PAL)
(Read only)
When FREQUENCY HD
is 1.001: (525 NTSC)
When FREQUENCY HD
is 1.000: (625 PAL)
Note
The default setting is
different among the
sales areas.
United States and
Canada: (525 NTSC)
Other areas: (625 PAL)
CAMERA FORMAT
Transmission
format selection
When FREQUENCY HD is
1.001: 1080/59.94i,
720/59.94P
When FREQUENCY HD is
1.000: 1080/50i, 720/50P
Note
The default setting is
different among the
sales areas.
United States and
Canada: 1080/59.94i
Other areas: 1080/50i
Page name
Page No.
Item Settings

17
Setup Menu
<OUTPUT
FORMAT>
S04
SLOT NO
1-1&2
SDI OUTPUT
1/2 connector
output format
selection
Sequence of
format options:
1: HD
2: SD
When CAMERA FORMAT
is 1080/59.94i:
1080/59.94i, 525/59.94i
When CAMERA FORMAT
is 720/59.94P: 720/59.94P,
525/59.94i
When CAMERA FORMAT
is 1080/50i: 1080/50i,
625/50i
When CAMERA FORMAT
is 720/50P: 720/50P,
625/50i
Note
The default setting is
different among the
sales areas.
United States and
Canada: 1080/59.94i
Other areas: 1080/50i
3&4
SDI OUTPUT
3/4 connector
output format
selection
Sequence of
format options:
1: HD
2: SD
When CAMERA FORMAT
is 1080/59.94i:
M1080/59.94i,
M525/59.94i
When CAMERA FORMAT
is 720/59.94P:
M720/59.94P, M525/59.94i
When CAMERA FORMAT
is 1080/50i: M1080/50i,
M625/50i
When CAMERA FORMAT
is 720/50P: M720/50P,
M625/50i
Note
The default setting is
different among the
sales areas.
United States and
Canada: M525/59.94i
Other areas: M625/50i
COMPONENT
Component signal
connector output
format selection
HD RGB, HD YPbPr,
SD RGB, SD YCD
HD-SD DELAY
HD signal to SD
signal delay mode
selection
When CAMERA FORMAT
is 1080 system format:
0-Delay, Line (90H), Frame
(1F)
When CAMERA FORMAT
is 720 system format:
0-Delay, Line (120H),
Frame (2F)
When GENLOCK is HD:
0to –71.1 µs
When GENLOCK is SD:
0to –51.7 µs
Page name
Page No.
Item Settings
<SD ASPECT>
S05
SD ASPECT
SD output aspect
selection
SQUEEZE, EDGE CROP
,
LETTER BOX
SD LB SEL
LETTER BOX
aspect ratio
selection
16:9, 15:9, 14:9, 13:9
H POSITION
Horizontal
position setting
–99 to 99, (–99) to (99) 0
( ) displayed when SD
ASPECT is SQUEEZE
or LETTER BOX (read
only)
CENTER
Horizontal
centering
selection
ON, OFF, (ON), (OFF)
( ) displayed when SD
ASPECT is SQUEEZE
or LETTER BOX (read
only)
V POSITION
Vertical position
setting
–99 to 99, (–99) to (99) (0)
( ) displayed when SD
ASPECT is SQUEEZE
or EDGE CROP (read
only)
CENTER
Ver ti cal
centering
selection
ON, OFF, (ON), (OFF)
( ) displayed when SD
ASPECT is SQUEEZE
or EDGE CROP (read
only)
H INTERP
Down converter
horizontal filter
selection
A, B, C, D, E
V INTERP
Down converter
vertical filter
selection
A, B, C, D, E
Page name
Page No.
Item Settings

18 Setup Menu
<RETURN
FORMAT>
S06
The RET1 to 4
signal outputs
support 16
combinations.
See “Return
Signal
Combinations”
on page 25.
RET1
Return 1 signal
format, aspect,
and letterbox
aspect ratio
selection
Sequence of
format options:
1: HD SDI
2: SD SDI
3: VBS
When CAMERA FORMAT
is 1080/59.94i:
1080/59.94i, 525/59.94i,
NTSC
When CAMERA FORMAT
is 720/59.94P: 720/59.94P,
525/59.94i, NTSC
When CAMERA FORMAT
is 1080/50i: 1080/50i,
625/50i, PAL
When CAMERA FORMAT
is 720/50P: 720/50P,
625/50i, PAL
SQUEEZE, EDGE CROP,
LETTER BOX
Not displayed for HD SDI
signals
16:9, 15:9, 14:9, 13:9
Not displayed for HD SDI
signals
RET2
Return 2 signal
format, aspect,
and letterbox
aspect ratio
selection
Sequence of
format options:
1: HD SDI
2: SD SDI
3: VBS
When CAMERA FORMAT
is 1080/59.94i:
1080/59.94i, 525/59.94i,
NTSC
When CAMERA FORMAT
is 720/59.94P: 720/59.94P,
525/59.94i, NTSC
When CAMERA FORMAT
is 1080/50i: 1080/50i,
625/50i, PAL
When CAMERA FORMAT
is 720/50P: 720/50P,
625/50i, PAL
SQUEEZE, EDGE CROP,
LETTER BOX
Not displayed for HD SDI
signals
16:9, 15:9, 14:9, 13:9
Not displayed for HD SDI
signals
RET3
Return 3 signal
format, aspect,
and letterbox
aspect ratio
selection
Sequence of
format options:
1: HD SDI
2: SD SDI
3: VBS
When CAMERA FORMAT
is 1080/59.94i:
1080/59.94i, 525/59.94i,
NTSC
When CAMERA FORMAT
is 720/59.94P: 720/59.94P,
525/59.94i, NTSC
When CAMERA FORMAT
is 1080/50i: 1080/50i,
625/50i, PAL
When CAMERA FORMAT
is 720/50P: 720/50P,
625/50i, PAL
SQUEEZE, EDGE CROP,
LETTER BOX
Not displayed for HD SDI
signals
16:9, 15:9, 14:9, 13:9
Not displayed for HD SDI
signals
Page name
Page No.
Item Settings
<RETURN
FORMAT>
S06
The RET1 to 4
signal outputs
support 16
combinations.
See “Return
Signal
Combinations”
on page 25.
RET4
Return 4 signal
format, aspect,
and letterbox
aspect ratio
selection
Sequence of
format options:
1: HD SDI
2: SD SDI
3: VBS
When CAMERA FORMAT
is 1080/59.94i:
1080/59.94i, 525/59.94i,
NTSC
When CAMERA FORMAT
is 720/59.94P: 720/59.94P,
525/59.94i, NTSC
When CAMERA FORMAT
is 1080/50i: 1080/50i,
625/50i, PAL
When CAMERA FORMAT
is 720/50P: 720/50P,
625/50i, PAL
SQUEEZE, EDGE CROP,
LETTER BOX
Not displayed for HD SDI
signals
16:9, 15:9, 14:9, 13:9
Not displayed for HD SDI
signals
SD RET ASPECT
SD return signal
aspect selection
AUTO, MANUAL
AUTO: Automatically
follows the SD output
aspect setting
MANUAL: Set manually,
independent of SD
output aspect setting
Page name
Page No.
Item Settings

19
Setup Menu
CCU CONFIGURATION menu
Page name
Page No.
Item Settings
<COLOR BAR>
C01
HD BAR
HD output color bar settings
SEL BAR 16:9 (100%), BAR
16:9 (75%), SMPTE 16:9
(BLACK), SMPTE 16:9
(–I/Q), BAR 4:3 (100%),
BAR 4:3 (75%), SMPTE
4:3 (BLACK), SMPTE 4:3
(–I/Q), MF-ARIB (75%),
MF-ARIB (100%),
MF-ARIB (+I), MF-SMPTE
(–I,Q), MF-SMPTE
(75%,Q), MF-SMPTE
(100%,Q), MF-SMPTE
(+I,Q), HD-CUSTOM, SDI
CHECK FIELD, Y -RAMP,
Y/C-RAMP, HD-CUSTOM2
MF CB MODIFY
, EVEN
SLOPE WIDE, NARROW
SD BAR
SD output color
bar setting
For NTSC: SMPTE, EIA,
FULL, 95%, NTSC100%,
Y/C-RAMP, Y -RAMP,
DISABLE
For PAL: SMPTE, EIA,
EBU, 95%, PAL100%,
Y/C-RAMP, Y -RAMP,
DISABLE
DISABLE: Down
conversion output of HD
color bar signal
BAR CHARA
Character
superimposed on
color bar signal
ON, OFF
GRAY ON, OFF
ON: Gray screen output
when camera power
supply is off
OFF: Color bar signal
output when camera
power supply is off
<BAR
CHARACTER>
C02
BAR CHARACTER Settings for strings 1 to 11
that are superimposed on
the color bar signal
<ALL CLEAR> ENTER to execute
Execute to clear all
character strings
<MONITOR 1>
C03
CHARACTER
WHITE LEVEL 0.0 to 107.0% 71.5
BLACK LEVEL 0.0 to 107.0%
PIX CHARACTER
WHITE LEVEL 75.0 to 107.0%
BLACK LEVEL 0.0 to 25.0%
<MONITOR 2>
C04
LEVEL GATE ---, 1&2, 1, 2, OFF
---: Displayed when
camera not connected,
video output not set to
CAMERA, or video
output is set to CAMERA
and GATE MARKER is
ON (read only)
Y LEVEL1
Level gate 1
minimum and
maximum
detection
levels and
zebra range
settings
0 to 108% 49 61
–99 to 99 –25
Y LEVEL2
Level gate 2
minimum and
maximum
detection
levels and
zebra range
settings
0 to 108% 74 108
–99 to 99 –25
GATE MARKER
Gate signal
display on/off and
signal level setting
---, ON, OFF
---: Displayed when
camera not connected
(read only)
–99 to 99 0
MODULATION
4:3 aspect ratio
mask function
on/off when
EDGE CROP is
ON, and mask
video level setting
---, ON, OFF
---: Displayed when
camera not connected
(read only)
–99 to 99 0
MARKER
Marker signal
on/off and
superimposed
signal selection
ON, OFF
4:3, 13:9, 14:9, EU VISTA,
VISTA, CINEMA, FOLLOW
DC
Page name
Page No.
Item Settings

20 Setup Menu
<MIC/AUDIO>
C05
CAM MIC GAIN (REMOTE), (LOCAL)
(REMOTE): MIC
REMOTE source
(LOCAL): Not MIC
REMOTE source
CH1 ---, 20, 30, 40, 50, 60 dB
---: Displayed when
camera not connected
(read only)
CH2 ---, 20, 30, 40, 50, 60 dB
---: Displayed when
camera not connected
(read only)
MIC REMOTE
MIC REMOTE
gain control
method
MIC 1&2, MIC 1.2
MIC 1&2: MIC 1, 2
common gain control
MIC 1.2: MIC 1, 2
independent gain control
MIC OUT
DELAY
MIC OUT 1,2
delay setting
0to 3328 Fs
MIC1 LEVEL –20, 0dBu
MIC2 LEVEL –20, 0dBu
<INCOM/PGM>
C06
SYSTEM INTERFACE
ENGINEER
Engineer line
intercom
system
selection
CLEAR COM, RTS, (4W)
(4W): Displayed when
the internal hardware
switch is set to 4-Wire
(read only)
PRODUCER
Producer line
intercom
system
selection
CLEAR COM, RTS, (4W)
(4W): Displayed when
the internal hardware
switch is set to 4-Wire
(read only)
PGM1 LEVEL –20, 0, +4 dBu
PGM2 LEVEL –20, 0, +4 dBu
Page name
Page No.
Item Settings
<FRONT
INCOM>
C07
CCU front panel
MIC/PGM switch
position (read only)
(MIC ON), (OFF), (PGM
ON)
CCU front panel
INTERCOM switch
position (read only)
(PRIVATE), (PROD),
(ENG)
INCOM MIC
Headset
microphone type
connected to
INTERCOM on
the front panel
CARBON, ECM,
DYNAMIC
CARBON: Carbon
microphone (power
supply, 20 dB gain)
ECM: Electret
condenser microphone
(power supply, 40 dB
gain)
DYNAMIC: Dynamic
microphone (no power
supply, 60 dB gain)
MIC TYPE
Headset
microphone type
connected to
INTERCOM on
the front panel
BALANCE, UNBALANCE
BALANCE: Balanced
microphone
UNBALANCE:
Unbalanced microphone
MIC GAIN
Input gain setting
–6dB, 0dB, +6dB
SIDE TONE 0 to 99 50
PGM MIX OFF, INCOM+PGM,
L-INCOM/R-PGM
PGM SEL PGM1, PGM2,
PGM1+PGM2
PGM1 LVL 0 to 99 50
PGM2 LVL 0 to 99 50
Page name
Page No.
Item Settings
Table of contents
Other Sony Control Unit manuals
Popular Control Unit manuals by other brands

M-system
M-system R3-NC3 instruction manual

extronics
extronics ISOLATE 100: ISOLATE 100M operating manual

Ossur
Ossur Icelock Alloy 4-Hole 674 Instructions for use

Watts
Watts Ames 986GD Installation, operation and maintenance manual

Samson
Samson 3510 Mounting and operating instructions

Panasonic
Panasonic CF-BAS04GU operating instructions