manuals.online logo
Brands
  1. Home
  2. •
  3. Brands
  4. •
  5. Soyal
  6. •
  7. IP Access Controllers
  8. •
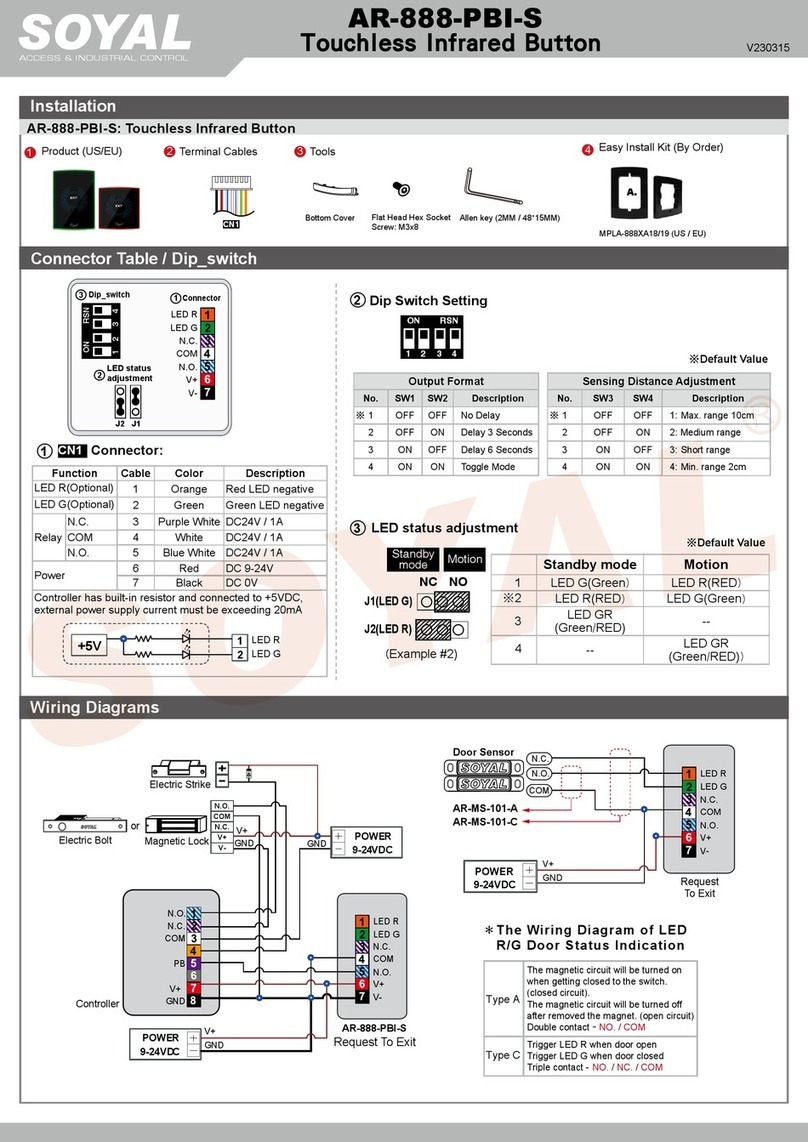
  9. Soyal AR-829E User manual

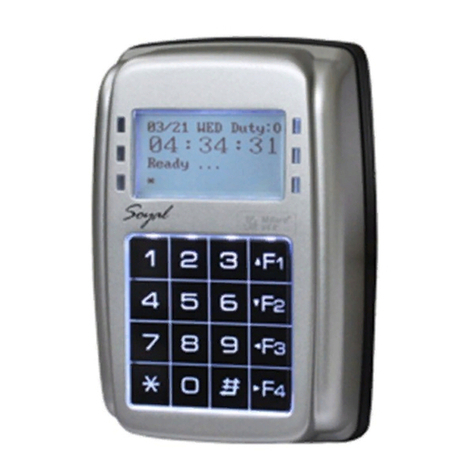
Soyal AR-829E User manual

SOYAL
ACCESS CONTROL SYSTEM
®AR-829E
V091119
P1 P2 P3 P4
A. B.
AR-821RB
1
5
7
*
4
0
8
#
9
1
3
2
6
2
3
4
5
ON
OFF
8
7
6
5
4
3
2
1
7
6
5
4
3
2
1
1
2
3
4
5
6
7
321
P1 P2
P3
P4
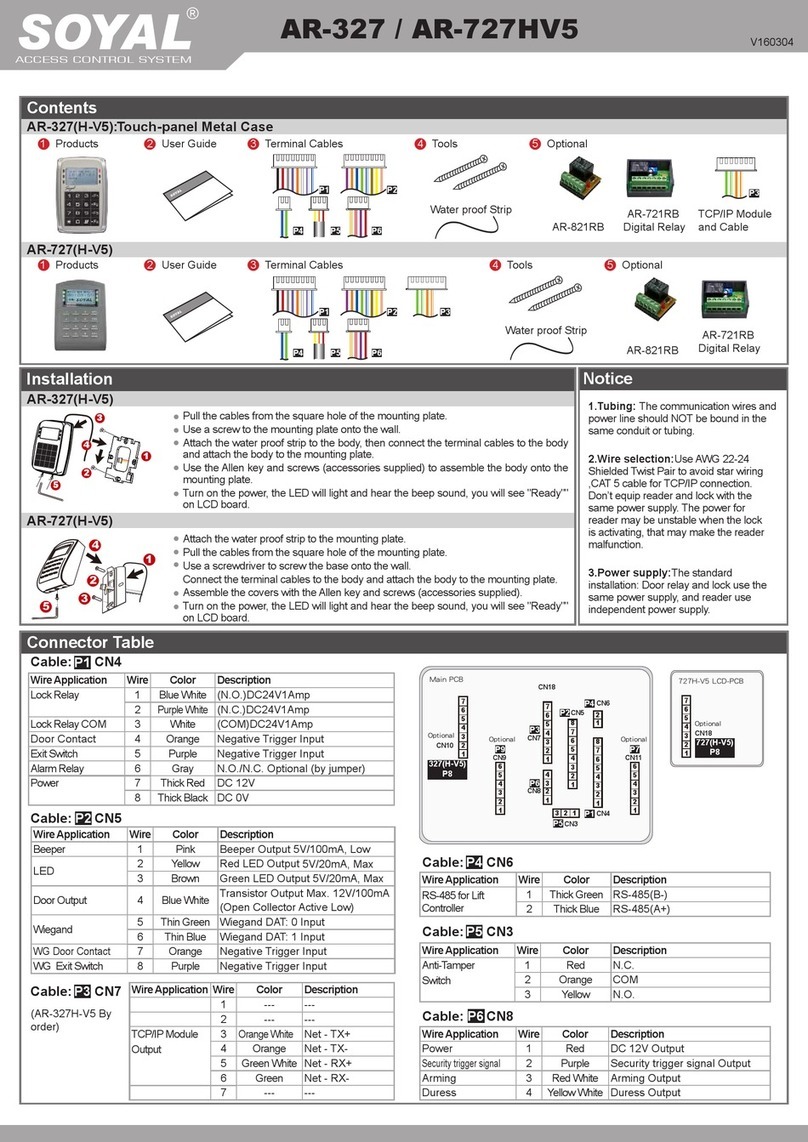
Contents
2User Guide
The communication wires and power line should NOT be bound in the same conduit or tubing.
Don’t equip reader and lock with the same power supply. The power for reader may be unstable when the lock is activating, that may make the
reader malfunction.
The standard installation: Door relay and lock use the same power supply, and reader use independent power supply.
Use AWG 22-24 Shielded Twist Pair to avoid star wiring.
1.Tubing:
2.Wire selection:
3.Power supply:
Installation
Connected to the lithium battery to provide power to the memory.
Use a screwdriver to screw the mounting plate to the wall.
Pull cables ends through the access hole in the mounting plate.
Attach AR-829E to the mounting plate and install screws (supplied) into the
holes at the bottom with the allen key (supplied).
Apply power. LED (green) will light up.
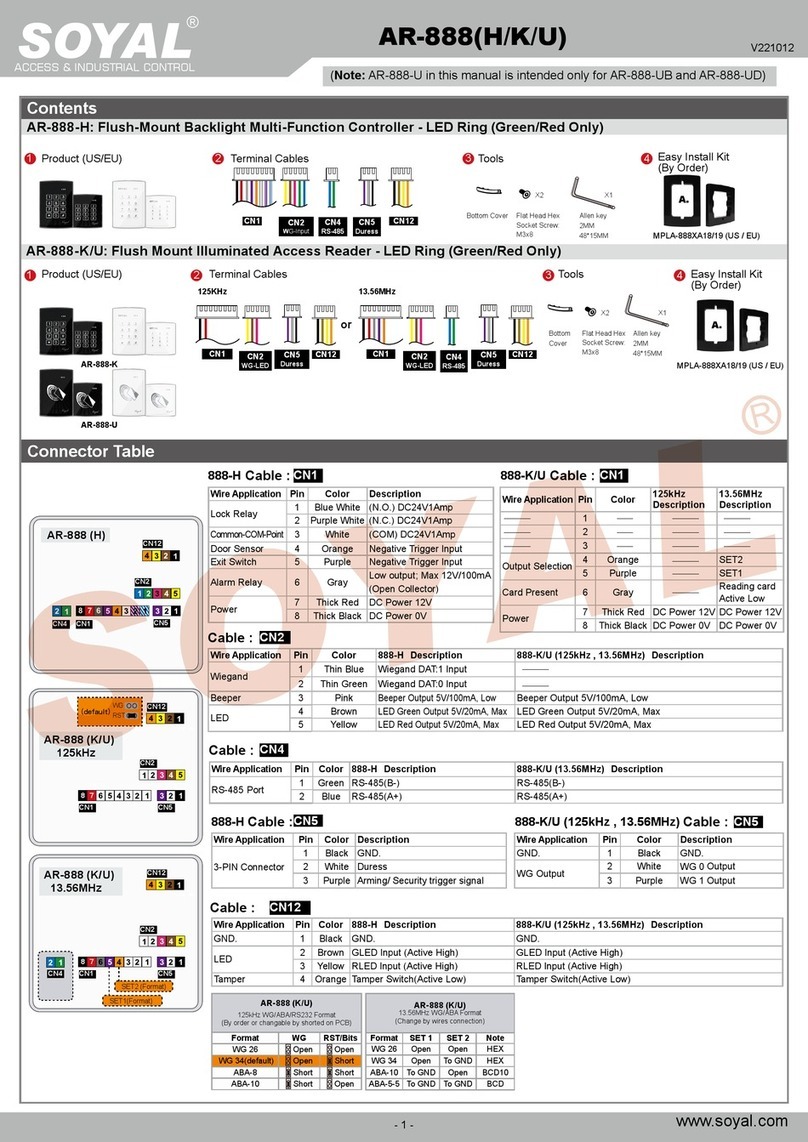
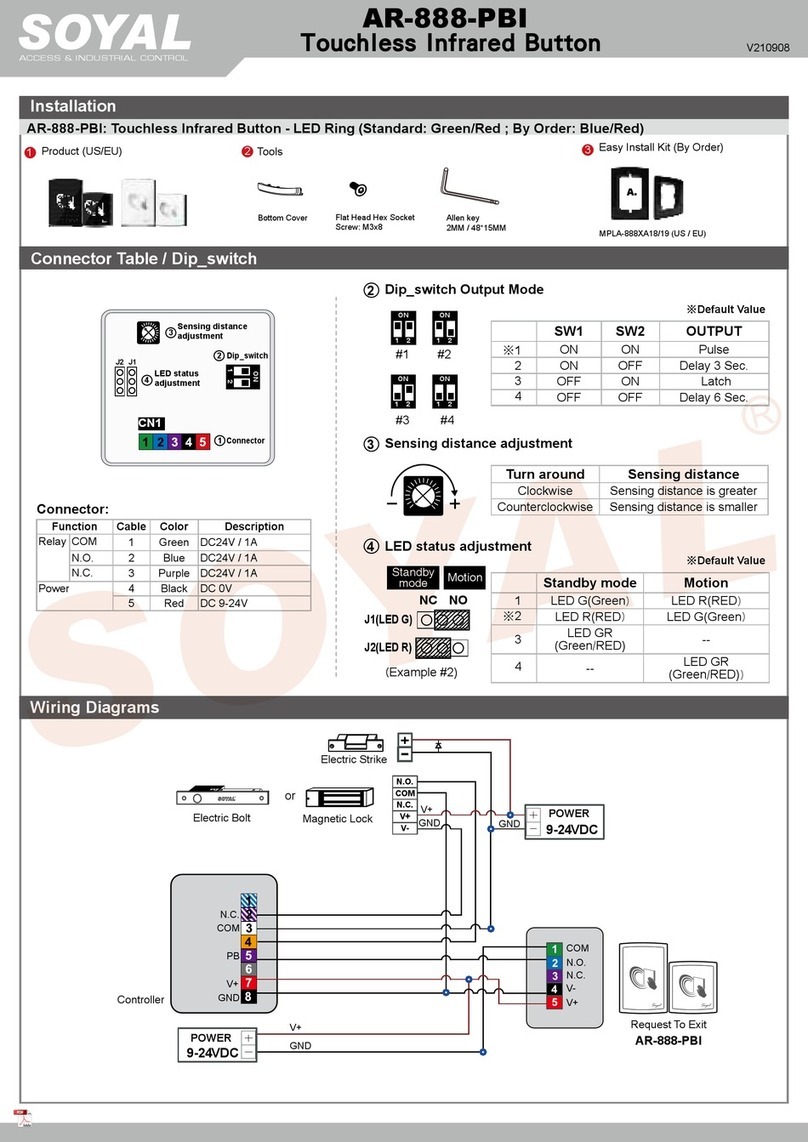
1Products 3Terminal Cables 4Tools 5Relay
Notice
Wire Application
Door Relay
Common-COM-Point
Door Sensor
Exit Switch
Alarm Relay
Power
Description
(N.O.)DC24V1Amp
(N.C.)DC24V1Amp
(COM)DC24V1Amp
Negative Trigger Input
N.O./N.C. Optional
(by jumper)
DC 12V
DC 0V
Color
Blue White
Purple White
White
Orange
Purple
Gray
Thick Red
Thick Black
Wire
1
2
3
4
5
6
7
8
P1Cable:
P3Cable: P4Cable:
P2Cable:
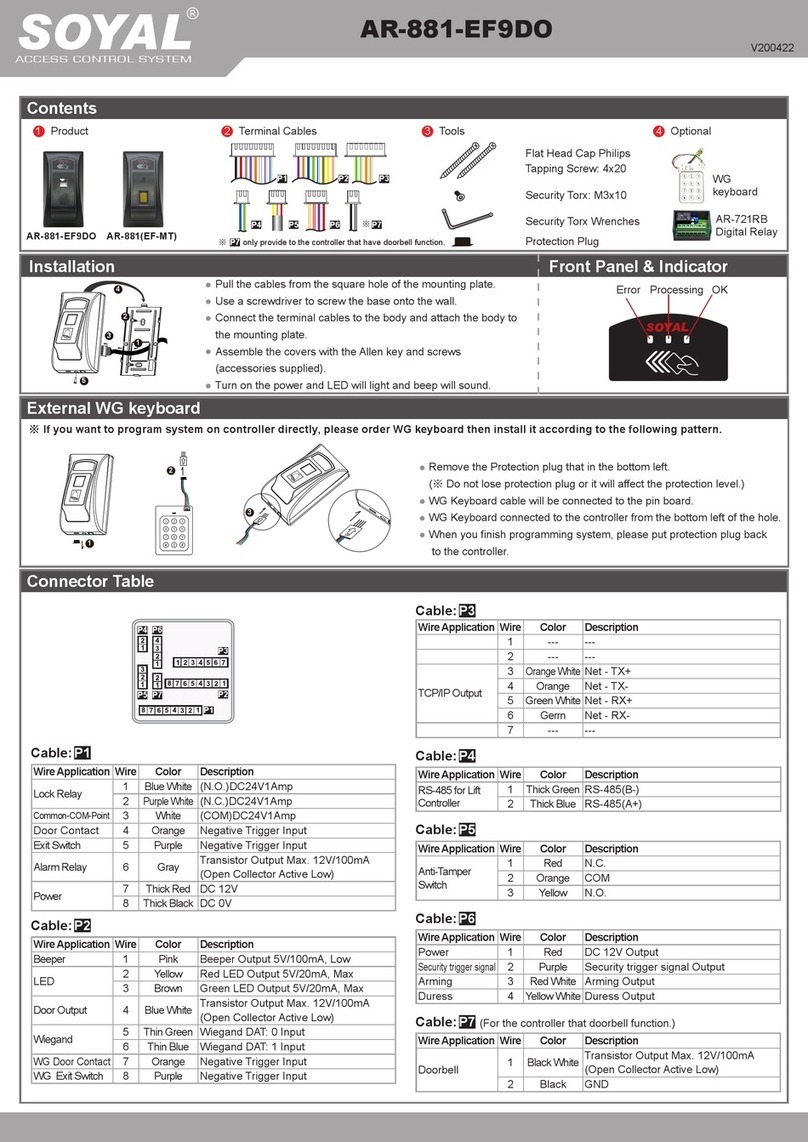
Connector Table
Wire Application
Tamper Switch
Wire Application
Networking
Wiegand
Buzzer
LED
Wire Application
Arming Setting
Switch
Alarm Input
Serial Port
Arming LED
Description
N.C.
COM
N.O.
Description
RS-485 (B-)
RS-485 (A+)
WG DAT: 1 Inpu
ABA Clock Input
WG DAT: 0 Input
ABA Data Input
Buzzer Output 5V/100mA, MAX
LED Green Output 5V/20mA, MAX
LED Red Output 5V/20mA, MAX
Description
Pulse type
Latch type
loop1 (Alarm) Sensor
loop2 (Alarm) Sensor
loop3 (Alarm) Sensor
Serial output (Transistor open
collector) (4800, N, 8, 1)
Arming output
(Active low)
Color
Red
Orange
Yellow
Color
Thick Green
Thick Blue
Blue
Green
Pink
Brown
Yellow
Color
Red
Orange
Yellow
Green
Blue
Purple
Gray
Wire
1
2
3
Wire
1
2
3
4
5
6
7
Wire
1
2
3
4
5
6
7
Front Panel & Indicator
Power(Green)
Busy(Red)
Alarm(Green)
OK(Green)/ Error(Red)
Receive(Green)/ Send(Red)
Alarm(Red)
Chinese Font Expansion Module
MIFARE (13.56MHz)
EM (125kHz)
Standard
Optional
Copyright by SOYAL Technology Co., Ltd.. All rights reserved.
V091119
EXIT
1
2
3
4
5
6
7
8
EXIT
1
2
3
4
5
6
7
8
E
N.C.
COM
PB
12V
GND
12V
GND
Exit Switch
12V
GND
12V
GND
12V
GND
12V
GND
12V
GND
N.O.
GND
N.O.
GND
N.O.
COM
PB
12V
GND
P1 P1
EXIT
1
2
3
4
5
6
7
8
12V
GND
12V
GND
12V
GND
N.O.
GND
N.O.
COM
PB
12V
GND
P1
1
2
3
4
5
6
7
8
COM
Door Sensor
ALM
12V
GND
12V
GND
12V
GND
12V
GND
P1
AR-321L485
1
2
3
4
5
6
7
8
1
2
3
4
5
6
7
1
2
1
2
12V
GND
SP
12V
GND
B-
A+
B-
A+
P4
P1
AR-321L485 7
8
1
2
1
2
3
4
5
6
7
1
2
SP
12V
GND
P4
P1
P2
B-
A+
B-
A+
B-
A+
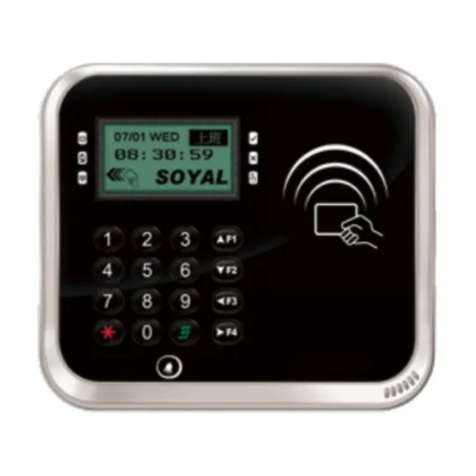
LCD Access Controller
Connect to Electric Bolt
Electric Bolt
Magnet Lock
Controller Controller
Push Button
Connect to Electric Strike
Connect to Printers or LED Display
Electric Strike Alarm
Controller
Controller
Converter
Printers
or
LED Display
Controller
AR- 401RO16B
Push Button Door Sensor
POWER
12VDC
POWER
12VDC
POWER
12VDC
POWER
12VDC
POWER
12VDC
Connect to Door Sensor
Controller
POWER
12VDC
Connect to AR-401RO16B
Push Button
POWER
12VDC
POWER
12VDC
POWER
12VDC
POWER
12VDC
Connect to Magnet Lock
Wiring Diagram
1. System will automatically exit from Programming Mode when inactivating for 30 seconds.
2. LED status indicates controller’s mode and status.
Busy (red) – blinking constantly when operates in Programming Mode
– or ashing an existed card in card learn mode, it comes 2 beeps warning and LCD panel displays “Same Card: user address / card number”
Error (red) – invalid card with 2 beeps warning and LCD panel displays “Card Number Err!”
– or in anti-pass-back mode, when violates the access, it comes one beep warning and LCD panel displays “Anti-pass Error!”
Arming (green) – arming on status
Alarm (red) – any abnormal condition occurs
3. Keypad will be locked up 30 sec. when constantly entering incorrect pin code or master code.
4. Maximum error times of pin code and master code can be changed via the software 701Server (default: 3 times)
Access programming mode → Add/Delete → Add > RF Learn → Input 5-digit user address
→ Input Tag Units(pcs) → Close Tag into RF Area
※A batch of tags are Sequential, present the tag with the lowest number to the controller.
1 2
Adding Tag by RF Learn Function Tag Information
SITE CODE
CARD CODE
SITE CODE
CARD CODE
Adding and Deleting Tag
※ User capacity: 15000 (00000~14999)
Access programming mode → Add/Delete → Add Card > ID → Input 5-digit user address → Input Site Code → Input Card Code
1 1
Adding Tag by Tag ID
Baud rate: 4800bps
Access programming mode → Add/Delete → Delete > Address → Input Start address → Input End address
1 5
Deleteing User Address
Copyright by SOYAL Technology Co., Ltd.. All rights reserved.
SOYAL
ACCESS CONTROL SYSTEM
®AR-829E
V091119
E. PIN Code
F. Arming Password
G. Duress Code
Access programming mode → User Setting → Password → Input 5-digit user address → Input 4-digit PIN (0001~9999) → Succeeded
Or via 701Client set it on Users screen
21
Access programming mode → Parameters[1] → Arming PWD → Input 4-digit PIN (0001~9999; Default: 1234) → Succeeded
Or via 701Server and set it on AR-829E screen
38
Access programming mode → Parameters[2] → Duress Code → 4 sets (select one) → Input 4-digit PIN (0001~9999) → Succeeded
Or via 701Server to set it on AR-829E screen
※Duress Code is only available in networking mode. It will substitute a personal pin code and send the message of Duress to computer as a warning
signal.
48
H. Setting up the alarm
Enable/Disable the arming status:
Standby Mode
Access Programming mode
Card only Card or PIN Card and PIN
Open the door
Present the tag to reader → Input
4 digits arming PWD →
Input user address → Input 4
digits individual PWD → →
Input 4 digits arming PWD →
Present the tag to reader → Input
4 digits individual PWD → →
Input 4 digits arming PWD →
Enable: Access programming mode → Quit & Arming
7Disable: Access programming mode → Quit
6
No open the door
→ Input 4 digits arming PWD
→ Present the tag to reader
Conditions:
1. Arming enabled
2.Alarm system connected
Programming
B. Entering and Exiting Programming Mode
C. Initial setup
Exiting
Press the repeatedly → Quit
6
Changing the Master Code
Access programming mode → Tools → Master Code → Input the 6-digit new master code → Succeeded
5 2
Node ID of Reader Setting
Access programming mode → Parameters[1] → Node ID → Input New Node ID:1~254(default value: 001) → Input: 1~4 to Show Card ID
mode (1.WG, 2.ABA10, 3.ABA8, 4.HEX) → Succeeded
3 1
Language Setting
Access programming mode → Tools → Language → EN → Succeeded → Initial system...
5 1 1
A. Keyboard Lock/ Unlock
Lock/ Unlock
Press and , and at the same time to lock keyboard. Press once to unlock.
Application:
1. Door open too long: Door is open longer than door relay time plus door close time.
2. Force open (Opened without a valid user card): Access by force or illegal procedure.
3. Door position abnormal: When power is off and then on, reader on arming before power off.
Access mode Card and Pin or Card or Pin or Card only for the model AR-721K
Access mode Card only for the model AR-721U, AR-737H/U (WG mode) and AR-661U
J. Anti-pass-back
Device enable
Access programming mode → Parameters[2] → Anti-pass-back → must select [1: Yes]
4 7
Card user enable
Access programming mode → Add/ Delete → Antipass Group → Input 5-digit starting user address → Input 5-digit ending user
address → must select [1: Yes]
1 9
Entering
Input 123456 or PPPPPP
[e.g.] The Default Value= 123456. If already changed the Master Code= 876112, input 876112 → Access programming mode
P.S.If entering no instruction within 30 sec., it will automatically leave the programming mode.
Access programming mode → User Setting → Access Mode → 1: Card; 2: or PIN; 3: & PIN; 4: Pause;
2 2
Setting up the access mode
Copyright by SOYAL Technology Co., Ltd.. All rights reserved.
V091119
M1
Board
Horn M2
1
2
3
4
5
6
7
8
N.C.
N.O.
COM
CTL
12V
ALM
12V
GND
GND
P1
LCD Access Controller
F. Lift control
G. Alarm Clock (for Factory)
Connect with AR- 401RO16B to control which oors the user will be able to access.
Output to M1 and M2
Mike device
Mike device
Music Box
Music Box Mike's sound wire
Mike's sound wire
DC 12V Relay Board
Access programming mode → Tools → Terminal Port → 1
:
AR- 401RO16
5 4
Setting Lift control
Hardware installation
Software Setting
Access programming mode → User Setting → Single Floor →
Input 5-digit user address → Input single oor number: 1~64
2 4
Single oor
Access programming mode → User Setting → Multi Floor → Input 5-digit user address → Select range: 1 or 2 or 3 or 4 → Input 16 digits
multi oors number [0:disable, 1: enable]
[i.e.] Set NO. 114, can use it with the 8 F and 16F:
Access programming mode → User Setting → Multi Floor → 114 → 1 → 0000000100000001
2
2
5
5
Multi oors
Set Floor/ Stop
1
0
17
0
33
0
49
0
9
0
25
0
41
0
57
0
1
2
3
4
3
0
19
0
35
0
51
0
11
0
27
0
43
0
59
0
2
0
18
0
34
0
50
0
10
0
26
0
42
0
58
0
4
0
20
0
36
0
52
0
12
0
28
0
44
0
60
0
5
0
21
0
37
0
53
0
13
0
29
0
45
0
61
0
6
0
22
0
38
0
54
0
14
0
30
0
46
0
62
0
7
0
23
0
39
0
55
0
15
0
31
0
47
0
63
0
8
1
24
0
40
0
56
0
16
1
32
0
48
0
64
0
The AR-821E/AR-829E controller can support up to 12 sets of ring per day
1. Click [82X] to [829E/821E Parameter Setting]
2. Select target node of AR-829E
3. Click [Read From Controller] to read the parameters of target 829E
4. Press [Daily Time Schedule] to start weekdays and timing settings
5. Select [SUN to MON]
6. Set up [Event] for timing to ring the bell and set up [Sec.] for activating time
of ring. (Range: 01~44 seconds; if you set 0 second there will not be action.)
7. Click [Yes] after setting
8. Click [Write To Controller] to end Setting
7
8
6
3
4
5
2
1
Manu Tree
5. Tools
1. Language
2. Master Code
3. Master Range
4. Terminal Port
5. AR401RO16 Node
6. Open Time Zone
7. Informations
8. Clock Setting
6. Quit
7. Quit & Arming
4. Parameters[2]
1. Auto Relock
2. Egress(R.T.E)
3. Attendance
4. Master Node
5. Force Open
6. Close & Stop
7. Anti-pass-back
8. Duress Code
3. Parameters[1]
1. Node ID
2. Auto open Zone
3. Door Relay Tm
4. Door Close Tm
5. Alarm Relay Tm
6. Alarm Delay Tm
7. Arming Delay Tm
8. Arming PWD
2. User Setting
1. Password
2. Access Mode
3. Extend Options
4. Single Floor
5. Multi Floor
1. Add/ Delete
1. Add > Card ID
2. Add > RF Learn
3. Suspend > Address
4. Suspend > ID #
5. Delete > Address
6. Delete > ID #
7. Recover > Address
8. Recover > ID #
9. Antipass Group
Controller
POWER
12VDC
Copyright by SOYAL Technology Co., Ltd.. All rights reserved.
Other Soyal IP Access Controllers manuals

Soyal AR-327-E User manual

Soyal

Soyal AR-327-E User manual

Soyal AR-837 E User manual

Soyal

Soyal AR-837 E User manual

Soyal AR-837-EA-T User manual

Soyal

Soyal AR-837-EA-T User manual

Soyal AR-721KP User manual

Soyal

Soyal AR-721KP User manual

Soyal AR-327-E User manual

Soyal

Soyal AR-327-E User manual

Soyal AR-327H User manual

Soyal

Soyal AR-327H User manual

Soyal AR-725E User manual

Soyal

Soyal AR-725E User manual

Soyal AR-321H User manual

Soyal

Soyal AR-321H User manual

Soyal AR-888-PBI-S User manual

Soyal

Soyal AR-888-PBI-S User manual

Soyal AR-837-EL User manual

Soyal

Soyal AR-837-EL User manual

Soyal AR-101-H User manual

Soyal

Soyal AR-101-H User manual

Soyal AR-727iV3 User manual

Soyal

Soyal AR-727iV3 User manual

Soyal AR-721K User manual

Soyal

Soyal AR-721K User manual

Soyal AR-721K User manual

Soyal

Soyal AR-721K User manual

Soyal AR-837-EA User manual

Soyal

Soyal AR-837-EA User manual

Soyal AR-837-E User manual

Soyal

Soyal AR-837-E User manual

Soyal AR-837-E User manual

Soyal

Soyal AR-837-E User manual

Soyal AR-725E User manual

Soyal

Soyal AR-725E User manual

Soyal AR-821EF User manual

Soyal

Soyal AR-821EF User manual

Soyal AR-723 User manual

Soyal

Soyal AR-723 User manual

Soyal AR-888U User manual

Soyal

Soyal AR-888U User manual

Soyal AR-327 User manual

Soyal

Soyal AR-327 User manual

Soyal AR-723-H User manual

Soyal

Soyal AR-723-H User manual

Soyal AR-363-E User manual

Soyal

Soyal AR-363-E User manual

Popular IP Access Controllers manuals by other brands

Anviz T5S user manual

Anviz

Anviz T5S user manual

SecuGen Hamster Air user guide

SecuGen

SecuGen Hamster Air user guide

Essex Electronics iSmartSE user guide

Essex Electronics

Essex Electronics iSmartSE user guide

Matrix COSEC EBS200 How to reset

Matrix

Matrix COSEC EBS200 How to reset

Samsung SSA-S2000V user manual

Samsung

Samsung SSA-S2000V user manual

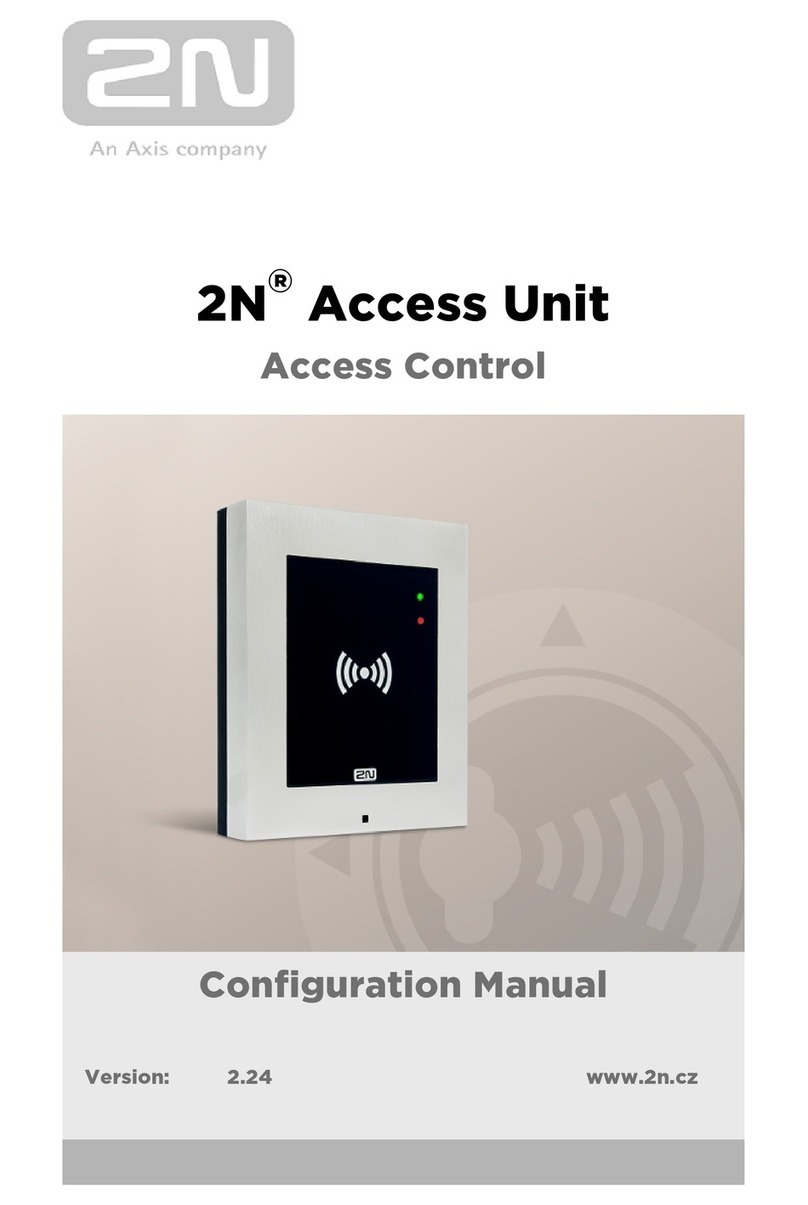
2N Access Unit installation manual

2N

2N Access Unit installation manual

sesamsec SECUSTOS SQ80 Series user manual

sesamsec

sesamsec SECUSTOS SQ80 Series user manual

King Pigeon RTU5025W user manual

King Pigeon

King Pigeon RTU5025W user manual

OneSpan DIGIPASS FX1 BIO user manual

OneSpan

OneSpan DIGIPASS FX1 BIO user manual

SCHEIDT & BACHMANN entervo.lane Device manual

SCHEIDT & BACHMANN

SCHEIDT & BACHMANN entervo.lane Device manual

bioscrypt VeriProx Operation manual

bioscrypt

bioscrypt VeriProx Operation manual

MPicoSys PicoLabel 2.7" Demo Kit user guide

MPicoSys

MPicoSys PicoLabel 2.7" Demo Kit user guide

Control iD iDAccess Nano quick guide

Control iD

Control iD iDAccess Nano quick guide

David-Link DL=A user manual

David-Link

David-Link DL=A user manual

ND IP 39-60 ePCR Quick installation guide

ND

ND IP 39-60 ePCR Quick installation guide

urmet domus IPerCom-2Voice Hardware installation guide

urmet domus

urmet domus IPerCom-2Voice Hardware installation guide

Tidomat SO-3396-V installation instructions

Tidomat

Tidomat SO-3396-V installation instructions

Connect SmartHome CSH-DEDBLTBIO manual

Connect SmartHome

Connect SmartHome CSH-DEDBLTBIO manual

manuals.online logo
manuals.online logoBrands
  • About & Mission
  • Contact us
  • Privacy Policy
  • Terms and Conditions

Copyright 2025 Manuals.Online. All Rights Reserved.