Tanco 1300 Series Service manual

handbook
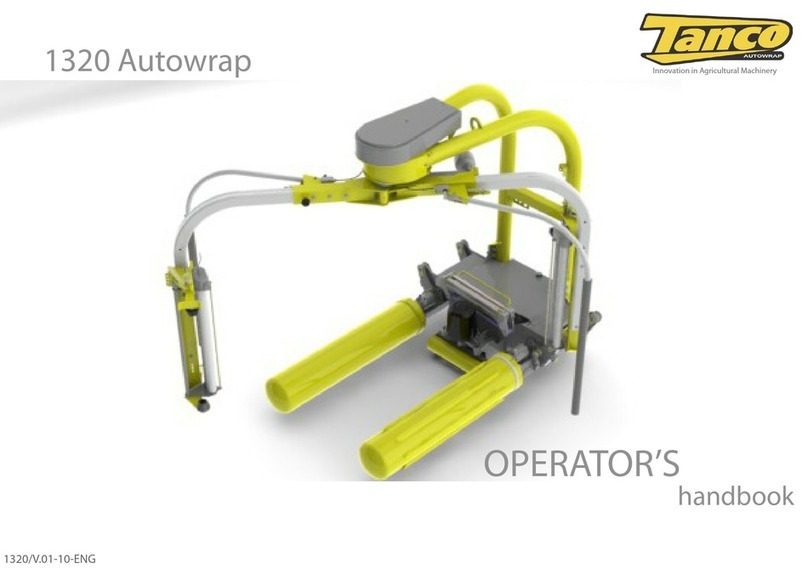
1300 Autowrap
1300/V.01-14-ENG
1300 Series (1310 S / 1310 SM / 1310 EH / 1320 EH)
OPERATOR’S
Model Shown: 1320 EH
Innovation in Agricultural Machinery

Tanco Autowrap - 1310 / 1320
Operator’s Manual
1
Chapter Contents Page
1 SAFETY DECALS 2
2 INTRODUCTION 3
3 TECHNICAL SPECIFICATIONS 5
4 SAFETY PRECAUTIONS 7
5 BALE WRAPPING 9
6 MACHINE SETUP 11
7 EH CONTROLLER INFORMATION 20
8 S & SM CONTROLLER INFORMATION 29
9 OPERATIONAL FEATURES 35
10 ELECTRO-HYDRAULICS 38
11 TROUBLESHOOTING 48
12 MAINTENANCE 51
13 GUARANTEE 53
14 DECLARATION OF CONFORMITY 54
TABLE OF CONTENTS

Tanco Autowrap - 1310 / 1320
Operator’s Manual
2
Read Operators Manual
Prior to using machine
Danger from rotating
Prestretcher
Warning, do not place your
feet between roller arms
and chassis
Warning, all hoses are
constantly under pressure
Danger keep hands
clear of sharp blades
Danger stay at a safe distance
whilst machine is in operation
Ensure all nuts & bolts have
been tightened prior to
operating the machine
1. SAFETY DECALS

Tanco Autowrap - 1310 / 1320
Operator’s Manual
3
2. INTRODUCTION
Tanco Autowrap Ltd congratulates you on your choice of the TANCO AUTOWRAP bale wrapping machine from the 1300 Model Range. We are certain you will be satised with the ma-
chine, and that you will have the pleasure of your investment for many years.
The TANCO AUTOWRAP bale wrapping machine has more features than any other bale wrapping machine available. The 1300 Range includes the 1310 EH / S / SM and 1320 EH models
and all can pick up the bale, wrap and stack them without the operator leaving the tractor cab; this is a patented system.
This machine is hydraulically driven by the tractor’s hydraulic system and is controlled from the tractor cab by an automatic control unit. The machine can either be mounted to three
point linkage, front mounted with quick-couplers to the tractors front loader or on a wheel loader. Then it’s possible to stack the bales upon each other. The wrapped bale can be either
dropped conventionally to the ground or with the tting of an optional‘End Tip’the bale can be dropped on its end.
TANCO AUTOWRAP 1300 Range is designed to wrap bales of grass, hay or straw, with nominal diameter of 1.1 - 1.5m, and weights up to (1200kg). The original 1300 model was launched
in the mid 1980’s and has been developed into the very reliable and safe range of machines we have today.
This manual is meant to explain how TANCO AUTOWRAP 1300 is setup, attached to tractor, used and how it works, and shall together with the spare part’s list be a reference for mainte-
nance and troubleshooting. So take good care of this book; it is a part of the machine.
Read carefully through this manual, and especially the safety instructions, before starting the machine. Follow the instructions thoroughly, if problems should occur, check the trouble-
shooting guide to try to establish the problem. Ask your dealer for advice before you attempt anything that may make the problem worse.

Tanco Autowrap - 1310 / 1320
Operator’s Manual
4
1
2
3
4
5
6
7
8
9
10
11
12
Item No. Description
1 Main Frame
2 Tower Frame
3 Gripped Roller
4 Smooth Roller
5 Main Wrapping Arm
6 Main Dispenser Assembly
7 Cut & Tie Assembly
8 Safety Switch
9 Emergency Stop Arm
10 Wrap Arm Drive Motor
11 Support Roller
12 Dispenser Mounting Arm
2. INTRODUCTION

Tanco Autowrap - 1310 / 1320
Operator’s Manual
5
1
2
3
4
6
5
8
7
9
12
13
10
11
17
14
15
16
Main Frame
1.
Tower Frame
2.
Gripped Roller
3.
Smooth Roller
4.
Main Wrapping Arm
5.
Slave Wrapping Arm
6.
Main Dispenser Assembly
7.
8. Slave Dispenser Assembly
9. Cut & Tie Assembly
10. Fixed Linkage
11. Arm Linkage
12. Safety Switch
13. Emergency Stop Arm
14. Wrap Arm Drive Motor
15. Roller Motor
16. End Tip Assembly
17. Support Roller
18. Arm Folding Ram
19. Dispenser Mounting Arm
18
19
Item No. Description
1 Main Frame
2 Tower Frame
3 Gripped Roller
4 Smooth Roller
5 Main Wrapping Arm
6 Slave Wrapping Arm
7 Main Dispenser Assembly
8 Slave Dispenser Assembly
9 Cut & Tie Assembly
10 Fixed Linakge
11 Arm Linkage
12 Safety Switch
13 Emergency Stop Arm
14 Wrap Arm Drive Motor
15 Roller Motor
16 End Tip Assembly
17 Support Roller
18 Arm Folding Ram
19 Dispenser Mounting Arm
2. INTRODUCTION

Tanco Autowrap - 1310 / 1320
Operator’s Manual
6
Technical Specications 1310 EH Autowrap 1310 S Autowrap 1310 SM Autowrap 1320 EH Autowrap
Height 2270mm 2270mm 2270mm 2270mm
Width 1370mm / 2230mm 1370mm / 2230mm 1370mm / 2230mm 1370mm / 2230mm
Length 2260mm 2260mm 2260mm 2260mm
Weight 655 kg 655 kg 655 kg 690 kg
Wrapping Arm Speed (Recomended) 28 R.P.M 28 R.P.M 28 R.P.M 28 R.P.M
Wrapping Arm Speed (max) 32 R.P.M. 32 R.P.M. 32 R.P.M. 32 R.P.M.
Maximum Bale Diameter 1500mm 1500mm 1500mm 1500mm
Maximum Bale Weight 1200 kg 1200 kg 1200 kg 1200 kg
Capacity 35 Bales per hour (Apx.) 35 Bales per hour (Apx.) 35 Bales per hour (Apx.) 50 Bales per hour (Apx.)
Pre-Stretcher(s) 1 x 750mm Width; 55 & 70% Stretch 1 x 750mm Width; 55 & 70% Stretch 1 x 750mm Width; 55 & 70% Stretch 1 x 750mm Width; 55 & 70% Stretch
Hydraulic Connection Double + Single + Free Return Single Working + Free Return Single Working + Free Return Single Working + Free Return
Oil Pressure 180 bar 180 bar 180 bar 180 bar
Oil Amount (Max / Min) 50 lts/min / 25 lts/min) 50 lts/min / 25 lts/min) 50 lts/min / 25 lts/min) 50 lts/min / 25 lts/min)
Maximum Counter Pressure 10 bar 10 bar 10 bar 10 bar
Eltectrical Connection 12 V DC 12 V DC 12 V DC 12 V DC
NB: Tanco Autowrap Ltd. reserves the right to modify the construction and/or technical specications without warning and without rights to changes on already delivered products.
3. TECHNICAL SPECIFICATIONS

Tanco Autowrap - 1310 / 1320
Operator’s Manual
7
4. SAFETY PRECAUTIONS
Tanco Autowrap Ltd does not take responsibility for damages that may occur to machine, persons or other equipment, because of the machine NOT being used as described in this
manual, or because of the safety precautions NOT being followed.
Emergency Stop
The Tanco Autowrap 1300 Model Range is equipped with a so-called emergency stop on the wrapping arm. This device stops all functions momentarily, but is per denition not an emer-
gency stop, because it does not shut down the inputs. But it has the same function, so we have decided to call it an emergency stop in this manual.
Safety Equipment
Before using the machine, make sure that all guards and covers are securely tted. The machine must not be operated if a function does not work as described later in this manual.
Become Familiar with the Operations of the Machine
If you are unsure how to operate the machine properly, either use of or maintenance to your Tanco autowrap, please contact your Tanco autowrap dealer.
Adjustments / Maintenance
Turn o the tractor and discharge the oil pressure before performing any adjustment or maintenance on the machine. Remember that a well maintained machine is a safe machine.
IMPORTANT!
Always make sure nobody is in the hazard area of the wrapping arm when the machine is in-use.
The machine must not be operated by persons who do not know enough about how to safely operate the machine, or by persons under the age of 16 years.
Dangerous Areas
Tanco Autowrap Ltd. has given the safety to the operator the highest priority, but it is still impossible to secure oneself of every danger area on the machine. Therefore we have hilighted
below some of the dangers that can occur when using the 1310 / 13200 Tanco Autowrap Bale Wrapper.
- Impact of the Wrapping Arm
During the wrapping process the arm rotates with a speed of 30-32 revolutions per minute around the bale. On the arm is mounted a Film dispenser unit with a plastic roll. The speed on
this can give a person serious injuries if one enters the working area of the wrapping arm. To reduce this danger we have mounted an emergency stop device on the wrapping arm; this
stops all movement when something comes in the way of it. It is very important that this protection always works and that it should not under any circumstances be disconnected.
- Squeeze Danger Between the Main Frame & Wrapping Arm
As earlier explained, we have a wrapping arm with a Dispenser and a plastic roll. During every revolution the wrapping arm passes the main frame. Here there may occur a squeeze
danger if a person stands to close to the main frame when the wrapping arm passes. The distance between the main frame and the wrapping arm is not large enough to give place for a
person. Between the pre-stretcher and the bottom frame there can also be a squeeze danger.

Tanco Autowrap - 1310 / 1320
Operator’s Manual
8
- Squeeze Danger Between the Stationary Arm & Wrapping Arm
During the main wrapping process the wrapping arm moves around a stationary arm. Everytime the wrapping arm passes the stationary arm
there is a squeeze danger that can be dangerous for the ngers. The distance between the stationary and the wrapping arm is between
25-40 mm. (See Fig. 4.1).
- Squeeze Danger between the Rollers and the Main Frame
During the wrapping process the bale rotates on two rollers. When the rollers are in motion there is a danger of being squeezed.
- Squeeze Danger between Roller Arms and Main Frame (Inwards)
When loading a new bale, the roller arms move towards the main frame, Beware of the danger. eep clear of this area.
- Squeeze Danger between Roller Arms and Main Frame (Outwards)
When loading or unloading a new bale, the roller arms move outwards. Beware of the danger. Keep clear of this area.
- Squeeze Danger Caused by Plastic Automation
At the end of the wrapping process the plastic is cut and held tight until the start of the next wrapping process. When the cutter arm moves down to lock the plastic, there can occur a
squeeze danger between the cutter arm and the cutter holder. The cutter blade that cuts the plastic is very sharp; ensure to keep hands away from the cutter. (See Fig. 4.2).
Three Point Mounting
When the machine is mounted on the three point linkage, make sure that the lifting arms are tightened up so there is no sideways movement.
Front Mounting
If the machine is mounted on a front loader there must be a counterweight tted to the three point linkage. It must be large enough
to give the tractor good stability. Connecting heavy working implements often has an overall negative eect on the tractor’s driving
and braking capacity.
Transporting
When transporting on a public road there are certain safety measures that must be taken:
- Ensure the machine is in the transport position.
- Ensure the squeeze arm is fully closed.
- Enure that the wrapping arm is not parked overhanging the sides of the machine.
- Ensure that the lights are connected and functioning correctly
- It is recommended that the lm rolls be taken o the dispensers for road transport and put on the lm carriers on the drawbar. This reduces stress on the machine and reduces the
danger of the rolls being accidently falling o on the public road.
- The machine is wide (2660mm) even in tranport position, be aware of this especially on narrow roads.
4. SAFETY PRECAUTIONS
Fig. 4.1
Fig. 4.2

Tanco Autowrap - 1310 / 1320
Operator’s Manual
9
5. BALE WRAPPING
Bale Wrapping Principles
The advantages of round bale silage are many, and include fewer feed units, a exible harvesting system, large capacity and the possibility of selling feed units.
In principle, the same fermentation processes occur whether the fodder is placed in a silo or pressed into bales and packed in plastic, i.e. lactic acid fermentation in anaerobic conditions.
The oxygen in the bale must be exhausted before fermentation begins.
The grass should be dried to approximately 30-40% solid content. The solid content can be determined by twisting the grass by hand. If drops of liquid are forced out of the grass, the
solid content is less than 25%. Low solid content (wet grass) can lead to increased butyric acid fermentation if preservatives are not added to the grass. If the solid content is too high,
(over 50%), normal fermentation will not take place and there will be enough oxygen in the bale to produce mould fungus.
The Baler
It is vital that the baler produces compact, well-formed bales, as misshapen bales can be dicult to wrap. Wrapping will also often take longer, thereby increasing the amount of plastic
used.
Dicult Bales
When a misshapen bale is wrapped, it will have a tendency to move outwards or inwards on the roller. If the bale begins to move outwards, the machine must be lifted slightly at the rear
edge to get the bale to rest against the support roller on the main frame. It can therefore be useful to use a hydraulic top link to make this adjustment easier.
If the bale to be wrapped is conical you must ensure that the sharp end is pointed at the tractor. It will then be easier to get the bale to lie correctly during packing. It is easy for such a
bale to“turn”forward in the direction in which it is pointing, and therefore lie against the support rollers. If the bale is lying on a slope it must be picked up from the lower side. A hydrau-
lic top link will again be advantageous.
Types of Plastic
A good type of plastic with good adhesive properties, and which is recommended for bale wrapping, must be used. The thickness of the plastic foil should be at least 25 µ. (25/1,000 mm).
In order that the plastic tightens suciently around the bale, it is stretched before being wrapped, so it is somewhat thinner when it is put on the bale. With short-term storage (up to
eight weeks) it is recommended that bales have a minimum of four layers of plastic at the thinnest points, with at least 52-53% overlap.
For long-term storage, or when the grass is wet when it is wrapped, the bale should have 90-100 µ plastic (six layers) and the same amount of overlap. If thinner plastic is used, more lay-
ers should be applied. If it is very hot the plastic will be stretched further, and more layers should be applied. It is better to have slightly too much than too little plastic on the bale.
From experience, light colored plastic produces slightly lower temperatures within the bale, and tends to improve feed quality.
Storage Location
Care should be taken in nding a suitable location for the storage of bales. The storage location should preferably be prepared before the bales are laid out. An elevation close to well-
drained roads is recommended. If the wrapped bales are simply placed on stubble there is a danger of the plastic being pierced. A tarpaulin or a thin layer of sand should therefore be laid
where the bales are to be stored over the winter.
Tanco Autowrap - 1310 / 1320
Operator’s Manual
10
Bales should be stored in the shade as far as possible. This reduces the danger of air leakage in the bales. A bale which is stored in sunlight and which therefore undergoes greater swings
in temperature“pumps in”a great deal of air in comparison to a bale stored in the shade. According to“Teknik for Lantbruket”[Technology for Agriculture] in Sweden, a bale stored in the
shade has only 40% of the air leakage of a bale which is stored in sunlight.
Stacking / Protection
If bales are hard and well formed, they can be stacked vertically, but loose and misshapen bales with low solid content should not be stacked higher than one layer, as this could easily
cause deformity and the danger of runo will be increased.
Bales can also be stored on their sides. The layer of plastic is thicker here, providing greater protection against piercing.
Bales should be covered with a tarpaulin or a ne-mesh net to protect against birds and small rodents. If the plastic is pierced, it must be sealed with weatherproof, hard-wearing tape,
preferably under the outermost layer of plastic. Ensure that the hole is adequately sealed.
For Best Wrapping Results...
1. Harvest the grass early.
2. Ensure the grass is driedout to 30-40% solid content. If there is a danger of rain, bale and wrap the
grass anyway.
3. Take care not to mix any earth in with the grass.
4. Use a baler that produces even, rm bales. Bales 1.2mtrs in width and with a diameter of 1.2-1.5mtrs
are preferred sizes.
5. Wrap the bales as soon after baling as possible; never more than two hours afterwards.
6. Use a good plastic type, applying six layers of plastic. This removes the need to use preservatives.
7. Store bales in the shade to reduce the danger of air leakage.
5. BALE WRAPPING

Tanco Autowrap - 1310 / 1320
Operator’s Manual
11
Mounting of the Machine
Be careful! There is a danger of being crushed when working implements are tted and
connected. Carry out the tting procedures slowly and carefully, and use separate and approved
lifting equipment to make the work easier. Note the section on safety precautions and pay
attention to the various safety decals displayed on dierent parts of the bale wrapper.
Three Point Linkage
TANCO AUTOWRAP 1300 range is intended for rear mounting to the three point linkage,
Category 2. When attached to three point linkage, make sure the machine is level
across the tractor. Tighten up and lock the lifting arms so there is no sideways movement.
Top Link
Adjust the top link of the tractor so that the machine is level with the ground. It is
recommended to use a hydraulic top link, as this makes it easy to adjust the angle of the machine.
During the wrapping process it is recommended to tilt the machine towards the tractor, as this
will prevent the bale from falling o the rollers. (See Fig. 6.1).
Front Mounting
This machine can be equipped with attachment brackets for front loader or wheel loader.
(Talk to your dealer for information regarding the mounting brackets available).
When front-mounted there must be a large enough counterweight tted to the three point linkage, this is to secure the tractors stability.
Fig. 6.1
6. MACHINE SETUP

Tanco Autowrap - 1310 / 1320
Operator’s Manual
12
1310 / 20 EH Control Box
1310 / 1320 EH Control Untit
The EH control units consist of the emergency stop button, a control cable, a fuse and a battery cable. The control unit should be
attached to a suitable place in the tractor cab using the suction pad provided.
The Remote Control Unit is not Shock Proof, make sure that is fastened to a soft pad that secures a non-vibratting foundation.
Electrical Connection
The electric supply for the machine’s remote control and electro-hydraulic components must come directly from the tractors’
12 volt battery.
The electric wires from the battery must have an area measurement of min. 2,5 mm2. Connection to other contacts on the tractor
can cause risk of malfunction and is not recommended.
Note:
Brown leader goes to the Battery’s Possitive Pole
Blue leader goes to the Battery’s Negative Pole
1310 S / SM Control Box
The 1310 S / SM control unit has 6 channel functions with an illuminated 4 digit LCD display,
5 switches to control all functions and an internal alarm. An external alarm is optional.
The instrument is powered on via the vehicle ignition circuit and recalls the
function displayed when the instrument was last used.
6. MACHINE SETUP
1310 S / SM Control Box

Tanco Autowrap - 1310 / 1320
Operator’s Manual
13
6. MACHINE SETUP
1310 / 1320 EH Hydraulic Connection
The hydraulic hoses between machine and tractor are equipped with 1/2”ISO Male Quick-Couplers. Ensure the oil pressure has been discharged before you connect the oil hoses using
the tractor’s hydraulic lever.
To make sure that the bale wrapper works properly, the tractors’oil pressure has to be at least 180 bar. The oil ow should be 15 - 25 liters per minute. The return pressure on the return
must be as low as possible, and not exceed 10 bar. This should be measured with a gauge. It is recommended to use one single-working hydraulic outlet and arrange a free return circuit
to the oil tank.
If you are unsure of what oil pressure the tractor gives, or what oil pressure the bale wrapper receives, please contact your machinery dealer. Generally all tractors have got some counter-
pressure in their hydraulic return systems. Some tractors have more than others.
Note:
The Hose with the Red Cap shall be connected to pressure‘P’and Hose with Blue Cap to the return ‘T’.
1310 S Hydraulic Connection
The 1300S machine uses two of the tractors remote valves to operate. One valve operates the wrap arm rotation and cutter, the second valve operates the rollers in (loading) and rollers
out (unloading) function. There are 4 no. hydraulic connections between the 1310S machine and the tractor. They are divided into two pairs, one pair are connected to ports on the entry
block marked ‘P’and ‘T’. The second pair are connected to ports marked ‘R+ and ‘R-‘. The hose from P can be connected to either a single or double acting service on the tractor, this is the
hydraulic supply for wrap arm rotation and cutter. The hose from T (tted with a female Q/R coupling) must be connected to a free return to tank. This is the return from the wrap arm
rotation and cutter. The Cutter will not operate correctly if this is not a free return.
Hoses from R+ and R- should be connected to a double acting service on the tractor. This is the hydraulic supply for rollers in and rollers out.
Hydraulic Connection1300SM
The 1300 SM is equipped with a two bank, cable operated valve. This requires just two connections, a Feed‘P’ and return ‘T’. It is recommended that the Return line is connected to a free
return point on the tractor as this eliminates the risk of Hydraulic lock. This occurs if you try to send oil in the opposite direction against the non-return valve. This results in pressurized
oil between the non-return valve and the quick coupling and prevents connection of the quick coupling. The only way to discharge the pressure is to open the quick coupling using two
27 mm spanners.

Tanco Autowrap - 1310 / 1320
Operator’s Manual
14
Open & Closed Center Hydraulics EH Models
The 1320 hydraulic system can be set up for tractors with
Open or Closed Center Hydraulics.
Open Centre Hydraulics
Most tractors have a hydraulic system that gives a continuous
output which ows through the valve on the machine and
back to tank when no function is operating (Open center).
Note:
The TANCO AUTOWRAP EH Models are set-up for open
centre on leaving the factory.
Close Centre Hydraulics
Some tractors (John Deere) have a hydraulic system
that require the valve on the machine to allow no
ow when no function is operating (Closed Center).
The hydraulic valve can easily be congured
to operate in this way.
Simply push and twist the Manual
Override on the Master Valve. (See Fig. 6.1)
Open & Closed Center Hydraulics SM Model
As with the EH models, the 1310SM is set for open centre hydraulics leaving the factory.
To convert to closed centre a plug on the valve must be changed. This plug is located
on the valve just beside the outlet (T line) (See Fig 6.2). Remove the existing one and replace with
closed center plug (Part No. Z01-03-A580J).
If you are likely to change frequently between open and closed centered hydraulic
systems and special plug incorporating a tap can be ordered.
(Part No. 1008050- closed center tap plug). This is tted in the same position on the valve.
Push & Twist to lock for Closed Centre
6. MACHINE SETUP
Replace with closed
centre plug
Fig. 6.1
Fig. 6.2

Tanco Autowrap - 1310 / 1320
Operator’s Manual
15
LS Hydraulics
Many modern tractors have a“Load Sensing”(LS) Hydraulic System. This is most ecient as the pump remains on standby, pumping no oil until it gets a signal from the machine. It is pos-
sible to run this machine on a load sensing tractor with the standard valve.
Congure the valve for open centers and if possible adjust the ow from the tractor to give ~30 lts/min. This however means that that tractor is constantly pumping and you do not get
the benet of the eciency of your load-sensing pump.
Tanco Autowrap strongly recommend that if you are running the machine on tractor with LS Hydraulics you t the optional Load-Sensing Block (see Hydraulic Circuit). With this block
tted a Load sensing signal is transmitted in the form of hydraulic pressure via a hose for the LS Port on the LS Entry Block to the LS Connection on the tractor.
Note:
The LS Entry Block can be congured also to run on any other hydraulic system, open or closed center.
Check List:
Before using the machine it is recommended to follow this check list:
1. Make it a habit to discharge the oil-pressure before connection or disconnection of the hydraulic hoses. (By operating the hydraulic control lever inside the tractor). (Use the tractors
hydraulic control lever).
2. Return-oil should be led directly to tank. Beware that if the counter pressure is too high, the security valve on the main block will release some oil. (See Chapter 9).
3. Hose with BLUE CAP = RETURN OIL.
4. Hose with RED CAP = PRESSURE.
5. Tie up loose hoses and Connection Cables so that no squeeze damages occur.
6. Start the tractor and try out the functions. A bale is not required for this test.
7. Check all connections, hoses and couplings. If there is any oil-leakage, it should be rectied immediately.
If any problems should occur, it is most likely that the failure is in the quick-couplers on the tractors pres¬sure and return-connections.
Make sure that both the male and female-couplers opens properly for the oil ow, check these carefully. The best thing to do is to exchange the quick-coupling on the return side and
arrange a“free return”.
Your TANCO AUTOWRAP bale wrapper has been tested in practical operation in approx. 2 hours at the factory.
6. MACHINE SETUP

Tanco Autowrap - 1310 / 1320
Operator’s Manual
16
Emergency Stop (See Fig. 6.3)
This machine is equipped with a safety guards on the Wrapping Arms,
and its operation must be tested before work itself is started.
The Emergency Stop is to prevent the Wrapping Arm from damaging
people and objects, when the machine is started and during the
wrapping process. It consists of two safety arms that run in front of the
lm dispensers. When tripped they activate an electric switch, which
gives a signal to the control box to activate the emergency stop.
When testing this function, start the Wrapping Arm, hold out an arm or any obstacle.
The wrapping arm shall now stop before it hits the arm. Great care must be taken
when testing this function.
To restart the machine the obstacle must be removed
and the arm must be returned to its original position. The Auto Switch on the control
box must be activated again. The wrapping may start again.
IMPORTANT!
GIVEN THE VELOCITY AND MOMENTUM OF THE ARM IT IS IMPOSSIBLE TO STOP THE WRAP ARM IMME-
DIATELY. THE EMERGENCY STOP ARM IS PROVIDED TO HELP REDUCE THE RISK OF SERIOUS INJURY AND
GREAT CARE MUST BE TAKEN WHEN OPERATING THIS MACHINE.
Electronic Switch
Safety Arm
Wrapping Arm
Film Dispenser
Fig. 6.3
6. MACHINE SETUP

Tanco Autowrap - 1310 / 1320
Operator’s Manual
17
Mounting of Plastic Film (See Fig. 6.4 & 6.5)
When loading a plastic roll, rst ensure the Top Cone is pushed up to the latched
position, then push back the Dispenser Insert until held in position by the
Bottom Latch.
Place the Roll on the Bottom Cone and release the Top Latch.
BEWARE OF FINGERS!
Pull the lm between the rollers on the Dispenser Insert in the direction of the
arrow, as shown below. (See also the sticker on the dispenser).
Release the Bottom Latch and allow the rollers to lie against the roll of lm.
Pull the lm from the roll and tie it to the bale.
Top Latch
Bottom Latch
Dispenser Insert
Bottom Cone
Top Cone
Fig. 6.5
Fig. 6.4
6. MACHINE SETUP

Tanco Autowrap - 1310 / 1320
Operator’s Manual
18
Adjusting the Height of the Dispenser
The standard lm dispenser is designed for 750mm lm. If using 500 mm lm an adaptor is required which must be ordered separately. See parts book and contact your dealer.
The plastic lm should hit at the middle of the bale wrapped (Fig. 6.6), and therefore it can be necessary to adjust the height of the pre-stretcher (See Fig. 6.7).
Height Adjustment
Fig. 6.6
Fig. 6.7
6. MACHINE SETUP

Tanco Autowrap - 1310 / 1320
Operator’s Manual
19
Gear Bolt
Pos. 1 Pos. 2
Tanco Dual Stretch Dispenser
All Tanco Autowrap machines are supplied with a patented dual stretch gear system.
This system enables a quick change of stretch levels on the Film Dispenser.
If the Gear Bolt is tted in Position 1 (See Fig. 6.7), the top set of gears provide the stretch @ 70%.
By removing the Gear Bolt from Position 1 and tting it in Position 2, the bottom set of gears become the
stretch gears giving 32% (for prestretched lm) or optionally 55% (for use in hotter climates or with square
bales).
Fig. 6.8
Inner Gear Outer Gear % Stretch
60 Tooth 35 Tooth 70%
58 Tooth 37 Tooth 55%
54 Tooth 41 Tooth 32%
Tanco Dispenser Gear Comninations
6. MACHINE SETUP
This manual suits for next models
4
Table of contents
Other Tanco Farm Equipment manuals

Tanco
Tanco S100 A User manual

Tanco
Tanco D80 Service manual

Tanco
Tanco 404 S Service manual

Tanco
Tanco i73 Service manual

Tanco
Tanco Autowrap 1320 Service manual

Tanco
Tanco E100 SA Service manual

Tanco
Tanco A200 EH User manual

Tanco
Tanco A Series Service manual

Tanco
Tanco 580A User manual

Tanco
Tanco 1400 Autowrap Service manual
Popular Farm Equipment manuals by other brands

Smithco
Smithco SN FWR-001 Parts & Service operators

horsch
horsch Cruiser 10 XL operating instructions

Yetter
Yetter 2967-002B Operator's manual

Hampel's
Hampel's Calf-Tel CT-10015AF Assembly Instruction for Installation

Green Frog Designs
Green Frog Designs Square Foot Garden Assemble

Nedap
Nedap VP1004-B instruction manual