TCL 30XL User manual

T701DL
User Manual

1 2
Table of Contents
1 Your mobile ����������������������������������������������������������������������������������������������������������������� 3
1.1 Keys and connectors.................................................................................................. 3
1.2 Getting started........................................................................................................... 6
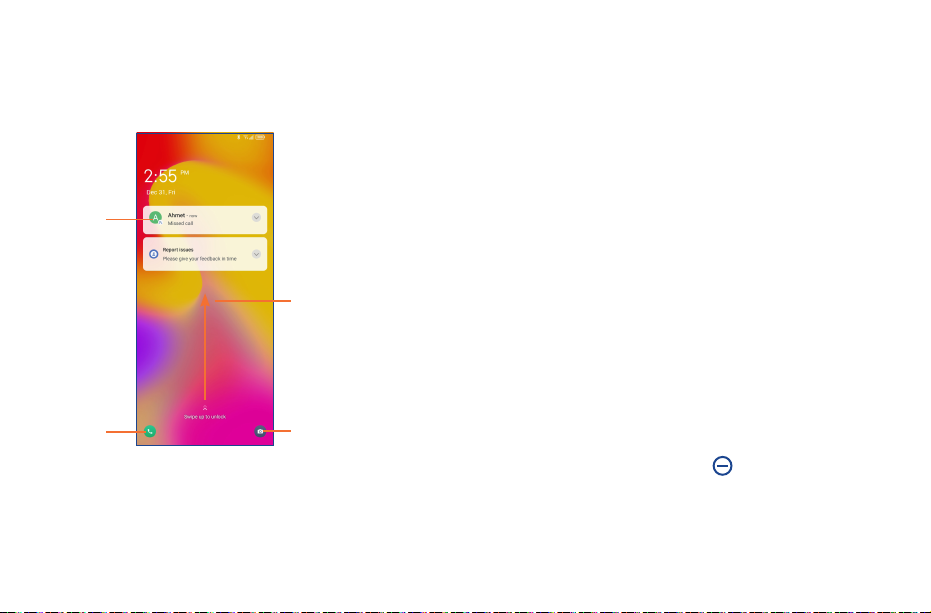
1.3 Home Screen............................................................................................................. 8
1.4 Text Input................................................................................................................. 16
2 Phone, Call log and Contacts����������������������������������������������������������������������������������� 20
2.1 Phone ...................................................................................................................... 20
2.2 Contacts .................................................................................................................. 26
3 Messages ������������������������������������������������������������������������������������������������������������������ 30
3.1 Writing a new message ........................................................................................... 30
3.2 Manage messages................................................................................................... 31
4 Apps and Features���������������������������������������������������������������������������������������������������� 33
4.1 Camera.................................................................................................................... 33
4.2 Gallery ..................................................................................................................... 37
4.3 Calendar .................................................................................................................. 41
4.4 Clock ....................................................................................................................... 42
4.5 Calculator ................................................................................................................ 44
5 Google Applications�������������������������������������������������������������������������������������������������� 45
6 Settings ��������������������������������������������������������������������������������������������������������������������� 48
6.1 Wi-Fi........................................................................................................................ 48
6.2 Bluetooth ................................................................................................................. 49
6.3 Mobile Network........................................................................................................ 49
6.4 Connections............................................................................................................. 50
6.5 Home Screen & Lock Screen ................................................................................... 53
6.6 Display..................................................................................................................... 53
6.7 NXTVISION ............................................................................................................... 54
6.8 Sound & Vibration .................................................................................................... 55
6.9 Notifications............................................................................................................. 55
6.10 Button & Gestures.................................................................................................... 56
6.11 Advanced Features .................................................................................................. 56
6.12 Smart Manager........................................................................................................ 57
6.13 Security & Biometrics .............................................................................................. 57
6.14 Location................................................................................................................... 58
6.15 Privacy..................................................................................................................... 58
6.16 Safety & Emergency................................................................................................. 58
6.17 Apps ........................................................................................................................ 58
6.18 Storage.................................................................................................................... 58
6.19 Users & Accounts..................................................................................................... 59
6.20 Digital Wellbeing & Parental Controls ....................................................................... 59
6.21 Google ..................................................................................................................... 59
6.22 Accessibility............................................................................................................. 59
6.23 System .................................................................................................................... 59
7 FOTA upgrade������������������������������������������������������������������������������������������������������������ 61
8 Safety and use ���������������������������������������������������������������������������������������������������������� 62
This product meets applicable national SAR limits of 1.6 W/kg. The specific
maximum SAR values can be found in the “SAR Information”section.
When carrying the product or using it while worn on your body, either use an
approved accessory such as a holster or otherwise maintain a distance of 10 mm
from the body to ensure compliance with RF exposure requirements. Note that the
product may be transmitting even if you are not making a phone call.

3 4
1 Your mobile ������������������������������������������
1�1 Keys and connectors
Microphone
USB Type-C
Headset connector
Back key
Home key
Front camera
Volume key
Power key
Recent Apps
Microphone Speaker
SIM card/
microSDTM card slot
Back camera Flash
Fingerprint
sensor
Back button
• Touch to go back to the previous screen, or to close a dialog box, options menu,
the notification panel, etc.
Home button
• From any application or screen, touch to return to the Home screen.
• Touch and hold to open Google Assistant. You can get help such as getting
directions and restaurant information based on the content detected on the
screen.

5 6
1�2 Getting started
1�2�1 Set up
Installing or removing the SIM card and microSDTM card
Your phone already has a SIM card installed. If you need to change or remove your SIM card, follow
the steps below.
1. Use the provided SIM pin to open the SIM tray.
2. To install SIM/microSDTM card, place the SIM/microSDTM card with the chip facing down into the SIM
card tray and then slide it into its slot.
3. To remove SIM/microSDTM card, push up on the chip side of the cards inside the SIM tray.
You must insert your SIM card to make phone calls. You do not need to power off your phone before
inserting or removing the SIM card as this phone supports hot swap.
Your phone only supports nano-SIM cards. Do not attempt to insert other SIM types;
otherwise this may cause damage to your phone.
Recent apps
• Touch to view applications you’ve recently accessed.
Power key
• Press: Lock the screen/Light up the screen.
Note: Additional shortcuts and customizable settings are available at Settings
> Button & gestures > Power key.
• Press and hold: Show the popup menu to select from Power off/Restart/
Airplane mode.
• Press the Power key and Volume down key at the same time to take a
screenshot.
• Press and hold the Power key for at least 10 seconds to force reboot.
• Press to turn on screen.
Volume Keys
• In call mode, adjusts the earpiece or headset volume.
• In Music/Video/Streaming mode, adjusts the media volume.
• In general mode, adjusts the media volume.
• Mutes the ringtone of an incoming call.
• In camera preview mode, press the Volume up or Down key to take a photo or
press and hold to take burst shots. To set, touch Camera > Settings > Volume
button function.

7 8
1�3 Home Screen
You can bring all of the items that you use most frequently (applications, shortcuts, widgets, folders) to
your Home screen for quick access. Touch the Home button to switch to the Home screen.
Swipe left or right to view more screens
Touch to open an application, folder, etc.
Search bar
Enter text search screen.
Enter voice search screen.
Status bar
• Status/Notification indicators
• Swipe down to open the Notification panel
Favorite apps tray
• Touch to open the application.
• Touch and hold to move or change applications.
The Home screen is provided in an extended format to allow more space for adding applications,
shortcuts etc. Slide the Home screen horizontally left and right to get a complete view.
Charging the battery
You are advised to fully charge the battery ( ). Charging status is indicated by a percentage
displayed on screen while the phone is powered off. The percentage increases as the phone is charged.
To reduce power consumption and energy waste when the battery is fully charged,
disconnect your charger from the plug; switch off Wi-Fi, GPS, Bluetooth or background-
running applications when not in use; reduce the backlight time, etc.
1�2�2 Powering on your phone
Hold down the Power key until the phone powers on, unlock your phone (Swipe, PIN, Password, Pattern,
Fingerprint or Face recognition) if necessary and confirm. The Home screen is displayed.
If you do not know your PIN code or forget it, contact your network carrier. Be sure to keep your PIN
code secure.
1�2�3 Powering off your phone
Press and hold the Power key until options appear, then select Power off.

9 10
1�3�2 Status bar
From the status bar, you can view both phone status (on the right side) and notification information
(on the left side).
Drag down the status bar to view notifications and drag again to enter the quick settings panel.
Touch and drag up to close it.
Status icons
GSM Vibrate mode
WCDMA Alarm is set
LTE Connected to a Wi-Fi network
Signal strength Speakerphone is on
No signal No SIM card inserted
Airplane mode Battery is charging
Bluetooth connected Battery is low
Headset connected Battery is partially drained
GPS is on Battery is full
Notification icons
New Gmail message Missed call
New text or multimedia
message Connect to open Wi-Fi network
Upcoming event Uploading data
Downloading data System update available
1�3�1 Using the touchscreen
Touch
To access an application, touch it with your finger.
Touch and hold
To enter the available options for an item, touch and hold the item. For example. Select a contact in
Contacts and touch and hold it. An options list will then appear.
Drag
Place your finger on the screen to drag an object to another location.
Slide/Swipe
Slide the screen to scroll up and down the applications, images, and web pages. You can also slide
the screen horizontally.
Flick
Similar to swiping, but flicking makes it move quicker.
Pinch/Spread
Place two fingers on the screen surface and draw them apart or together to scale an element on the
screen.
Rotate
Automatically change the screen orientation from portrait to landscape by turning the device sideways
to have a better view.

11 12
Quick settings panel
Touch and drag down from the top of the screen twice to open the Quick settings panel.
You can enable or disable functions or change modes by touching the icons.
Touch to
customize your
Quick settings
panel.
Touch to access
Settings, where
you can set
more items.
Lock/Unlock your screen
To protect your phone and privacy, you can lock the screen with a Pattern, PIN, Password, registered
Fingerprint or Face unlock (1).
To create a screen unlock, touch Settings > Security & biometrics > Screen lock.
(1) Fingerprint and Face unlock may not be as secure as Pattern, PIN, or Password locks.
Drag down the Status bar to open the Quick Settings panel or Notification panel. Drag up to close
the panels.
Notification panel
When there are notifications, touch and drag down the Status bar to open the Notification panel to read
more detailed information.
Touch to clear all event–based notifications
(other ongoing notifications will remain).
With the Notification panel open, drag down
again to see the Quick Settings menu.

13 14
Use pattern unlock
Draw the same pattern you have set to unlock the screen.
Use Face unlock
• From the app list, touch Settings > Security & biometrics > Face unlock. Before using the face
unlock, you need to set a pattern/PIN/password.
• Hold your phone 20-50 cm from your face. Position your face in the square shown on the screen. For
best results, we suggest that the face key setup is completed indoors and away from direct sunlight.
• Enable Face unlock when your screen turns on, otherwise you will have to swipe up on the screen
in order to unlock.
Use Fingerprint unlock
• For the best result, begin with the index finger on your dominant hand.
• Put your finger on the sensor and lift after you feel a vibration. Keep lifting your finger to add the
different parts of your fingerprint.
• Follow theses steps until fingerprints are fully registered.
1�3�3 Personalizing your Home screen
Add
You can touch and hold a folder, an application or a widget and drag the item to your preferred Home
screen.
Reposition
Touch and hold an item and drag it to the desired position and then release. You can move items both
on the Home screen and the Favorite tray. Hold the icon on the left or right edge of the screen to drag
the item to another Home screen.
Remove
Touch and hold the item and drag it up to the top of the remove icon, and release after it turns red.
Create folders
To improve the organization of shortcuts or applications on the Home screen and the Favorite tray, you
can add them to a folder by stacking one item on top of another. To rename a folder, open it and touch
the folder’s title bar to input the new name.
To lock the phone screen
• If your phone remains inactive for a period of time, it will automatically lock the screen and enter
sleep mode to save power. Go to Settings > Display > Sleep and select a screen timeout period.
• You can also manually lock the screen by pressing the Power key once.
Swipe to unlock the screen
Press the Power key once to light up the screen, swipe up the screen to unlock the screen. (1)
Swipe right to
enter Phone (1)
Double tap to enter
the detailed screen
Swipe left to
enter Camera (1)
Swipe up to
unlock the screen
Enter a password to unlock the screen
Once the screen is turned on, swipe up the screen to display the password input panel. Then enter
your lock screen password.
(1) Customize by touching Settings > Home screen & lock screen > Lock screen shortcut.

15 16
1�3�5 Volume adjustment
Press the Volume key to adjust the Media volume.
Touch the icon to adjust Ring, Alarm and Notification volume.
1�4 Text Input
1�4�1 Using the Onscreen Keyboard
Onscreen Keyboard settings
Touch Settings > System > Language & input, touch the Virtual keyboard you want to set up and a
series of settings will become available.
Wallpaper customization
Touch and hold an empty area on the Home screen, then touch Wallpapers to customize wallpaper.
1�3�4 Widgets and recently used applications
Widgets
Touch and hold the empty area in the Home screen, then touch Widgets to display all widgets.
Touch and hold the selected widget and slide it to move to your preferred screen.
Recently used applications
To consult recently used applications, touch the Recent apps key.
Touch a thumbnail in the window to open the application.
Touch one thumbnail and slide it up to close the application, slide it right/left to switch between the
applications.
Touch at the bottom of the screen to close all the running applications.

17 18
Touch to switch between "abc/Abc" mode
Touch twice to switch to "ABC" mode
Touch to access the symbols and numbers keyboards
1�4�3 Text editing
You can edit text which you have entered�
• Touch and hold or double tap within the text you want to edit.
• Drag the tabs to change the amount of text to edit.
• The following options will appear: Cut, Copy, and Share.
Adjust the Onscreen Keyboard orientation
Turn the phone sideways or upright to adjust the onscreen keyboard orientation. You can adjust it by
changing the settings (Touch on/off Settings > Display > Auto-rotate screen).
1�4�2 Android keyboard
Enter recipient numbers or select from contacts
Touch to send the message
Touch to insert a period
Touch and hold to select symbols
Touch to insert a comma
Touch and hold to access keyboard settings, insert an emoji, or view input options.

19 20
2 Phone, Call log and Contacts ��������������
2�1 Phone ��������������������������������������������������������������������������
2�1�1 Making a call
To make a call, touch in the Favorites tray.
Contacts
View the call's detailed information
Call logs
Favorite numbers
Show the dial pad
You can also insert new texts if preferred
• Touch where you want to type, or touch and hold a blank area. The cursor will blink and the tab
will appear. Drag the tab to move the cursor.
• If you have cut or copied any text, touch the tab to show the Paste and Select all option which
allows you to complete pasting immediately.

21 22
Emergency call
If your phone has network coverage, dial the emergency number and touch to make an
emergency call. Depending on your network and country this could even work without a SIM card and
without typing in the SIM PIN code.
2�1�2 Answering or rejecting a call
When you receive a call:
• Press ANSWER, or swipe up the icon to answer;
• Press DECLINE, or swipe down the icon to reject;
• Swipe up the icon to reject the call by sending a preset message.
Touch and hold to access voicemail
Enter the desired number from the dial pad and touch to place the call or select a contact from
Contacts or Call logs by sliding or touching tabs, then make the call.
The number you entered can be saved to Contacts by touching Create new contact or Add to a
contact.
If you make a mistake, you can delete the incorrect digits by touching .
To hang up a call, touch .
International call
To dial an international call, touch and hold to enter “+”, then enter the international country prefix
followed by the full phone number and touch .

23 24
End the current call.
Touch to mute the current call. Touch this icon again to unmute the call.
Display the dial pad.
Touch to activate the speaker during the current call. Touch this icon again to deactivate
the speaker.
Make another call.
Put a call on hold.
Merge calls to start a conference call.
Swap the calls.
To avoid accidental operation of the touchscreen during a call, the screen will be locked
automatically when you put the cellphone close to your ear and it will be unlocked when the
cellphone is taken away from your ear.
2�1�5 Managing multiple calls
With this phone you can handle multiple calls at the same time.
Swap calls
When you accept two calls, touch the icon to switch between two lines. The current call will be
put on hold and you are able to join the other call.
2�1�3 Calling your voicemail
Your voicemail is provided by your network to avoid missing calls. It works like an answering machine
that you can consult at any time.
To access your voicemail, touch and hold .
If you receive a voicemail, appears on the Status bar. Open the Notification panel and touch
New voicemail.
2�1�4 During a call
To adjust the volume during a call, press the Volume up/down key.

25 26
2�2 Contacts ����������������������������������������������������������������������
Contacts enables quick and easy access to the contact you want to reach.
You can view and create contacts on your phone and synchronize these with your Gmail contacts or
other applications on the web or on your phone.
2�2�1 Consult your Contacts
To see your contacts, touch from the App drawer.
Add new contact
• Touch to open the Quick contact panel
• Touch and hold to share or delete the selected contact
Deleted contacts will also be removed from other applications on the phone or web the next
time you synchronize your phone.
Conference calls(1)
You can set up a conference call as follows.
• Place a call to the first participant of the conference call.
• Touch to add another call.
• Enter the phone number of the person you want to add to the conference and touch . You
can also add participants from Call logs or Contacts.
• Touch to start the conference.
• Touch to end the conference call and disconnect all callers.
2�1�6 Call settings
Touch from the Phone screen, then touch Settings to set phone and contact settings.
2�1�7 Call log
You can access your call logs by touching from the Phone screen to view missed calls, outgoing
calls and incoming calls.
Touch one call to view information or further operations. You can launch a new call, send a message to
the contact or number, or view detailed information of the call.
To delete the call history of a selected contact or number, touch and hold the contact and choose Delete.
(1) Depending on your network carrier.

27 28
2�2�3 Editing your contacts
To edit contact information, touch in the contact details screen.
When finished, touch Save.
2�2�4 Using the Quick contact panel
Touch a contact to open the Quick contact panel.
• Touch or the number to make a call.
• Touch to send a message.
The icons available on the Quick contact panel depend on the information you have for the contact and
the applications and accounts on your phone.
2�2�2 Adding a contact
Touch in the contact list to create a new contact.
You are required to enter the contact's name and other contact information. By scrolling up and down
the screen, you can move from one field to another.
Select a picture or take a photo
for the Phone contact
Touch to save
Touch to open available labels
Add to/remove from Favorites (1)
To add a contact to favorites, you can touch a contact to view details then touch to add the
contact to favorites.
To remove a contact from favorites, touch on the contact details screen.
(1) Phone and Gmail contacts can be added to favorites.

29 30
3 Messages �������������������������������������
3�1 Writing a new message
You can create, edit, send and receive SMS and MMS with this phone.
To access Messages, touch from the App drawer.
On the message list screen, touch to write text/multimedia messages.
2�2�5 Sharing contacts
You can share a single contact or contacts with others by sending the contact's vCard to them via
Bluetooth, Gmail, etc.
• From the Contacts screen, touch and hold a contact and touch .
• Select the application to perform this action.
2�2�6 Accounts
Contacts, data or other information can be synchronized from multiple accounts, depending on the
applications installed on your phone.
To add an account, touch from the contacts list and touch Settings > Accounts > Add account,
or from the home screen, touch Settings > Accounts > Add account.
You are required to select the type of account you are adding, like Google, etc.
As with any other account setup, you need to enter detailed information, such as username, password,
etc.
You can remove an account and all associated information from the phone. Touch the account you want
to delete, touch Remove account, then confirm.
Auto-sync
On the Accounts screen, turn on Automatically sync data . When activated, all changes to
information on the phone or online will be automatically synchronized with each other.

31 32
Touch for more options
Touch to video call the number
Touch to call the number
Touch to save the number to Contacts or view the contact details if the number has been saved
To adjust message settings, touch and select Settings on the message list screen.
Sending a text message
• To add recipients, enter a mobile phone number or select a contact in the To bar.
• Touch the Text message bar to enter the text of the message.
• When finished, touch to send the text message.
Specific letters (accented) will also increase the size of the SMS. This may cause multiple
SMS to be sent to your recipient.
Sending a multimedia message
MMS enables you to send video clips, images, photos, animations, and sounds to other compatible
mobile devices and e-mail addresses.
An SMS will be converted to MMS automatically when media files (image, video, audio, slides, etc.) are
attached or subject or email addresses are added.
• To send a multimedia message, enter the recipient's phone number in the To bar.
• Write the text of the message in the Text message bar.
• Touch to attach a picture, video, audio, etc.
• When finished, touch to send the multimedia message.
3�2 Manage messages
When receiving a message, will appear on the Status bar as a notification. Drag down the Status
bar to open the Notification panel. Touch the new message to open and read it. You can also access the
Messages application and touch the message to open it.
Messages are displayed as a conversation.
Touch a message to enter the message composing screen:

33 34
Select filters
Flash mode: Touch to turn on/off the camera flash
WARNING: Keep a safe distance when using the flash. Do not point the flash toward people’s
or animals’ eyes.
Take a timed photo
Take HDR photos
Zoom in/out
Turn on/off Ultra Wide mode.
Switch between front/back camera
Take a photo
4 Apps and Features�������������������������������
4�1 Camera�����������������������������������������������������������������������
Before using the camera, make sure that you remove the protective lens cover to avoid it affecting
your picture quality.
4�1�1 Launch Camera
There are multiple ways to open the Camera app.
From the Home Screen
From the home screen, touch Camera .
From the Lock Screen
When the screen is locked, press the Power key once to light up the screen, then swipe left on the
camera icon in the lower right corner to open the camera.

35 36
• PRO: Pro camera mode lets you fine-tune parameters and gives you full control over ISO, WB
exposure time, aperture, shutter speed and so on.
• PANO: Touch to turn on the panorama function. Touch the shutter button to start taking a panoramic
photo and move the phone steadily along in the direction indicated by the onscreen line. Once the
progress bar are filled, the photo will be automatically saved. If the progress bar is not fully filled,
touch the shutter button again to save the photo.
Touch to access more modes. These modes can be moved to the main screen by touching .
• STOP MOTION: Capture a number of photos of a certain scene, then convert them into a speeded-
up video.
• LIGHT TRACE: Capture creative movements of light using a long exposure photograph.
• SUPER MACRO: Touch to access super macro mode. 1to 3inches is the best macro shooting
distance.
• HIGH PIXEL: When capturing pictures the device will use the 50M rear camera or 16M front camera.
The photos are larger and more detailed than pictures taken in auto mode. This mode works only
in partially bright scenes, such as when the sun is shining.
Settings
Touch to set more options:
• Photo size: Touch to select photo size.
• Video quality: Touch to select video quality.
• Calorie detection: Turn on to detect the calorie content of a captured object.
• Smart guideline: Touch to turn on/off. This feature provides AI-powered facial detection and
composition guides for portrait shots. It only works when using the main camera.
• Volume button function: Touch to customize the Volume button to Shutter, Zoom or Volume when
using camera.
• Storage: Touch to choose between phone and microSDTM card storage when an microSDTM card is
inserted. The default is phone storage.
• Save location information: Turn on to tag photos and videos with your location. This
option is available when the GPS location service is enabled.
• Shutter sound: Touch to turn on/off shutter sound when capturing.
• Watermark: Touch to turn on/off Watermark.
• Reset settings: Touch to reset the camera to its factory default settings.
Touch to access settings
Picture size
Pinch fingers together to zoom out, or spread fingers apart to zoom in
View the photos or videos you have taken
4�1�2 To take a photo
The screen acts as the viewfinder. First, position the object or landscape in the viewfinder, touch the
screen to focus if necessary. Touch to capture. The photo will be automatically saved. You can
also touch and hold to take burst shots.
4�1�3 To take a video
Touch VIDEO to change the camera mode to video.
Touch to start video recording. Touch the left part of this icon to take a picture during
video recording.
Touch the right part of this icon to pause video recording and touch to continue.
Touch to stop recording. The video will be automatically saved.
Further operations when viewing a photo/video you have taken
• Slide left or right to view the photos or videos you have taken.
• Touch , then Gmail/Bluetooth/MMS/etc. to share the photo or video.
• Touch Back button to return to Camera.
4�1�4 Modes and settings
Modes
Slide left or right to switch between modes.
• AUTO: Auto is the default mode for Camera.
• VIDEO: Touch to access video mode.
• PORTRAIT: Touch to create a depth of field effect. You can compose an image that highlights your
subject while producing a gorgeously blurred background.

37 38
Tap to access more options
Explore: Explore collects photos into groups making them more easy to find
Albums: Photos, videos, screenshots, etc. are all automatically grouped in Albums
Moments: View the photos/videos you have just taken
4�2�1 Working with pictures
You can work with pictures by rotating or cropping them, sharing them with friends, setting them as a
contact photo or wallpaper, etc.
Find the picture you want to work on, and touch the picture in the full-screen picture view.
More options are available when you switch to using the front camera:
• Face Beauty: Touch to turn on/off. When activated, touch to adjust skin smoothing and
enhance coloring effects in portraits.
• Mirror camera: Touch to turn on/off.
4�2 Gallery �������������������������������������������������������������������������
Gallery acts as a media player for you to view photos and play videos. In addition, a set of further
operations to pictures and videos are available for selection.
To view the photos you have taken, touch from the Home screen.
Other manuals for 30XL
2
This manual suits for next models
1
Table of contents
Other TCL Cell Phone manuals

TCL
TCL FLIP 2 User manual

TCL
TCL A501DL User manual

TCL
TCL Alcatel Pixi4-3.5 3G User manual

TCL
TCL Alcatel POP4-5 User manual

TCL
TCL 30Z User manual

TCL
TCL Idol4 S VF Technical manual

TCL
TCL Alcatel Pixi4-4.5 TF User manual

TCL
TCL Alcatel Pixi4-3.5 3G Technical manual

TCL
TCL TCLFLIP2 User manual

TCL
TCL 30 XE 5G User manual