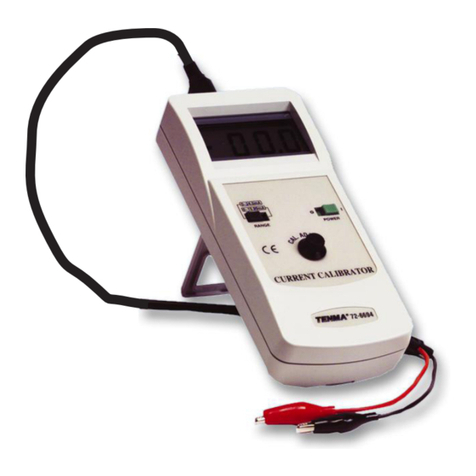
Tenma 72-6802 User manual

30MHz Dual Trace Oscilloscope
Model 72-6802
USER MANUAL
This manual contains proprietary information, which is protected by copyrights. All rights
are reserved. No part of this manual may be photocopied, reproduced or translated to
another language without prior written consent of Tenma Test Equipment.
The information in this manual was correct at the time of printing. However, Tenma
continues to improve products and reserves the rights to change specification, equipment,
and maintenance procedures at any time without notice.
Tenma Test Equipment
405 S. Pioneer Blvd. Springboro Ohio, 45036

TABLE OF CONTENTS
3
Table of Contents
SAFETY INSTRUCTIONS ................................................................................5
PRODUCT OVERVIEW .................................................................................. 10
Product Description .....................................................10
Main Features.................................................................11
Block Diagram ...............................................................12
PANEL OVERVIEW ....................................................................................... 13
Front Panel Overview ...................................................13
Display Controls............................................................14
LCD Display....................................................................15
Horizontal Controls ......................................................16
Vertical Controls ..........................................................17
Trigger Controls ...........................................................19
Input Terminals ............................................................22
Rear Panel Overview ...................................................23
SETUP .........................................................................................................24
Default Settings ...........................................................24
Set up & Probe Compensation....................................26
MEASUREMENT........................................................................................... 28
Single Channel (Basic) Measurement ........................28
Dual Channel Measurement.........................................30
Waveform Addition/Subtraction ................................32
Frequency Measurement.............................................32
X-Y Mode .......................................................................33
Waveform Magnification..............................................34
FAQ ............................................................................................................ 35
72-6802 User Manual
APPENDIX ...................................................................................................37
Line Voltage & Fuse Replacement .............................. 37
Specifications ..............................................................39
Declaration of Conformity........................................... 41

SAFETY INSTRUCTIONS
5
SAFETY INSTRUCTIONS
Thischaptercontainsimportantsafetyinstructions
thatyoumustfollowwhenoperatingandstoring
thisinstrument.Readthefollowinginstructions
beforeoperatingtheinstrumenttoensureyour
safetyandtokeepitinbestcondition.
Safety symbols
Thesesafetysymbolsmayappearinthismanualoronthe
instrument.
WARNING Warning:Identifiesconditionsorpracticesthat
couldresultininjuryorlossoflife.
CAUTION Caution:Identifiesconditionsorpracticesthat
couldresultindamagetotheinstrumentorto
otherproperties.
DANGER:HighVoltage
Attention:RefertotheManual
ProtectiveConductorTerminal
Earth(Ground)Terminal
72-6802 User Manual
6
Safety guidelines
General
Guideline
CAUTION
•Neverconnectahazardouslivevoltagetothe
groundsideoftheBNCconnectors.Itmight
leadtofireorelectricshock.
•Donotplaceheavyobjectsontheinstrument.
•Avoidsevereimpactsorroughhandlingsthat
leadtodamagingtheinstruments.
•Donotdischargestaticelectricityontothe
instruments.
•Useonlymatingconnectors,notbarewires,for
theterminals.
•Donotblockthecoolingfanopening.
•Donotperformmeasurementsatpower
generatingsourcesandbuildinginstallation
sites(Seenotebelow).
•Donotdisassembletheinstrumentunlessyou
aretechnicallyqualified.
•TopreventapermanentdamagetotheCRT
phosphor,avoidexcessivelybrighteningthe
traceorholdingalightspotforanunreasonably
longtime.
•Donotoperatetheinstrumentinaplacewhere
strongmagneticorelectricfieldexistsasitmay
disturbthemeasurement.
•Makesuretheinputvoltagedoesnotexceedthe
followingvalues.
Input Terminal Maximum Input Voltage
CH1,CH2input300Vpeak
EXTTRIGinput300Vpeak

SAFETY INSTRUCTIONS
7
Probeinput600Vpeak
ZAXISinput30Vpeak
(Measurement categories) EN 61010-1:2001 specifies the measurement categories and
their requirements as follows. The 72-6802 falls under category II.
•Measurement category IV is for measurements performed at the source of low-
voltage installations.
•Measurement category III is for measurements performed in building installations.
•Measurement category II is for measurements performed on the circuits directly
connected to low voltage installations.
•Measurement category I is for measurements performed on circuits not directly
connected to mains.
Power Supply
WARNING
•ACInputvoltage:115V/230VAC,50/60Hz
•Thepowersupplyvoltageshouldnotfluctuate
morethan15%.
•Toavoidelectricshock,connecttheprotective
groundingconductoroftheACpowercordto
anearthground.
Fuse
WARNING
•Fusetype:T0.63A/250V(AC115V),
T0.315A/250V(AC230V)
•Makesurethecorrecttypeoffuseisinstalled
beforepowerup.
•Toensurefireprotection,replacethefuseonly
withthespecifiedtypeandrating.
•Disconnectthepowercordbeforefuse
replacement.
•Makesurethecauseoffuseblowoutisfixed
beforereplacingthefuse.
72-6802 User Manual
8
Cleaning the
instrument
•Disconnectthepowercordbeforecleaningthe
instrument.
•Useasoftclothdampenedinasolutionofmild
detergentandwater.Donotsprayanyliquid
intotheinstrument.
•Donotusechemicalscontainingharshproducts
suchasbenzene,toluene,xylene,andacetone.
Operation
Environment
•Location:Indoor,nodirectsunlight,dustfree,
almostnon‐conductivepollution(Seenote
below)
•RelativeHumidity:<85%,non‐condensing
•Altitude:<2000m
•Temperature:0°Cto40°C
(Pollution Degree) EN 61010-1:2001 specifies the pollution degrees and their requirements
as follows. The 72-6802 falls under degree 2.
Pollution refers to “addition of foreign matter, solid, liquid, or gaseous (ionized gases),
that may produce a reduction of dielectric strength or surface resistivity”.
•Pollution degree 1: No pollution or only dry, non-conductive pollution occurs. The
pollution has no influence.
•Pollution degree 2: Normally only non-conductive pollution occurs. Occasionally,
however, a temporary conductivity caused by condensation must be expected.
•Pollution degree 3: Conductive pollution occurs, or dry, non-conductive pollution
occurs which becomes conductive due to condensation which is expected. In such
conditions, equipment is normally protected against exposure to direct sunlight,
precipitation, and full wind pressure, but neither temperature nor humidity is
controlled.
Storage
environment
•Location:Indoor
•RelativeHumidity:<70%
•Temperature:–10°Cto70°C
SAFETY INSTRUCTIONS
9
Power cord for the United Kingdom
WhenusingtheinstrumentintheUnitedKingdom,makesurethe
powercordmeetsthefollowingsafetyinstructions.
NOTE: This lead/appliance must only be wired by competent persons
WARNING: THIS APPLIANCE MUST BE EARTHED
IMPORTANT: The wires in this lead are coloured in accordance with the
following code:
Green/ Yellow: Earth
Blue: Neutral
Brown: Live (Phase)
As the colours of the wires in mains leads may not correspond with the
colours marking identified in your plug/appliance, proceed as follows:
The wire which is coloured Green & Yellow must be connected to the Earth
terminal marked with the letter E or by the earth symbol or coloured Green
or Green & Yellow.
The wire which is coloured Blue must be connected to the terminal which is
marked with the letter N or coloured Blue or Black.
The wire which is coloured Brown must be connected to the terminal marked
with the letter L or P or coloured Brown or Red.
If in doubt, consult the instructions provided with the equipment or contact
the supplier.
This cable/appliance should be protected by a suitably rated and approved
HBC mains fuse: refer to the rating information on the equipment and/or user
instructions for details. As a guide, cable of 0.75mm2should be protected by
a 3A or 5A fuse. Larger conductors would normally require 13A types,
depending on the connection method used.
Any moulded mains connector that requires removal /replacement must be
destroyed by removal of any fuse & fuse carrier and disposed of immediately,
as a plug with bared wires is hazardous if a engaged in live socket. Any re-
wiring must be carried out in accordance with the information detailed on this
label.
72-6802 User Manual
10
PRODUCT OVERVIEW
Product Description
TheTenmaModel72‐6802oscilloscopeisaportable,dual‐channel
oscilloscope.Itprovidesmaximum30MHzDCbandwidthand
1mV/DIVsensitivity.Itstimebasereaches0.2μS/DIVandthesweep
speed100nS/DIV.The72‐6802usesa6‐inchrectangularcathoderay
tubedisplaywithredinternalgraticule.Thisisasturdy,easy‐to‐
operate,andhighlyreliabileproduct.The72‐6802alsoincorporates
aseparateLCDDisplay,whichcanshowCH1/CH2VOLT/DIV,
TIME/DIV,X‐YMODE,andFrequency.

PRODUCT OVERVIEW
11
Main Features
High intensity
and
acceleration
CRT
TheCRTincorporateshighbeamtransmission,
highintensity,anda2kVhighaccelerationvoltage.
TheCRTdisplaysclearlyreadabletracesevenat
highersweepspeeds.
Wide
bandwidth and
sensitivity
InadditiontotheDC‐30MHz(‐3dB)wide
bandwidth,theoscilloscopeprovidesa1mV/DIV
highsensitivity.The30MHzfrequencyrangeis
obtainedbyanimprovedtriggering
synchronization.
Frequency
Counter
Abuilt‐in5‐digitfrequencycounteroffers±0.02%
accuracybetween1kHzand30MHz,and±0.05%
between50Hzand1kHz.
Automatic
timebase
adjustment
PressingtheAUTOTIMEBASEkeyautomatically
adjuststhesweeptimetoanappropriaterange.
Alternate
triggering
Evenwhenobservingtwowaveformsindifferent
frequencies,bothwaveformscanbestably
triggeredusingthealternatetriggeringmode.
TV sync
triggering:
Theoscilloscopehasasyncseparatorcircuitfor
theTV‐VandTV‐Hsignaltriggering.
CH1 output TheCH1signalisoutputfromarearpanel
terminal,whichcanbeappliedtoexternaldevices.
Z-axis input DisplayintensitycanbecontrolledviatheTTL
compatiblez‐axisinputontherearpanel.
X-Y mode TheX‐YmodecomparestheCH1andCH2signal
amplitude.Itisusefulforcomparingthephase
difference.
Buzzer alarm Incorrectoperationgeneratesawarningbeep.
72-6802 User Manual
12
Block Diagram

PANEL OVERVIEW
13
PANEL OVERVIEW
Front Panel Overview
Detaileddescriptionsofeachblockstartfromthenextpage.
Main Display Showsthewaveformsofinputsignals.
Display
Controls
Controlspoweron/off,displayconfiguration,and
theprobecompensationoutput.
LCD Display Showstheverticalscale,horizontalscale,X‐Y
displaymode,andwaveformfrequencies.
Horizontal
Controls
Controlsthehorizontalscale,horizontalposition,
sweeplength,andx10magnification.
Vertical
Controls
Controlstheverticalscale,verticalposition,display
mode,CH2inversion,andalternatedisplaymode.
72-6802 User Manual
14
Trigger
Controls
Controlsthetriggermode,triggerlevel,trigger
couplingsource,triggerslope,andalternate
triggeringmode.Acceptstheexternaltriggerinput.
Input
Terminals
AcceptstheCH1andCH2inputsignalsandground
wire.Controlstheinputsignalcouplingmode.
Display Controls
654321
1 CAL Output Generatestheprobecompensationsignal;2Vp‐p,
1kHz,positivesquarewave.Forprobe
compensationdetails,seepage26.
2 INTEN Knob Controlsthebrightnessofalightspotortracein
thedisplay.
3 FOCUS
Knob
Controlsthefocus(sharpness)ofthewaveformsin
thedisplay.
4 TRACE
ROTATION
Point
Controlsthealignmentofthehorizontaltracein
parallelwithgraticulelines.
5 AUTO
TIMEBASE
Key
Automaticallyadjuststhehorizontalscaletoan
appropriaterangeaccordingtotheinputsignal.
6 POWER
Switch
Turnsonorofftheoscilloscope’smainpower.
Whenthepowerison,theLEDlights.

PANEL OVERVIEW
15
LCD Display
1 CH1
Vertical
Scale
ShowstheCH1verticalscale.
2 Horizontal
Scale
Showsthehorizontalscale.
3 X-Y Mode Whenturnedon,indicatesthattheX‐Ymodeis
activated.ForX‐Ymodedetails,seepage33.
4 Signal
Frequency
Showsthewaveformfrequency.Forfrequency
measurementdetails,seepage32.
5 CH2
Vertical
Scale
ShowstheCH2verticalscale.
72-6802 User Manual
16
Horizontal Controls
1 Horizontal
POSITION
Knob
Controlsthehorizontalpositionoftracesandlight
spots.
2 ×10 MAG
Switch
Magnifiesthehorizontalscalebyafactorof10.For
horizontalmagnificationdetails,seepage34.
3 SWP VAR
Knob
Adjuststhehorizontalscale.
Attheminimumposition,thehorizontalscale
becomes2.5timeswiderthantheoriginalvalue
selectedbytheTIME/DIVknob.Forexample,ifthe
originalscaleis1mS/DIV,theadjustedscale
becomes2.5mS/DIV.
Atthemaximum(CAL)position,thereisno
changeinthehorizontalscale.
4 TIME/DIV
Knob
Controlsthehorizontalscalefrom0.2μs/divto0.5
s/divin20steps.
When“X‐Y”isselected,theoscilloscopeworksin
theX‐Ymode.ForX‐Ymodedetails,seepage33.

PANEL OVERVIEW
17
Vertical Controls
1 VOLTS/DIV
Knob
ControlstheCH1/CH2verticalscalefrom
1mV/DIVto5V/DIVin12steps.
2 Vertical
POSITION
Knob
Controlstheverticalpositionoftracesandlight
spotsforCH1/CH2.
3 ALT/CHOP
Switch
SelectshowtheCH1andCH2signalsappear inthe
display,intheDUALtracemode.
CHOP
Thetwosignalsarechoppedand
displayedsimultaneously(generally
usedinslowsweep,1ms/DIVor
slower).
ALT
Thetwosignalsaredisplayed
alternatively(generallyusedinfast
sweep,0.5ms/DIVorfaster).
4 Vertical
MODE
Switch
SelectsCH1andCH2displaymodes.
CH1/CH2TheCH1orCH2signalisdisplayed
independently.
72-6802 User Manual
18
DUALTheCH1andCH2signalsaredisplayed
simultaneously.
ADDTheCH1andCH2signalsareaddedor
subtracted,andthentheresultis
displayed.ForCH1/CH2
addition/subtractiondetails,seepage32.
5 VAR Knob Adjuststheverticalscale.
Attheminimumposition,theverticalscale
becomes2.5timeswiderthantheoriginalvalue
selectedbytheVOLTS/DIVknob.Forexample,if
theoriginalscaleis1mV/DIV,theadjustedscale
becomes2.5mV/DIV.
Atthemaximum(CAL)position,thereisno
changeintheverticalscale.
6 CH2 INV
Switch
InvertstheCH2inputsignalvertically.Whenthe
verticalmodeswitchisintheADDposition,CH2is
subtractedfromCH1insteadofbeingaddedto
CH1.ForCH1/CH2addition/subtractiondetails,
seepage32.

PANEL OVERVIEW
19
Trigger Controls
1 Trigger ALT
Switch
Whenpressed,theTRIGALTswitchconstantly
togglesthetriggersourcebetweenCH1andCH2
signal,sothatbothsignalscanbeclearlyviewed.
TheTRIGALTswitchworkswhenthevertical
modeisintheDUALpositionandalsothetrigger
sourceisintheCH1orCH2position.
Note
•TheTRIGALTswitchdoesnotworkwhenthe
ALT/CHOPswitchisintheCHOPposition.
•ThefrequencycounterintheLCDdisplaydoes
notworkwhentheTRIGALTswitchispressed.
2 Trigger
MODE
Switch
TheTRIGGERMODEswitchselectswhenthe
oscilloscoperespondstothetriggerconditions.
AUTO Theoscilloscopesweepsregardlessof
theexistenceoftriggerconditions.
NORM Theoscilloscopesweepsonlywhena
triggerconditionoccurs.
72-6802 User Manual
20
TV-V Theoscilloscopetriggerswhena
verticalvideosynchronizationsignal
appears.Fortriggeringonthefield,
select2ms/DIVasthehorizontalscale;
fortriggeringontheframe(two
interlacedfields),5ms/DIV.
TV-H Theoscilloscopetriggerswhena
horizontalvideosynchronization
signalappears.Fortriggeringonthe
line,select10us/DIVasthehorizontal
scale.UsetheSWPVARknobto
controlthenumberofwaveforms.
Note
•ForTV‐VandTV‐Htrigger,the
oscilloscoperespondsonlyto
negativepolaritysignals.
•Theoscilloscopecannottrigger
inputsignalswhentheir
frequenciesarelessthan25Hz.
3 Trigger
LEVEL Knob
Changesthetriggerlevelvertically.
ThetriggerlevelmovesupwhenthetriggerLEVEL
knobisturnedclockwise.
Thetriggerlevelmovesdownwhenthetrigger
LEVELknobisturnedcounterclockwise.

PANEL OVERVIEW
21
4 Trigger
SLOPE
Switch
Selectsthetriggeringslope.
Wheninthe“+”position(),theoscilloscope
triggerswhenthepositiveslopeofthetrigger
sourcesignalcrossesthetriggerlevel.
Wheninthe“–”position(),theoscilloscope
triggerswhenthenegativeslopeofthetrigger
sourcesignalcrossesthetriggerlevel.
5 Trigger
SOURCE
Switch
Selectsthesignalonwhichtheoscilloscopesweeps.
CH1CH1signalbecomesthetrigger
source.
CH2CH2signalbecomesthetrigger
source.
LINEACpowerlinesignalbecomesthe
triggersource.Usefulwhentheinput
signalsynchronizeswiththepower
linefrequency.
EXTTheexternaltriggerinput(TRIGIN
terminal)signalbecomesthetrigger
source.
6 TRIG IN
Terminal
Acceptsanexternaltriggersourcesignal.The
signalbecomesactivewhenthetriggerSOURCE
switchisintheEXTposition.
Inputimpedance:1MΩ//25pF
72-6802 User Manual
22
Input Terminals
1 CH 1 (X)
Input
Terminal
AcceptstheCH1inputsignal.InX‐Ymode,the
CH1inputsignalbecomestheX‐axis.
2 AC/GND/
DC Switch
Selectsthecouplingmodefortheinputsignal.
AC TheoscilloscopeblockDCcomponents
includedintheinputsignal.
GND Showstheground(zerovolt)levelon
thedisplay.Thismodeisonlyfor
checkingthereferencelevel;input
signaldoesnotappearonthedisplay.
DC Theoscilloscopedisplaysallofthe
inputsignal.
3 GND
Terminal
Acceptsagroundwire.TheGNDterminalis
connectedtotheoscilloscopemainframe.
4 CH 2 (Y)
Input
Terminal
AcceptstheCH2inputsignal.InX‐Ymode,the
CH2inputsignalbecomestheY‐axis.
•ForX‐Ymodedetails,seepage33.

PANEL OVERVIEW
23
Rear Panel Overview
1 FUSE & Line
Voltage
Selector
HoldstheACmainsfuseandselectstheACline
voltage,115Vor230V.
2 AC Power
Input
Connector
AcceptstheACpowercord.
3 CH1
OUTPUT
Terminal
OutputstheCH1signal;approximately20mV/DIV
whenterminatedwith50Ω.
4 Z AXIS
INPUT
Terminal
Acceptsanexternalintensitymodulation(Z‐axis)
signal;1kHzsquarewave,DC–2MHz.Positive
goingreducesintensity.Fordetailedspecifications,
seepage39.
•ForAClinevoltageselectionandfusereplacement,seepage37.
72-6802 User Manual
24
SETUP
Default Settings
Beforepoweringuptheoscilloscope,setupthefrontpanelas
follows.
POWER Switch
Off
INTEN Knob
Center
FOCUS Knob
Center
Vertical MODE
Switch
CH1
ALT/CHOP
Switch ALT()
CH 2 INV
Switch
Released(Inversiondisabled)
CH1/CH2
Vertical
POSITION
Knob
Centerofthedisplay
CH1/CH2
VOLTS/DIV
Knob
50mV/DIV

SETUP
25
CH1/CH2
VARIABLE
Knob
CAL
CH1/CH2
Coupling
Switch
AC
Trigger
SOURCE Switch
CH1
Trigger SLOPE
Switch
+(Positiveslope)
TRIG ALT
Switch
Released(alternatingtrigger
disabled)
Trigger MODE
Switch
AUTO
TIME/DIV
Knob
0.5ms/DIV
Horizontal
SWP.VAR Knob
CAL
Horizontal
POSITION
Knob
Centerofthedisplay
x10 MAG
Switch
Released(x10maginification
disabled)
72-6802 User Manual
26
Set up & Probe Compensation
Followthesestepsandproperlysetuptheoscilloscope,makesureit
isfunctional,andcompensatetheprobe.
1 Power on PressthePowerswitchandturn
ontheoscilloscope’spower.The
LEDlightswhenthepowerison.
Thetracelinestartstoappearafter
20–30seconds.
2 Intensity
and focus
adjustment
UsetheINTENknobandFOCUS
knobtoadjustthetraceline
appearancetothebestcondition.
3 Probe
connection
Connecttheprobebetweenthe
CALoutputandtheCH1input
terminal.Selectx10(attenuation)
ontheprobe.
Selectx10(attenuation)ontheprobe.
4 Probe
attenuation
x1
0
x1
5 Coupling
mode
selection
SelecttheACpositionintheCH1
AC‐DC‐GNDswitch.Asquare
waveformappearsinthedisplay.

SETUP
27
6 Vertical
adjustment
UsetheCH1VOLTS/DIVknob
andCH1verticalPOSITIONknob
toadjusttheverticalscaleand
positionofthewaveform.
7 Horizontal
adjustment
UsetheCH1TIME/DIVknoband
CH1horizontalPOSITIONknobto
adjustthehorizontalscaleand
positionofthewaveform.
Adjustthecompensationpointontheprobeso
thatthewaveformbecomessquare.
8 Probe
compensa-
tion
Under compensation Right amount Over compensation
9 Completion
Nowsettinguptheoscilloscopeiscompleted.For
moreadvancedmeasurements,seepage28.
72-6802 User Manual
28
MEASUREMENT
Single Channel (Basic) Measurement
Steps 1. Connecttheinputsignaltothe
CH1orCH2terminal.
2. Selecttheverticalcoupling
betweenAC(DCcomponents
areblocked)orDC(allsignal
componentsappear).
3. Configurethetriggersettings.
Fordetails,seepage19.
4. UsetheVOLTS/DIVknoband
verticalPOSITIONknobto
adjusttheverticalscaleand
positionofthewaveform.
5. PresstheAUTOTIMEBASE
keytoautomaticallyadjustthe
horizontalscaleaccordingto
theinputsignal.

MEASUREMENT
29
6. Ifnecessary,usetheTIME/DIV
knobtoadjustthehorizontal
scalemanually.Usethe
horizontalPOSITIONknobto
adjustthepositionofthe
waveform.
72-6802 User Manual
30
Dual Channel Measurement
Steps 1. ConnectbothCH1andCH2
signalstotheinputterminals.
2. Selecttheverticalcoupling
betweenAC(DCcomponents
areblocked)orDC(allsignal
componentsappear)forboth
channels.
3. Configurethetriggersettings.
Fordetails,seepage19.
MakesurethetriggerSOURCE
switchisineithertheCH1or
CH2position.
4. SettheverticalMODEswitchto
theDUALposition.
5. BoththeCH1andCH2signalsappearonthe
display.

MEASUREMENT
31
6. UsetheverticalALT/CHOP
switchtoselecthowthetwo
waveformappearonthe
display:alternately(ALTmode)
orsimultanouesly(CHOP
mode).Seepage17fordetails.
7. Ifnecessary,usethe
VOLTS/DIVknobandvertical
POSITIONknobtoadjustthe
verticalscaleandpositionof
thewaveform.
8. Ifnecessary,usetheTIME/DIV
knobandhorizontalPOSITION
knobtoadjustthehorizontal
scaleandpositionofthe
waveform.
Note
ThetriggerALTswitchdoesnot
workwhentheALT/CHOPswitch
isintheCHOPposition.
72-6802 User Manual
32
Waveform Addition/Subtraction
Steps 1. MakesurebothCH1andCH2
waveformsappearonthe
display.Fordetails,seepage30.
2. SettheverticalMODEswitchto
theADDposition.Thetwo
waveformsareaddedand
appearonthedisplayasa
singlewaveform.
3. TosubtracttheCH2signalfrom
theCH1signal,inverttheCH2
signalbypressingtheCH2INV
switch.
Frequency Measurement
Frequency
shown on the
LCD
Thefrequencyoftheinputsignalappearsonthe
LCDdisplayandisconstantlyupdated.
Frequency
measurement
using the CH1
output
TheCH1signalfrequencycanbe
measuredusinganexternaldevice
suchasfrequencycounter,viathe
rearpanelterminal.

MEASUREMENT
33
X-Y Mode
Background TheX‐Ymodecomparestheamplitudeoftwo
signals(CH1andCH2),oneasX‐axis(CH1)and
theotherasY‐axis(CH2).TheX‐Ymodeisuseful
formeasuringthephasedifferenceoftwosignals,
videocolorpatterns,andfrequencyresponse.
Steps 1. MakesurebothCH1andCH2
waveformsappearonthe
display.Fordetails,seepage30.
2. MovetheTIME/DIVknobtothe
X‐Yposition.
3. TheCH1andCH2signalsappearintheX‐Y
modeandtheX‐YindicatorintheLCDdisplay
(X‐Y)turnson.
4. ToadjusttheX‐axispositionand
deflection,usethehorizontal
POSITIONknob(position)and
CH1VOLTS/DIVknob
(deflection).
72-6802 User Manual
34
5. ToadjusttheY‐axispositionand
deflection,usetheCH2vertical
POSITIONknob(position)and
CH2VOLTS/DIVknob
(deflection).
Waveform Magnification
Background Theoscilloscopecanmagnifythewaveformbyten
timesinthehorizontaldirection.The
magnificationisusefulforobservingcomplex
signals.
Steps 1. Makesurethewaveformisshownonthe
display.
2. Pressthe×10MAGswitch.The
waveformbecomesmagnified
bytentimesinthehorizontal
direction.
x10 magnification
Any part can be covered by using the POSITION control

FAQ
35
FAQ
The probe waveform is distorted.
Youmightneedtocompensatetheprobe.Fordetails,seepage26.
Notethatfrequencyaccuracyanddutyfactorarenotspecifiedfor
theprobecompensationwaveformandthereforeitshouldnotbe
usedforreferencepurpose.
The trace line does not appear on the display.
MakesurethatthetriggermodeisintheAUTOmode.Inthe
NORMALmode,thetracedoesnotappearunlessatrigger
conditionoccurs.
The alternate trigger (TRIG ALT switch) does not work.
MakesurethattheALT/CHOPswitchisreleased(ALTposition).
TheTRIGALTswitchdoesnotworkintheCHOPmode.
The frequency counter in the LCD display does not work.
MakesurethattheTRIGALTswitchisnotpressed.Thefrequency
counterdoesnotworkinthealternatetriggermode.
The TV trigger does not work.
Makesurethatthevideosynchronizationsignalispositive.TheTV‐
V/TV‐Htriggerworksonlywhenthesynchronizationsignalis
negative.
72-6802 User Manual
36
The input signal does not appear on the display.
Checkthefollowingsettings.
•ThecouplingmodeisnotsetattheGNDmode,inwhichthe
waveformdoesnotappearonthedisplay.Seepage22fordetails.
•Theappropriatetriggersourceisselected.Seepage19fordetails.
The oscilloscope accuracy does not match the specifications.
Makesuretheoscilloscopeispoweredonforatleast30minutes,
within+20°C–+30°C.Thisisnecessarytostabilizetheoscilloscope.
Formoreinformation,contactyourlocaldealer,Tenmawebsite
www.tenma.com.,orMCMElectronicsatwww.mcmelectronics.com.

APPENDIX
37
APPENDIX
Line Voltage & Fuse Replacement
1. Takeoffthepowercord.
115
230
2. Useasmallminusdriverandpulloutthefusesocket.
115
230
3. Rotatetheholdersothatthetargetvoltagemarkingmovestothe
upperside.
115
230
AC115V
230
115
AC230V
115
230
72-6802 User Manual
38
4. Ifnecessary,replacethefusethatisattachedtothefuseholder.
115
230
5. Pushthefuseholderbackintothesocket.
230
115
Fuse rating AC115V:T0.63A/250V,AC230V:T0.315A/250V

APPENDIX
39
Specifications
Thespecificationsapplywhenthe72‐6802ispoweredonforatleast
30minutesunder+20°C–+30°C.
Vertical Sensitivity accuracy 1mV/DIV to 2mV/DIV: ±5%
5mV/DIV to 5V/DIV: ±3%
Bandwidth 1mV/DIV to 2mV/DIV: DC to 7MHz
5mV/DIV to 5V/DIV: DC to 30MHz
AC coupling > 10Hz (reference: 100kHz, 8DIV, –3dB)
Rise time 1mV/DIV to 2mV/DIV: Approx. 50nS
5mV/DIV to 5V/DIV: Approx. 11.7nS
Input impedance Approx. 1M ohm // 25pF.
Square wave
characteristics
≤5% Overshoot at 10mV/DIV
Other ranges: 5% added to the above
Linearity ±0.1DIV when moving 2 DIV at center
Vertical mode CH1, CH2, DUAL, ADD
Chop frequency Approx. 250kHz
Input coupling AC, GND, DC
Max input voltage CAT II 300Vpeak (AC: ≤1kHz)
Max effective
readout
Probe1:1 40Vpp (14Vrms Sine wave)
Probe10:1 400Vpp (140Vrms Sine wave)
Common mode
rejection ratio
≥50:1 at 50kHz sine wave
(CH1 and CH2 vertical scales are equal)
Channel isolation @
5mV/DIV
>1000:1 at 50kHz
>30:1 at 30MHz
CH1 signal output ≥20 mV/DIV @ 50Ω,50Hz to 5MHz
CH2 INV BAL. ≤1 DIV (Reference at center graticule)
Trigger Trigger source CH1, CH2, LINE, EXT
Coupling AC: 20Hz to full bandwidth
Slope + / -
Sensitivity 20Hz to 2MHz : 0.5 DIV
(TRIG-ALT:2 DIV, EXT: 200mV)
2MHz to 30MHz: 1.5 DIV
(TRIG-ALT:3 DIV, EXT: 800mV)
TV: Sync pulse > 1 DIV (EXT: 1V)
Triggering modes AUTO, NORM, TV-V, TV-H
EXT TRIG input Input impedance: Approx.:1MΩ// 25pF
Max. input: CAT II 300Vpeak < 1kHz
72-6802 User Manual
40
Horizontal Axis Sweep time accuracy 0.2µS to 0.5S/DIV, ±3%
x10MAG accuracy
±5% (20/50nS uncalibrated)
Linearity ±3%, x10:±5% (20/50nS uncalibrated)
X-Y Mode Sensitivity Same as vertical axis
Bandwidth DC to at least 500kHz
Phase Difference
≤3 degrees at DC to 50kHz
Z-Axis Sensitivity 5Vpp (Positive going reduces intensity)
Bandwidth DC to 2MHz
Input resistance Approx. 47kΩ
Max input voltage CAT II 30Vpeak (AC ≤1kHz)
Waveform Positive-going square wave
Frequency Approx. 1 kHz
Duty Ratio Within 48:52
Output voltage 2 Vp-p ±2%.
Probe
Compensation
Signal
Output impedance Approx. 1 kΩ
Display Digits Maximum 5 digit decimal
Frequency
Counter Frequency Range 50Hz to 30MHz
Accuracy
50Hz to 1kHz: ±0.05%
1kHz to 30MHz: ±0.02%
Sensitivity > 2DIV
LCD Display VOLT/DIV, TIME/DIV, X-Y, Frequency
Backlight Orange
CRT Type 6-inch rectangular, internal graticule
Phosphor P 31
Acceleration Volt. Approx. 2kV
Screen Size 8 ×10 DIV (1 DIV = 10mm (0.39in))
Power Source AC115V/230V±15%, 50/60Hz
Power Approx. 40VA, 35W(max.)
Operation
Environment
Indoor use, Altitude ≤2000 m
Ambient temperature :
To satisfy specifications:10℃to 35℃(50°F to 95°F)
Maximum operating range: 0℃to 40℃(32°F to 104°F)
Relative humidity: 85% RH(max.) non-condensing
Installation Category II, Pollution degree 2
Storage
Environment
Ambient temperature: -10℃to 70℃
Relative humidity: 70%RH (maximum)
Accessories Power cord x 1, User manual x 1, Probe x 2
Dimensions 310 (W) x 150 (H) x 455 (D) mm
Weight Approx.8.2kgs (18.0lbs)
Table of contents
Other Tenma Test Equipment manuals

Tenma
Tenma 72-7630 User manual

Tenma
Tenma TEN01057 User manual

Tenma
Tenma 72-6947 User manual

Tenma
Tenma 72-9400A User manual

Tenma
Tenma 72-7910 User manual

Tenma
Tenma 72-2680 User manual

Tenma
Tenma 72-9405 User manual

Tenma
Tenma 72-2650 User manual

Tenma
Tenma DSO Series User manual

Tenma
Tenma 72-9966 User manual
Popular Test Equipment manuals by other brands

First Alert
First Alert Drinking Water Test Kit WT1 user manual

Ametek
Ametek MGC-LOW user manual

Conrad
Conrad 1386326 operating instructions

Teledyne Lecroy
Teledyne Lecroy HDO4104A Operator's manual

Kramer
Kramer 861 quick start guide

Associated Research
Associated Research Hypot II 4500D Operation and service manual