Tenma 72-7615 User manual

1
Digital Storage Oscilloscope
Model No. 72-7615, 72-7620, 72-7625
72-7635 and 72-7640

2
When using electrical appliances, basic safety precautions should always
be followed to reduce the risk of re, electric shock and injury to persons or
property.
Read all instructions before using the appliance and retain for future reference.
• This meter is designed to meet IEC61010-1, 61010-2-032, and 61010-2-033 in
Pollution Degree 2, Measurement Category (CAT II 150V when switched to 1X and
300V CAT II when switched to 10X) and double Insulation.
• Check that the voltage indicated on the rating plate corresponds with that of the
local network before connecting the product to the mains power supply.
• Do not operate this product with a damaged plug or cord, after a malfunction or
after being dropped or damaged in any way.
• Check the product before use for any damage. Should you notice any damage on
the cable or casing, do not use.
• This product contains no user-serviceable parts. All repairs should only be carried
out by a qualied engineer. Improper repairs may place the user at risk of harm.
• Take caution when voltages are above 60V DC and 30V ACrms.
• The earth probe must only be used to connect to ground, never connect to a
voltage source.
• This product must be earthed using the mains power cord ground connection.
• Do not disconnect from the mains supply and it’s ground connection when any item
is connected to this product for measurement.
• Children should be supervised to ensure that they do not play with the product.
• Always disconnect from the mains when the product is not in use or before
cleaning.
• Do not use the product for any purpose other than that for which it is designed.
• Do not operate or store in an environment of high humidity or where moisture may
enter the product as this can reduce insulation and lead to electric shock.
PRODUCT OVERVIEW
Main Features
• Dual analogue channels with 800x480 7” colour LCD display
• 6 digital trigger frequency counter
• Automatic measurement of 24 waveform parameters plus 2 advanced
• Edge, video, pulse width and alternate trigger functions
• Supports plug and play USB storage devices
• Print screen feature
• Unique waveform recording and replay function
WHAT’S INCLUDED
• Digital Oscilloscope Unit
• Mains power lead
• User Manual
• Communications software CD
• USB lead
• 2 x selectable 1:1/10:1 passive voltage probes

3
CONTROLS AND CONNECTIONS
OPERATING PARAMETERS
• The oscilloscope also has high performance index and powerful functions required
for faster measurements. Faster signals can be observed with the oscilloscope
via 500MS/s (or 1GS/s) real‐time sampling and 25GS/s (or 50GS/s) equivalent
sampling.
• Powerful trigger and analysis ability make it easier to capture and analyse
waveforms.
• Clear LCD and mathematical operating functions make it easy to use to observe
and analyse signal problems in a faster and clearer way.
1. Screen display area
2. Copy/print screen
3. Multifunctional control
4. Function control area
5. Automatic setting
6. Run/stop
7. Single trigger control
8. All clear
9. Calibration and ground terminal
10. Trigger control area
11. Horizontal control area
12. Analogue channel inputs
13. Vertical control area
14. Control menu area
15. USB HOST Interface
16. Power on/off
1 2814 3
5
9
7
10
6
11
12131516
4

4
• Press UTILITY button then F1 and the screen will display DEFAULT SETUP.
Note: The meter has dual input channels plus one external trigger input channel.
• Press CH1 to enter channel 1 menu.
• Connect the probe to the CH1 input.
• Set the probe attenuation switch to 10X position.
Note: The oscilloscope attenuation has to be set as well.
• Press F4 until 10X displays. This changes the vertical range multiple to ensure the
measurement result correctly reects the amplitude of the measured signal.
• Connect both probe and ground clamp to the corresponding signal terminals.
• Press AUTO and a square wave of about 3V at 1kHz is displayed.
• Press OFF then CH2 and repeat for channel 2.
OPERATION
AUTOSET WAVEFORM DISPLAY
Probe compensation
• Perform this adjustment when connecting the probes to any input channel for the
rst time or errors in the measurement may result.
• Connect the probe tip to the probe compensator’s signal output connector and
connect the ground clamp to the earth wire of the probe compensator.
• Enable CH1 and press AUTO.
• Observe the shape of the displayed waveform.
• Adjust the variable capacitor on the probe with an insulated screwdriver until a
correct waveform is achieved.
• The oscilloscope features an AUTOSET function which automatically adjusts the
vertical deection factor, scanning time base and trigger mode based on the input
signal until the most appropriate waveform is displayed.
• This function only operates when the signal to be measured is 50Hz or above and
the duty ratio is larger than 1%.
• Boot check
• Power on the unit at the rear followed by the soft power
button on the front panel.
• The oscilloscope then run through a set on self test
functions followed by the display screen showing.
• Take the probe and connect its BNC header to the
BNC terminal of the oscilloscope. Connect the probe’s
main alligator clip to the “Calibration terminal” and the
ground clip also connected to the “Ground terminal”.

5
DISPLAY SETTING CONTROLS
Using the AUTOSET function
• Connect the signal to be measured to the signal input channel.
• Press AUTO and the oscilloscope will scan the time base and trigger mode and set
the vertical deection factor. You can manually adjust further after this process to
get the optimum display.
Vertical control panel
• Vertical position control centres the waveform display.
• Press CH1, CH2 to turn on or off each channel.
• As you adjust the POSITION control the ground channel indicator
moves in line with the waveform.
• Pressing the position control resets the display to the centre
point.
• Adjusting the VERTICAL SCALE control adjusts the VOLT/DIV
range. The current status display changes accordingly.
• Press MATH or REFERENCE and the screen shows the
corresponding operation menu, sign, waveform and range status information.
Horizontal control panel
• HORIZONTAL POSITION control adjusts the position of the waveform
window by adjusting the trigger shift of the signal.
• Pressing HORIZONTAL POSITION resets the display to the centre point.
• The HORIZONTAL SCALE adjustment changes the SEC/DIV time base
range and the current status indicator will change accordingly.
• The horizontal scanning rate range is 5ns - 50ns in steps of 1-2-5-10.
• Pressing HORIZONTAL SCALE resets the zoom to default.
Zoom display option
• Press MENU to display the ZOOM options.
• Press F3 to display further options including WINDOW EXPANSION and
HOLDOFF.
• Rotate the MULTI FUNCTION rotary control to make adjustments.
• Press F1 to quit the option and return to MAIN TIME BASE.
Trigger system
• The TRIGGER LEVEL rotary control adjusts the trigger level. The display value
changes on the display as you make adjustment.
• Press MENU to select the trigger options. Press multi-function control
to conrm all selections.
• Press F1 to select TRIGGER TYPE
• Press F2 to select TRIGGER SOURCE to CH1 or CH2
• Press F3 selects EDGE TYPE options
• Press F4 selects TRIGGER MODE options
• Press F5 selects TRIGGER COUPLING options
• Press TRIGGER LEVEL CONTROL 50% to set trigger level at the
range amplitude centre point (trigger zero - highest sensitivity setting)
• FORCE: Press to generate a trigger event once.

6
INSTRUMENT SETUP
Vertical system setup
• Each channel CH1 or CH2 has it’s own vertical menu. Each channel should be set
up individually.
• Press CH1 or CH2 and the system will display the operation menu for that channel.
Channel coupling setup
• If for example a signal is applied to CH1 which
has a sine signal that contains DC quantities.
• Press F1 to select AC and set up as AC
coupling. Any DC quantities in the signal are
now intercepted.
• Press F1 to select DC.
• Both AC and DC quantities of the signal being
measured can now pass through.
• The waveform displays both AC and DC
quantities of the signal.
• Press F1 to select GROUND.
Both AC and DC quantities of the signal being measured are now intercepted.
• The waveform is not displayed in this mode but the signal remains connected to the
channel circuit.
Functions Menu Setup Notes
Coupling
AC Intercepts the DC quantities of the input signal.
DC Pass AC and DC quantities of input signal
GROUND Disconnect input signal
Bandwidth Limit On Limit bandwidth to 20MHz to reduce noise display.
Off Full bandwidth
Volts / DIV
Coarse tune Coarse tune in steps of 1-2-5 to set up the
deection factor of the vertical system.
Fine tune Fine tune is further tuning within the coarse tune
set up to improve the vertical resolution.
Probe
1X, 10X,
100X and
1000X
Select either value based on the probe attenuation
factor to keep the vertical deection factor reading
correct.
Invert On Waveform invert function on.
Off Normal waveform display.

7
Channel bandwidth setup
• If for example a signal is applied to CH1 which is a pulse signal that contains high
frequency oscillation.
• Press CH1 to select Channel1.
• Press F2 to set the BANDWIDTH LIMIT
OFF so it is set up as full bandwidth.
• The signal being measured can now pass
through even if it contains high frequency
quantities.
• Press F2 to set BANDWIDTH LIMIT ON so
that frequency quantities higher than 20MHz in the signal being measured will be
limited.
Probe rate setup
• To match the probe attenuation factor setup, it is necessary to set up the probe
attenuation factor in the channel operation
menu accordingly.
• For example when the probe attenuation
factor is 10:1, set the probe attenuation
factor at 10X in the menu. This principle
applies to other values to ensure the voltage
reading is correct.
Waveform inversion setup
• The displayed signal is inverted 180
degrees with respect to the ground level.
Vertical Volts/Div adjustment setup
• The VOLTS/DIV range of the vertical deection factor can be adjusted either in
coarse or ne tune mode.
• In COARSE TUNE the VOLTS/DIV range is
2mV/div~5V/div. Tuning is in steps of 1-2-5.
• In FINE TUNE mode the deection factor
can be adjusted in smaller steps allowing
continuous adjustment within the range
2mV/div~5V/div without interruption.

8
Operating Math functions
• Math functions are displays of +, -, x, ÷and
FFT mathematical results of CH1 and CH2.
The menu options are:-
FFT spectrum analysis
• Using FFT algorithm you can convert the domain signals (YT) into frequency
domain signals.
• With FFT you can observe the following types of signals:
1. Measure the harmonic wave composition and distortion of the system.
2. Demonstrate the noise characteristics of the DC power.
3. Analyse oscillation.
• Signals with DC quantities or DC offset will cause error or offset FFT waveform
quantities. To reduce DC quantities select AC coupling.
• To reduce random noise and frequency aliasing as a result of repeated or single
pulse event, set the acquired mode of the oscilloscope to average acquisition.
Functions Menu Setup Notes
Type Math To carry out +, -, x, ÷ functions
Signal source 1 Ch1
Ch2
Set signal source 1 as CH1 waveform
Set signal source 1 as CH2 waveform
Operator +
-
x
÷
Signal source 1+ Signal source 2
Signal source 1- Signal source 2
Signal source 1x Signal source 1
Signal source 1÷ Signal source 2
Signal source 2 Ch1
Ch2
Set signal source 2 as CH1 waveform
Set signal source 2 as CH2 waveform
Scaling ratio
1/1
1/10
1/100
1/1000
Scaling the waveform according to the four ratio
options
Functions Menu Setup Notes
Type FFT To carry out FFT algorithm functions
Signal source Ch1
Ch2
Set CH1 as math waveform
Set CH2 as math waveform
Window
Hanning
Hamming
Blackman
Rectangle
Set Hanning window function
Set Hamming window function
Set Blackman window function
Set Rectangle window function
Vertical coordinate Linear/dbv Sets vertical coordinate

9
Select the FFT window
• Assuming the YT waveform is constantly repeating itself, the oscilloscope will carry
out FFT conversion of time record of a limited length. When this cycle is a whole
number, the YT waveform will have the same amplitude at the start and nish.
There is no waveform interruption.
• If the YT waveform cycle is not a whole number there will be different amplitudes
at the start and nish, resulting in transient interruption of high frequency at the
connection point. In frequency domain this is known as leakage.
• To avoid leakage multiply the original waveform by one window function to set the
value at 0 for start and nish compulsively. See the following table:
Reference waveform
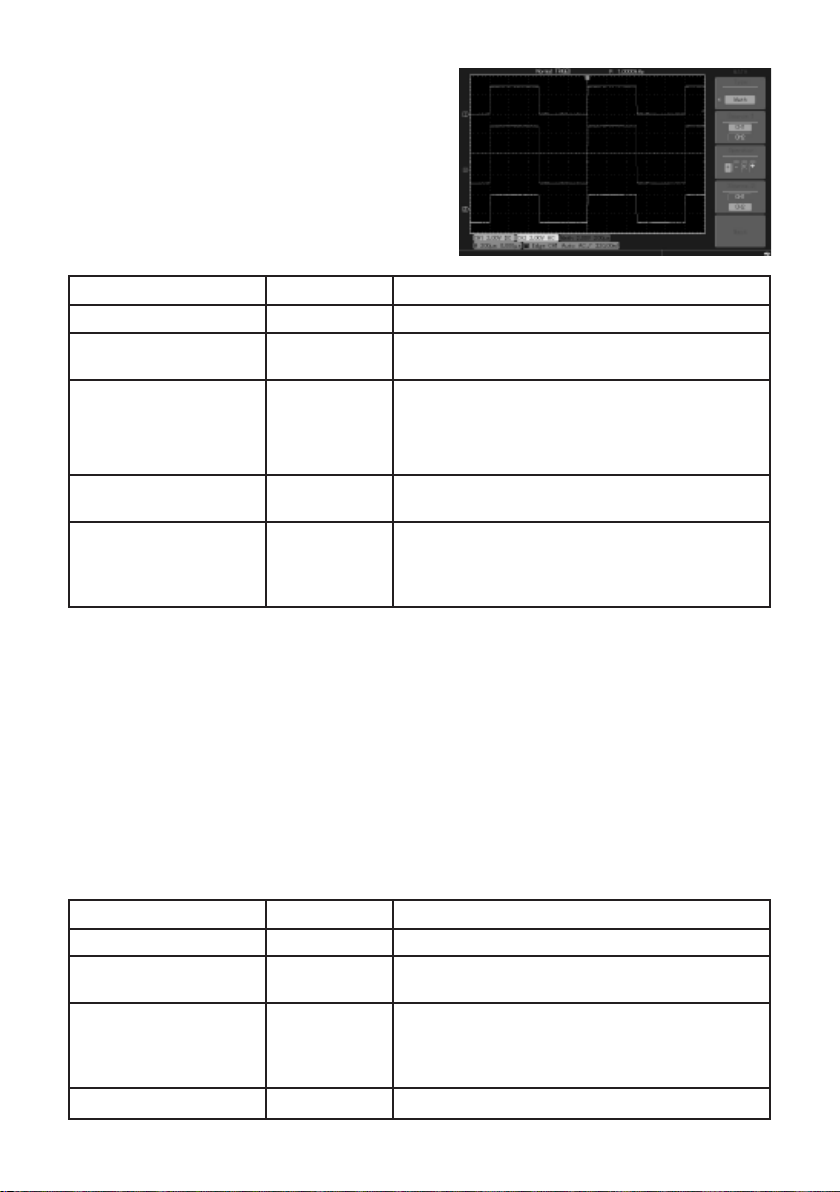
• Displays of the saved reference waveforms can be set on or off in thee REF menu.
• The waveforms are saved in non-volatile memory and identied with the following
names: Ref A, Ref B.
• To display (recall) or hide the reference waveforms use the following method:
1. Press REF menu button on the front panel.
2. Press F2 to call back.
3. Select the signal source and the position of the signal source 1~10 by use of the
multi-function rotary control.
4. Press REF to display the waveform stored in that location.
FFT Window Feature Most suitable measurement item
Rectangle
The best frequency resolution, the
worst amplitude resolution. Basically
similar to a status without adding
window.
Temporary or fast pulse. Signal level is generally
the same before and after.
Equal sine wave of very similar frequency. There
is broad-band random noise with slow moving
wave spectrum.
Hanning
Frequency resolution is better than
the rectangle window but amplitude
resolution is poorer.
Sine, cyclical and narrow-band random noise.
Hamming Frequency resolution is marginally
better than Hanning window.
Temporary or fast pulse. Signal level varies
greatly before and after.
Blackman The best amplitude resolution and
the poorest frequency resolution.
Mainly for single frequency signals to search for
higher-order harmonic wave.
Functions Menu Setup Notes
Type Digital Filtering Digital Filtering
Information source Ch1 or Ch2 Set CH1 or CH2 as ltering object
Filtering types
Lowpass
Highpass
Bandpass
Set lter type
Note: FFT resolution means the quotient of the sampling and math points. When the
math point value is xed, the sampling rate should be as low as possible relative to the
FFT resolution.
• Nyquist frequency: To rebuild the original waveform, at least 2f sampling rate
should be used for waveform with a maximum frequency of f.
• This is known as Nyquist stability criterion, where f is the Nyquist frequency and 2f
is the Nyquist sampling rate.
Digital Filtering Menu

10
Note: If the stored waveform is on external disk press F5 to select between DSO and
USB and select USB having inserted the drive into the USB port.
5. The recalled waveform will be displayed on the screen.
6. Press CANCEL to go back to the previous menu.
7. Press REF B and select the second signal source for the math function repeating
step 3
Note: To measure and observe such waveforms you can compare the current waveform
with the reference waveform for analysis.
8. Press REF to display the reference waveform menu. See following table:
Functions Menu Setup Notes
Reference waveform REF A
REF B Set reference waveforms as REF A or REF B
Callback ------- To call our 10 storage positions selected using the
multi-function control and press to conrm
Introduce
USB
connected
USB not
connected
Press F5 to select the le stored in root of USB
Select using multi function control and press to
conrm.
Functions Menu Setup Notes
Main time base --
1 - enable main time base
2 - if window extension is enabled, press main time
base to disable window extension
Window extension -- Enable time base
Holdoff -- Adjust Holdoff time
• To store to a selected location choose between 1 and 10. To use external USB, plug
in the U disk and press F5 to select the USB memory.
• To save a waveform press SAVE menu.
Horizontal system setup
• The horizontal rotary control is used to change the graticule (time
base) and trigger the horizontal position of the memory (triggering
position).
• The vertical centre point above the horizontal orientation of the
screen is the time reference point of the waveform. Changing the
graticule will cause the waveform to increase or decrease in size
relative to screen centre. When the horizontal position changes,
the position in respect to the waveform triggering point is also
changed.
Horizontal position
• Adjust the horizontal positions of the channel waveforms
(including math waveforms). Resolution of this control changes
with the time base.
Horizontal scaling
• Adjusting the main time base i.e. sec/div. When time base
extension is on you can use the horizontal scaling control to
change the delay scanning time base and change the window width.

11
Icon denitions
1. Represents the memory position of the current waveform.
2. Represents the memory position of the triggering point.
3. Represents the position of the triggering point in the current waveform window.
4. Horizontal time base (main time base) ie: sec/div.
5. Horizontal distance between the triggering position and the window centre point.
Denitions
• YT Mode: in this mode the y axis indicates voltage and the x axis indicates time.
• X-Y Mode: in this mode the X axis indicates CH1 voltage and the Y axis indicates
the CH2 voltage.
• Slow Scanning Mode: When the horizontal time base control is set at 50ms/div or
slower, the unit will operate in the slow scan sampling mode. When observing low
frequency signals in slow scanning mode, it is advised to set the channel coupling
as DC.
• Sec/Div: a horizontal scaling (time base) unit. If waveform sampling is stopped (by
pressing the RUN/STOP button) time base control can expand or compress the
waveform.
Window Extension
• Window extension can be use to zoom in or zoom out a band of waveform to check
image details. The window extension setting must not be slower than that of the
main time base.
• In the time base extension mode, the display is divided into two zones as shown.
• The upper part displays the original
waveform. You can move this zone left or
right by turning the horizontal POSITION
control, or increase and decrease the
selected zone in size by turning the
horizontal SCALE control.
• The lower part is the horizontally extended
waveform zone.
• Please note that the resolution of extended
time base relative to the main time base is now higher as shown.
• Since the waveform shown in the entire lower part corresponds to the selected
zone in the upper part, you can increase the extended time base by turning the
horizontal SCALE control to decrease the size of the selected zone (increase the
multiple of waveform extension).
XY Mode
• This mode is suitable for CH1 and CH2
only. After selecting the X-Y display mode,
the horizontal axis will display CH1 voltage,
while the vertical axis will display CH2
voltage.
Note: in the normal X-Y mode the oscilloscope
can cause the random sampling rate to acquire
waveforms. To adjust sampling rate and channel
vertical range in the X-Y mode, the omitted
sampling rate is 100MS/s.

12
• Generally adjusting the time base lower will result in appropriately Lissajous gures
of better display quality.
1. Auto measurement mode
2. Cursor measurement mode
3. Reference or math waveform
Setting up the Trigger system
• Triggering decides when the oscilloscope collects data and displays waveforms.
Once the trigger is correctly set up, it can convert unstable display into signicant
waveforms.
• When beginning to collect data the oscilloscope rst collects sufcient data to draw
a waveform on the left of the triggering point.
• While waiting for the triggering condition to occur it will continuously collect data.
When sufcient data to draw a waveform on the right of the triggering point.
• The trigger control zone on the operation panel comprises a trigger level adjustment
control, a trigger MENU button, 50% button for setting up the trigger level at the
vertical centre point of the signal, and a SINGLE trigger button.
• Trigger level sets the signal voltage with respect to the triggering point.
• 50% sets the trigger level at the vertical centre point of the trigger signal amplitude.
• FORCE is used to generate an immediate trigger signal, mainly used in the trigger
mode and normal and single mode to conduct a test.
• Menu button enables the trigger set up modes.
Trigger Control Mode
• Trigger modes: Edge, Pulse, Video and Alternate.
Edge Trigger:
• When selecting edge trigger, you are triggering at the rising and falling edges of the
input signal.
Functions Menu Setup Notes
Type Edge
Signal source
selection
CH1
CH2
EXT
EXT/5
Set Ch1 as the signal source trigger signal
Set CH2 as the signal source trigger signal
Set the external trigger input channel as the signal source
trigger signal
Set the external trigger source divided by 5 to extend the
external trigger level range
Inclination
Rising
Falling
Rise & Fall
Set to trigger on the signals rising edge
Set to trigger on the signals falling edge
Set to trigger on rising and falling edge
Trigger Mode
Auto
Normal
Single
Set to sample waveform only if no trigger condition is
detected
Set to sample waveform only if trigger condition is satised
Set to sample waveform once when detecting one trigger and
then stop
Trigger coupling
DC
AC
H/F reject
L/F reject
Intercept DC quantities of the input signal
Allow AC and DC quantities of the input signal to pass
Reject high frequency quantities above 80kHz of the signal
Reject low frequency quantities below 80kHz of the signal

13
Pulse Trigger
• Pulse trigger means determining the triggering time based on the pulse width. You
can acquire abnormal pulse by setting the pulse width condition.
• Adjust the pulse width from 2ns~10s by turning the control on the upper front panel.
Functions Menu Setup Notes
Pulse width polarity
Positive pulse
width
Negative pulse
width
Set to positive pulse width as trigger information source
Set to negative pulse width as trigger information source
Pulse width
conditions
<
>
=
To trigger when the input signal pulse width is smaller
than the set value of pulse time
To trigger when the input signal pulse width is larger
than the set value of pulse time
To trigger when the input signal pulse width is equal to
the set value of pulse time
Pulse width time
20ns~10.0s Set to trigger on the signals rising edge
Set to trigger on the signals falling edge
Set to trigger on rising and falling edge
Back ------- Return to pulse trigger menu
Functions Menu Setup Notes
Type Pulse
Trigger source
CH1
CH2
EXT/EXT5
AC line
Alter
Set Ch1 as the signal source trigger signal
Set CH2 as the signal source trigger signal
Set the external trigger input channel as the signal
source trigger signal or divided by 5
Set up as AC grid trigger
Ch1, CH2 trigger their own signals alternately
Trigger coupling
DC
AC
Low frequency
restriction
High frequency
restriction
Accept AC and DC signal components
Prevents DC signal components
Restricts low frequency component lower than 80kHz
within the signal source
Restricts high frequency component higher than 80kHz
within the signal source
Trigger polarity Pos pulse width
Neg pulse width
Set positive pulse as the trigger signal
Set negative pulse width as the trigger signal
Trigger mode
Auto
Normal
Single
The system automatically samples waveform data
when there is no trigger signal input. The scan baseline
is shown on the display. When the trigger signal is
generated it automatically turns to trigger scan.
The system stops acquiring data when there is no
trigger signal. When the trigger signal is generated
trigger scan occurs.
One trigger will occur when there is an input trigger
signal. Then trigger will stop.
Pulse width setting ------ Enter the pulse width options
Pulse Width Setting

14
• When PAL is selected for STANDARD format and SYNCHRONISATION mode is
LINE you will see a screen display similar to this:-
• When SYNCHRONISATION mode is FIELD you will see a screen display similar to
this:-
Video Trigger
• By selecting video trigger you can carry out eld or line trigger with NTSC or PAL
standard video signals. Default trigger coupling is DC.
Functions Menu Setup Notes
Type Video
Trigger source
CH1
CH2
EXT
EXT/5
Set Ch1 as the trigger signal
Set CH2 as the trigger signal
Set the external trigger input channel as the trigger signal
Attenuate the external trigger source 5 times as the trigger
signal
Standard PAL
NTSC
Suitable for video signals of low black level
Suitable for video signals of high black level
Synchronisation
All lines
Specied
lines
Odd eld
Even eld
Set the TV line to synchronise with trigger
Set synchronised trigger on the specied line and adjust by
turning the control on the front panel
Set video odd eld to synchronised trigger
Set video even eld to synchronised trigger

15
Adjusting the Holdoff time
• You can adjust the Holdoff time to observe complicated waveforms. Holdoff time
means the waiting time for the trigger to be ready for use again. During this time the
oscilloscope will not trigger until the Holdoff is complete.
• Follow the normal signal synchronisation procedure and select the edge, trigger
source and inclination in the trigger menu.
• Adjust the trigger level to make the
waveform display as stable as possible.
• Press the key in the horizontal MENU to
display the horizontal menu.
• Adjust the multi-function control in the upper
front panel. The hold-off time will change
accordingly until the waveform display is
stable.
Functions Menu Setup Notes
Type Edge Set trigger mode to EDGE
Trigger source Alternate Set CH1 and Ch2 to alternate trigger
Inclination Rising Set trigger inclination as rising edge
Trigger mode Auto Set trigger mode to automatic
Trigger coupling AC Set trigger coupling mode to AC

16
Trigger Source - Trigger can be obtained from various sources: Input channel (CH1 or
CH2), external trigger (EXT, EXT/5) or grid.
1. Input channel - the most common trigger source is input channel. The selected
trigger source can operate normally whether the input is displayed or not.
2. External trigger - this type of trigger source can trigger in a third channel while
acquiring data in two other channels. Both EXT and EXT/5 trigger sources use
external trigger signals from the EXT TRIG jack. EXT can use the signals directly.
You can use EXT within the trigger level range of -0.8V and +0.8V. EXT/5 divides
the trigger by 5. As a result trigger range is extended to -4V to +4V enabling the
oscilloscope to trigger at a large signal.
Trigger Mode - determines the action of the oscilloscope when there is no trigger. There
are three trigger modes - auto, normal and single.
1. Auto Trigger - samples the waveform data when there is no trigger signal input.
The scan base is shown on the display. When the trigger signal is generated it
automatically turns to trigger scan for signal synchronisation.
Note: when the time base of the scan waveform is set to 50ms/div or slower, the auto
mode allows a rolling waveform when there is no trigger signal.
2. Normal Trigger - In this mode waveforms are only sampled when triggering
conditions are met. The system stops acquiring data and waits when there is no
trigger signal. When a trigger is generated, trigger scan occurs.
3. Single Trigger - In this mode press RUN button once and the oscilloscope will wait
for trigger. When one trigger is detected, it will sample and display the acquired
waveform, then stop.
Trigger coupling - determines which quantities of the signal are transmitted to the
trigger circuit. Coupling modes are DC, AC, low frequency reject and high frequency
reject.
1. DC - allowing all quantities to pass.
2. AC - intercepting DC quantities and attenuating signals under 10Hz.
3. Low Frequency Reject - Intercepting DC quantities and attenuating low frequency
quantities under 80kHz.
4. High Frequency Reject - Attenuating high frequency quantities over 80kHz.
Pre-Trigger/Delayed Trigger - data sampled before/after triggering. The trigger position
is typically set at the horizontal centre of the screen. You are able to view ve divisions
of pre-trigger and delayed trigger information. Use the horizontal position control to
adjust the horizontal shift of the waveform to see more pre-trigger information. By
observing pre-trigger data you can see the waveform before trigger occurs. You can
detect the glitch that occurs when the circuitry starts. Observing this data can help
identify the cause of this glitch.
OPERATION
Run/Stop
• When the RUN/STOP key is pressed, a green light will be on, indicating the RUN
status.
• When the key is pressed again and a red light appears, it indicates the STOP
status.
• The RUN state enables the oscilloscope to be in continuous acquisition.
• During the STOP state, the oscilloscope stops collecting data.

17
Setting up the Sampling System
• The ACQUIRE button on the
control panel is the function key for
the sampling system.
Functions Menu Setup Notes
Acquisition Mode
Sample
Peak detect
Average
Turn on the ordinary sampling mode
Turn on the peak detect mode
Set the average sampling and display the average number
of times
Sampling mode
Real time
Equivalent
Set sampling to real time
Set sampling to equivalent at a time base range of
5ns~100ns/div.
Memory Depth Normal
Deep
Normal: 6kpts
Deep: 8Mpts or 16Mpts
Fast Acquire
ON or OFF The oscilloscope only acquires enough points for Min
memory depth needed to display so as to maintain super
waveform capture rate.
Average number of
times 2-256
Set the average number of times in multiples of 2 ie: 2, 4,
8, 16, 32, 64, 128, 256 To change the average number of
times use the multi-function control on the front panel.
• By changing acquisition setup you can observe the
consequent changes in waveform display. If the
signal contains considerable noise, you will see this
waveform displays when average sampling is not
selected.
•
•
• When 32 time average sampling is selected you
will see this.
Note: Use Real Time Sampling to observe single signals. In this mode the system
makes full acquisition to ll the memory. Maximum sampling rate is 500MS/s. At a
setting of 50ns or faster, the oscilloscope will automatically carry out interpolation ie:
inserting a sampling point between other sampling points.
Use Equivalent Sampling to observe high frequency cyclical signals. This is a
repeated sampling mode that allows detailed observation of repeated cyclical signals. In
the equivalent sampling mode, the horizontal resolution is 40ps higher than the real time
mode ie: 25GS/s equivalent.

18
Memory Depth
Deep memory is required in order to view more waveform detail, and with help of Zoom
function, waveform detail is show clearly on the screen, which prevent waveform details
becoming too compressed to observe clearly when signal frequency gets higher.
Deep Memory allows 10000 x amplication compared to 10 x for normal memory.
Waveform Display after Zoom-in under
Normal Mode
Waveform Display after Zoom-in under
Deep Memory
Waveform Display not using fast
acquisition mode
Waveform Display using fast
acquisition mode
Note:
Please select Peak Detect mode if you want to observe signal envelope and also to
avoid noise. If the timebase is greater than 100ms/div and deep memory is used, please
set trigger mode to Single or Normal.
Deep memory and fast acquisition cannot apply at the same time.
Fast Acquisition
Fast acquisition helps capture waveforms at high speed and up to 150,000wfms/s.
With this function, the operator can view any glitches or other transient signal just in a
few seconds.
Sampling Mode is when the oscilloscope reconstructs the waveform by sampling
signals at regular intervals.
To avoid mixed envelope, select Peak Detect. In this mode the oscilloscope identies
the maximum and minimum values of the input signals at each sampling interval and
use these values to display the waveform.
Average Mode is when the oscilloscope acquires several waveforms and take the
average value to display the nal waveform. You can use this mode to reduce random
noise. To reduce random noise of the displayed signal, select average sampling and
increase the average number of times in multiples of 2 ie: selecting from 2 to 256.

19
Note:
Please use deep memory if you want to view more waveform details.
Fast Acquisition is recommended in order to capture certain abnormal signal. Fast
Acquisition is valid only within 1 ms/div~1 O0ns/div for single channel and
1 ms/div~200ns/div for dual channels.
Setting up the Display System
• The DISPLAY button on the
control panel is the function key
for the display system.
Functions Menu Setup Notes
Types YT
XY
Operating mode of the oscilloscope X-Y is the display mode
CH1 is X input CH2 is Y input.
Format Vector
Dots
Sampling points are linked for display
Sampling points are directly displayed
Grid
Full
Grid
Cross Hair
Frame
Set grid display mode of waveform display area
Continuous
Off
Innite
The waveform on the screen is refreshed at higher speed
The original waveform on the screen remains on display.
New data will be added continuously until this function is
disabled.
X-Y Mode
Under the mode, CH1 voltage will be shown on the horizontal (x) axis, and CH2 voltage
will be shown on the vertical (y) axis.
Note: under X-Y Mode, to shift the waveform display horizontally with CH1 POSITION
control and shift it vertically with CH2 POSITION control. It is possible to regulate size
and shape of X-Y display with the SCALE control with two channels and it will display
effective Lissajous waveform by changing the time base.
The following functions can be displayed:
1. Automatic measuring function
2. Cursor measuring function
3. Reference or mathematical function
Note: Window extension and horizontal position control are not available in X-Y Mode.
Storage System: pressing the STORAGE button displays the setup menu from where
you can save or recall waveforms and setup documents stored in memory both internal
and in USB storage devices.
Operating procedure
• Press STORAGE to go to the
type menu. There are three
types to select from:
1. WAVEFORM to go to the
waveform save menu.
2. SETUP to enter the setup save menu.
3. BITMAP to enter the position save menu
Note: this feature can only be recalled after connecting USB ram.

20
Print Screen Function
• Plug in a USB memory stick into oscilloscope and press PR SCRN key, the screen
picture would be stored into the USB instantly with default le name: DSO***· BMP.
Storage Menu Setup Notes
Types Waveform Select the waveform save and recall menu
Information source CH1
CH2
Select the waveform from CH1
Select the waveform from CH2
Store 1~10
Set and select the position in which the waveform is saved in
the internal memory. Adjust using the multi-function control
Output ----
Enter into USB menu
Settings Menu Setup Notes
Types Setting To store the present status of the oscilloscope
Store 1~10
Maximum 10 front panel setups can be saved. Select with
the multi-function control on front panel
Fetch 1~10
Recall the setting 1~10 selected using the multi-function
control then press to conrm
Input ----
Displays USB le list after connecting USB drive
Output ----
Returns to the output menu
Output Menu Setup Notes
Filename ----
Select using the multi-function control and F1 key
Format
CSV
Inner
Bitmap
Selects the type of le to be saved and enter setting storage
menu
Conrmation ----
Save graphic data
Note: inner or CSV format can be chosen in Outputting Reference Waveform into USB.
The inner format only displays on the oscilloscope under REF on other interface.
CSV format can be opened using EXCEL on a computer and is data reecting relation
between voltage and time.
Disk DSO
USB
Select the internal memory
Select external USB memory
Depth Normal
Lengthy
Set normal saving depth of 250 dots
Set lengthy saving of 2.5k
USB Menu Setup Notes
This manual suits for next models
4
Table of contents
Other Tenma Test Equipment manuals

Tenma
Tenma 72-2650 User manual

Tenma
Tenma TEN01057 User manual

Tenma
Tenma 72-14520 User manual

Tenma
Tenma 72-9966 User manual

Tenma
Tenma 72-2650 User manual

Tenma
Tenma 72-9355 User manual

Tenma
Tenma 72-8710 User manual

Tenma
Tenma 72-2680 User manual

Tenma
Tenma 72-3575 User manual

Tenma
Tenma 72-7630 User manual

Tenma
Tenma 72-3565 User manual

Tenma
Tenma 72-7910 User manual

Tenma
Tenma 72-6694 User manual

Tenma
Tenma 72-9405 User manual

Tenma
Tenma 72-6947 User manual

Tenma
Tenma 72-7985 User manual

Tenma
Tenma 72-490 User manual

Tenma
Tenma 72-10175 User manual

Tenma
Tenma DSO Series User manual

Tenma
Tenma 72-9400A User manual