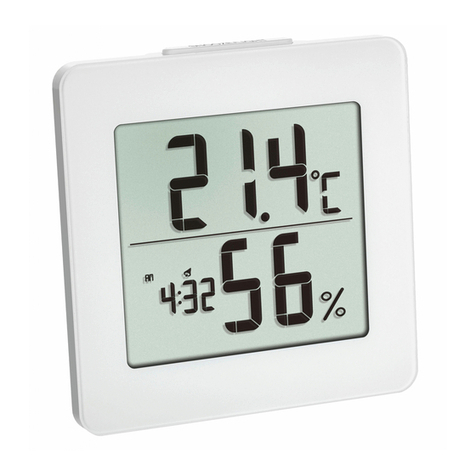
TFA 30.5045.54 User manual

RoHS
Bedienungsanleitung
Instruction manual
Mode d’emploi
Instrucciones de uso
Gebruiksaanwijzing
Istruzioni per l'uso
Kat. Nr. 30.5045.54
TFA_No. 30.3045_Anleitung 03.08.2017 13:55 Uhr Seite 1

32
Fig. 1 Fig. 2
A 3
A 4
A 6
A 8
A 7
A 9 B 3
A 2
A 1
A 12
B 1
A 13
A 11
B 2
A 10 A 5
TFA_No. 30.3045_Anleitung 03.08.2017 13:55 Uhr Seite 2

4
Fig. 3
C 1
C 2
C 3
5
Digitales Thermo-Hygrometer
Vielen Dank, dass Sie sich für dieses Gerät aus dem
Hause TFA entschieden haben.
1. Bevor Sie mit dem Gerät arbeiten
•Lesen Sie sich bitte die Bedienungsanleitung
genau durch.
So werden Sie mit Ihrem neuen Gerät vertraut, ler-
nen alle Funktionen und Bestandteile kennen,
erfahren wichtige Details für die Inbetriebnahme
und den Umgang mit dem Gerät und erhalten Tipps
für den Störungsfall.
•Durch die Beachtung der Bedienungsanleitung
vermeiden Sie auch Beschädigungen des Gerä-
tes und die Gefährdung Ihrer gesetzlichen Män-
gelrechte durch Fehlgebrauch.
•Für Schäden, die aus Nichtbeachtung dieser
Bedienungsanleitung verursacht werden, über-
nehmen wir keine Haftung. Ebenso haften wir
nicht für inkorrekte Messwerte und Folgen, die
sich aus solchen ergeben können.
•Beachten Sie besonders die Sicherheitshinweise!
•Bewahren Sie diese Bedienungsanleitung gut
auf!
2. Lieferumfang
• Digitales Thermo-Hygrometer
• Bedienungsanleitung
3. Einsatzbereich und alle Vorteile Ihres neuen
Gerätes auf einen Blick
• Zur Kontrolle des Raumklimas
• Innentemperatur und Luftfeuchtigkeit
• Trendpfeile
TFA_No. 30.3045_Anleitung 03.08.2017 13:55 Uhr Seite 3

76
Digitales Thermo-Hygrometer
• Höchst- und Tiefstwerte mit manueller oder auto-
matischer Rückstellung
• Hintergrundbeleuchtung
• Mit farbigen Komfortzonen
• Als Funksender einsetzbar für Kat.-Nr. 30.3054.10,
30.3056.10 und 30.3062.10
• Zum Aufstellen oder an die Wand hängen
4. Zu Ihrer Sicherheit
• Das Produkt ist ausschließlich für den oben
beschriebenen Einsatzbereich geeignet. Verwen-
den Sie das Produkt nicht anders, als in dieser
Anleitung dargestellt wird.
• Das eigenmächtige Reparieren, Umbauen oder
Verändern des Gerätes ist nicht gestattet.
Vorsicht!
Verletzungsgefahr:
• Bewahren Sie das Gerät und die Batterien außer-
halb der Reichweite von Kindern auf.
• Batterien können bei Verschlucken lebensgefähr-
lich sein. Wurde eine Batterie verschluckt, kann
dies innerhalb von 2 Stunden zu schweren inneren
Verätzungen und zum Tode führen. Wenn Sie ver-
muten, eine Batterie könnte verschluckt oder
anderweitig in den Körper gelangt sein, nehmen
Sie sofort medizinische Hilfe in Anspruch.
• Batterien nicht ins Feuer werfen, kurzschließen,
auseinander nehmen oder aufladen. Explosionsge-
fahr!
Digitales Thermo-Hygrometer
• Batterien enthalten gesundheitsschädliche Säuren.
Um ein Auslaufen der Batterien zu vermeiden, soll-
ten schwache Batterien möglichst schnell ausge-
tauscht werden. Verwenden Sie nie gleichzeitig alte
und neue Batterien oder Batterien unterschiedli-
chen Typs.
• Beim Hantieren mit ausgelaufenen Batterien
chemikalienbeständige Schutzhandschuhe und
Schutzbrille tragen!
Wichtige Hinweise
zur Produktsicherheit!
• Setzen Sie das Gerät keinen extremen Temperatu-
ren, Vibrationen und Erschütterungen aus.
• Vor Feuchtigkeit schützen.
• Nur für den Betrieb in Innenräumen geeignet.
5. Bestandteile
A: Display
A 1: Temperatur
A 2: °C/°F
A 3: Trendpfeil Temperatur
A 4: Temperatur kalibriert
A 5: Sendesymbol
A 6: Trendpfeil Luftfeuchtigkeit
A 7: Symbol für automatische Rückstellung der
Max.-Min.-Werte
A 8: Batteriesymbol
A 9: Luftfeuchtigkeit kalibriert
A 10: Komfortzonenindikator
A 11: Luftfeuchtigkeit
A 12: Kanalnummer
A 13: Max.-Min.-Werte
TFA_No. 30.3045_Anleitung 03.08.2017 13:55 Uhr Seite 4

98
Digitales Thermo-Hygrometer
B: Tasten (Fig. 2):
B 1: MIN/MAX/– Taste
B 2: SET Taste
B 3: CH/+ Taste
C: Gehäuse (Fig. 3):
C 1: Aufhängeöse
C 2: Ständer (ausklappbar)
C 3: Batteriefach
6. Inbetriebnahme
• Öffnen Sie das Batteriefach des Gerätes.
• Legen Sie zwei neue Batterien 1,5 V AAA polrichtig
ein. Auf dem Display erscheint die gemessene
Temperatur und Luftfeuchtigkeit und die Kanal-
nummer 2 (Voreinstellung).
• Schließen Sie das Batteriefach wieder.
7. Temperaturanzeige
• Drücken und halten Sie die MIN/MAX/– Taste, um
zwischen °F (Fahrenheit) oder °C (Celsius) als
Temperaturanzeige auszuwählen.
8. Tendenzanzeige
• Die Tendenzpfeile zeigen Ihnen an, ob die Tempe-
ratur- und Luftfeuchtigkeitswerte aktuell steigen,
fallen oder gleich bleiben.
9. Komfortstufe
• Auf dem Display erscheint eine Markierung zur
Anzeige der Komfortstufe des Raumklimas.
Digitales Thermo-Hygrometer
10. Höchst- und Tiefstwerte
• Drücken Sie die MIN/MAX/– Taste.
• MAX erscheint auf dem Display.
• Es erscheinen die höchsten Messwerte seit der
letzten Rückstellung.
• Drücken Sie die MIN/MAX/– Taste noch einmal.
• MIN erscheint im Display.
• Die niedrigsten Messwerte seit der letzten Rück-
stellung werden angezeigt.
• Um wieder die Anzeige mit den aktuellen Werten
zu erhalten, betätigen Sie nochmals die
MIN/MAX/– Taste.
11. Rückstellung auf die aktuelle Temperatur
11.1 Manuelle Rückstellung
• Halten Sie die MIN/MAX/– Taste gedrückt, wenn
die maximalen oder minimalen Werte angezeigt
werden, um die entsprechenden Werte zu löschen.
11.2 Automatische Rückstellung
• Halten Sie die SET Taste für 3 Sekunden gedrückt,
um die automatische Rückstellung der Höchst-
und Tiefstwerte zu aktivieren.
• 24hrs erscheint im Display.
RH <45% RH 45%... 65% RH >65%
DRY COM WET
Trocken Komfortabel Feucht
TFA_No. 30.3045_Anleitung 03.08.2017 13:55 Uhr Seite 5

1110
Digitales Thermo-Hygrometer
• Die maximalen und minimalen Werte werden alle
24 Stunden (ab dem Zeitpunkt der Aktivierung)
zurückgestellt.
• Halten Sie die SET Taste für 3 Sekunden gedrückt,
um die automatische Rückstellung der Höchst-
und Tiefstwerte zu deaktivieren.
• 24hrs verschwindet im Display.
12. Hintergrundbeleuchtung
• Zum kurzzeitigen Aktivieren der Hintergrundbe-
leuchtung drücken Sie eine beliebige Taste.
13. Senderfunktion
• Das Gerät ist als Thermo-Hygro-Sender einsetzbar
für die Stationen Kat.-Nr. 30.3054.10, 30.3056.10
und 30.3062.10 (nur Temperatur).
• Verbinden Sie den Sender, wie in der Bedienungs-
anleitung der Basisstation beschrieben.
14. Einstellen der Kanalnummer
• Halten Sie die CH/+ Taste für 3 Sekunden gedrückt.
• Das Kanalwechsel-Symbol erscheint.
• Stellen Sie mit der CH/+ Taste den Kanal (1-8) ein.
• Halten Sie die CH/+ Taste für 3 Sekunden gedrückt,
um die Auswahl zu bestätigen.
• Das Kanalwechsel-Symbol verschwindet.
15. Aufstellen und Befestigen des Gerätes
•
Mit dem Ständer auf der Rückseite kann das Gerät
aufgestellt (um 150° ausklappen) oder mit der Auf-
hängeöse auf der Rückseite an der Wand befestigt
werden.
Digitales Thermo-Hygrometer
15.1 Einsatz als Thermo-Hygro-Sender
• Vermeiden Sie die Nähe zu anderen elektrischen
Geräten (Fernseher, Computer, Funktelefone) und
massiven Metallgegenständen.
• Prüfen Sie, ob eine Übertragung der Messwerte
vom Gerät am gewünschten Aufstellort zur Basis-
station stattfindet (Reichweite Freifeld ca. 100
Meter), bei massiven Wänden, insbesondere mit
Metallteilen kann sich die Sendereichweite erheb-
lich reduzieren.
• Suchen Sie sich gegebenenfalls einen neuen Auf-
stellort für das Gerät und/oder die Basisstation.
16. Pflege und Wartung
• Reinigen Sie das Gerät mit einem weichen, leicht
feuchten Tuch. Keine Scheuer- oder Lösungsmittel
verwenden!
• Entfernen Sie die Batterien, wenn Sie das Gerät
längere Zeit nicht verwenden.
•
Bewahren Sie Ihr Gerät an einem trockenen Platz auf.
16.1 Batteriewechsel
• Sobald das Batteriesymbol erscheint, wechseln Sie
bitte die Batterien im Gerät.
17. Fehlerbeseitigung
Problem Lösung
Keine Anzeige ➜ Batterien polrichtig
einlegen
➜ Batterien wechseln
TFA_No. 30.3045_Anleitung 03.08.2017 13:55 Uhr Seite 6
1312
Digitales Thermo-Hygrometer
Unkorrekte Anzeige ➜ Batterien wechseln
➜ Kalibrierfunktion nutzen
Basisstation empfängt ➜ Basisstation nicht kom-
die Werte nicht patibel (siehe Punkt 13.
Senderfunktion)
➜ Neuinbetriebnahme des
Gerätes und der Basis-
station (gemäß Bedie-
nungsanleitung der
Basisstation)
➜ Manuelle Sendersuche
starten (gemäß Bedie-
nungsanleitung der
Basisstation)
➜ Anderen Aufstellort für
das Gerät und/oder die
Basisstation wählen
➜ Abstand zwischen dem
Gerät und der Basis-
station verringern
➜ Beseitigen der Stör-
quellen
18. Kalibrierfunktion
• Das Thermo-Hygrometer erlaubt dem Anwender,
die Anzeige der Temperatur- und Luftfeuchtigkeits-
messwerte mithilfe einer externen, besseren Refe-
renzquelle zu kalibrieren. Der Anwender kann
dabei Korrekturen der Temperatur- und Luftfeuch-
tigkeitsanzeigen innerhalb des Messbereichs vor-
nehmen.
Digitales Thermo-Hygrometer
18.1 Kalibrierung der Luftfeuchtigkeitsanzeige
• Drücken Sie gleichzeitig die SET und die MIN/
MAX/– Taste für 5 Sekunden.
• Die Luftfeuchtigkeitsanzeige blinkt.
• Drücken Sie die CH/+ oder MIN/MAX/– Taste zur
Korrektur der Luftfeuchtigkeitsanzeige.
• CALIBRATED erscheint im Display.
• Drücken Sie kurz die SET Taste, um wieder den
normalen Messwert zu erhalten oder bestätigen
Sie den eingegebenen Wert, indem Sie die SET
Taste für 3 Sekunden gedrückt halten.
18.2 Kalibrierung der Temperaturanzeige
• Drücken Sie gleichzeitig die SET und die CH/+
Taste für 5 Sekunden.
• Die Temperaturanzeige blinkt.
• Drücken Sie die CH/+ oder MIN/MAX/– Taste zur
Korrektur der Temperaturanzeige.
• Drücken Sie kurz die SET Taste, um wieder den
normalen Messwert zu erhalten oder bestätigen
Sie den eingegebenen Wert, indem Sie die SET
Taste für 3 Sekunden gedrückt halten.
19. Entsorgung
Dieses Produkt wurde unter Verwendung hochwerti-
ger Materialien und Bestandteile hergestellt, die recy-
celt und wiederverwendet werden können.
Batterien und Akkus dürfen keinesfalls
in den Hausmüll!
Als Verbraucher sind Sie gesetzlich ver-
pflichtet, gebrauchte Batterien und
Akkus zur umweltgerechten Entsorgung
beim Handel oder entsprechenden
TFA_No. 30.3045_Anleitung 03.08.2017 13:55 Uhr Seite 7

1514
Digitales Thermo-Hygrometer
Sammelstellen gemäß nationaler oder
lokaler Bestimmungen abzugeben.
Die Bezeichnungen für enthaltene
Schwermetalle sind:
Cd=Cadmium, Hg=Quecksilber, Pb=Blei
Dieses Gerät ist entsprechend der EU-
Richtlinie über die Entsorgung von Elek-
tro- und Elektronik-Altgeräten (WEEE)
gekennzeichnet.
Dieses Produkt darf nicht mit dem
Hausmüll entsorgt werden. Der Nutzer
ist verpflichtet, das Altgerät zur umwelt-
gerechten Entsorgung bei einer ausge-
wiesenen Annahmestelle für die Entsor-
gung von Elektro- und Elektronikgeräten
abzugeben.
20. Technische Daten
Messbereich
Innentemperatur 0 °C… 60°C
(32 °F …140 °F)
Messbereich
Luftfeuchtigkeit 10 … 99%
Genauigkeit Temperatur ±1°C
Auflösung Temperatur 0,1°C
Genauigkeit
Luftfeuchtigkeit ±5% @ 20…90%
Auflösung
Luftfeuchtigkeit 1 %
Digitales Thermo-Hygrometer
Reichweite ca. 100 m (Freifeld)
Übertragungsfrequenz 433 MHz
Maximale Sendeleistung < 10mW
Übertragungszeit alle 60 Sekunden
Spannungsversorgung 2 x 1,5 V AAA
(Batterien nicht inklusive)
Größe 64 x 18 (40) x 109 mm
Gewicht 65 g (nur das Gerät)
Diese Anleitung oder Auszüge daraus dürfen nur mit Zustimmung
von TFA Dostmann veröffentlicht werden. Die technischen Daten
entsprechen dem Stand bei Drucklegung und können ohne vorhe-
rige Benachrichtigung geändert werden.
Die neuesten technischen Daten und Informationen zu Ihrem Pro-
dukt finden Sie unter Eingabe der Artikel-Nummer auf unserer
Homepage.
EU-Konformitätserklärung
Hiermit erklärt TFA Dostmann, dass der Funkanlagentyp
30.5045.54 der Richtlinie 2014/53/EU entspricht. Der vollständige
Text der EU-Konformitätserklärung ist unter der folgenden Inter-
netadresse verfügbar:
www.tfa-dostmann.de
E-Mail: [email protected]
TFA Dostmann GmbH & Co.KG
Zum Ottersberg 12, D-97877 Wertheim, Deutschland
08/17
TFA_No. 30.3045_Anleitung 03.08.2017 13:55 Uhr Seite 8

1716
Digital thermo-hygrometer
Thank you for choosing this instrument from TFA.
1. Before you use this product
•Please make sure you read the instruction manual
carefully.
This information will help you to familiarize your-
self with your new device, to learn all of its func-
tions and parts, to find out important details about
its first use and how to operate it and to get advice
in the event of a malfunction.
•Following and respecting the instructions in your
manual will prevent damage to your instrument
and loss of your statutory rights arising from
defects due to incorrect use.
•We shall not be liable for any damage occurring
as a result of non following of these instructions.
Likewise, we take no responsibility for any incor-
rect readings or for any consequences resulting
from them.
•Please take particular note of the safety advice!
•Please keep this instruction manual safe for
future reference.
2. Delivery contents
• Digital thermo-hygrometer
• Instruction manual
3. Range of application and all the benefits of your
new instrument at a glance
• For checking indoor climate
• Indoor temperature and humidity
• Trend arrows
Digital thermo-hygrometer
• Indication of maximum and minimum values with
manual or auto-reset
• Backlight
• With coloured comfort levels
• Can be used as a transmitter for
Cat.-No. 30.3054.10, 30.3056.10 and 30.3062.10
• Wall mounting or table stand
4. For your safety
• This product is exclusively intended for the range
of application described above. It should only be
used as described within these instructions.
• Unauthorized repairs, alterations or changes to the
product are prohibited.
Caution!
Risk of injury:
• Keep the device and the batteries out of reach of
children.
• Batteries may be hazardous if swallowed. If a bat-
tery is swallowed, this can lead to serious internal
burns and death within two hours. If you suspect a
battery could have been swallowed or otherwise
caught in the body, seek medical help immediately.
• Batteries must not be thrown into a fire, short-cir-
cuited, taken apart or recharged. Risk of explo-
sion!
• Batteries contain harmful acids. Low batteries
should be changed as soon as possible to prevent
damage caused by leaking. Never use a combina-
tion of old and new batteries together, nor batteries
of different types.
TFA_No. 30.3045_Anleitung 03.08.2017 13:55 Uhr Seite 9

1918
Digital thermo-hygrometer
• Wear chemical-resistant protective gloves and
safety glasses when handling leaking batteries.
Important information
on product safety!
• Do not expose the device to extreme temperatures,
vibrations or shocks.
• Protect it from moisture.
• Only suitable for indoor use.
5. Elements
A: Display
A 1: Temperature
A 2: °C/°F
A 3: Temperature trend arrow
A 4: Temperature calibrated
A 5: Transmission symbol
A 6: Trend arrow humidity
A 7: Symbol for auto-reset of the maximum-
minimum values
A 8: Battery symbol
A 9: Humidity calibrated
A 10: Comfort level indicator
A 11: Humidity
A 12: Channel number
A 13: Max/min values
B: Buttons (Fig. 2):
B 1: MIN/MAX/– button
B 2: SET button
B 3: CH/+ button
Digital thermo-hygrometer
C: Housing (Fig. 3):
C 1: Mounting hole
C 2: Stand (fold out)
C 3: Battery compartment
6. Getting started
• Open the battery compartment.
• Insert two new AAA 1.5 V batteries, polarity as
illustrated. The measured temperature and humi-
dity and the channel number 2 (default) appear on
the display.
• Close the battery compartment again.
7. Temperature display
• Press and hold the MIN/MAX/– button to change
between °C (Celsius) or °F (Fahrenheit) as temper-
ature unit.
8. Trend indicator
• The trend arrows indicate whether the values for
temperature and humidity are currently increasing,
steady or decreasing.
9. Comfort level
• A marking appears on the display to indicate the
comfort level.
RH <45% RH 45%... 65% RH >65%
DRY COM WET
Dry Comfortable Wet
TFA_No. 30.3045_Anleitung 03.08.2017 13:55 Uhr Seite 10

2120
Digital thermo-hygrometer
10. Maximum and minimum values
• Press the MIN/MAX/– button.
• MAX appears on the display.
• The maximum values measured since the last
reset appear on the display.
• Press the MIN/MAX/– button again.
• MIN appears on the display.
• The minimum values measured since the last reset
appear on the display.
• Press the MIN/MAX/– button again, to go back to
the display of the present values.
11. Reset to the current temperature
11.1 Manual reset
• Press and hold the MIN/MAX/– button when the
maximum or minimum values are displayed to
reset the corresponding values.
11.2 Automatic reset
• Press and hold the SET button for 3 seconds to
activate the automatic reset of the maximum-mini-
mum values.
• 24hrs appears on the display.
• The maximum and minimum values will be reset
every 24 hours (from the moment of activation).
• Press and hold the SET button for 3 seconds to
deactivate the automatic reset of the maximum-
minimum values.
• 24hrs disappears on the display.
12. Backlight
• Press any button to temporarily activate the back-
light.
Digital thermo-hygrometer
13. Transmitter function
• The device can be used as a thermo-hygro trans-
mitter for stations cat.-No. 30.3054.10, 30.3056.10
and 30.3062.10 (temperature only).
• Connect the transmitter according to the instruc-
tion manual of the base station.
14. Setting of channel number
• Press and hold the CH/+ button for 3 seconds.
• The circle symbol for channel change appears.
• Press CH/+ button to adjust the channel (1-8).
• Press and hold the CH/+ button for 3 seconds to
confirm the selection.
• The circle symbol for channel change disappears.
15. Positioning and mounting of the device
•
The device can be placed onto any flat surface with
its fold out (150 degrees) stand or wall mounted with
the mounting hole, both found on the back of the
unit.
15.1 Use as thermo-hygro transmitter
• Make sure you avoid the vicinity of any source of
interference such as computer screens, TV sets or
solid metal objects.
• Once the desired location is chosen, check
whether the transmission from the device to the
base station is possible (transmission range of up
to 100 m in open areas). Within solid walls, espe-
cially ones with metal parts, the transmission
range can be reduced considerably.
• If necessary choose another position for the device
and/or base station.
TFA_No. 30.3045_Anleitung 03.08.2017 13:55 Uhr Seite 11

2322
Digital thermo-hygrometer
16. Care and maintenance
• Clean the device with a soft damp cloth. Do not
use solvents or scouring agents.
• Remove the batteries if the device will not be used
for an extended period of time.
• Keep the device in a dry place.
16.1 Battery replacement
• Change the batteries when the battery symbol
appears on the display.
17. Troubleshooting
Problem Solution
No display ➜ Ensure the batteries'
polarity are correct
➜ Change the batteries
Incorrect indication ➜ Change the batteries
➜ Use the calibration
function
Base station doesn't ➜ Base station is not com-
receive the values patible (see “transmitter
function" section 13.)
➜ Restart the device and
the base station
(according to the base
station manual)
➜ Manual search for the
transmitter (according
to the base station
manual)
Digital thermo-hygrometer
➜ Choose another place
for the device and/or the
base station
➜ Reduce the distance
between the device and
the base station
➜ Check if there is any
source of interference
18. Calibration function
• The thermo-hygrometer allows the user to calibrate
the display of temperature and humidity measure-
ments with an external, better reference source. The
user can make adjustments to the temperature and
humidity displays within the measuring range.
18.1 Calibration of the humidity display
• Press the SET and the MIN/ MAX/– button at the
same time for 5 seconds.
• The humidity display flashes.
• Press the CH/+ or the MIN/ MAX/– button to cor-
rect the display of the humidity.
• CALIBRATED appears on the display.
• Press the SET button briefly, on the display
appears the normal measurement or press and
hold the SET button for 3 seconds to confirm the
set value.
18.2 Calibration of the temperature display
• Press the SET and the CH/+ button at the same
time for 5 seconds.
• The temperature display flashes.
TFA_No. 30.3045_Anleitung 03.08.2017 13:55 Uhr Seite 12

2524
Digital thermo-hygrometer
• Press the CH/+ or the MIN/MAX/– button to correct
the display of the temperature.
• Press the SET button briefly, on the display
appears the normal measurement or press and
hold the SET button for 3 seconds to confirm the
set value.
19. Waste disposal
This product has been manufactured using high-
grade materials and components which can be recy-
cled and reused.
Never dispose of empty batteries and
rechargeable batteries with ordinary
household waste.
As a consumer, you are required by law
to take them to your retail store or to an
appropriate collection site depending on
national or local regulations in order to
protect the environment.
The symbols for the contained heavy
metals are:
Cd = cadmium, Hg = mercury, Pb = lead
This product is labelled in accordance
with the EU Waste Electrical and Elec-
tronic Equipment Directive (WEEE).
Please do not dispose of this product in
ordinary household waste. As a con-
sumer, you are required to take end-of-
life devices to a designated collection
point for the disposal of electrical and
electronic equipment, in order to ensure
environmentally-compatible disposal.
Digital thermo-hygrometer
20. Specifications
Temperature range indoor 0 °C… 60° C
(32 °F …140 °F)
Humidity range 10 … 99%
Temperature accuracy ±1°C
Temperature resolution 0.1°C
Humidity accuracy ±5% @ 20…90%
Humidity resolution 1 %
Range max. 100 m (open field)
Transmission frequency 433 MHz
Maximum
radio-frequency power < 10mW
Transmission time Every 60 seconds
Power consumption Batteries 2 x 1,5 V AAA
(not included)
Dimensions 64 x 18 (40) x 109 mm
Weight 65 g (device only)
TFA_No. 30.3045_Anleitung 03.08.2017 13:55 Uhr Seite 13

2726
Digital thermo-hygrometer
No part of this manual may be reproduced without written con-
sent of TFA Dostmann. The technical data are correct at the time
of going to print and may change without prior notice.
The latest technical data and information about your product can
be found by entering the product number on our homepage
EU Declaration of conformity
Hereby, TFA Dostmann declares that the radio equipment type
30.5045.54 is in compliance with Directive 2014/53/EU. The full
text of the EU declaration of conformity is available at the follow-
ing Internet address:
www.tfa-dostmann.de
E-Mail: [email protected]
TFA Dostmann GmbH & Co.KG
Zum Ottersberg 12, D-97877 Wertheim, Germany
08/17
Thermo-hygromètre digital
Nous vous remercions d'avoir choisi l'appareil de la
société TFA.
1. Avant d'utiliser votre appareil
•Veuillez lire attentivement le mode d'emploi.
Vous vous familiariserez ainsi avec votre nouvel
appareil, vous découvrirez toutes les fonctions et
tous les éléments qui le composent, vous noterez
les détails importants relatifs à sa mise en service
et vous lirez quelques conseils en cas de dysfonc-
tionnement.
•En respectant ce mode d'emploi, vous éviterez
d'endommager votre appareil et de perdre vos
droits légaux en cas de défaut si celui-ci résulte
d’une utilisation non-conforme.
•Nous n'assumons aucune responsabilité pour
des dommages qui auraient été causés par le
non-respect du présent mode d'emploi. De
même, nous n’assumons aucune responsabilité
pour des relevés incorrects et les conséquences
qu’ils pourraient engendrer.
•Suivez bien toutes les consignes de sécurité !
•Conservez soigneusement le mode d'emploi !
2. Contenu de la livraison
• Thermo-hygromètre digital
• Mode d'emploi
3. Aperçu du domaine d'utilisation et de tous les
avantages de votre nouvel appareil
• Pour le contrôle du climat ambiant
• Température et humidité intérieure
• Flèches de tendance
TFA_No. 30.3045_Anleitung 03.08.2017 13:55 Uhr Seite 14

2928
Thermo-hygromètre digital
• Valeurs maximales et minimales mesurées avec
actualisation manuelle ou automatique
• Éclairage de fond
• Avec zones de confort en couleur
• Peut être utilisé comme un émetteur pour les art.
n° 30.3054.10, 30.3056.10 et 30.3062.10
• Peut être posé sur une surface plane ou fixé au
mur
4. Pour votre sécurité
• Le produit est destiné uniquement à l'utilisation
décrite ci-dessus. N'utilisez jamais l’appareil à
d'autres fins que celles décrites dans le présent
mode d'emploi.
• Vous ne devez en aucun cas réparer, démonter ou
modifier l'appareil par vous-même.
Attention !
Danger de blessure :
• Gardez votre appareil et les piles hors de portée
des enfants.
• Les piles peuvent être mortelles dans le cas d’une
ingestion. Si une pile a été avalée, elle peut entraî-
ner des brûlures internes graves ainsi que la mort
dans l’espace de 2 heures. Si vous craignez qu’une
pile ait pu être avalée ou ingérée d’une autre
manière, quelle qu’elle soit, contactez immédiate-
ment un médecin d’urgence.
• Ne jetez jamais de piles dans le feu, ne les court-
circuitez pas, ne les démontez pas et ne les rechar-
gez pas. Risque d'explosion !
Thermo-hygromètre digital
• Les piles contiennent des acides nocifs pour la
santé. Une pile faible doit être remplacée le plus
rapidement possible afin d'éviter toute fuite. N'uti-
lisez jamais simultanément de piles anciennes avec
des piles neuves ou des piles de types différents.
• Pour manipuler des piles qui ont coulé, utilisez des
gants de protection chimique spécialement adap-
tés et portez des lunettes de protection !
Conseils importants
de sécurité du produit
• Évitez d’exposer l’appareil à des températures
extrêmes, à des vibrations ou à des chocs.
• Protégez-le contre l'humidité.
• L'appareil est conçu pour fonctionner uniquement
à l'intérieur.
5. Composants
A : Affichage
A 1 : Température
A 2 : °C/°F
A 3 : Flèche de tendance de température
A 4 : Température calibrée
A 5 : Symbole de transmission
A 6 : Flèche de tendance de l’humidité
A 7 : Symbole de ré-initialisation automatique des
valeurs minimales et maximales
A 8 : Symbole de pile
A 9 : Humidité calibrée
A 10 : Niveau de confort du climat
A 11 : Humidité
A 12 : Numéro de canal
A 13 : Valeurs max.-min.
TFA_No. 30.3045_Anleitung 03.08.2017 13:55 Uhr Seite 15

3130
Thermo-hygromètre digital
B : Touches (Fig. 2) :
B 1 : Touche MIN/MAX/–
B 2 : Touche SET
B 3 : Touche CH/+
C : Boîtier (Fig. 3) :
C 1 : Œillet de suspension
C 2 : Support (dépliable)
C 3 : Compartiment à piles
6. Mise en service
• Ouvrez le compartiment à piles de l’appareil.
• Insérez deux piles neuves de type 1,5 V AAA en
respectant la polarité +/-. L'écran affiche la tempé-
rature et l’humidité mesurées et le numéro de
canal 2 (par défaut).
• Refermez le compartiment à piles.
7. Affichage de la température
• Maintenez la touche MIN/MAX/– appuyée pour
passer de l’affichage de la température en degrés
Celsius (°C) à l’affichage en degrés Fahrenheit (°F).
8. Indication de la tendance
• Les flèches de tendance vous indiquent si les
valeurs de température et d'humidité actuelles
montent, descendent ou restent stables.
9. Niveau de confort
• Pour symboliser le niveau de confort dans la pièce,
un marquage apparaît.
Thermo-hygromètre digital
10. Valeurs maximales et minimales
• Appuyez sur la touche MIN/MAX/–.
• MAX apparaît sur l'écran.
• Les valeurs maximales mesurées depuis la derniè-
re ré-initialisation apparaissent sur l'écran.
• Appuyez une nouvelle fois sur la touche
MIN/MAX/–.
• MIN apparaît sur l'écran.
• Les valeurs minimales mesurées depuis la dernière
ré-initialisation apparaissent sur l'écran.
• Appuyez une nouvelle fois sur la touche
MIN/MAX/– pour afficher à nouveau les valeurs
actuelles sur l'écran.
11. Ré-initialisation avec la température actuelle
11.1 Ré-initialisation manuelle
• Maintenez la touche MIN/MAX/– appuyée pendant
que les valeurs maximales ou minimales sont affi-
chées afin de les effacer.
11.2 Ré-initialisation automatique
• Maintenez la touche SET appuyée pendant 3
secondes pour activer la ré-initialisation automati-
que des valeurs maximales et minimales.
• 24hrs apparaît sur l'écran.
• Les valeurs maximales et minimales seront ré-ini-
tialisées toutes les 24 heures (à partir du moment
de l’activation).
RH <45% RH 45%... 65% RH >65%
DRY COM WET
Sec Confortable Humide
TFA_No. 30.3045_Anleitung 03.08.2017 13:55 Uhr Seite 16

3332
Thermo-hygromètre digital
• Maintenez la touche SET appuyée pendant 3
secondes pour désactiver la ré-initialisation auto-
matique des valeurs maximales et minimales.
• 24hrs disparaît de l'écran.
12. Éclairage de fond
• Pour activer temporairement l'éclairage de fond,
appuyez sur une touche de votre choix.
13. Fonction d'émetteur
• L'appareil peut être utilisé comme un émetteur
thermo-hygro pour les stations art. n° 30.3054.10,
30.3056.10 et 30.3062.10 (seulement pour la tem-
pérature).
• Connectez l'émetteur selon les instructions du
mode d'emploi de la station de base.
14. Réglage du numéro de canal
• Maintenez la touche CH/+ appuyée pendant 3
secondes.
• Le symbole de changement de canal apparaît.
• Réglez le canal (1-8) avec la touche CH/+.
• Maintenez la touche CH/+ appuyée pendant 3
secondes pour confirmer la sélection.
• Le symbole de changement de canal disparaît.
15. Mise en place ou fixation au mur
•
L’appareil peut être placé sur une surface plane à l'ai-
de de son pied dépliable (dépliez de 150°) au dos ou
accroché au mur à l'aide de l'œillet de suspension.
Thermo-hygromètre digital
15.1 Utilisation comme émetteur thermo-hygro
• Évitez de le placer à proximité d'autres appareils
électriques (téléviseur, ordinateur, téléphone sans
fil) ou d'objets métalliques.
• Vérifiez que les valeurs mesurées sont bien trans-
mises de l'appareil à la station de base (portée sur
champ libre jusqu'à 100 mètres) depuis l'endroit
choisi. Si les murs sont massifs, en particulier s'ils
comportent des parties métalliques, la portée
d'émission peut se trouver réduite considérable-
ment.
• Si nécessaire, choisissez un autre emplacement
pour l'appareil et/ou pour la station de base.
16. Entretien et maintenance
• Pour le nettoyage de votre appareil, utilisez un
chiffon doux et humide. N’utilisez pas de solvants
ou d'agents abrasifs !
• Retirez les piles si vous n'utilisez pas votre appa-
reil pendant une durée prolongée.
• Conservez votre appareil dans un endroit sec.
16.1 Remplacement des piles
• Dès que le symbole de pile apparaît sur l'écran,
changez les piles de l’appareil
17. Dépannage
Problème Solution
Aucun affichage ➜ Contrôlez la bonne pola-
rité des piles
➜ Changez les piles
TFA_No. 30.3045_Anleitung 03.08.2017 13:55 Uhr Seite 17

3534
Thermo-hygromètre digital
Affichage incorrect ➜ Changez les piles
➜ Utilisez la fonction de
calibrage
La station de base ne ➜ La station de base n'est
reçoit pas les valeurs pas compatible (voir
13. Fonction d'émetteur)
➜ Remettez l'appareil et la
station de base en ser-
vice (conformément au
mode d'emploi de la
station de base)
➜ Démarrez la recherche
de l'émetteur manuelle-
ment (conformément au
mode d'emploi de la
station de base)
➜ Sélectionnez une autre
position pour l'appareil
et/ou la station de base
➜ Modifiez la distance
entre l'appareil et la sta-
tion de base
➜ Éliminez les sources
parasites
18. Fonction de calibrage
• Le thermo-hygromètre permet à l'utilisateur d'éta-
lonner l'affichage de la température et de l'humidi-
té à l’aide d’une meilleure source de référence
externe. L'utilisateur peut effectuer des ajuste-
ments de la température et de l'humidité dans la
plage de mesure.
Thermo-hygromètre digital
18.1 Étalonnage de l'affichage de l'humidité
• Maintenez simultanément les touches SET et MIN/
MAX/– appuyées pendant 5 secondes.
• L’affichage de l’humidité clignote.
• Appuyez sur la touche CH/+ ou MIN/ MAX/– pour
corriger l'affichage de l'humidité.
• CALIBRATED apparaît sur l'écran.
• Appuyez brièvement sur la touche SET pour res-
taurer la valeur de mesure normale ou confirmez la
valeur saisie en maintenant la touche SET appuyée
pendant 3 secondes.
18.2 Étalonnage de l'affichage de la température
• Maintenez simultanément les touches SET et CH/+
appuyées pendant 5 secondes.
• L’affichage de la température clignote.
• Appuyez sur la touche CH/+ ou MIN/MAX/– pour
corriger l'affichage de la température.
• Appuyez brièvement sur la touche SET pour res-
taurer la valeur de mesure normale ou confirmez la
valeur saisie en maintenant la touche SET appuyée
pendant 3 secondes.
19. Traitement des déchets
Ce produit a été fabriqué avec des matériaux de haute
qualité qui peuvent être recyclés et réutilisés.
Les piles usagées ne doivent pas être
jetées dans les détritus ménagers.
En tant qu'utilisateur, vous avez l'obliga-
tion légale de rapporter les piles et piles
rechargeables usagées à votre revendeur
ou de les déposer dans une déchetterie
proche de votre domicile conformément
à la réglementation nationale et locale.
TFA_No. 30.3045_Anleitung 03.08.2017 13:55 Uhr Seite 18

3736
Thermo-hygromètre digital
Les métaux lourds sont désignés
comme suit : Cd=cadmium, Hg=mercu-
re, Pb=plomb.
Cet appareil est conforme aux normes de
l'UE relatives au traitement des déchets
électriques et électroniques (WEEE).
L'appareil usagé ne doit pas être jeté
dans les ordures ménagères. L’utilisa-
teur s’engage, pour le respect de l’envi-
ronnement, à déposer l’appareil usagé
dans un centre de traitement agréé pour
les déchets électriques et électroniques.
20. Caractéristiques techniques
Plage de mesure
température intérieure 0 °C… 60°C
(32 °F …140 °F)
Plage de mesure
humidité 10 … 99%
Précision température ±1°C
Résolution température 0,1°C
Précision humidité ±5% @ 20…90%
Résolution humidité 1 %
Rayon d’action env. 100 mètres
(champ libre)
Fréquence
de transmission 433 MHz
Thermo-hygromètre digital
Puissance de fréquence
radio maximale transmise < 10mW
Intervalle de transmission Toutes les 60 secondes
Alimentation Piles 2 x 1,5 V AAA
(non incluses)
Dimensions du boîtier 64x 18 (40) x 109 mm
Poids 65 g (appareil seulement)
La reproduction, même partielle, du présent mode d'emploi est stric-
tement interdite sans l'accord explicite de TFA Dostmann. Les carac-
téristiques techniques de ce produit ont été actualisées au moment
de l'impression et peuvent être modifiées sans avis préalable.
Les dernières données techniques et les informations concernant
votre produit peuvent être consultées en entrant le numéro de
l'article sur notre site Internet :
EU-Konformitätserklärung
Le soussigné, TFA Dostmann, déclare que l'équipement radioélec-
trique du type 30.5045 est conforme à la directive 2014/53/UE. Le
texte complet de la déclaration UE de conformité est disponible à
l'adresse Internet suivante :
www.tfa-dostmann.de
TFA Dostmann GmbH & Co.KG
Zum Ottersberg 12, D-97877 Wertheim, Allemagne 08/17
TFA_No. 30.3045_Anleitung 03.08.2017 13:55 Uhr Seite 19

3938
Termo-igrometro digitale
Vi ringraziamo per aver scelto l'apparecchio della TFA.
1. Prima di utilizzare l'apparecchio
•Leggete attentamente le istruzioni per l'uso.
Avrete così modo di familiarizzare con il vostro
nuovo apparecchio, di scoprirne tutte le funzioni e
le componenti, di apprendere importanti dettagli
sulla sua messa in funzione, di acquisire dimesti-
chezza nel suo utilizzo e di usufruire di alcuni vali-
di consigli da seguire in caso di guasti.
•Seguendo le istruzioni per l'uso, eviterete anche
di danneggiare il prodotto e di pregiudicare, a
causa di un utilizzo scorretto, i diritti del consu-
matore che vi spettano per legge.
•Decliniamo ogni responsabilità per i danni deri-
vanti dal mancato rispetto delle presenti istruzio-
ni per l'uso. Allo stesso modo, non siamo
responsabili per eventuali misurazioni errate e
per le conseguenze che ne possono derivare.
•Prestate particolare attenzione alle misure di
sicurezza!
•Conservate con cura queste istruzioni per l'uso.
2. La consegna include
• Termo-igrometro digitale
• Istruzioni per l'uso
3. Tutte le applicazioni e tutti i vantaggi del vostro
nuovo apparecchio
• Per il controllo del clima di ambiente
• Temperatura ed umidità interna
• Frecce di tendenza
Termo-igrometro digitale
• Valori massimi e minimi con aggiornamento
manuale o automatico
• Retroilluminazione
• Con zone di comfort colorate
• Utilizzabile come un trasmettitore per cat.-n.
30.3054.10, 30.3056.10 e 30.3062.10
• Montaggio a muro o sistemazione su piano d’ap-
poggio
4. Per la vostra sicurezza
• Il prodotto è adatto esclusivamente agli utilizzi di
cui sopra. Non utilizzate il prodotto in maniera
diversa da quanto descritto in queste istruzioni.
• Non sono consentite riparazioni, alterazioni o
modifiche non autorizzate del dispositivo.
Attenzione!
Pericolo di lesioni:
• Tenere il dispositivo e le batterie lontano dalla por-
tata dei bambini.
• Se ingerite, le batterie possono essere mortali. Se
una batteria venisse ingerita, potrebbe causare
gravi ustioni e portare alla morte nel giro di due
ore. Se si sospetta che una batteria sia stata inge-
rita o inserita nel corpo in altra maniera, consultare
immediatamente un medico.
• Non gettare le batterie nel fuoco, non polarizzarle
in maniera scorretta, non smontarle e non cercare
di ricaricarle. Pericolo di esplosione!
• Le batterie contengono acidi nocivi per la salute.
Sostituite quanto prima le batterie quasi scariche, in
modo da evitare che si scarichino completamente.
TFA_No. 30.3045_Anleitung 03.08.2017 13:55 Uhr Seite 20
Table of contents
Languages:
Other TFA Measuring Instrument manuals