Pluviometro
Vi ringraziamo per aver scelto l'apparecchio della TFA.
Questo pluviometro consente di misurare la quantità di precipita-
zioni con grande facilità e precisione. E´ un informazione impor-
tante per i possessori di giardini, per chi opera nell’agricoltura o
per tutti coloro che desiderano avere maggiori informazioni sulla
natura.
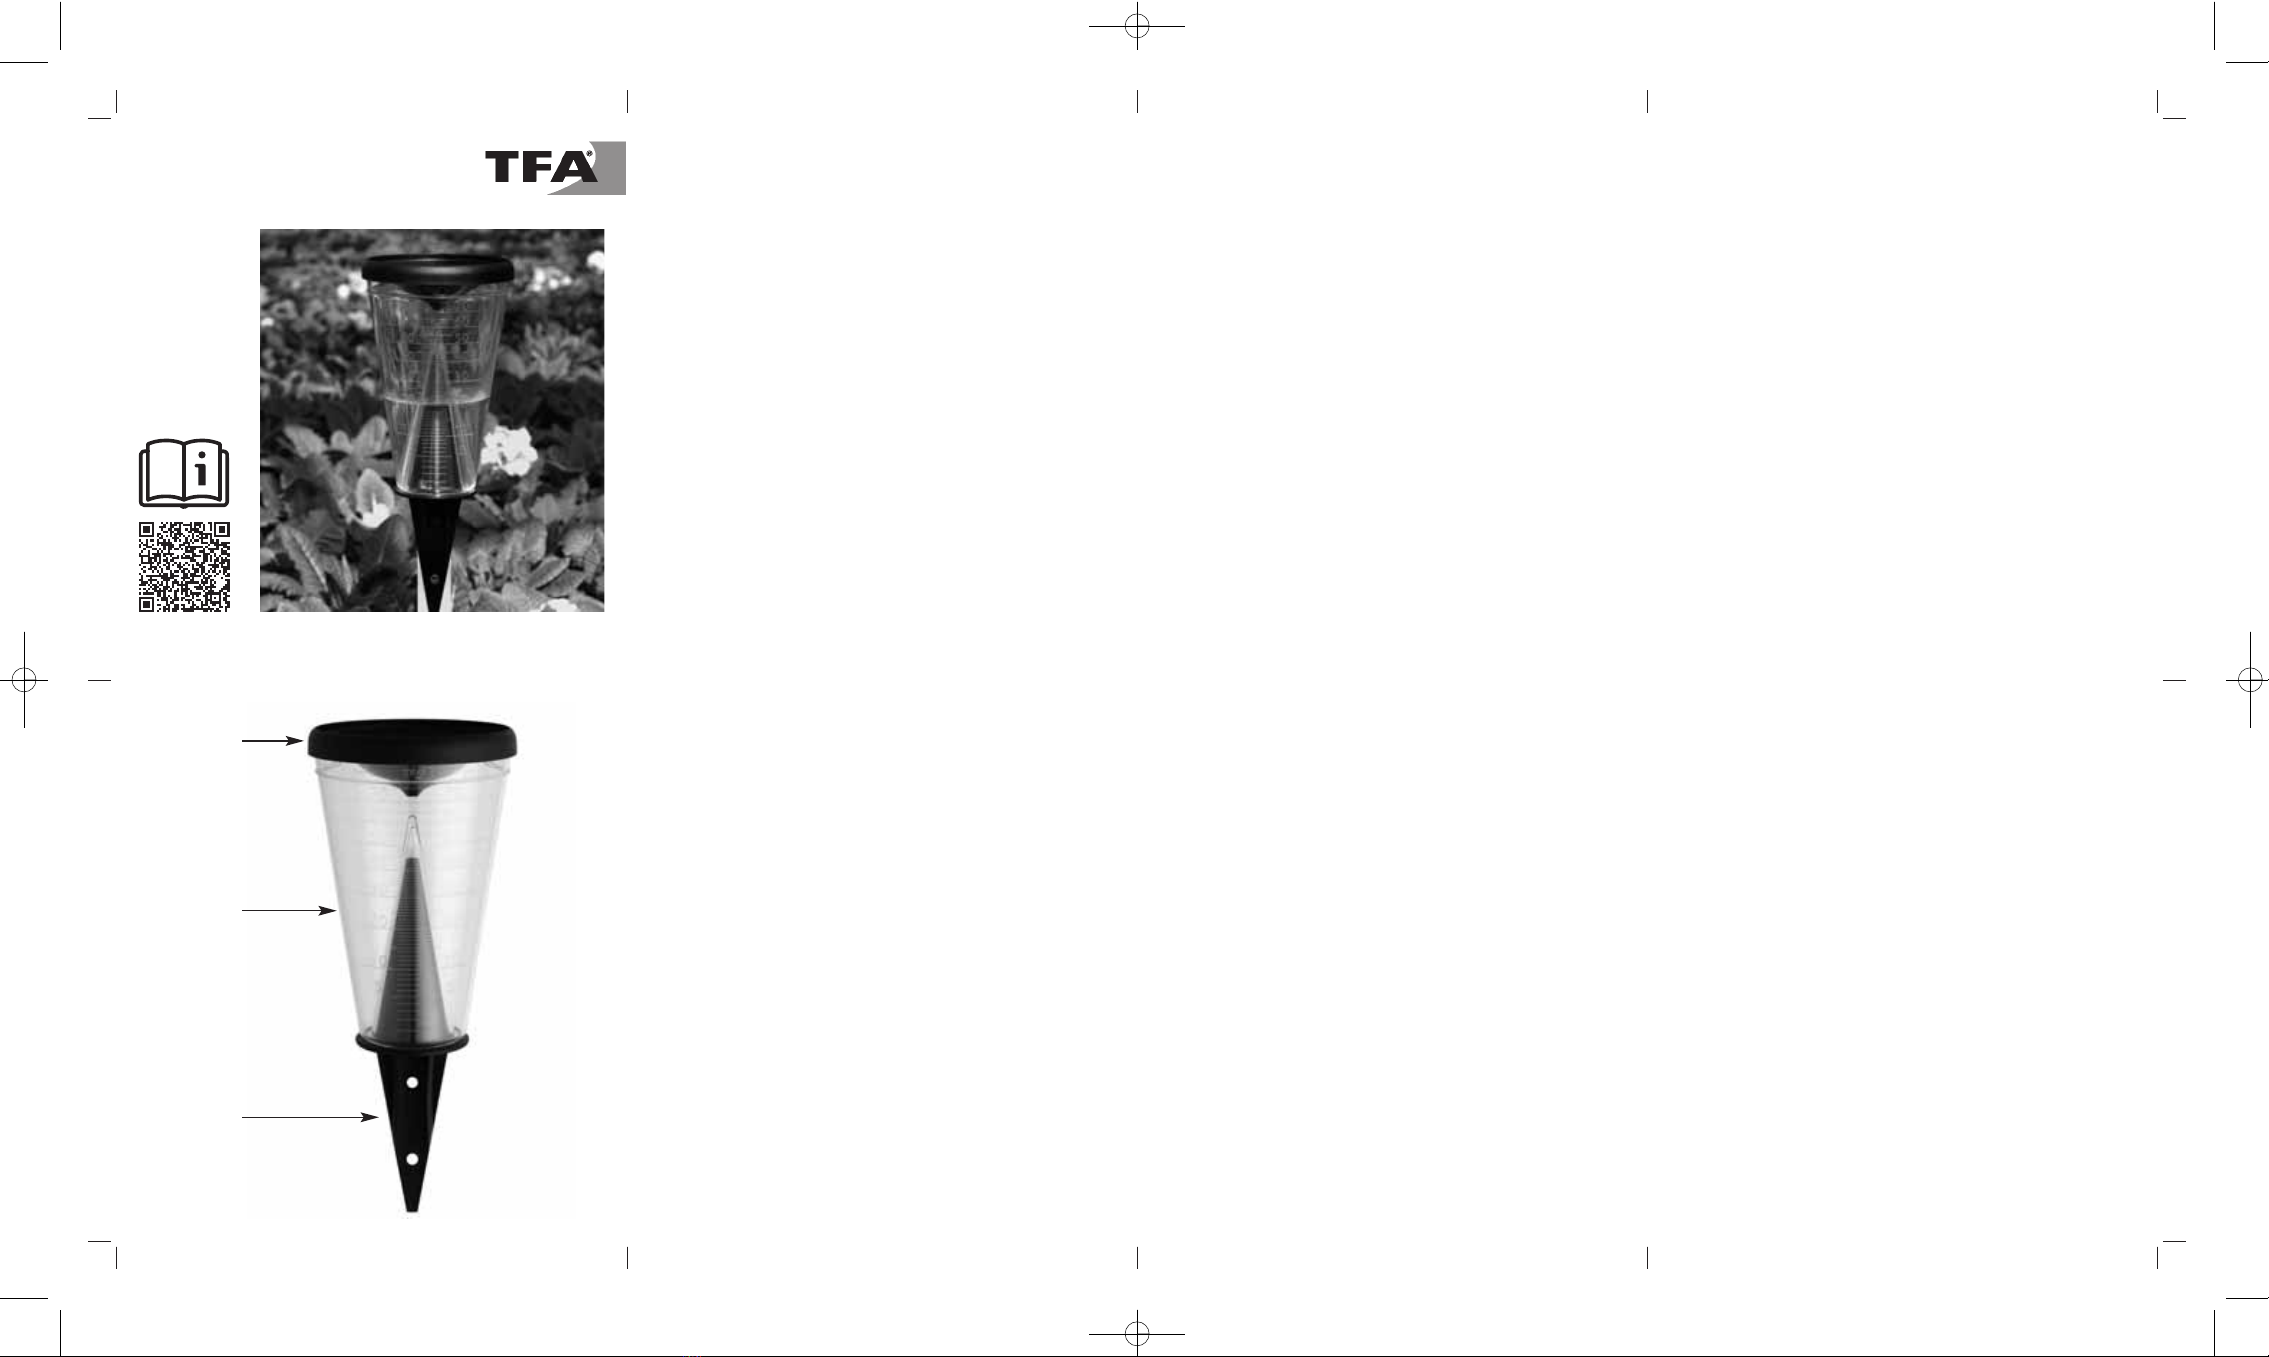
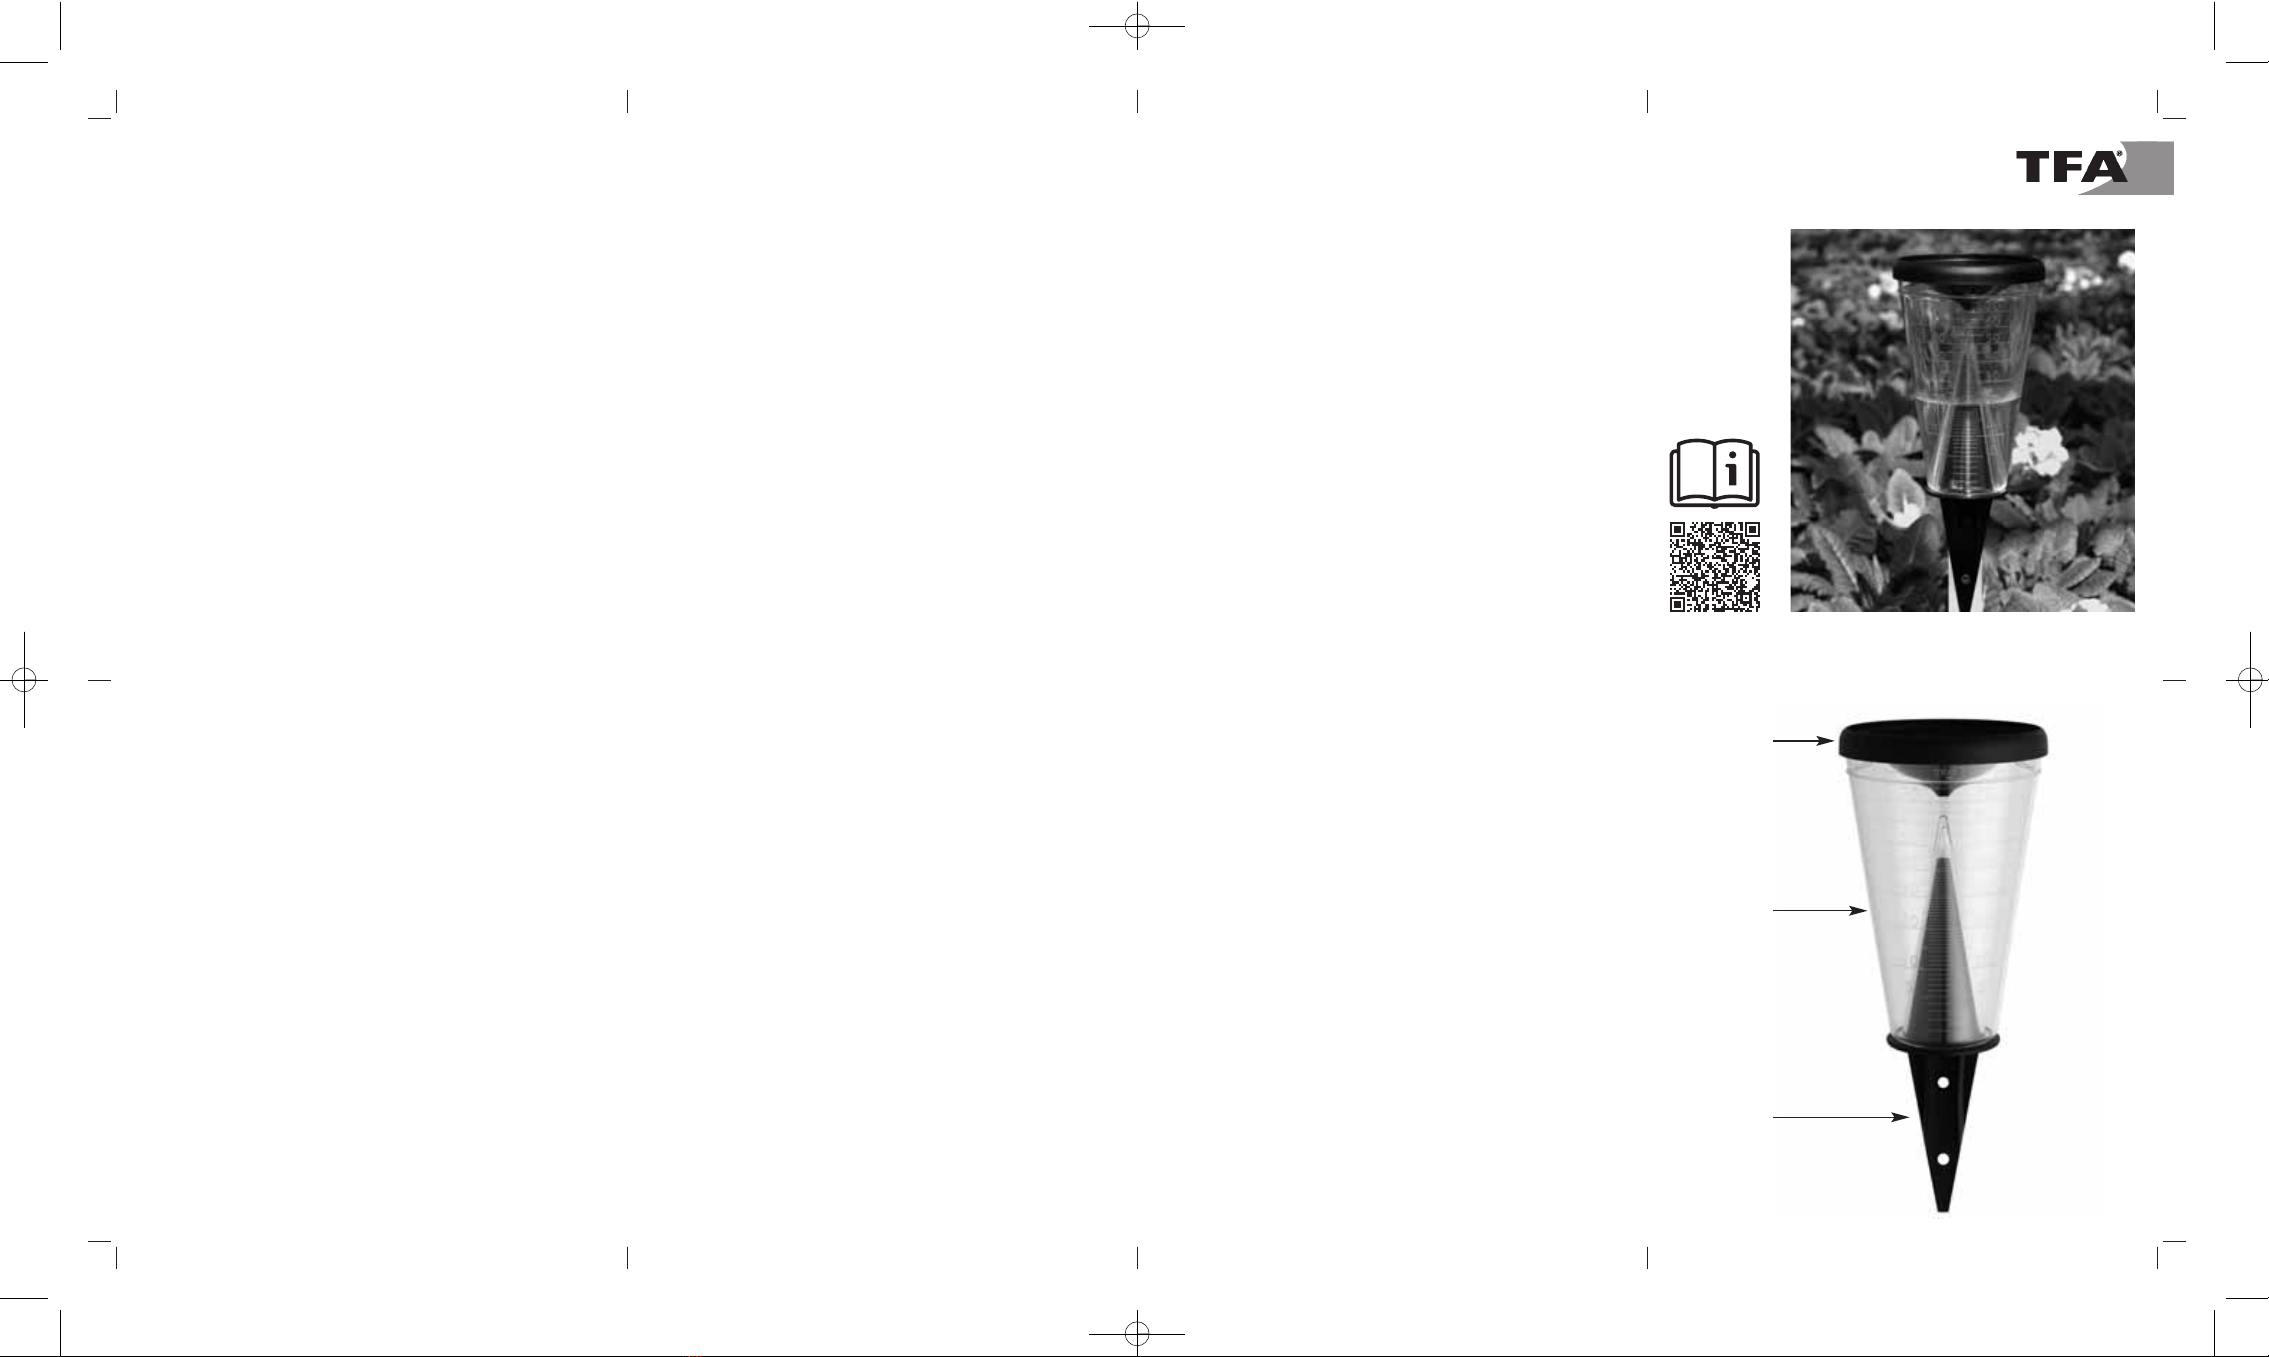
Componenti
A: Supporto
B: Recipiente di raccolta
C: Coperchio
Usare
• Disporre il pluviometro in un luogo il più possibile libero. Evi-
tare l'installazione in prossimità di alberi e altre coperture che
potrebbero compromettere la corretta rilevazione della piog-
gia.
• Infilare il supporto con la parte asimmetrica nel suolo.
• Per eseguire la misurazione sopra il terreno e per un sostegno
sicuro, fissare il supporto ad un'asta tramite due viti o chiodi
(posizione ottimale: 1 m sopra il terreno).
• Collocare il recipiente di raccolta sul supporto.
• Verificare che il recipiente di raccolta sia il più possibile oriz-
zontale.
• Chiudere il recipiente di raccolta con il coperchio a forma di
imbuto.
• Il coperchio è utile per evitare una rapida evaporazione e ogni
tipo di contaminazione del recipiente di raccolta.
• La pioggia scorre attraverso l'apertura situata al centro del
coperchio. Rimuovere regolarmente eventuali foglie o sporci-
zia dal coperchio.
• Dopo le precipitazioni atmosferiche, è possibile rilevare facil-
mente la quantità di pioggia sulla scala ben leggibile del
pluviometro. Ogni lineetta di graduazione corrisponde a 1 mm
o a 1 lt. di precipitazione atmosferica per m2 (fino a 50 mm,
volume complessivo 70 mm).
• In caso di precipitazione atmosferica solida (neve/grandine) è
necessario rimuovere il coperchio per far sciogliere il conte-
nuto, al fine di poter eseguire la misurazione.
•Attenzione: dopo aver effettuato la lettura, svuotare il pluvio-
metro! Per eseguire lo svuotamento, togliere semplicemente
il contenitore dal dispositivo e rimuovere il coperchio.
Manutenzione
• Quando si pulisce l'apparecchio, usare solo un panno soffice
inumidito con acqua. Non usare solventi o abrasivi.
TFA Dostmann GmbH & Co.KG
Zum Ottersberg 12, D-97877 Wertheim, Germania
È vietata la pubblicazione delle presenti istruzioni o di parti di esse senza una prece-
dente autorizzazione della TFA Dostmann. I dati tecnici corrispondono allo stato del
prodotto al momento della stampa e possono cambiare senza preavviso.
È possibile trovare dati tecnici e informazioni aggiornate sul prodotto inserendo il
numero di articolo sul nostro sito.
www.tfa-dostmann.de 02/21
Pluviómetro
Muchas gracias por haber adquirido este dispositivo de TFA.
Con este pluviómetro puede determinar de modo fácil y exacto la
cantidad de las precipitaciones. Es importante para el jardín, la
agricultura e interesante para todos aquellos que desean saber
algo más de la naturaleza
Componentes
A: Soporte
B: Vaso colector
C: Tapa
Usare
• Coloque el pluviómetro dentro de lo posible en un espacio
libre. Evite la proximidad a los árboles y otras cubriciones que
puedan influir negativamente sobre una medición correcta de
la lluvia.
• Clave el soporte en el suelo por el lado asimétrico.
• Si desea medir la cantidad de lluvia sobre el suelo, fije el
soporte a un poste y estabilícelo mediante dos tornillos o cla-
vos (distancia ideal del suelo: 1 metro).
• Coloque el vaso colector sobre el soporte.
• Asegúrese de que la posición del vaso colector sea horizontal.
• Cierre el vaso colector con la tapa en forma de embudo.
• La tapa impide que se produzca una rápida evaporación y al
mismo tiempo evita que el vaso colector se ensucie.
• La lluvia fluye a través del orificio situado en el centro de la
tapa. Limpie la suciedad y las hojas de la tapa regularmente.
• Tras haber cesado las precipitaciones, podrá leer fácilmente la
cantidad de lluvia caída en la escala del pluviómetro. Cada
línea divisora corresponde a 1 mm ó1 litro de lluvia por m2
(hasta 50 mm, volumen total 70 mm).
• Si las precipitaciones son de nieve o granizo debe retirar la
tapa previamente y fundir el contenido para poder determinar
la cantidad recogida.
•Atención: ¡Vacíe el pluviómetro tras cada medición. Para ello
desmonte el vaso colector y retire la tapa!
Mantenimiento
• Limpie el aparato con un trapo suave, ligeramente humectado.
¡No utilizar ningún medio abrasivo o disolvente!
TFA Dostmann GmbH & Co.KG
Zum Ottersberg 12, D-97877 Wertheim, Alemania
Estas instrucciones o extractos de las mismas no pueden ser publicados sin la
autorización de la TFA Dostmann. Los datos técnicos de este producto correspon-
den al estado en el momento de la impresión y pueden ser modificados sin previo
aviso. Los actuales datos técnicos e informaciones sobre su producto los puede
encontrar bajo el número de artículo en nuestra página web.
www.tfa-dostmann.de 02/21
Regenmeter
Hartelijk dank dat u voor dit apparaat van de firma TFA hebt
gekozen.
Met deze regenmeter kunt u neerslaghoeveelheden gemakkelijk
en exact vaststellen. Dit is belangrijk voor de tuin en landbouw en
het is interessant voor al diegenen, die meer over onze natuur te
weten willen komen.
Afzonderlijke delen
A: Houder
B: Opvangbak
C: Deksel
Gebruiken
• Plaats de regenmeter op een zo vrij mogelijke plaats. Vermijd
de nabijheid van bomen en andere afdekkingen die een cor-
recte meting van regen zouden kunnen belemmeren.
• Steek de houder met het asymmetrisch deel in de grond.
• Bevestig de houder met twee schroeven of nagels aan een
staaf (ideaal is 1 m boven de grond). Zo kan u op een afstand
van de grond meten en zit de regenmeter tegelijk goed vast.
• Zet de opvangbak op de houder.
• Zorg er voor dat de opvangbak goed horizontaal staat.
• Sluit de opvangbak met het trechtervormig deksel.
• Het deksel verhindert snelle verdamping en vervuiling van de
opvangbank.
• De regen vloeit door de opening midden in het deksel. Verwij-
der regelmatig bladeren en vuil van het deksel.
• U kan de hoeveelheden neerslag gemakkelijk op de goed lees-
bare schaal van de regenmeter aflezen. Ieder schaalstreepje is
1 mm of 1 liter neerslag per m2(tot 50 mm, totaal volume
70 mm).
• Bij sterke neerslag (sneeuw/hagel) het deksel vooraf verwijde-
ren en de inhoud voor de meting smelten.
•Opgelet: De regenmeter na iedere meting ledigen! De
opvangbak gewoon van de houder nemen, het deksel verwij-
deren en de opvangbak ledigen.
Onderhoud
• Maak het apparaat met een zachte, enigszins vochtige doek
schoon. Geen schuur- of oplosmiddelen gebruiken!
TFA Dostmann GmbH & Co.KG
Zum Ottersberg 12, D-97877 Wertheim, Duitsland
Deze gebruiksaanwijzing of gedeelten eruit mogen alleen met toestemming van TFA
Dostmann worden gepubliceerd. De technische gegevens van dit apparaat zijn actu-
eel bij het ter perse gaan en kunnen zonder voorafgaande informatie worden gewij-
zigd. De nieuwste technische gegevens en informatie over uw product kunt u vinden
door het invoeren van het artikelnummer op onze homepage.
www.tfa-dostmann.de 02/21
A
B
C
Instruction manuals
www.tfa-dostmann.de/en/service/downloads/instruction-manuals
Kat. Nr. 47.1008
Istruzioni per l'uso
Gebruiksaanwijzing
Instrucciones de uso