TFA 30.3052 User manual

Bedienungsanleitung
Kat. Nr. 30.3052
Funk-Thermo-Hygrometer mit Frostwarnung
1. Bevor Sie mit dem Gerät arbeiten
•Lesen Sie sich bitte die Bedienungsanleitung genau durch.
•Durch die Beachtung der Bedienungsanleitung vermeiden Sie auch Beschädigun-
gen des Gerätes und die Gefährdung Ihrer gesetzlichen Mängelrechte durch Fehl-
gebrauch. Für Schäden, die aus Nichtbeachtung dieser Bedienungsanleitung ver-
ursacht werden, übernehmen wir keine Haftung.
•Ebenso haften wir nicht für inkorrekte Messwerte und Folgen, die sich aus solchen
ergeben können.
•Beachten Sie besonders die Sicherheitshinweise!
•Bewahren Sie diese Bedienungsanleitung gut auf!
2. Zu Ihrer Sicherheit
• Verwenden Sie das Produkt nicht anders, als in dieser Anleitung dargestellt wird.
• Das eigenmächtige Reparieren, Umbauen oder Verändern des Gerätes ist nicht gestattet.
Vorsicht!
Verletzungsgefahr:
• Bewahren Sie die Geräte und die Batterien außerhalb der Reichweite von Kindern auf.
• Batterien nicht ins Feuer werfen, kurzschließen, auseinander nehmen oder aufladen.
Explosionsgefahr!
• Batterien enthalten gesundheitsschädliche Säuren. Um ein Auslaufen der Batterien zu
vermeiden, sollten schwache Batterien möglichst schnell ausgetauscht werden. Ver-
wenden Sie nie gleichzeitig alte und neue Batterien oder Batterien unterschiedlichen
Typs.
• Beim Hantieren mit ausgelaufenen Batterien chemikalienbeständige Schutzhand-
schuhe und Schutzbrille tragen!
Wichtige Hinweise zur Produktsicherheit!
• Setzen Sie das Gerät keinen extremen Temperaturen, Vibrationen und Erschütterun-
gen aus.
• Vor Feuchtigkeit schützen.
• Der Außensender ist spritzwassergeschützt, aber nicht wasserdicht. Suchen Sie einen
schattigen und niederschlagsgeschützten Platz für den Sender aus.
3. Bedienung
3.1 Inbetriebnahme / Batterien einlegen
• Legen Sie die Geräte in einem Abstand von ca. 1,5 Metern voneinander auf einen
Tisch. Vermeiden Sie die Nähe zu möglichen Störquellen (elektronische Geräte und
Funkanlagen).
• Ziehen Sie die Schutzfolie vom Display des Außensenders und der Basisstation.
• Öffnen Sie das Batteriefach des Außensenders, indem Sie den Batteriefachdeckel nach
unten schieben (siehe Markierung) und den Deckel abheben.
• Legen Sie zwei neue Batterien 1,5 V AAA polrichtig ein.
• Öffnen Sie das Batteriefach der Basisstation, indem Sie den Batteriefachdeckel nach
oben schieben (siehe Markierung) und den Deckel abheben.
• Legen Sie zwei neue Batterien 1,5 V AAA polrichtig ein.
3.2 Empfang der Außenwerte
• Nach dem Einlegen der Batterien werden die Außenwerte an die Basisstation übertragen.
• Im unteren Display blinkt das Funksignal-Symbol.
• Drücken Sie die IN/OUT Taste auf der Rückseite der Basisstation. OUT erscheint im
unteren Display. Die aktuellen Außenwerte werden angezeigt.
• Werden die Außenwerte nicht empfangen, erscheint „- -.-” auf dem Display. Prüfen Sie
die Batterien und starten Sie einen weiteren Versuch. Beseitigen Sie eventuelle Stör-
quellen.
• Sie können die Initialisierung auch manuell starten. Halten Sie die IN/OUT Taste für
drei Sekunden gedrückt.
3.3 Display
• Das obere Display zeigt Ihnen die Innentemperatur an.
• Das untere Display zeigt Ihnen die Innenluftfeuchtigkeitan.
• Mit der IN/OUT Taste können Sie die Außenwerte aufrufen.
• Drücken Sie die IN/OUT Taste noch einmal. Das Kreissymbol ( ) erscheint. Im Dis-
play erscheinen nun abwechselnd die Innen- und Außenwerte.
• Beenden Sie den automatischen Wechsel, indem Sie die IN/OUT Taste noch einmal
drücken.
• Drücken Sie die °C/°F Taste auf der Rückseite des Gerätes und Sie können zwischen
Celsius (°C) oder Fahrenheit (°F) als Temperaturanzeige auswählen.
• Liegt die Außentemperatur zwischen -2 °C und + 3°C, erscheint das Schneeflocken-
Symbol auf dem Display der Außentemperatur.
3.4 Höchst- und Tiefstwerte
• Drücken Sie die MAX/MIN Taste auf der Rückseite des Gerätes.
• Die höchsten Innen- oder Außenwerte seit der letzten Rückstellung werden angezeigt.
• Drücken Sie die MAX/MIN Taste noch einmal.
• Die niedrigsten Innen- oder Außenwerte seit der letzten Rückstellung werden ange-
zeigt.
• Drücken Sie noch einmal die Taste und die aktuellen Werte erscheinen wieder.
• Halten Sie die MAX/MIN Taste gedrückt, werden alle Werte auf die momentanen Werte
zurückgestellt.
• Bei der manuellen Sendersuche werden ebenfalls alle maximalen und minimalen
Außenwerte zurückgesetzt.
4. Aufstellen und Befestigen der Basisstation und des Senders
• Mit dem ausklappbaren Ständer auf der Rückseite aufstellen oder mit der Aufhängeö-
se an der Wand befestigen
5. Pflege und Wartung
• Reinigen Sie das Gerät mit einem weichen, leicht feuchten Tuch. Keine Scheuer- oder
Lösungsmittel verwenden!
• Entfernen Sie die Batterien, wenn Sie das Gerät längere Zeit nicht verwenden.
5.1 Batteriewechsel
• Batteriesymbol (TX) - Außensender / Batteriesymbol (RX) - Basisstation
•Achtung: Bei einem Batteriewechsel muss der Kontakt zwischen Außensender und
Basisstation wieder hergestellt werden – also Batterien immer in beide Geräte neu ein-
legen oder manuelle Sendersuche starten.
6. Fehlerbeseitigung
Problem Lösung
Keine Anzeige / ➜Batterien polrichtig einlegen
Unkorrekte Anzeige ➜Batterien wechseln
➜RESET Taste drücken
Kein Senderempfang ➜Batterien des Außensenders prüfen
Anzeige „---” (keine Akkus verwenden!)
➜Neuinbetriebnahme von Außensender und Basisstation
gemäß Anleitung
➜Manuelle Sendersuche starten: IN/OUT Taste auf der
Basisstation gedrückt halten.
➜Anderen Aufstellort für Außensender und/oder Basis-
station wählen
➜Abstand zwischen Außensender und Basisstation
verringern
➜Beseitigen der Störquellen
7. Entsorgung
Batterien und Akkus dürfen keinesfalls in den Hausmüll!
Als Verbraucher sind Sie gesetzlich verpflichtet, gebrauchte Batterien und
Akkus zur umweltgerechten Entsorgung beim Handel oder entsprechenden
Sammelstellen gemäß nationaler oder lokaler Bestimmungen abzugeben.
Die Bezeichnungen für enthaltene Schwermetalle sind:
Cd=Cadmium, Hg=Quecksilber, Pb=Blei
Dieses Gerät ist entsprechend der EU-Richtlinie über die Entsorgung von
Elektro- und Elektronik-Altgeräten (WEEE) gekennzeichnet.
Dieses Produkt darf nicht mit dem Hausmüll entsorgt werden. Der Nutzer
ist verpflichtet, das Altgerät zur umweltgerechten Entsorgung bei einer aus-
gewiesenen Annahmestelle für die Entsorgung von Elektro- und Elektronik-
geräten abzugeben.
8. Technische Daten
Messbereiche
Innentemperatur: -10 °C…+50 °C (+14 °F…+122 °F)
Außentemperatur: -20 °C… +70 °C (-4 °F…+158 °F)
Luftfeuchtigkeit: 20 … 90% (Innen/Außen)
Frostanzeige: -2°C…+3°C (+29°F…+37°F)
Anzeige LL.L /HH.H: Temperatur außerhalb des Messbereichs
Reichweite/Frequenz: ca. 100 m (Freifeld) / 868 MHz
Achtung: Bitte nur einen Außensender dieses Typs in
Gebrauch nehmen
Maximale Sendeleistung: < 25mW
Übertragungszeit: Außensender sendet alle 12 Sekunden – Basisstation
aktualisiert sich alle 60 Sekunden
Spannungsversorgung: Basisstation: 2 x 1,5 V AAA (Batterien nicht inkl.)
Außensender: 2 x 1,5 V AAA (Batterien nicht inkl.)
Diese Anleitung oder Auszüge daraus dürfen nur mit Zustimmung von TFA Dostmann veröffentlicht werden.
Die technischen Daten entsprechen dem Stand bei Drucklegung und können ohne vorherige Benachrichtigung
geändert werden.
Die neuesten technischen Daten und Informationen zu Ihrem Produkt finden Sie unter Eingabe der Artikel-
Nummer auf unserer Homepage.
EU-KONFORMITÄTSERKLÄRUNG
Hiermit erklärt TFA Dostmann, dass der Funkanlagentyp 30.3052 der Richtlinie 2014/53/EU entspricht. Der
vollständige Text der EU-Konformitätserklärung ist unter der folgenden Internetadresse verfügbar:
www.tfa-dostmann.de
E-Mail: [email protected]
TFA Dostmann GmbH & Co.KG, Zum Ottersberg 12, D-97877 Wertheim, Deutschland 08/16
Bedienungsanleitung
Kat. Nr. 30.3052
TFA_No. 30.3052_Anleitung_08_16 19.08.2016 09:07 Uhr Seite 1

Instruction manual
Cat.-No. 30.3052
Wireless hygro-thermometer with frost warning
1. Before you start using it
•Please make sure to read the instruction manual carefully.
•Following and respecting the instructions in your manual will prevent damage to
your instrument and loss of your statutory rights arising from defects due to incor-
rect use.
•We shall not be liable for any damage occurring as a result of not following these
instructions. Likewise, we take no responsibility for any incorrect readings and for
any consequences which may result from them.
•Please take particular note of the safety advice!
•Please keep this instruction manual for future reference.
2. For your safety
• This product should only be used as described within these instructions.
• Unauthorised repairs, modifications or changes to the product are prohibited.
Caution!
Risk of injury:
• Keep these instruments and the batteries out of the reach of children.
• Batteries must not be thrown into a fire, short-circuited, taken apart or recharged.
Risk of explosion!
• Batteries contain harmful acids. Low batteries should be changed as soon as possible
to prevent damage caused by a leaking. Never use a combination of old and new bat-
teries together, or batteries of different types.
• Wear chemical-resistant protective gloves and safety glasses when handling leaking
batteries.
Important information on product safety!
• Do not place your product near extreme temperatures, vibrations or shocks.
• Protect it from moisture.
• The instrument is protected against water splashes, but it is not watertight. Choose a
shady and dry position for the transmitter.
3. Operation
3.1 Getting started / Insert batteries
• Place both instruments on a desk with a distance of approximately 1.5 meter. Check
that no other electronic devices are close.
• Pull off the protection foil from the display of the transmitter and the basic station.
• Open the battery compartment of the transmitter by pushing the battery compartment
cover downwards (see marking) and lifting up the cover.
• Insert two new batteries 1,5 V AAA. Make sure that the battery polarity is correct.
• Open the battery compartment of the basic station by pushing the battery compart-
ment cover upwards (see marking) and lifting up the cover.
• Insert two new batteries 1,5 V AAA. Make sure that the battery polarity is correct.
3.2 Reception of outdoor values
• After insertion of the batteries, the outdoor values will automatically be transmitted to
the basic station.
• The reception symbol flashes in the lower part of the display.
• Press IN/OUT button on the back of the instrument. OUT appears on the display. The
current outdoor values appear.
• If the reception of the outdoor values fails, “- -.-” will appear on the display. Check the
batteries and try again. Check if there is any possible source of interference.
• You can also start the initialization manually. Press the IN/OUT button for 3 seconds.
3.3 Display
• The upper display shows the indoor temperature.
• The lower display shows the indoor humidity.
• Using the IN/OUT button, you can choose between the display of the indoor or the
outdoor values.
• Press the IN/OUT button again.
• The circle symbol ( ) appears on the display.
• The indoor and outdoor values will appear alternately.
• Press the IN/OUT button again to stop the automatically alternating display.
• Press °C/°F button at the back of the instrument to change between °C (Celsius) or °F
(Fahrenheit) as temperature unit.
• If the outside temperature is between -2 °C and +3 °C the snowflake symbol appears
on the display of the outdoor temperature.
3.4 Maximum and minimum values
• Press the MAX/MIN button at the back of the instrument.
• The highest indoor or outdoor values are displayed since the last reset.
• Press the MAX/MIN button again.
• The lowest indoor or outdoor values are displayed since the last reset.
• Press the MAX/MIN button again to return to the present values display.
• Press and hold the MAX/MIN button to reset all values to the present values.
• During the manual transmitter search all maximum and minimum outdoor values will
be reset as well.
4. Positioning and fixing of the basic unit and the transmitter
• With the foldable leg at the back, the instruments can be placed onto any flat surface
or mounted on a wall using the hole at the back of the instruments.
5. Care and maintenance
• Clean your instrument with a soft damp cloth. Do not use solvents or scouring agents.
• Remove the batteries if you do not use the product for a long period of time.
5.1 Battery replacement
• Battery symbol (TX) – transmitter / Battery symbol (RX) - basic station
•Please note: When the batteries are changed, the contact between transmitter and
basic station must be restored – for this reason you must always insert new batteries
in both units or start a manual transmitter search.
6. Troubleshooting
Problems Solution
No indication / ➜Make sure that the batteries’ polarity is correct.
Incorrect indication ➜Change the batteries
➜Press the RESET button
No transmitter reception ➜Check the batteries of the external transmitter
Display “---” (do not use rechargeable batteries!)
➜Restart the transmitter and the basic station by
following the instructions
➜Start the manual search for the transmitter: Press
and hold the IN/OUT button
➜Choose another place for the transmitter and/or
the basic station
➜Reduce the distance between the transmitter and
the basic station
➜Check if there is any source of interference
7. Waste disposal
Never dispose of empty batteries and rechargeable batteries in household
waste. As a consumer, you are legally required to take them to your retail
store or to an appropriate collection site depending on national or local
regulations in order to protect the environment.
The symbols for the heavy metals contained are:
Cd=cadmium, Hg=mercury, Pb=lead
This instrument is labelled in accordance with the EU Waste Electrical and
Electronic Equipment Directive (WEEE).
Please do not dispose of this instrument in household waste. The user is
obligated to take end-of-life devices to a designated collection point for the
disposal of electrical and electronic equipment, in order to ensure environ-
mentally-compatible disposal.
8. Specifications
Measuring range
Indoor temperature: -10 °C…+50 °C (+14 °F…+122 °F)
Outdoor temperature: -20 °C… +70 °C (-4 °F…+158 °F)
Humidity: 20 … 90% (outdoor/indoor)
Frost warning temperature: -2°C…+3°C (+29°F…+37°F)
Indication LL.L / HH.H: Temperature is outside measuring range
Range/ Transmission frequency: max. 100 m (free field) / 868 MHz
Caution: Please make sure that you only use one
external transmitter of this type
Maximum radio-frequency power: < 25mW
Transmission time: Outdoor transmitter sends signal every 12 seconds
– basic station receives every 60 seconds
Power consumption: Basic station: Batteries 2 x 1,5 V AAA (not included)
Outdoor transmitter:
Batteries 2 x 1,5 V AAA (not included)
No part of this manual may be reproduced without written consent of TFA Dostmann. The technical
data are correct at the time of going to print and may change without prior notice.
The latest technical data and information about your product can be found by entering your product
number on our homepage.
EU declaration of conformity
Hereby, TFA Dostmann declares that the radio equipment type 30.3052 is in compliance with Direc-
tive 2014/53/EU.
The full text of the EU declaration of conformity is available at the following internet address:
www.tfa-dostmann.de
E-Mail: [email protected]
TFA Dostmann GmbH & Co.KG, Zum Ottersberg 12, D-97877 Wertheim, Germany 08/16
Instruction manual
Cat.-No. 30.3052
RoHS
TFA_No. 30.3052_Anleitung_08_16 19.08.2016 09:07 Uhr Seite 2

Mode d’emploi
Réf. 30.3052
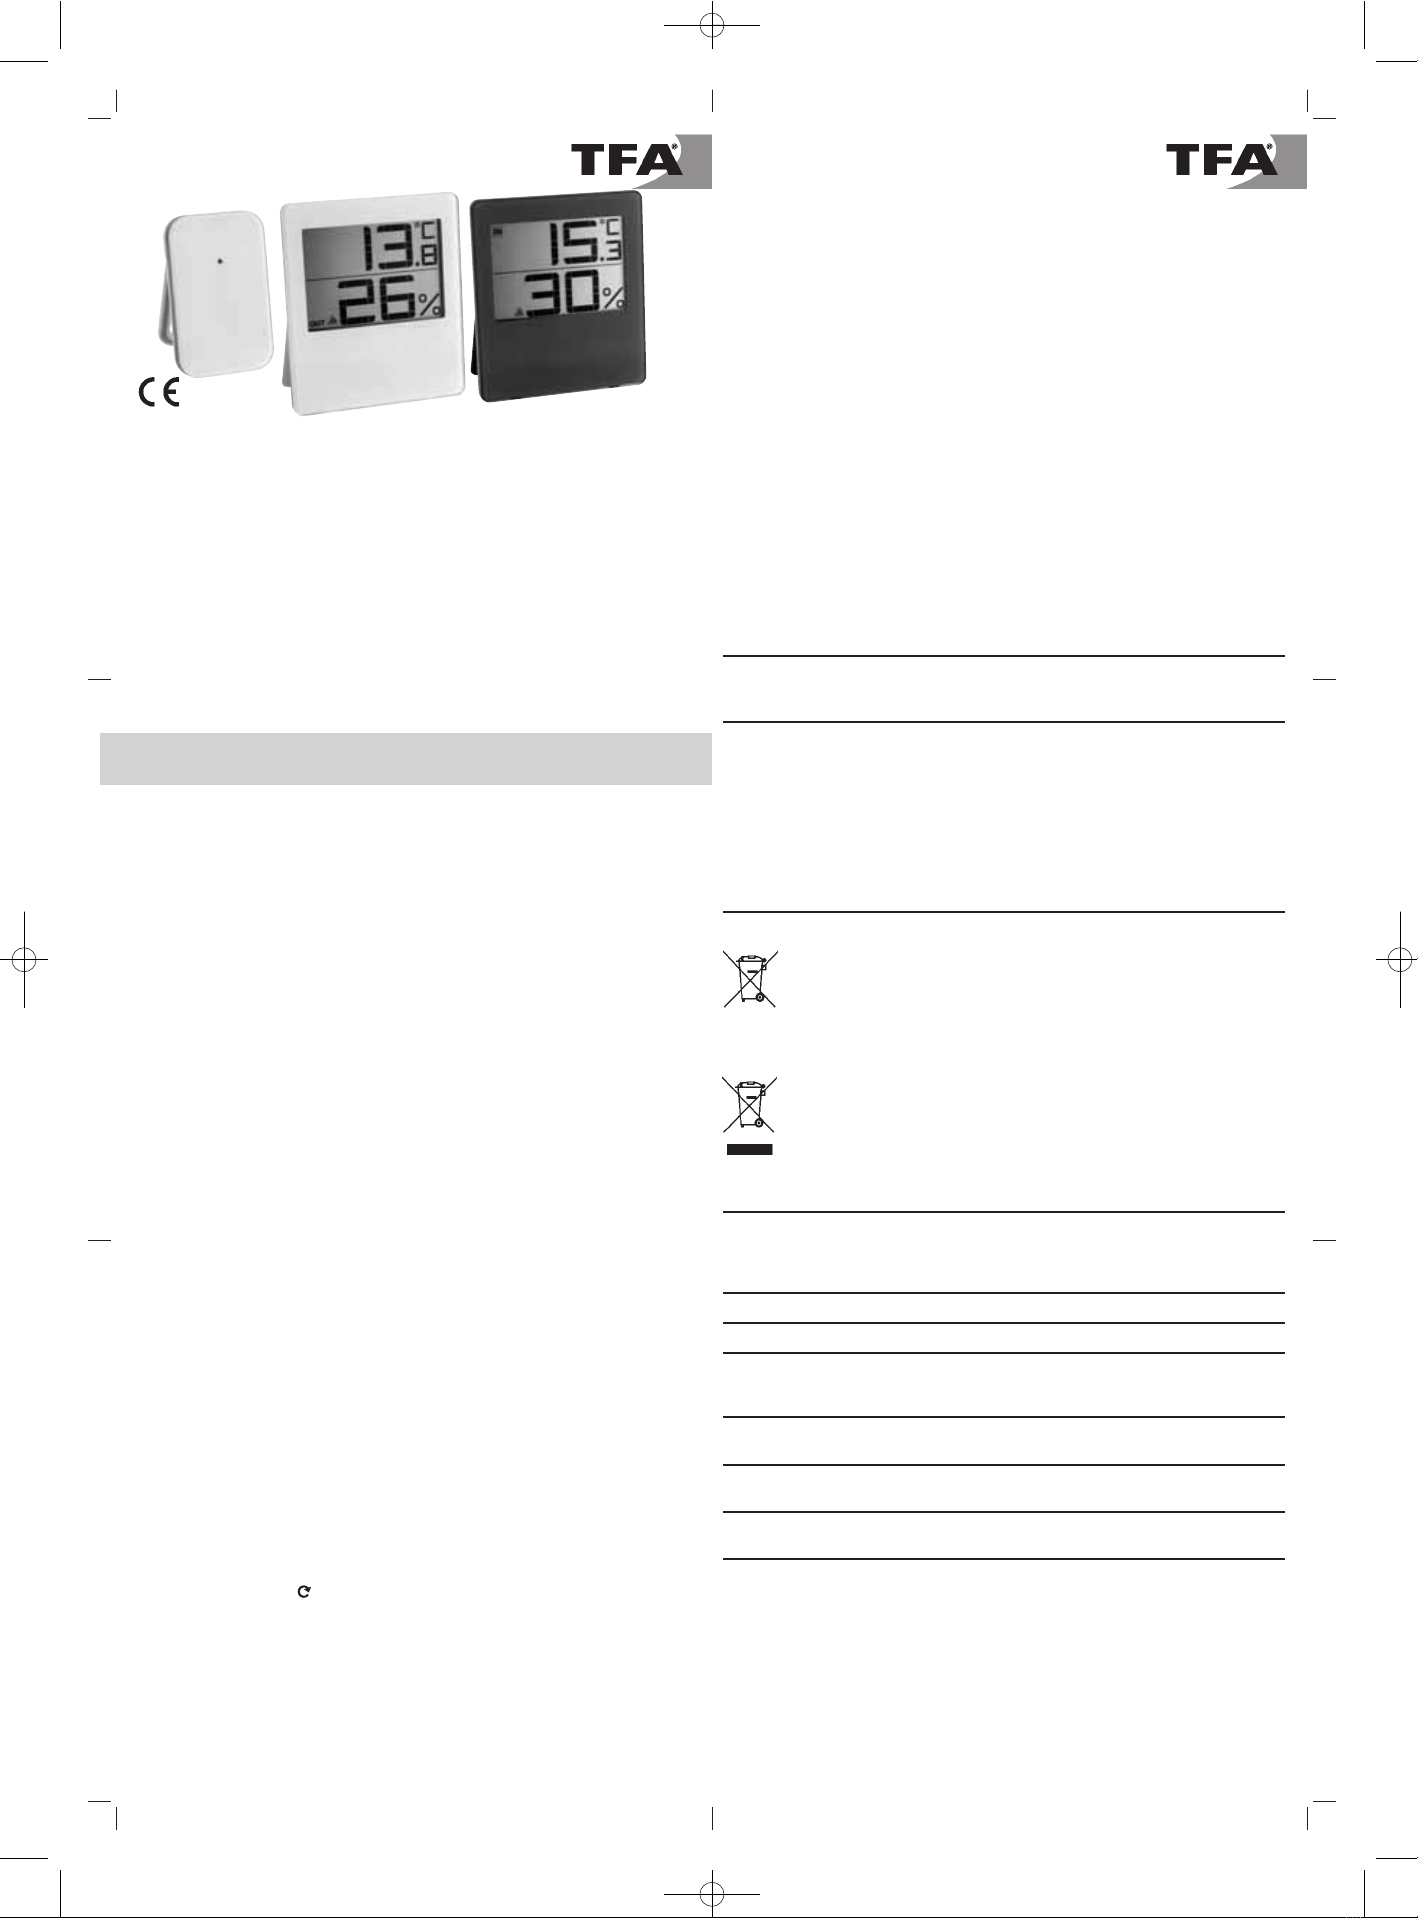
Thermo-hygromètre radio-piloté avec indicateur de gel
1. Avant d'utiliser votre appareil
•Lisez attentivement le mode d'emploi.
•En respectant ce mode d'emploi, vous éviterez d'endommager votre appareil et de
perdre vos droits résultant d'un défaut pour cause d'utilisation non-conforme.
•Nous n'assumons aucune responsabilité pour des dommages qui auraient été cau-
sés par le non-respect du présent mode d'emploi. De même, nous n’assumons
aucune responsabilité pour des relevés incorrects et les conséquences qu’ils pour-
raient engendrer.
•Suivez bien toutes les consignes de sécurité!
•Conservez soigneusement le mode d'emploi!
2. Pour votre sécurité
• Ne l'utilisez jamais à d'autres fins que celles décrites dans le présent mode d'emploi.
• Vous ne devez en aucun cas réparer, démonter ou modifier l'appareil par vous-même.
Attention!
Danger de blessure:
• Gardez les appareils et les piles hors de la portée des enfants.
• Ne jetez jamais les piles dans le feu, ne les court-circuitez pas, ne les démontez pas et
ne les rechargez pas. Risques d'explosion!
• Les piles contiennent des acides nocifs pour la santé. Une pile faible doit être remplacée
le plus rapidement possible, afin d'éviter une fuite. N'utilisez jamais de piles anciennes
avec des piles neuves simultanément ou bien encore des piles de types différents.
• Pour manipuler des piles qui ont coulé, utilisez des gants de protection chimique spé-
cialement adaptés et portez des lunettes de protection !
Conseils importants de sécurité du produit!
•
Évitez d’exposer l’appareil à des températures extrêmes, à des vibrations ou à des chocs.
• Protégez-le contre l'humidité.
• L’émetteur extérieur est résistant aux éclaboussures d'eau mais il n'est pas étanche.
Choisissez un emplacement à l'ombre et protégé de la pluie pour votre émetteur.
3. Utilisation
3.1 Mise en service / Insertion des piles
• Déposez les appareils sur une table à une distance d'environ 1,5 mètre l'un de l'autre.
Évitez la proximité de sources de parasitage (appareils électroniques ou appareils radio).
• Enlevez le film de protection de l’écran de l’émetteur et de la station de base.
• Ouvrez le compartiment à piles de l’émetteur et poussez le couvercle du compartiment
des piles vers le bas (voir le marquage).
• Insérez deux piles neuves 1,5 V AAA, contrôlez la bonne polarité des piles.
• Ouvrez le compartiment à piles de la station de base et poussez le couvercle du com-
partiment des piles vers le haut. (voir le marquage).
• Insérez deux piles neuves 1,5 V AAA, contrôlez la bonne polarité des piles.
3.2 Réception des valeurs extérieures
• Après l'insertion des piles, les valeurs extérieures seront transférées de l'émetteur à la
station de base.
• Le symbole de réception clignote dans l'écran du bas.
• Appuyez sur la touche IN/OUT au verso de la station de base. OUT apparaît sur l’écran.
Les valeurs extérieures apparaissent sur l’écran.
• Si les valeurs extérieures ne sont pas reçues, «- -.- » apparaît sur l'écran. Contrôlez les
piles et effectuez une nouvelle tentative. Éliminez les éventuelles sources de parasitage.
• Vous pouvez activer manuellement la réception. Appuyez sur la touche IN/OUT pen-
dant trois secondes.
3.3 Display
• L’affichage supérieur vous indique la température intérieure.
• L’affichage inférieur vous indique l’humidité ambiante.
• Avec la touche IN/OUT, vous pouvez sélectionner l'affichage des valeurs intérieures ou
extérieures.
• Appuyez encore une fois sur la touche IN/OUT.
• Le symbole circulaire de changement ( ) apparaît sur l’écran.
• Les valeurs intérieures et extérieures apparaissent tour à tour sur l’écran.
• Pour arrêter le changement automatique, appuyez encore une fois sur la touche
IN/OUT.
• En appuyant sur la touche °C/°F au verso de la station de base, vous pouvez sélection-
ner la température en Celsius (°C) ou en Fahrenheit (°F).
• Si la température extérieure se trouve entre -2 °C et +3 °C, le symbole flocon de neige
apparaît sur l'écran de la température extérieur.
3.4 Valeurs maximales et minimales
• Appuyez sur la touche MAX/MIN au verso de la station de base.
• Les valeurs intérieures ou extérieures maximales depuis la dernière réactualisation
apparaissent sur l’écran.
• Appuyez encore une fois sur la touche MAX/MIN. Les valeurs intérieures ou extérieu-
res minimales depuis la dernière réactualisation apparaissent sur l’écran.
• Appuyez encore sur la touche MAX/MIMN pour que les valeurs actuelles apparaissent
sur l'écran.
• Maintenez la touche MAX/MIN appuyée, toutes les valeurs maximales ou minimales
sont réinitialisés et remises aux valeurs du site en cours.
• Durant la recherché manuelle faite par l’émetteur, les valeurs maximales et minimales
extérieures seront également réinitialisées.
4. Position ou accrochage au mur de la station de base et de l’émetteur
• À l'aide du pied au verso les appareils peut être mise en place sur une surface plate
ou encore être accroché au mur à l'aide de l'œillet de suspension.
5. Entretien et maintenance
• Pour le nettoyage de votre appareil utilisez un chiffon doux et humide. N’utilisez pas
de solvant ou agent d'abrasif!
• Enlevez les piles, si vous n'utilisez pas votre appareil pendant une durée prolongée.
5.1 Remplacement des piles
• Symbole de pile (TX) - l’émetteur / Symbole de pile (RX) - la station de base
•Attention: Il faut rétablir le contact entre l'émetteur et le récepteur après le remplace-
ment des piles - Il faut donc toujours remplacer les piles dans les deux appareils ou
bien lancer la recherche manuellement.
6. Dépannage
Problème Solution
Aucun affichage / ➜Contrôlez la bonne polarité des piles
Indication incorrecte ➜Changez les piles
➜Appuyez sur la touche RESET
Pas de réception ➜Vérifiez les piles de l'émetteur extérieur
de l'émetteur (n'utilisez pas d'accus)
Affichage «---» ➜Remettez l'émetteur et la station de base en service
conformément aux instructions
➜Démarrez la recherche de l’émetteur manuelle-
ment: Appuyez sur la touche IN/OUT pendant trois
secondes
➜Sélectionnez une autre position pour l'émetteur et / ou
la station de base
➜Modifiez l’écart entre l'émetteur extérieur et la station
de base
➜Éliminez les éventuelles sources de parasitage
7. Traitement des déchets
Les piles et accus usagés ne peuvent en aucun cas être jetés dans les
ordures ménagères ! En tant qu'utilisateur, vous avez l'obligation légale de
rapporter les piles et accus usagés à votre revendeur ou de les déposez
dans une déchetterie proche de votre domicile conformément à la régle-
mentation nationale et locale. Les métaux lourds sont désignés comme
suit: Cd=cadmium, Hg=mercure, Pb=plomb
Cet appareil est conforme aux normes de l'UE relatives au traitement des
déchets électriques et électroniques (WEEE).
L'appareil usagé ne doit pas être jeté dans les ordures ménagères. L’utilisa-
teur s’engage, pour le respect de l’environnement, à déposer l’appareil
usagé dans un centre de traitement agréé pour les déchets électriques et
électroniques.
8. Caractéristiques techniques
Plage de mesure
Température ambiante -10 °C…+50 °C (+14 °F…+122 °F)
Température extérieure: -20 °C… +70 °C (-4 °F…+158 °F)
Humidité: 20 … 90% (extérieure / ambiante)
Température de gel: -2°C…+3°C (+29°F…+37°F)
Affichage LL.L /HH.H: Hors de portée la gamme de mesure
Rayon d’action/ Fréquence env. 100 mètres champ libre /868 MHz
de réception: Attention: Veuillez-vous assurer que seul un émet-
teur extérieur du type est utilisé
Puissance de radiofréquence
maximale transmise: < 25mW
Temps de transmission: Émetteur envoie toutes les 12 secondes - La station
de base reçoit toutes les 60 secondes
Alimentation: Station de base: 2 x 1,5 V AAA (piles non incluses)
Émetteur: 2 x 1,5 V AAA (piles non incluses)
La reproduction, même partielle du présent mode d'emploi est strictement interdite sans l'accord
explicite de TFA Dostmann. Les spécifications techniques de ce produit ont été actualisées au
moment de l'impression et peuvent être modifiées, sans avis préalable.
Les dernières données techniques et des informations concernant votre produit peuvent être trouvées
en entrant le numéro de l'article sur notre site.
Déclaration UE de conformité
Le soussigné, TFA Dostmann, déclare que l'équipement radioélectrique du type 30.3052 est conforme
à la directive 2014/53/UE. Le texte complet de la déclaration UE de conformité est disponible à
l'adresse internet suivante:
www.tfa-dostmann.de
E-Mail: [email protected]
TFA Dostmann GmbH & Co.KG, Zum Ottersberg 12, D-97877 Wertheim, Allemagne 08/16
Mode d’emploi
Réf. 30.3052
TFA_No. 30.3052_Anleitung_08_16 19.08.2016 09:07 Uhr Seite 3

Istruzioni per l'uso
Cat. N. 30.3052
Termo-igrometro radiocontrollato con indicazione de gelo
1. Prima di utilizzare l'apparecchio
•Leggete attentamente le istruzioni per l'uso.
•Seguendo le istruzioni per l'uso, eviterete anche di danneggiare il dispositivo e di
pregiudicare, a causa di un utilizzo scorretto, i diritti del consumatore che vi spet-
tano per legge.
•Decliniamo ogni responsabilità per i danni derivanti dal mancato rispetto delle
presenti istruzioni per l'uso. Allo stesso modo, non siamo responsabili per even-
tuali misurazioni errate e per le conseguenze che ne possono derivare.
•Prestate particolare attenzione alle misure di sicurezza!
•Conservate con cura queste istruzioni per l'uso!
2. Per la vostra sicurezza
• Non utilizzate il prodotto in maniera diversa da quanto descritto in queste istruzioni.
• Non sono consentite riparazioni, alterazioni o modifiche non autorizzate del dispositivo.
Avvertenza!
Pericolo di lesioni:
• Tenete i dispositivi e le batterie lontano dalla portata dei bambini.
• Non gettare le batterie nel fuoco, non polarizzarle in maniera scorretta, non smontarle
e non cercare di ricaricarle. Pericolo di esplosione!
• Le batterie contengono acidi nocivi per la salute. Sostituite quanto prima le batterie
quasi scariche, in modo da evitare che si scarichino completamente. Non utilizzate
mai contemporaneamente batterie usate e batterie nuove né batterie di tipi diversi.
• Quando si maneggiano batterie esaurite indossate sempre guanti resistenti alle
sostanze chimiche e occhiali di protezione.
Avvertenze sulla sicurezza del prodotto!
• Non esporre l'apparecchio a temperature estreme, vibrazioni e urti.
• Proteggere dall’umidità.
• Il trasmettitore è resistente all'acqua ma non impermeabile. Cercare un luogo
ombreggiato e al riparo dalla pioggia per il trasmettitore.
3. Uso
3.1 Messa in funzione / Inserire le batterie
• Posizionare gli apparecchi su un tavolo ad una distanza di circa 1,5 metri l'uno dall'altro.
Tenerli lontano da eventuali fonti di interferenza (dispositivi elettronici e impianti radio).
• Rimuovere il foglio protettivo dal display del trasmettitore e della stazione base.
• Aprire il vano batteria del trasmettitore, tirando il coperchio del vano batterie verso il
basso (vedi simbolo) e sollevare il coperchio.
• Inserire due batterie nuove tipo AAA da 1,5 V, rispettando le corrette polarità.
• Aprire il vano batteria della stazione base, tirando il coperchio del vano batterie verso
l’alto (vedi simbolo) e sollevare il coperchio.
• Inserire due batterie nuove tipo AAA da 1,5 V, rispettando le corrette polarità.
3.2 Ricezione dei valori esterni
• Dopo la messa in funzione il trasmettitore esterno inizia automaticamente a trasmettere
i valori esterni.
• Il simbolo della ricezione del segnale lampeggia sul display inferiore.
• Premete il tasto IN/OUT sul retro del dispositivo. Sul display appare OUT. Sul display
appaiono i valori esterni.
• Se non si ricevono i valori esterni, sul display viene visualizzato “- -.-”. Controllare le
batterie e riprovare di nuovo. Eliminare eventuali fonti di interferenza.
• È possibile avviare l'inizializzazione manualmente tenendo premuto il tasto IN/OUT per
3 secondi.
3.3 Display
• Il display superiore indica la temperatura interna.
• Il display inferiore indica l’umidità interna.
• Con il tasto IN/OUT potete variare, tra indicazione dei valori interni ed esterni.
• Premete il tasto IN/OUT di nuovo.
• Sul display appare il simbolo di cerchio ( ) per il cambio automatico.
• I valori interni ed esterni appaiono alternativamente sul display.
• Premendo il tasto IN/OUT di nuovo spegnete il cambio automatico.
• Premendo il tasto °C/°F sul retro del dispositivo è possibile scegliere fra la visualizza-
zione della temperatura in gradi °C (gradi Celsius) o °F (gradi Fahrenheit).
• Se la temperatura esterna è tra -2 °C e +3 °C compare il simbolo del fiocco di neve sul
display de temperatura esterna.
3.4 Valori massimi e minimi
• Premete il tasto MAX/MIN sul retro del dispositivo.
• Vengono visualizzati i valori interni o esterni massimi raggiunti dopo l´ultimo azzera-
mento.
• Premete nuovamente il tasto MAX/MIN.
• Vengono visualizzati i valori interni o esterni minimi raggiunti dopo l´ultimo azzera-
mento.
• Per tornare alla visualizzazione dei valori attuali, premete ancora una volta il tasto
MAX/MIN.
• Tenendo premuto il tasto MAX/MIN tutti i valori vengono resettati sui rispettivi valori
attuali.
• Nella sintonizzazione manuale tutti i valori massimi e minimi esterni vengono resettati.
4. Posizionamento della stazione base e fissaggio del trasmettitore
• Con il supporto pieghevole situato nella parte posteriore è possibile disporre i dispo-
sitivi in posizione verticale oppure fissarla a parete con il foro di sospensione.
5. Cura e manutenzione
• Per pulire l'apparecchio utilizzare solo un panno morbido leggermente inumidito. Non
usare solventi o abrasivi.
• Rimuovere le batterie, se non si utilizza l'apparecchio per un periodo prolungato.
5.1 Sostituzione delle batterie
• Simbolo della batteria (TX) – trasmettitore / Simbolo della batteria (RX) - stazione
base
•Attenzione: dopo aver sostituito le batterie è necessario ristabilire il contatto tra il tra-
smettitore e il ricevitore, pertanto cambiate sempre le batterie contemporaneamente
ad entrambi i dispositivi oppure avviate manualmente la ricerca del trasmettitore.
6. Guasti
Problema Risoluzione del problema
Nessuna indicazione / ➜Inserire le batterie rispettando le corrette polarità
Indicazione non corretta ➜Cambiare le batterie
➜Premete il tasto RESET
Nessuna ricezione ➜Controllare le batterie del trasmettitore
del trasmettitore (non utilizzare batterie ricaricabili!)
Indicazione “---” ➜Riavviate il trasmettitore e la stazione base secondo
le istruzioni
➜Sintonizzate manualmente il trasmettitore:
Premete il tasto IN/OUT per 3 secondi
➜Cercate nuove posizioni per il trasmettitore e/o il
stazione base
➜Diminuite la distanza tra il trasmettitore e il stazione
base
➜Eliminate fonti di interferenza
7. Smaltimento
È assolutamente vietato gettate le batterie tra i rifiuti domestici. In qualità
di consumatori, siete tenuti per legge a consegnare le batterie usate al
negoziante o ad altri enti preposti al riciclaggio in conformità alle vigenti
disposizioni nazionali o locali, ai fini di uno smaltimento ecologico.
Le sigle dei metalli pesanti contenuti sono: Cd=cadmio, Hg=mercurio,
Pb=piombo
Questo apparecchio è etichettato in conformità alla Direttiva UE sullo smal-
timento delle apparecchiature elettriche ed elettroniche (WEEE).
Questo prodotto non deve essere smaltito insieme ai rifiuti domestici. Il
consumatore è tenuto a consegnare il vecchio apparecchio presso un
punto di raccolta per lo smaltimento di apparecchiature elettriche ed elet-
troniche ai fini di uno smaltimento ecologico.
8. Dati tecnici
Campo di misura
Temperatura interna: -10 °C…+50 °C (+14 °F…+122 °F)
Temperatura esterna: -20 °C… +70 °C (-4 °F…+158 °F)
Umidità: 20 … 90% (esterna / interna)
Temperatura de gelo: -2°C…+3°C (+29°F…+37°F)
Indicazione LL.L /HH.H: Temperatura fuori dal campo di misura
Raggio d'azione/ Frequenza ca. 100 metri al massimo (campo libero) / 868 MHz
di ricezione Attenzione: Assicurarsi che solo un trasmettitore di
questo tipo sia in uso
Tempo di trasmissione: Trasmettitore invia ogni 12 secondi - La stazione
base riceve ogni 60 secondi
Massima potenza a
radiofrequenza trasmessa: < 25mW
Alimentazione: Stazione base: 2 batterie AAA da 1,5 V (non fornite)
Trasmettitore: 2 batterie AAA da 1,5 V (non fornite)
È vietata la pubblicazione delle presenti istruzioni o di parti di esse senza una precedente autorizza-
zione della TFA Dostmann. I dati tecnici corrispondono allo stato del prodotto al momento della stam-
pa e possono cambiare senza preavviso.
È possibile trovare dati tecnici e informazioni aggiornate sul prodotto inserendo il numero di articolo
sul nostro sito.
Dichiarazione di conformità UE
Il fabbricante, TFA Dostmann, dichiara che il tipo di apparecchiatura radio 30.3052 è conforme alla
direttiva 2014/53/UE. Il testo completo della dichiarazione di conformità UE è disponibile al seguente
indirizzo Internet:
www.tfa-dostmann.de
E-Mail: [email protected]
TFA Dostmann GmbH & Co.KG, Zum Ottersberg 12, D-97877 Wertheim, Germania 08/16
Istruzioni per l'uso
Cat. N. 30.3052
TFA_No. 30.3052_Anleitung_08_16 19.08.2016 09:07 Uhr Seite 4

Gebruiksaanwijzing
Cat.-Nr. 30.3052
Radiografische thermo-hygrometer met weergave van vorst
1. Voor u met het apparaat gaat werken
•Leest u a.u.b. de gebruiksaanwijzing aandachtig.
•Door rekening te houden met wat er in de handleiding staat, vermijdt u ook
beschadigingen van het apparaat en riskeert u niet dat uw wettelijke rechten door
verkeerd gebruik niet meer gelden.
•Voor schade die wordt veroorzaakt doordat u geen rekening houdt met de handlei-
ding aanvaarden wij geen aansprakelijkheid. Ook zijn wij niet verantwoordelijk
voor verkeerde metingen en de mogelijke gevolgen die daaruit voortvloeien.
•Neem in elk geval acht op de veiligheidsinstructies !
•Bewaar deze gebruiksaanwijzing a.u.b. goed!
2. Voor uw veiligheid
• Gebruik het product niet anders dan in deze handleiding is aangegeven.
• Het eigenmachtig repareren, verbouwen of veranderen van het apparaat is niet toege-
staan.
Voorzichtig!
Kans op letsel:
• Bewaar de apparaten en de batterijen buiten de reikwijdte van kinderen.
• Batterijen niet in het vuur gooien, niet kortsluiten, niet uit elkaar halen of opladen.
Kans op explosie!
• Batterijen bevatten zuren die de gezondheid schaden. Zwakke batterijen moeten zo
snel mogelijk worden vervangen om lekkage van de batterijen te voorkomen. Gebruik
nooit tegelijkertijd oude en nieuwe batterijen of batterijen van een verschillend type.
• Draag handschoenen die bestand zijn tegen chemicaliën en een beschermbril wanneer
u met uitgelopen batterijen hanteert!
Belangrijke informatie over de productveiligheid!
• Stel het apparaat niet bloot aan extreme temperaturen, trillingen en schokken.
• Tegen vocht beschermen.
• De buitensensor is tegen spatwater beschermd maar niet waterdicht. Zoek een tegen
regen en zon-beschermde plaats uit voor de zender.
3. Bediening
3.1 Inbedrijfstelling / Het plaatsen van de batterijen
• Leg het basisapparaat en de zender op een afstand van ca. 1,5 meter van elkaar op
een tafel. Vermijd de nabijheid van eventuele stoorbronnen (elektronische apparaten
en radiografische installaties).
• Trek de beschermfolie van het display van de zender en van het basisapparaat af.
• Open het batterijvak van de zender, door het deksel van het batterijvak naar beneden te
schuiven (zie markering) en het deksel op te heffen.
• Plaats er twee nieuwe batterijen 1,5 V AAA in. Batterijen met de juiste poolrichting
plaatsen.
• Open het batterijvak van het basisapparaat, door het deksel van het batterijvak naar
boven (zie markering)te schuiven en het deksel op te heffen.
• Plaats er twee nieuwe batterijen 1,5 V AAA in. Batterijen met de juiste poolrichting
plaatsen.
3.2 Ontvangst van de buitenwaarden
• Na het plaatsen van de batterijen worden de buitenwaarden van de buitenzender naar
het basisapparaat overgedragen.
• Het onderste display knippert het radiografische signaalsymbool.
• Druk op de IN/OUT toets op de achterkant van het apparaat. OUT verschijnt op het dis-
play. De buitenwaarden verschijnen op het display.
• Worden de buitenwaarden niet ontvangen, verschijnt „- -.-” op het display. Controleer
de batterijen en start nog een poging. Verwijder eventuele stoorbronnen.
•
U kunt de initiatie ook handmatig starten. Houdt de IN/OUT toets drie seconden ingedrukt.
3.3 Display
• De bovenste display geeft de binnentemperatuur aan.
• De onderste display geeft de binnenluchtvochtigheid aan.
• Met de IN/OUT toets kunt u de weergave van de buitenwaarden kiezen.
• Druk nog eenmaal op de IN/OUT toets. Op het display verschijnt het symbool voor de
automatische wissel ( ). De binnenwaarden en de buitenwaarden verschijnen afwis-
selend op het display.
• Druk nog eens op de IN/OUT toets om de automatische wissel te beëindigen.
• Met de °C/°F toets op de achterkant van het apparaat kunt u tussen de weergave van
de temperatuur in °C (graden Celsius) of °F (graden Fahrenheit) kiezen.
• Ligt de buitentemperatuur tussen -2 °C en +3 °C verschijnt het sneeuwvloksymbool
op de display van de buitentemperatuur.
3.4 Maximum- en minimumwaarden
• Druk op de MAX/MIN toets op de achterkant van het apparaat.
• De maximale binnenwaarden of buitenwaarden sinds de laatste terugstelling worden
aangetoond.
• Druk nog eens op de MAX/MIN toets.
• De minimale binnenwaarden of buitenwaarden sinds de laatste terugstelling worden
aangetoond.
•
Druk nog eens op de MAX/MIN toets om de display met de actuele waarden te verkrijgen.
• Houd de MAX/MIN toets ingedrukt, worden alle waarden op de huidige waarden gere-
tourneerd.
• Bij de handmatige zenderzoeker worden ook alle maximale en minimale buitenwaar-
den teruggezet.
4. Opstellen en bevestigen van het basisapparaat en buitenzender
• U kunt het apparaten met de uitklapbare standaard aan de achterkant opstellen of met
het ophangoog aan de muur bevestigen.
5. Schoonmaken en onderhoud
• Maak het apparaat met een zachte, enigszins vochtige doek schoon. Geen schuur- of
oplosmiddelen gebruiken!
• Verwijder de batterijen, als u het apparaat langere tijd niet gebruikt.
5.1 Batterijwissel
• Batterijsymbool (TX) – zender / batterijsymbool (RX) - basisapparaat
•Attentie: Bij een batterijwissel moet het contact tussen zender en ontvanger weer
worden hersteld – dus altijd beide apparaten van nieuwe batterijen voorzien of de
handmatige zenderzoeker starten.
6. Storingswijzer
Probleem Oplossing
Geen indicatie / ➜Batterijen met de juiste poolrichting plaatsen
Geen correcte indicatie ➜Vervang de batterijen
➜Druk op de RESET toets
Geen ontvangst ➜Batterijen van de buitenzender controleren
Indicatie „---” (geen accu’s gebruiken!)
➜Zender en basisapparaat opnieuw volgens de hand-
leiding in bedrijf stellen
➜Handmatig de buitenzender zoeken:
Houdt de IN/OUT toets drie seconden ingedrukt
➜Zoek een nieuwe plaats voor de buitenzender en/of
de ontvanger
➜Afstand tussen zender en basisapparaat verminderen
➜Verwijder stoorbronnen
7. Verwijderen
Batterijen en accu's mogen niet met het huisvuil worden weggegooid. Als
consument bent u wettelijk verplicht om gebruikte batterijen en accu's bij
uw dealer af te geven of naar de daarvoor bestemde containers volgens de
nationale of lokale bepalingen te brengen om een milieuvriendelijk verwij-
deren te garanderen.
De benamingen van de zware metalen zijn:
Cd=cadmium, Hg=kwikzilver, Pb=lood
Dit apparaat is gemarkeerd in overeenstemming met de EU-richtlijn (WEEE)
over het verwijderen van elektrisch en elektronisch afval.
Dit product mag niet met het huisvuil worden weggegooid. De gebruiker is
verplicht om de apparatuur af te geven bij een als zodanig erkende plek van
afgifte voor het verwijderen van elektrisch en elektronisch apparatuur om
een milieuvriendelijk verwijderen te garanderen.
8. Technische gegeven
Meetbereik
Binnentemperatuur: -10 °C…+50 °C (+14 °F…+122 °F)
Buitentemperatuur: -20 °C… +70 °C (-4 °F …+158 °F)
Luchtvochtigheid: 20 … 90% (Buiten / binnen)
Vrosttemperatuur: -2°C…+3°C (+29°F…+37°F)
Indicatie LL.L /HH.H: Temperatuur buiten het meetbereik
Reikwijdte / Transmissie maximaal 100 meter vrij veld / 868 MHz
frequentie: Attentie: Zorg ervoor dat er slechts één buitenzender
van dit type in gebruik is
Maximaal radiofrequentie
vermogen uitgezonden: < 25mW
Zendtijd: Buitenzender zendt elke 12 seconden - Het basis-
station ontvangt elke 60 seconden
Spanningsvoorziening: Basisapparaat: 2 x 1,5 V AAA (niet inclusief)
Buitenzender: 2 x 1,5 V AAA (niet inclusief)
Deze gebruiksaanwijzing of gedeelten eruit mogen alleen met toestemming van TFA Dostmann wor-
den gepubliceerd. De technische gegevens van dit apparaat zijn actueel bij het ter perse gaan en kun-
nen zonder voorafgaande informatie worden gewijzigd.
De nieuwste technische gegevens en informatie over uw product kunt u vinden door het invoeren van
het artikelnummer op onze homepage.
EU-conformiteitsverklaring
Hierbij verklaar ik, TFA Dostmann, dat het type radioapparatuur 30.3052 conform is met Richtlijn
2014/53/EU. De volledige tekst van de EU-conformiteitsverklaring kan worden geraadpleegd op het
volgende internetadres:
www.tfa-dostmann.de
E-Mail: [email protected]
TFA Dostmann GmbH & Co.KG, Zum Ottersberg 12, D-97877 Wertheim, Duitsland 08/16
Gebruiksaanwijzing
Cat.-Nr. 30.3052
TFA_No. 30.3052_Anleitung_08_16 19.08.2016 09:07 Uhr Seite 5

Instrucciones de uso
Cat. No. 30.3052
Termó-higrómetro inalámbrica con indicación de la helada
1. Antes de utilizar el dispositivo
•Lea detenidamente las instrucciones de uso.
•Si sigue las instrucciones de uso, evitará que se produzcan daños en el dispositivo
y no comprometerá sus derechos por vicios, prevista legalmente debido a un uso
incorrecto.
•No asumimos responsabilidad alguna por los daños originados por el incumpli-
miento de estas instrucciones de uso. Del mismo modo, no nos hacemos respon-
sables por cualquier lectura incorrecta y de las consecuencias que pueden derivar-
se de tales.
•Tenga en cuenta ante todo las advertencias de seguridad.
•Guarde estas instrucciones de uso en un sitio seguro.
2. Para su seguridad
• No emplee el dispositivo de modo distinto al especificado en estas instrucciones.
• No está permitido realizar reparaciones, transformaciones o modificaciones por cuen-
ta propia en el dispositivo.
¡Precaución!
Riesgo de lesiones:
• Mantenga los dispositivos y las pilas fuera del alcance de los niños.
• No tire las pilas al fuego, no las cortocircuite, desmonte ni recargue, ya que existe
riesgo de explosión.
• Las pilas contienen ácidos nocivos para la salud. Las pilas con un estado de carga
bajo deben cambiarse lo antes posible para evitar fugas. No utilice simultáneamente
pilas nuevas y usadas o pilas de diferente tipo.
• Utilice guantes protectores resistentes a productos químicos y gafas protectoras si
manipula pilas con fugas de líquido!
¡Advertencias importantes sobre la seguridad del producto!
• No exponga el dispositivo a temperaturas extremas, vibraciones ni sacudidas extremas.
• Protegerlo de la humedad.
• El sensor exterior está protegido contra las salpicaduras de agua, pero no es estanco
al agua. Busque un lugar protegido de la lluvia para poner el emisor.
3. Manejo
3.1 Puesta en marcha / Introducir las pilas
• Coloque los aparatos sobre una mesa a una distancia de 1,5 metros aprox. entre sí.
Evite las fuentes de interferencias próximas (aparatos electrónicos y sistemas de
radio).
• Despegue la película de protección de la pantalla del transmisor y de la estación básica.
• Abra el compartimiento de la pila del transmisor, tirando de la tapa hacia abajo (vea
marca) y levante la tapa.
• Introduzca dos pilas nuevas 1,5 V AAA. Asegúrese que las pilas estén colocadas con
la polaridad correcta.
• Abra el compartimiento de la pila de la estación básica, deslizando la tapa hacia arriba
(vea marca) y levante la tapa.
• Introduzca dos pilas nuevas 1,5 V AAA. Asegúrese que las pilas estén colocadas con
la polaridad correcta.
3.2 Recepción de los valores externos
• Después de insertar las pilas los valores externos se transmiten a la estación básica.
• El símbolo señal de radio parpadea en la pantalla inferior.
• Pulse la tecla IN/OUT en la parte posterior del dispositivo. OUT aparece en la pantalla.
• Los valores externos aparecen en la pantalla.
• Si no se reciben los valores externos, en la pantalla aparece “- -.-”. Compruebe las
pilas e inicie un nuevo intento. Elimine las posibles fuentes de interferencia.
• También puede comenzar la inicialización manualmente. Mantenga pulsada la tecla
IN/OUT durante tres segundos.
3.3 Pantalla
• La pantalla superior le indica la temperatura interna.
• La pantalla inferior le indica la humedad del aire.
• Con la tecla IN/OUT puede elegir los valores externos.
• Pulse la tecla IN/OUT otra vez. En la pantalla aparece el símbolo de cambio automático
( ). En la pantalla aparece alternativamente los valores externos e internos.
• Finalice el cambio automático, pulse otra vez la tecla IN/OUT .
• Con la tecla °C/°F en la parte posterior del dispositivo podrá seleccionar entre la
visualización de la temperatura en °C (grados Celsius) o °F (grados Fahrenheit).
• Si la temperatura exterior está entre -2 °C y +3 °C, el símbolo de los copos de nieve
aparece en la pantalla de la temperatura exterior.
3.4 Valores máximos y mínimos
• Pulse la tecla MAX/MIN en la parte posterior del dispositivo.
• Los valores más altos externos o internos tras la última reposición serán mostrados.
• Pulse la tecla MAX/MIN otra vez.
• Los valores más bajos externos o internos tras la última reposición serán mostrados.
• Pulse la tecla MAX/MIN otra vez para volver a la visualización de los valores actuales.
• Mantenga pulsada la tecla MAX/MIN todos los valores máximos y mínimos se borra-
rán y volverá a indicar los valores actuales.
• Durante una búsqueda manual de emisor todos los valores máximos y mínimos exter-
nos se borrarán también.
4. Instalación y fijación la estación básica y del emisor
• Con el soporte desplegable en el lado posterior, se puede colocar los dispositivos o se
puede colgar con el gancho en la pared.
5. Cuidado y mantenimiento
• Limpie el dispositivo con un paño suave, ligeramente humedecido. ¡No utilice medio
abrasivo ni disolventes!
• Extraiga las pilas si no va a usar el dispositivo por un largo período de tiempo.
5.1 Cambio de las pilas
• Símbolo de la pila (TX) – emisor / Símbolo de la pila (RX) - estación básica
•Atención: Al cambiar las pilas, debe volver a establecerse el contacto entre el emisor
y la estación básica; por esta razón, deben introducirse siempre pilas nuevas en
ambos dispositivos o iniciar una búsqueda manual de emisor.
6. Averías
Problema Solución
Ninguna indicación / ➜Asegúrese que las pilas estén colocadas con la
Indicación incorrecta polaridad correcta
➜Cambiar las pilas
➜Pulse la tecla RESET
Ninguna recepción ➜Comprobar las pilas del emisor exterior
de emisor (¡No utilizar baterías!)
Indicación “---” ➜Vuelva a la puesta en marcha del emisor y la estación
básica de acuerdo a las instrucciones
➜Iniciar una búsqueda manual de emisor: Pulse la tecla
IN/OUT durante tres segundos
➜Busque un nuevo lugar de instalación para la estación
básica
➜Reducir la distancia entre el emisor y la estación
básica
➜Elimine las fuentes de interferencia
7. Eliminación
Las pilas y baterías no pueden desecharse en ningún caso junto con la
basura doméstica. Como consumidor, está obligado legalmente a depositar
las pilas y baterías usadas de manera respetuosa con el medio ambiente en
el comercio especializado o bien en los centros de recogida y reciclaje pre-
vistos para ello según el reglamento nacional o local.
Las denominaciones de los metales pesados que contienen son:
Cd=cadmio, Hg=mercurio, Pb=plomo
Este dispositivo está identificado conforme a la Directiva de la UE sobre
residuos de aparatos eléctricos y electrónicos (WEEE).
No deseche este producto junto con la basura doméstica. El usuario está
obligado a llevar el dispositivo usado a un punto de recogida de aparatos
eléctricos y electrónicos acreditado para que sea eliminado de manera res-
petuosa con el medio ambiente.
8. Datos técnicos
Gama de medición
Temperatura interior: -10 °C…+50 °C (+14 °F…+122 °F)
Temperatura exterior: -20 °C… +70 °C (-4 °F…+158 °F)
Humedad: 20 … 90% (exterior / interior)
Temperatura de la helada: -2°C…+3°C (+29°F…+37°F)
Indicación LL.L /HH.H: Fuera DEL rango de temperatura
Alcance/ Frecuencia máximo de 100 m campo libre/868 MHz
de transmisión: Atención: Asegúrese que un sólo emisor externo del
tipo esté en uso
Potencia máxima de
radiofrecuencia transmitida: < 25mW
Tiempo de transmisión: Emisor envía cada 12 segundos - La estación base
recibe cada 60 segundos
Alimentación de tensión: Estación básica: Pilas 2 x 1,5 V AAA (no incluidas)
Emisor: Pilas 2 x 1,5 V AAA (no incluidas)
Estas instrucciones o extractos de las mismas no pueden ser publicados sin la autorización de la TFA
Dostmann. Los datos técnicos de este producto corresponden al estado en el momento de la impre-
sión y pueden ser modificados sin previo aviso.
Los actuales datos técnicos e informaciones sobre su producto los puede encontrar bajo el número
de artículo en nuestra página web.
Declaración UE de conformidad
Por la presente, TFA Dostmann declara que el tipo de equipo radioeléctrico 30.3052 es conforme con
la Directiva 2014/53/UE. El texto completo de la declaración UE de conformidad está disponible en la
dirección Internet siguiente:
www.tfa-dostmann.de
E-Mail: [email protected]
TFA Dostmann GmbH & Co.KG, Zum Ottersberg 12, D-97877 Wertheim, Alemania 08/16
Instrucciones de uso
Cat. No. 30.3052
TFA_No. 30.3052_Anleitung_08_16 19.08.2016 09:07 Uhr Seite 6
Table of contents
Languages:
Other TFA Thermometer manuals
Popular Thermometer manuals by other brands

ACU-RITE
ACU-RITE 00683A3 instruction manual

ACU-RITE
ACU-RITE 00891W3 instruction manual

Isotech
Isotech TTI 7 PLUS User maintenance manual/handbook

ACU-RITE
ACU-RITE 00782 quick start guide

Digitron
Digitron 1100T instruction manual

FLORABEST
FLORABEST FFGT 433 A1 Operating instructions and safety instructions