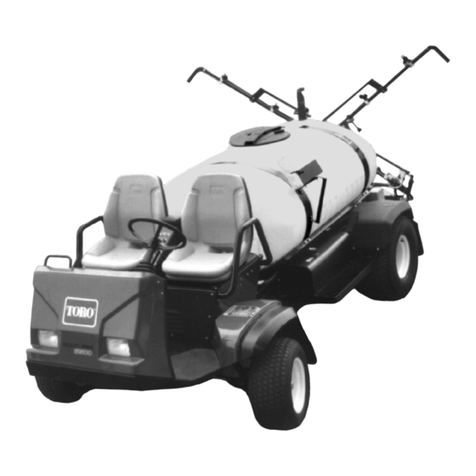
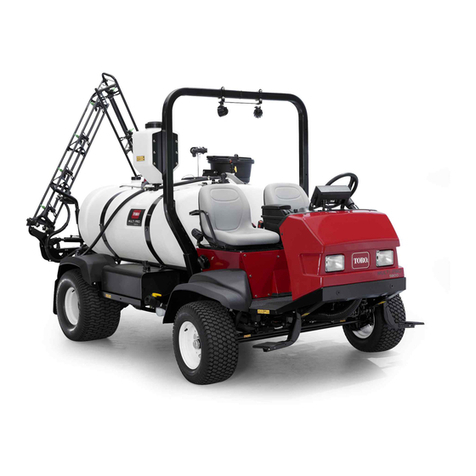
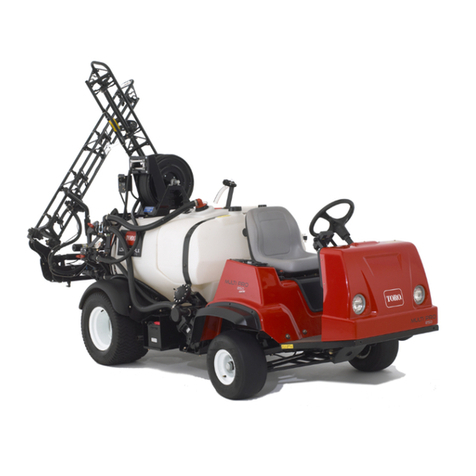
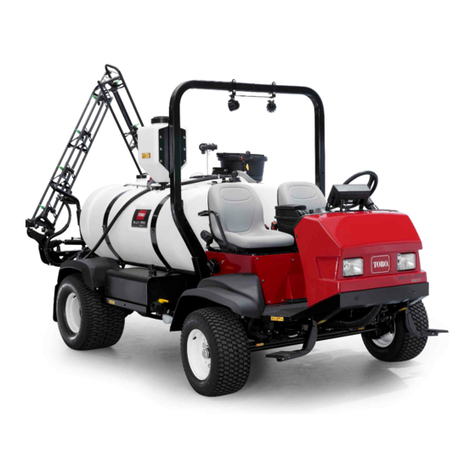
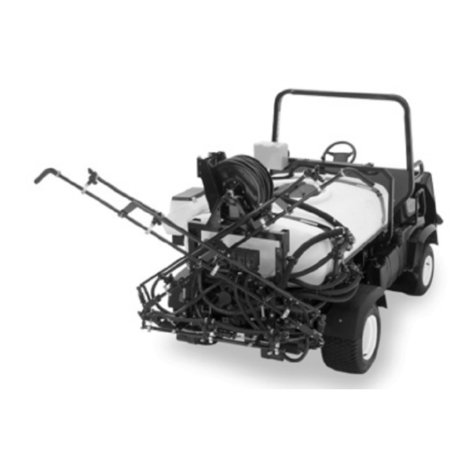
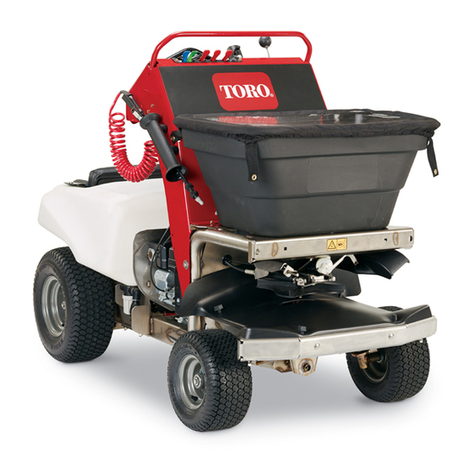
Toro 41188 User manual

FormNo.3393-823RevC
MultiPro®1750TurfSprayer
ModelNo.41188—SerialNo.315000001andUp
Registeratwww.Toro.com.
OriginalInstructions(EN)*3393-823*C

TheMultiProturfsprayerisadedicatedturfsprayapplication
vehicleandisintendedtobeusedbyprofessional,hired
operatorsincommercialapplications.Itisprimarilydesigned
forsprayingonwell-maintainedlawnsinparks,golfcourses,
sportselds,andoncommercialgrounds.
ThisproductcomplieswithallrelevantEuropeandirectives;
fordetails,pleaseseetheseparateproductspecicDeclaration
ofConformity(DOC)sheet.
WARNING
CALIFORNIA
Proposition65Warning
Thisproductcontainsachemicalorchemicals
knowntotheStateofCaliforniatocausecancer,
birthdefects,orreproductiveharm.
Theengineexhaustfromthisproduct
containschemicalsknowntotheStateof
Californiatocausecancer,birthdefects,
orotherreproductiveharm.
Useofthisproductmaycauseexposureto
chemicalsknowntotheStateofCalifornia
tocausecancer,birthdefects,orother
reproductiveharm.
Important:Thisengineisnotequippedwithaspark
arrestermufer.ItisaviolationofCaliforniaPublic
ResourceCodeSection4442touseoroperatetheengine
onanyforest-covered,brush-covered,orgrass-covered
land.Otherstatesorfederalareasmayhavesimilarlaws.
ThissparkignitionsystemcomplieswithCanadianICES-002.
Theenclosed
Engine Owner's Man ual
issuppliedfor
informationregardingtheUSEnvironmentalProtection
Agency(EPA)andtheCaliforniaEmissionControl
Regulationofemissionsystems,maintenance,and
warranty.Replacementsmaybeorderedthroughthe
enginemanufacturer.
Introduction
Readthismanualcarefullytolearnhowtooperateand
maintainyourproductproperly.Theinformationinthis
manualcanhelpyouandothersavoidinjuryandproduct
damage.AlthoughTorodesignsandproducessafeproducts,
youareresponsibleforoperatingtheproductproperlyand
safely.
YoumaycontactTorodirectlyatwww .Toro.comforproduct
safetyandoperationtrainingmaterials,accessoryinformation,
helpndingadealer,ortoregisteryourproduct.
Wheneveryouneedservice,genuineToroparts,oradditional
information,contactanAuthorizedServiceDealerorToro
CustomerServiceandhavethemodelandserialnumbersof
yourproductready.Figure1illustratesthelocationofthe
modelandserialnumbersontheproduct.
Figure1
1.Locationofthemodelandserialnumbers
ModelNo.
SerialNo.
Thismanualidentiespotentialhazardsandhassafety
messagesidentiedbythesafetyalertsymbol(Figure2),
whichsignalsahazardthatmaycauseseriousinjuryordeath
ifyoudonotfollowtherecommendedprecautions.
Figure2
1.Safetyalertsymbol.
Thismanualuses2wordstohighlightinformation.
Importantcallsattentiontospecialmechanicalinformation
andNoteemphasizesgeneralinformationworthyofspecial
attention.
©2015—TheToro®Company
8111LyndaleAvenueSouth
Bloomington,MN554202
Contactusatwww.Toro.com.
PrintedintheUSA.
AllRightsReserved

Contents
Safety...........................................................................4
SafeOperatingPractices...........................................4
ChemicalSafety.......................................................5
WhileOperating......................................................5
Maintenance...........................................................7
SoundPower..........................................................7
SoundPressure.......................................................7
Hand-ArmVibration...............................................7
WholeBodyVibration.............................................7
SafetyandInstructionalDecals.................................8
Setup...........................................................................14
1InstallingtheAnti-siphonFillReceptacle.................14
2CheckingtheBoomHingeSprings.........................14
3LearningMoreaboutYourProduct........................15
ProductOverview.........................................................16
Controls...............................................................18
Specications........................................................21
Attachments/Accessories........................................21
Operation....................................................................22
SafetyFirst............................................................22
PreparingtoDrivetheSprayerfortheFirst
Time.................................................................22
PerformingthePre-StartingChecks..........................23
DrivingtheSprayer.................................................23
BreakinginaNewSprayer.......................................24
AdjustingtheBoomstoLevel..................................24
OperatingtheSprayer.............................................25
FillingtheFreshWaterTank....................................26
FillingtheSprayTank..............................................26
OperatingtheBooms..............................................26
Spraying................................................................26
SprayingTips.........................................................27
CleaningtheSprayer...............................................27
UsingtheInfoCenterLCDDisplay...........................28
CalibratingtheSprayerFlow....................................30
CalibratingtheSprayerSpeed...................................31
CalibratingtheBoom-SectionBypassValves..............32
AgitationBypassValveKnobPosition.......................32
CalibratingtheAgitationBypassValve.......................33
AdjustingtheMasterBoomBypassValve...................33
LocatingthePump.................................................33
TransportingtheSprayer.........................................34
TowingtheSprayer.................................................34
Maintenance.................................................................35
RecommendedMaintenanceSchedule(s)......................35
DailyMaintenanceChecklist....................................36
NotationforAreasofConcern.................................37
PremaintenanceProcedures........................................38
JackingUptheSprayer............................................38
Lubrication...............................................................38
GreasingtheSprayer...............................................38
GreasingtheBoomHinges......................................38
EngineMaintenance..................................................39
CheckingtheAirIntakeScreen.................................39
ServicingtheAirCleaner.........................................39
ServicingtheEngineOil..........................................40
ChangingtheSparkPlugs........................................41
FuelSystemMaintenance...........................................42
ReplacingtheFuelFilter..........................................42
DrainingtheFuelTank...........................................42
ElectricalSystemMaintenance....................................43
LocatingtheFuses..................................................43
ServicingtheBattery...............................................43
DriveSystemMaintenance.........................................45
InspectingtheWheelsandTires...............................45
AdjustingtheFrontWheelToe-in.............................45
BrakeMaintenance....................................................46
CheckingtheBrakeFluid.........................................46
InspectingtheBrakes..............................................46
AdjustingtheParkingBrake.....................................46
HydraulicSystemMaintenance....................................47
CheckingtheTransaxle/HydraulicFluid....................47
ChangingTransaxle/HydraulicFluid.........................47
ReplacingtheHydraulicFilter..................................48
SpraySystemMaintenance..........................................48
InspectingtheHoses..............................................48
ChangingthePressureFilter....................................49
InspectingthePump...............................................49
InspectingtheNylonPivotBushings.........................49
SprayerFlowDiagram.............................................51
Cleaning...................................................................52
CleaningtheFlowmeter..........................................52
CleaningtheSuctionStrainer...................................52
CleaningtheSprayerValves.....................................53
Storage........................................................................62
Troubleshooting...........................................................64
3

Safety
Improperuseormaintenancebytheoperatororownercan
resultininjury.Toreducethepotentialforinjury,comply
withthesesafetyinstructionsandalwayspayattentionto
thesafetyalertsymbol,whichmeansCaution,Warning,or
Danger—“personalsafetyinstruction.”Failuretocomply
withtheinstructionmayresultinpersonalinjuryordeath.
ThemachinemeetstherequirementsofSAEJ2258.
SafeOperatingPractices
Important:Themachineisdesignedprimarilyasan
off-roadvehicleandisnotintendedforextensiveuseon
publicroads.Whenusingthemachineonpublicroads,
followalltrafcregulationsanduseanyadditional
accessoriesthatmayberequiredbylaw,suchaslights,
turnsignals,slowmovingvehicle(SMV)sign,and
othersasrequired.
TheMulti-Pro1750TurfSprayerwasdesignedandtestedto
offersafeservicewhenoperatedandmaintainedproperly.
Althoughhazardcontrolandaccidentpreventionpartiallyare
dependentuponthedesignandcongurationofthemachine,
thesefactorsarealsodependentupontheawareness,concern,
andpropertrainingofthepersonnelinvolvedintheoperation,
maintenanceandstorageofthemachine.Improperuseor
maintenanceofthemachinecanresultininjuryordeath.
NotalloftheattachmentsthatadapttotheMulti-Pro1750
TurfSprayerarecoveredinthismanual.Seethespecic
Operator’sManualprovidedwitheachattachmentfor
additionalsafetyinstructions.Readthesemanuals.
Toreducethepotentialforinjuryordeath,complywiththe
followingsafetyinstructions:
Supervisor'sResponsibilities
•Makesurethatoperatorsarethoroughlytrainedand
familiarwiththeOperator'sManual,EngineManual,andall
labelsonthesprayer.
•Establishyourownspecialproceduresandworkrules
forunusualoperatingconditions(e.g.slopestoosteep
forsprayeroperation).
Training
•ReadtheOperator'sManualandothertrainingmaterial
beforeoperatingthemachine.
Note:Iftheoperator(s)ormechanic(s)cannotreadthe
manuallanguage,itistheowner'sresponsibilitytoexplain
thismaterialtothem.
•Becomefamiliarwiththesafeoperationoftheequipment,
operatorcontrols,andsafetysigns.
•Alloperatorsandmechanicsshouldbetrained.The
ownerisresponsiblefortrainingtheusers.
•Neverallowuntrainedpeopletooperateorservicethe
equipment.
Note:Localregulationsmayrestricttheageofthe
operator.
•Theowner/usercanpreventandisresponsiblefor
accidentsorinjuriesoccurringtohimselforherself,other
people,ordamagetoproperty.
BeforeOperating
•Operatethemachineonlyafterreadingandunderstanding
thecontentsofthismanual.
•Neverallowchildrentooperatethesprayer.
•Neverallowotheradultstooperatethesprayerwithout
rstreadingandunderstandingtheOperator'sManual.
Onlytrainedandauthorizedpersonsshouldoperatethis
sprayer.Makesurethatalloperatorsarephysicallyand
mentallycapableofoperatingthesprayer.
•Thissprayerisdesignedtocarryonlyyou,theoperator.
Nevercarryanypassengersonthesprayer.
•Neveroperatethesprayerwhenundertheinuence
ofdrugsoralcohol.Evenprescriptiondrugsandcold
medicinescancausedrowsiness.
•Donotdrivethesprayerwhenyouaretired.Besureto
takeoccasionalbreaks.Itisveryimportantthatyoustay
alertatalltimes.
•Becomefamiliarwiththecontrolsandknowhowtostop
theenginequickly.
•Keepallshields,safetydevices,anddecalsinplace.Ifa
shield,safetydevice,ordecalismalfunctioning,illegible,
ordamaged,repairorreplaceitbeforeoperatingthe
machine.
•Wearappropriateclothing;includingahardhat,safety
glasses,longpants,safetyshoes,rubberboots,gloves,and
hearingprotection.Donotwearloosettingclothingor
jewelrywhichcouldgetcaughtinmovingpartsandcause
personalinjury.
Note:Wearingsafetyglasses,safetyshoes,longpants,
andahelmetisadvisableandrequiredbysomelocal
safetyandinsuranceregulations.
CAUTION
Thismachineproducessoundlevelsinexcess
of85dBAattheoperator’searandcancause
hearinglossthroughextendedperiodsof
exposure.
Wearhearingprotectionwhenoperatingthis
machine.
•Avoiddrivingwhenitisdark,especiallyinunfamiliar
areas.Ifyoumustdrivewhenitisdark,besuretodrive
4

cautiously,usetheheadlights,andevenconsideradding
additionallights.
•Beextremelycarefulwhenoperatingaroundpeople.
Alwaysbeawareofwherebystandersmightbeandkeep
themawayfromtheworkarea.
•Beforeoperatingthesprayer,alwayscheckthedesignated
areasofthesprayerthatarestatedinthePre-Starting
ChecksintheOperationsection.Ifthemachinedoes
notfunctioncorrectlyorisdamagedinanyway,donot
usethesprayer.Makesurethattheproblemiscorrected
beforethesprayerorattachmentisoperated.
•Makesuretheoperator’sareaiscleanandfreefrom
chemicalresidueanddebrisbuildup.
•Ensurethatalluidlineconnectorsaretightandallhoses
areingoodconditionbeforeapplyingpressuretothe
system.
•Sincefuelishighlyammable,handleitcarefully.
–Useanapprovedfuelcontainer.
–Donotremovethecapfromthefueltankwhenthe
engineishotorrunning.Allowtheenginetocool
beforefuelingthemachine.
–Donotsmokewhilehandlinggasoline.
–Fillthefueltankofthemachineoutdoors.
–Fillthefueltankofthemachinetoabout25mm(1
inch)belowthetopofthetank(thebottomofthe
llerneck).Donotoverllthefueltank.
–Wipeupanyspilledfuel.
ChemicalSafety
WARNING
•Chemicalsubstancesusedinthesprayersystem
maybehazardousandtoxictoyou,bystanders,
animals,plants,soilsorotherproperty.
•Carefullyreadandfollowthechemicalwarning
labelsandMaterialSafetyDataSheets(MSDS)
forallchemicalsusedandprotectyourself
accordingtothechemicalmanufacturer's
recommendations.Ensurethataslittleskin
aspossibleisexposedwhileusingchemicals.
UseappropriatePersonalProtectiveEquipment
(PPE)toguardagainstpersonalcontactwith
chemicals,suchas:
–safetyglasses,goggles,and/orfaceshield
–respiratororltermask
–chemicalresistantgloves
–rubberbootsorothersubstantialfootwear
–hearingprotection
–cleanchangeofclothes,soap,anddisposable
towels,tobekepton-hand,intheeventof
achemicalspill.
Important:Keepinmindthattheremaybemorethan
onechemicalused,andinformationoneachchemical
shouldbeassessed.
Refusetooperateorworkonthesprayerifthis
informationisnotavailable!
Beforeworkingonasprayersystem,makesurethatthe
systemhasbeentriplerinsedandneutralizedaccording
totherecommendationsofthechemicalmanufacturer(s)
andallofthevalveshavebeencycled3times.
Verifythereisanadequatesupplyofcleanwaterand
soapnearby,andimmediatelywashoffanychemicals
thatcontactyou.
•Obtainpropertrainingbeforeusingorhandling
chemicals.
•Usethecorrectchemicalforthejob.
•Followthechemicalmanufacturer'sinstructionsfor
thesafeapplicationofthechemical.Donotexceed
recommendedsystemapplicationpressure.
•Donotll,calibrate,orcleantheunitwhenpeople,
especiallychildren,orpetsareinthearea.
•Handlechemicalsinawellventilatedarea.
•Havecleanwateravailableespeciallywhenllingthe
spraytank.
•Donoteat,drink,orsmokewhileworkingwithchemicals.
•Donotcleanspraynozzlesbyblowingthroughthemor
placinginmouth.
•Alwayswashyourhandsandotherexposedareasassoon
aspossibleafteryounishworkingwithchemicals.
•Keepchemicalsintheiroriginalpackagesandstoredin
asafelocation.
•Properlydisposeofunusedchemicalsandchemical
containersasinstructedbythechemicalmanufacturer
andyourlocalcodes.
•Chemicalsandfumesaredangerous;neverenterthetank
orplaceyourheadoverorintheopeningofatank.
•Followalllocal,state,andfederalregulationsfor
spreadingorsprayingchemicals.
WhileOperating
WARNING
Engineexhaustcontainscarbonmonoxide,which
isanodorless,deadlypoisonthatcankillyou.
Donotrunengineindoorsorinanenclosedarea.
•Theoperatorshouldremainseatedwheneverthesprayer
isinmotion.Theoperatorshouldkeepbothhandson
thesteeringwheelwheneverpossible.Keepyourarms
andlegswithinthesprayerbodyatalltimes.
•Alwayswatchoutforandavoidlowoverhangssuchas
treelimbs,doorjambs,andoverheadwalkways.Make
surethereisenoughroomoverheadtoeasilyclearthe
sprayerandyourhead.
5

•Failuretooperatethesprayersafelymayresultinan
accident,tipoverofthesprayer,andseriousinjuryor
death.Drivecarefully.Topreventtippingorlossof
control:
–Useextremecaution,reducespeed,andmaintain
asafedistancearoundsandtraps,ditches,creeks,
ramps,unfamiliarareas,oranyareasthathaveabrupt
changesingroundconditionsorelevation.
–Watchforholesorotherhiddenhazards.
–Useextracautionwhenoperatingthesprayeronwet
surfaces,inadverseweatherconditions,athigher
speeds,orwithafullload.Stoppingtimeanddistance
willincreasewithafullload.
–Avoidsuddenstopsandstarts.Donotgofrom
reversetoforwardorforwardtoreversewithoutrst
comingtoacompletestop.
–Slowdownbeforeturning.Donotattemptsharp
turnsorabruptmaneuversorotherunsafedriving
actionsthatmaycausealossofsprayercontrol.
–Beforebackingup,looktotherearandensurethat
nooneisbehindyou.Backupslowly.
–Watchoutfortrafcwhenyouarenearorcrossing
roads.Alwaysyieldtherightofwaytopedestrians
andothervehicles.Thissprayerisnotdesignedfor
useonstreetsorhighways.Alwayssignalyourturns
orstopearlyenoughsothatotherpeopleknowwhat
youplantodo.Obeyalltrafcrulesandregulations.
–Theelectricalandexhaustsystemsofthesprayercan
producesparkscapableofignitingexplosivematerials.
Neveroperatethesprayerinornearanareawhere
thereisdustorfumesintheairwhichareexplosive.
–Ifyouareeverunsureaboutsafeoperation,stop
workandaskyoursupervisor.
•Donottouchtheengineormuferwhiletheengineis
runningorsoonafterithasstopped.Theseareasmaybe
hotenoughtocauseburns.
•Ifthemachineevervibratesabnormally,stopimmediately,
waitforallmotiontostop,andinspectthesprayerfor
damage.Repairalldamagebeforeresumingoperation.
•Beforegettingoffoftheseat:
1.Stopthemovementofthemachine.
2.PlacetherangeselectorinNeutralandsetthe
parkingbrake.
3.TurntheignitionkeytoOff.
4.Removetheignitionkey.
Important:Donotparkthemachineonan
incline.
•Lightningcancausesevereinjuryordeath.Iflightning
isseenorthunderisheardinthearea,donotoperate
themachine;seekshelter.
Braking
•Slowdownbeforeyouapproachanobstacle.Thisgives
youextratimetostoporturnaway.Hittinganobstacle
candamagethesprayeranditscontents.Moreimportant,
itcaninjureyou.
•GrossVehicleWeight(GVW)hasamajorimpactonyour
abilitytostopand/orturn.Heavyloadsandattachments
makeasprayerhardertostoporturn.Theheavierthe
load,thelongerittakestostop.
•Turfandpavementaremuchmoreslipperywhenthey
arewet.Itcantake2to4timesaslongtostoponwet
surfacesasondrysurfaces.Ifyoudrivethroughstanding
waterdeepenoughtogetthebrakeswet,theywillnot
workwelluntiltheyaredry.Afterdrivingthroughwater,
youshouldtestthebrakestomakesuretheywork
properly.Iftheydonot,driveslowlywhileputtinglight
pressureonthebrakepedal.Thiswilldrythebrakesout.
OperatingonHillsandRoughTerrain
Operatingthesprayeronahillmaycausetippingorrolling
ofthesprayer,ortheenginemaystallandyoucouldlose
headwayonthehill.Thiscouldresultinpersonalinjury.
•Donotacceleratequicklyorslamonthebrakeswhen
backingdownahill,especiallywithaload.
•Neverdriveacrossasteephill;alwaysdrivestraightupor
downorgoaroundthehill.
•Iftheenginestallsoryoubegintoloseheadwaywhile
climbingahill,graduallyapplythebrakesandslowlyback
straightdownthehill.
•Turningwhiletravelingupordownhillscanbedangerous.
Ifyouhavetoturnwhileonahill,doitslowlyand
cautiously.Nevermakesharporfastturns.
•Heavyloadsaffectstability.Reducetheweightoftheload
andyourspeedwhenoperatingonhills.
•Avoidstoppingonhills,especiallywithaload.Stopping
whilegoingdownahillwilltakelongerthanstopping
onlevelground.Ifthesprayermustbestopped,avoid
suddenspeedchanges,whichmayinitiatetippingor
rollingofthesprayer.Donotslamonthebrakes
whenrollingbackward,asthismaycausethesprayerto
overturn.
•Usetheseatbeltwhenoperatingthemachineandbe
certainthatitcanbereleasedquicklyintheeventofan
emergency.
•Donotremoveoraltertherolloverprotectionsystem
(ROPS).
•Reducespeedandloadwhenoperatingonroughterrain,
unevenground,andnearcurbs,holes,andothersudden
changesinterrain.Loadsmayshift,causingthesprayer
tobecomeunstable.
6
WARNING
Suddenchangesinterrainmaycauseabrupt
steeringwheelmovement,possiblyresultingin
handandarminjuries.
•Reduceyourspeedwhenoperatingonroughterrainand
nearcurbs.
•Gripthesteeringwheellooselyaroundtheperimeter.
Keepyourhandsclearofthesteeringwheelspokes.
Loading
Theweightofthecargocanchangethesprayercenterof
gravityandsprayerhandling.Toavoidlossofcontroland
personalinjury,followtheseguidelines:
•Reducetheweightoftheloadwhenoperatingonhills
androughterraintoavoidtippingoroverturningofthe
sprayer.
•Liquidloadscanshift.Thisshiftinghappensmostoften
whileturning,goingupordownhills,suddenlychanging
speeds,orwhiledrivingoverroughsurfaces.Shifting
loadscancausethesprayertotipover.
•Whenoperatingwithaheavyload,reduceyourspeedand
allowforsufcientbrakingdistance.Donotsuddenly
applythebrakes.Useextracautiononslopes.
•Beawarethatheavyloadsincreaseyourstoppingdistance
andreduceyourabilitytoturnquicklywithouttipping
over.
Maintenance
•Onlypermitqualiedandauthorizedpersonnelto
maintain,repair,adjust,orinspectthesprayer.
•Beforeservicingormakingadjustmentstothemachine,
stoptheengine,settheparkingbrake,andremovethekey
fromtheignitiontopreventsomeonefromaccidentally
startingtheengine.
•Tomakesurethattheentiremachineisingoodcondition,
keepallnuts,bolts,andscrewsproperlytightened.
•Toreducethepotentialforre,keeptheengineareafree
ofexcessivegrease,grass,leaves,andaccumulationofdirt.
•Neveruseanopenametocheckthelevelorleakageof
fuelorbatteryelectrolyte.
•Iftheenginemustberunningtoperformamaintenance
adjustment,keepyourhands,feet,clothing,andanyparts
ofyourbodyawayfromtheengineandanymovingparts.
Keepeveryoneaway.
•Donotuseopenpansoffuelorammablecleaning
uidswhencleaningparts.
•Donotadjustthegroundspeedgovernor.Toensure
safetyandaccuracy,haveanAuthorizedToroDistributor
checkthegroundspeed.
•Keepyourbodyandhandsawayfrompinholeleaksor
nozzlesthatejecthighpressureuid.Usecardboardor
papertondleaks.Fluidescapingunderpressurecan
penetrateskinandcauseinjuryrequiringsurgerywithin
afewhoursbyaqualiedsurgeon;otherwise,gangrene
mayresult.
•Ifmajorrepairsareeverneededorassistanceisrequired,
contactanAuthorizedToroDistributor.
•Tobesureofoptimumperformanceandsafety,
alwayspurchasegenuineTororeplacementpartsand
accessories.Replacementpartsandaccessoriesmadeby
othermanufacturerscouldbedangerous.Alteringthis
sprayerinanymannerthatmayaffectsprayeroperation,
performance,durability,oritsuse,mayresultininjuryor
death.Suchusecouldvoidtheproductwarranty.
SoundPower
Thisunithasaguaranteedsoundpowerlevelofof98dBA,
whichincludesanUncertaintyValue(K)of1dBA.
Soundpowerlevelwasdeterminedaccordingtothe
proceduresoutlinedinISO11094.
SoundPressure
Thisunithasasoundpressurelevelattheoperator’searof86
dBA,whichincludesanUncertaintyValue(K)of1dBA.
Soundpressurelevelwasdeterminedaccordingtothe
proceduresoutlinedinENISO11201.
Hand-ArmVibration
Measuredvibrationlevelforrighthand=3.00m/s2
Measuredvibrationlevelforlefthand=3.20m/s2
UncertaintyValue(K)=1.6m/s2
Measuredvaluesweredeterminedaccordingtotheprocedures
outlinedinENISO20643.
WholeBodyVibration
Measuredvibrationlevel=0.58m/s2
UncertaintyValue(K)=0.29m/s2
Measuredvaluesweredeterminedaccordingtotheprocedures
outlinedinEN1032.
7

SafetyandInstructionalDecals
Safetydecalsandinstructionsareeasilyvisibletotheoperatorandarelocatednearanyareaofpotential
danger.Replaceanydecalthatisdamagedorlost.
117–2718
106-9206
1.Wheeltorquespecications
2.ReadtheOperator'sManual.
120–0616
1.Warning—readtheOperator’sManual;usefresh,clean
waterforrst-aidwashing.
120–0617
1.Severinghazardofhand,
pinchingpoint—keep
awayfromactuatedjoints.
2.Crushinghazard—keep
bystandersawayfromthe
machine.
120–0622
1.Warning—readthe
Operator’sManual.
3.Chemicalburnhazard;
toxicgasinhalation
hazard—wearhandand
skinprotection;weareye
andrespiratoryprotection.
2.Warning—donotenterthe
sprayertank.
125–4125
1.Turnthethrottle
lock/speedlockon/off
3.Turnthefoammakers
on/off(optional)
2.Sonicboom(optional)
8

130-8293
1.Sprayeroff5.Increasespeed
2.Sprayeron6.Decreasespeed
3.Engineon7.Agitationon
4.Engineoff8.Agitationoff
125–4128
1.Raise/lowerleftboom4.Engine—run
2.Raise/lowerrightboom5.Engine—stop
3.Engine—start
125–4129
1.Leftboom3.Rightboom
2.Centerboom
125–6694
1.Tiedownlocation
125–8113
1.Gearselection5.Automatic(optional)
2.Lockdifferentiallock6.Manual(optional)
3.Unlockdifferentiallock7.Rewindhosereel
(optional)
4.Toggleheadlightson/off
9

125–8114
1.Ratelockout
locked/unlocked
2.Togglerinsepumpon/off
127–3942
1.ReadtheOperator’s
Manualforinformationon
fuses.
6.7.5A
2.10A—Ignition7.7.5A
3.15A—Sprayerboom8.2A—TEC
4.15A—Headlights9.30A—Rinsetank
5.7.5A
127–3935
1.Parkingbrake3.Forinformationon
stoppingtheengine,read
theOperator’sManual—1)
Pressdownonthebrake
pedal;2)Setthegearto
neutral;3)Engagethe
parkingbrake;4)Release
thebrakepedal;5)Turn
theignitionkeytothe
enginestopposition;6)
Removethekeyfromthe
ignition.
2.Forinformationonstarting
theengine,readthe
Operator’sManual—1)
Engagetheparkingbrake;
2)Insertthekeyintothe
ignition;3)Turnthekeyto
theenginerunposition.
4.Entanglementhazard,
belt—keepawayfrom
movingparts;keepall
guardsandshieldsin
place.
10

127–3937
1.Warning—donotstep.3.Entanglementhazard,
belt—keepawayfrom
movingparts;keepall
guardsandshieldsin
place.
2.Warning—keepawayfrom
hotsurfaces.
127–3939
1.Warning—readthe
Operator’sManual;always
wearaseatbeltwhen
operatingthemachine;do
nottipthemachine.
3.Cutting/dismemberment
hazard—keeparmsand
legsinsidethevehicleat
alltimes.
2.Fallinghazard—donot
carrypassengersonthe
sprayertank.
4.Warning—donotdrill,
weld,oraltertheROPS
system.
11

127–3938
1.ReadtheOperator’sManual.
127–3941
1.Warning—donotoperatethemachinewithoutpropertraining;
readtheOperator’sManual.
4.Electricalshockhazard,overheadpowerlines—checkthe
areaforoverheadpowerlinesbeforeoperatingthemachine
inthearea.
2.Warning—keepbystandersawaywhenoperatingthe
machine.
5.Warning—Engagetheparkingbrake,stoptheengine,and
removethekeyfromtheignitionbeforeleavingthemachine.
3.Warning—keepawayfrommovingparts;keepallguardsand
shieldsinplace.
6.Tippinghazard—Moveslowlywhenthesprayertankisfull;
moveslowlywhendrivingoverroughterrain;donotturnat
highspeed;turnslowly;driveslowlywhendrivingacrossor
upslopes.
12

127-6976
1.Decrease2.Increase
127-6979
1.Pump-returnow3.Agitationow
2.Flow
127-6981
1.Bypass-returnow3.Boomspray
2.Flow
127-6982
1.Bypass-returnow2.Boomspray
127-6984
1.Flow2.Tank-returnow
13

Setup
Note:Determinetheleftandrightsidesofthemachine
fromthenormaloperatingposition.
1
InstallingtheAnti-siphonFill
Receptacle
Partsneededforthisprocedure:
190°tting
1Quickcoupler
1Hoseadapter
1Fillreceptaclebracket
1Flange-headbolt,5/16x3/4inch
1Anti-siphonhose
Procedure
1.Placethellreceptaclebracketoverthethreaded
holeinthetankandsecureitwithaange-headbolt
(5/16x3/4inch)(Figure3).
Figure3
1.Fillreceptaclebracket5.Quickcoupler
2.Threadedholeinthetank6.Hoseadapter
3.Flangebolt,5/16x3/4inch7.Anti-siphonhose
4.90°elbowtting
2.Placethethreadedendofthe90°elbowttingthrough
thebracketandthreadthequickcouplerontoit,
securingittothebracket(Figure3).
Note:Installthettingwiththeopenendpointing
towardthelargeopeninginthebracketandtowardthe
tankopeningsothewaterwillarcintothetankwhen
youllit.
3.Installthehoseadapterintothequickcoupler(Figure
3).
4.Locktheadapterintoplacebyswingingthelevers
towardtheadapterandthensecurethemwiththe
hairpincotters(Figure3).
5.Installtheanti-siphonhosethroughthelargeopening
onthebracketandontothebarbedendofthe90°
elbowtting(Figure3).
Important:Donotlengthenthehosetoallow
contactwiththetankuids.
2
CheckingtheBoomHinge
Springs
NoPartsRequired
Procedure
Important:Operatingthespraysystemwiththeboom
hingespringsundertheincorrectcompressioncould
damagetheboomassembly.Measurethespringsand
usethejamnuttocompressthespringsto4cm(1–1/2
inches)ifnecessary.
Thesprayerisshippedwiththeboomextensionsswung
forwardtofacilitatepackagingofthemachine.Thesprings
arenotfullytightenedatthetimeofmanufacturetoallowthe
boomstobeinthispositionfortransit.Beforeoperating
themachine,thespringsmustbeadjustedtothecorrect
compression.
1.Ifnecessary,removethepackingcomponentsthat
securetherightandleftextensionboomsduring
shipping.
2.Supporttheboomswhiletheyareextendedtothe
sprayposition.
3.Attheboomhinge,measurethecompressionofthe
upperandlowerspringswhiletheboomsareintheir
extendedposition(Figure4).
A.Allspringsmustbecompresseduntiltheymeasure
4cm(1–1/2inches).
B.Usethejamnuttocompressanyspringthat
measuregreaterthan4cm(1–1/2inches).
14

Figure4
1.Boomhingespring2.Jamnut
4.Repeattheprocedureforeachspringonbothboom
hinges.
5.Movetheboomsintothetransport“X”position.See
UsingtheBoomTransportCradle(page26)formore
information.
3
LearningMoreaboutYour
Product
Partsneededforthisprocedure:
1Ignitionkey
1Operator'sManual
1EngineOperator'sManual
1PartsCatalog
1Operatortrainingmaterial
1Registrationcard
1Pre-deliveryInspectionSheet
Procedure
1.Readthemanuals.
2.Viewtheoperatortrainingmaterial.
3.CompletetheregistrationcardandreturnittoToro.
4.Storethedocumentationinasafeplace.
15

ProductOverview
G028 639
1
2
3
4
5
6
7
8
10
11
12 9
Figure5
1.ROPSbar4.Valvemanifolds7.Boomcontrolcylinder10.Leftboom
2.Anti-siphonreceptacle5.Rightboom8.Agitationthrottlevalve11.Fueltank
3.Chemicaltanklid6.Centerboom9.Pressurelter12.Parkingbrake
16

Figure6
1.Rightboom4.Freshwatertank
2.Boomtransportcradle5.Operator’sseat
3.Leftboom
17

Controls
Figure7
1.InfoCenter6.Rangeselector11.Hosereelrewindbutton
(optional)
16.Supervisor(ratelockout)
switch
2.Foammarkerswitch
(optional)
7.Choke12.Agitationswitch17.Masterboomswitch
3.Pressuregauge8.Headlightswitch13.Spraypressureswitch18.Boomliftswitches
4.Engineswitch9.Differentiallock14.Pumpswitch19.Throttle/speedlockswitch
5.Boom-Sectionswitches10.Sonicboomswitch
(optional)
15.Rinsetankswitch(optional)20.Sonicboomindicator
(optional)
18

AcceleratorPedal
Theacceleratorpedal(Figure8)givesyoutheabilitytovary
thegroundspeedofthesprayer.Pressingthepedalincreases
groundspeed.Releasingthepedalwillslowthesprayerand
theenginewillidle.
Figure8
1.Clutchpedal3.Acceleratorpedal
2.Brakepedal
ClutchPedal
Theclutchpedal(Figure8)mustbefullypressedtodisengage
clutchwhenstartingtheengineorshiftingtransmissiongears.
Releasethepedalsmoothlywhenthetransmissionisingear
topreventunnecessarywearonthetransmissionandother
relatedparts.
Important:Donotridetheclutchpedalduring
operation.Theclutchpedalmustbefullyoutorthe
clutchwillslipcausingheatandwear.Neverholdthe
vehiclestoppedonahillusingtheclutchpedal.Damage
totheclutchmayoccur.
BrakePedal
Usethebrakepedaltostoporslowthesprayer(Figure8).
CAUTION
Brakescanbecomewornorcanbeadjusted
incorrectlyresultinginpersonalinjury.
Ifbrakepedaltravelstowithin2.5cm(1inch)ofthe
sprayeroorboard,adjustorrepairthebrakes.
ParkingBrake
Theparkingbrakeisalargelevertotheleftoftheseat(Figure
9).Engagetheparkingbrakewheneveryouplanonleaving
theseattopreventaccidentalmovementofthesprayer.To
engagetheparkingbrake,pullupandbackonthelever.To
disengage,pushitforwardanddown.Ifthesprayerisparked
onasteepgrade,applytheparkingbrakeandplaceblocksat
thedownhillsideofthewheels.
Figure9
1.Parkingbrakelever
ChokeControl
Thechokecontrolisasmallknobbehindtherangeselector
(Figure7).Tostartacoldengine,pullthechokecontrolup.
Aftertheenginestarts,regulatethechoketokeeptheengine
runningsmoothly.Assoonaspossible,pushthecontrol
downtotheOffposition.Awarmenginerequireslittleor
nochoking.
RangeSelector
Therangeselector(Figure7)has5positions:3forward
speeds,Neutral,andReverse.Theenginewillstartonlywhen
therangeselectorisintheNeutralposition.
IgnitionSwitch
Theignitionswitch(Figure7),usedtostartandstopthe
engine,has3positions:Stop,Run,andStart.Rotatethekey
clockwisetotheStartpositiontostarttheengineandrelease
ittotheRunpositionwhenstarted.Rotatethekeytothe
Stoppositiontostoptheengine.
HeadlightSwitch
Toggletheswitchtooperatetheheadlights(Figure7).Pushit
forwardtoturnthelightsonandrearwardtoturnthemoff.
Throttle/SpeedLockSwitch
WhentherangeselectorisintheNeutralposition,youcan
usetheacceleratorpedaltospeeduptheengine,thenpush
theswitchbelowtheInfoCenterforwardtosettheengineat
thatspeed.Thisisnecessarytorunthechemicalagitation
whilestationaryoroperatingattachmentssuchasthehand
sprayer(Figure7).
19

Important:TherangeselectormustbeintheNeutral
positionandtheparkingbrakemustbesetfortheswitch
towork.
FuelGauge
Thefuelgaugeislocatedontopofthefueltank,ontheleft
sideofthemachine,andshowstheamountoffuelinthetank.
MasterBoomSwitch
Themasterboomswitch(Figure7)islocatedonthesideof
theconsoleandtotherightoftheoperator.Itallowsyouto
startorstopthesprayoperation.Presstheswitchtoenable
ordisablethespraysystem.
Boom-SectionSwitches
Theboomswitchesarelocatedonthecontrolpanel(Figure
7).Toggleeachswitchforwardtoturnthecorresponding
boomsectiononandrearwardtoturnthemoff.Whenthe
switchisturnedon,alightontheswitchilluminates.These
switcheswillonlyaffectthespraysystemwhenthemaster
boomswitchison.
PumpSwitch
Thepumpswitchislocatedonthecontrolpaneltotheright
oftheseat(Figure7).Togglethisswitchforwardtorunthe
pumporrearwardtostopthepump.
Important:Thepumpswitchwillonlyengagewhenthe
engineisatlowidletoavoiddamagingthepumpdrive.
ApplicationRateSwitch
Theapplicationrateswitchislocatedonthecontrolpanelto
therightoftheseat(Figure7).Pressandholdtheswitch
forwardtoincreasethespraysystempressure,orpressand
holditrearwardtodecreasethepressure.
Supervisor(RateLockout)Switch
Thesupervisorswitchislocatedonthecontrolpaneltothe
rightoftheseat(Figure7).Turnthekeycounterclockwise
tothelockedpositiontodisabletheapplicationrateswitch,
therebykeepinganyonefromaccidentallychangingthe
applicationrate.Turnthekeyclockwisetotheunlocked
positiontoenabletheapplicationrateswitch.
BoomLift
Theboomliftswitchesarelocatedonthecontrolpaneland
areusedtoraisetheleftandrightboomrespectively.
HourMeter
Thehourmeterindicatesthetotalnumberofhoursthe
enginehasrun.Thisnumberisdisplayedontherstscreenof
theInfoCenter.Thehourmeterstartstofunctionwhenever
thekeyisturnedtotheRunposition.
SonicBoom(Optional)
TheSonicBoomswitchisarockerswitchusedtooperate
theSonicBoom.Toggletheswitchforwardforautomatic,
rearwardformanualandcenterforOff.
FoamMarkerSwitchLocations
(Optional)
IfyouinstalltheFoamMarkerkit,youwilladdswitchesto
thecontrolpanelforcontrollingtheiroperation.Thesprayer
comeswithplasticplugsintheselocations.
Regulating(RateControl)Valve
Thisvalve,locatedbehindthetank(Figure9),controlsthe
amountofuidthatisroutedtotheboomsortheratereturn
tothetank.
Figure10
1.Regulating(ratecontrol)
valve
4.Flowmeter
2.Agitationvalve5.Boom-sectionvalves
3.Masterboomvalve
MasterBoomValve
Themasterboomvalve(Figure10)isusedtostoptheowto
theowmeterandboomvalves.
Flowmeter
Theowmetermeasurestheowrateoftheuidforuseby
theInfoCentersystem(Figure10).
Boom-SectionValves
Thesevalvesturnthethreeboomsectionsonoroff(Figure
10).
20
This manual suits for next models
1
Table of contents
Other Toro Paint Sprayer manuals

Toro
Toro Pro Control XP User manual

Toro
Toro 41642 User manual

Toro
Toro 41605 User manual

Toro
Toro Multi Pro 1750 User manual

Toro
Toro MultiPro 1200 User manual

Toro
Toro SprayMaster Max 34240 User manual

Toro
Toro 132-5570 User manual

Toro
Toro GeoLink 41624 User manual

Toro
Toro Multi Pro 1750 User manual

Toro
Toro GeoLink CL-55 User manual

Toro
Toro 41621 User manual

Toro
Toro Multi-Pro 5800 User manual

Toro
Toro Multi Pro 5800-D User manual

Toro
Toro Multi Pro WM 41240 User manual

Toro
Toro 41178 Multi-Pro 1200 User manual

Toro
Toro 34230 User manual

Toro
Toro Multi Pro 5800 User manual

Toro
Toro 41440 Specifications

Toro
Toro Multi-Pro 5800 User manual

Toro
Toro 131-3301 Service manual