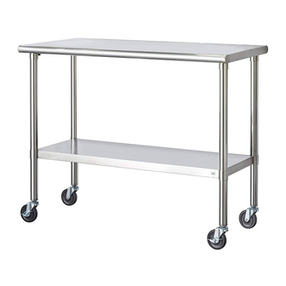
STAINLESS STEEL PREP TABLE
Model TLS-0201
Trinity International Industries (“Trinity”) warrants to the original consumer purchaser
(“Purchaser”) of the TRINITY Stainless Steel Prep Table (“Product”) that each Product shall be
free from defects in workmanship and materials for a period of 1 year from the date of original
purchase. Trinity’s obligation under this warranty shall be limited to repair or replacement of, or
adequate compensation for the Product which shall not be greater than the amount of the
purchase price of the Product, at the option of Trinity, during the warranty period. All replaced
parts and Products become the property of Trinity and must be returned to Trinity.
This warranty excludes normal wear and tear of the Product and its parts or components, and
damage arising from any of the following: negligent use or misuse of the Product, use contrary to
this User’s Manual, or alteration by any one other than Trinity. The warranty period of 1 year shall
not be extended or renewed by the repair or replacement of, or compensation for, the Product.
Except as set forth herein, there are no warranties on this Product either express or implied, and
Trinity disclaims all warranties including, but not limited to, any implied warranties of merchant-
ability, infringement or fitness for a particular purpose. No warranty or guarantee given by any
person, firm, or corporation with respect to this product shall be binding on Trinity.
If your Product is defective or otherwise requires service or parts, please call TRINITY Customer
Service toll-free at (800) 985-5506, between 8:00 a.m. and 5:00 p.m., PST. Please tell us which
model you purchased, the date of the purchase, and the problem with your Product. A copy of
your original purchase receipt must accompany your service request.
LIMITATION OF REMEDIES AND LIABILITY
Trinity shall not be liable for any incidental, consequential, special, or punitive damages for
breach of any express or implied warranty on its Product. Except to the extent prohibited by
applicable law, any implied warranty of merchantability or fitness for a particular purpose on this
Product shall be limited to the duration of the above warranty. Neither Trinity nor anyone else
who has been involved in the creation, production, delivery or sale of the Product shall be liable
for any damages of any type, including but not limited to any lost profits, lost savings, loss of
anticipated benefits, or any other incidental, consequential, special, or punitive damages which
arise out of the purchase, use, or inability to use the Product, whether arising out of contract,
negligence, strict tort, or any other legal theory on which a claim is based. Recovery of any kind
against Trinity shall not be greater in amount than the purchase price of the Product. Without
limiting the foregoing, Purchaser assumes all risk and liability for loss, damage or injury to
Purchaser and Purchaser’s property and to others and their property arising out of the use,
misuse, or inability to use this Product. This limited warranty shall not extend to anyone other
than the original purchaser of this product, is nontransferable and states your exclusive remedy.
Some states do not allow the exclusion or limitation of incidental, consequential, special, or
punitive damages, so the above limitation or exclusion may not apply to you. The above warranty
gives you specific legal rights, and you may have other rights which vary from state to state.
LIMITED WARRANTY
Step 1
Lay the Stainless Steel Table Top (A) upside-down and insert Legs (C) into the round slots on the
bottom of the table top. Do NOT tighten the Legs in.
Step 2
Slide the Stainless Steel Bottom Shelf (B) over each Leg (C) until your desired height is achieved.
Tighten the Bolts (D) into the Shelf (B) FIRST. Do NOT tighten the bolts into the Tabletop until the
Shelf is secure.
Use the Hex Key (D) to tighten the Hex Bolts (D) for each of the Legs (C) onto the Shelf (B). Turn
the Hex Key as far clockwise as possible, take out the Hex Key, reposition, reinsert, and turn as
far clockwise as possible again until the Hex Bolt is securely in place. Place the Hex Bolt Cap (E)
onto each Hex Bolt (D).
Step 3
Tighten Hex Bolts (B) into Table Top (A) in a similar fashion.
Step 4
Turn the Table right-side up and adjust Feet Levelers until the Table is stable and level.
D
E
E
D
C
B
A
STEP 2
STEP 3
