manuals.online logo
Brands
  1. Home
  2. •
  3. Brands
  4. •
  5. turck
  6. •
  7. Amplifier
  8. •
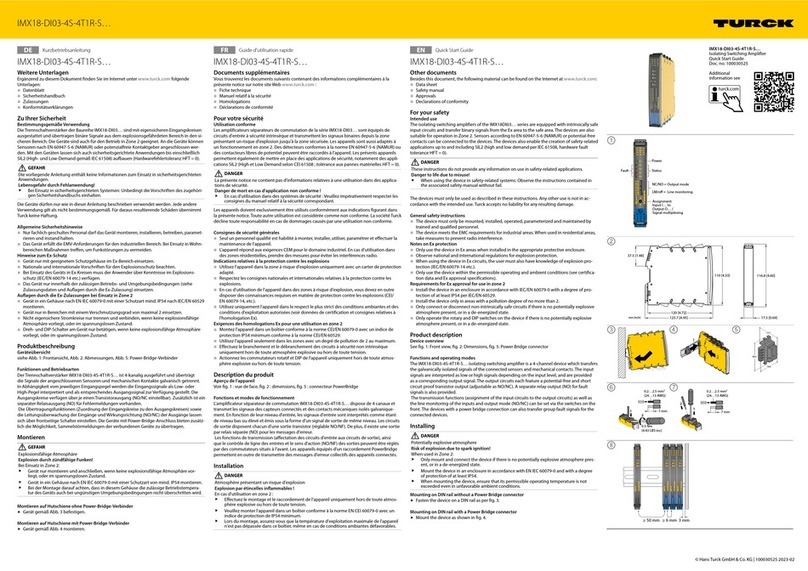
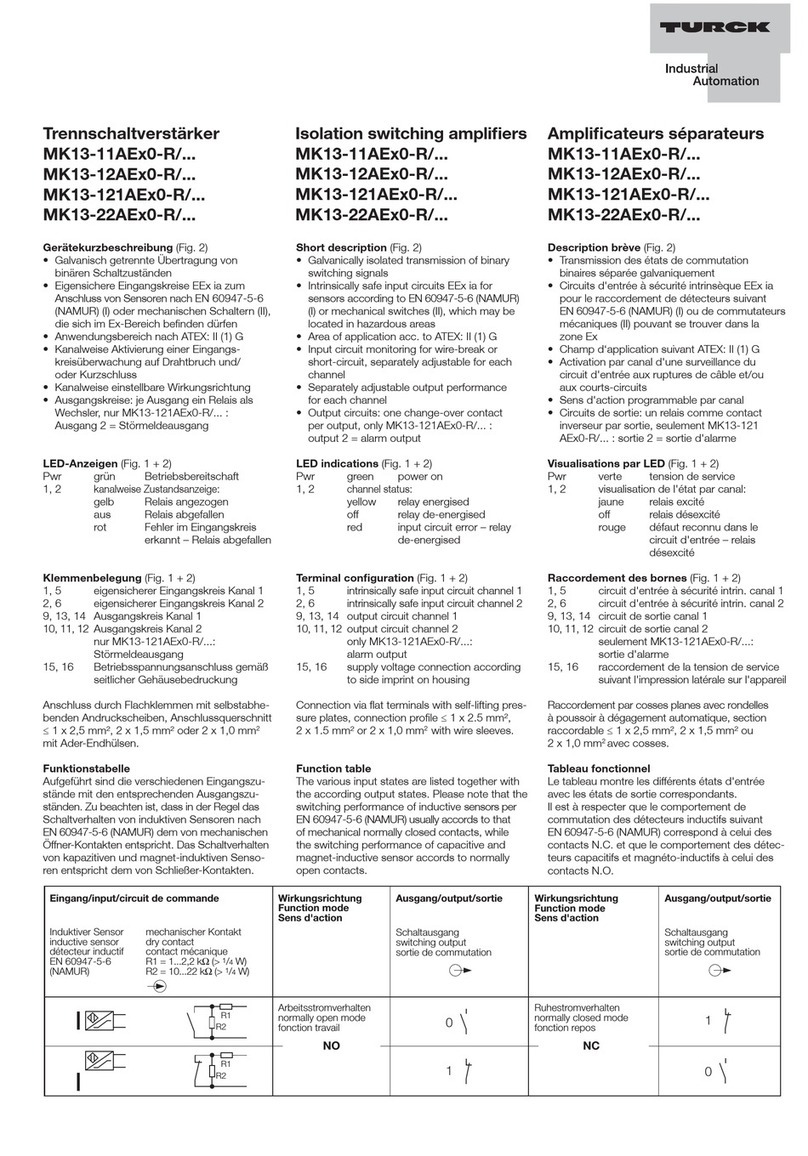
  9. turck IM1-451Ex-R User manual

turck IM1-451Ex-R User manual

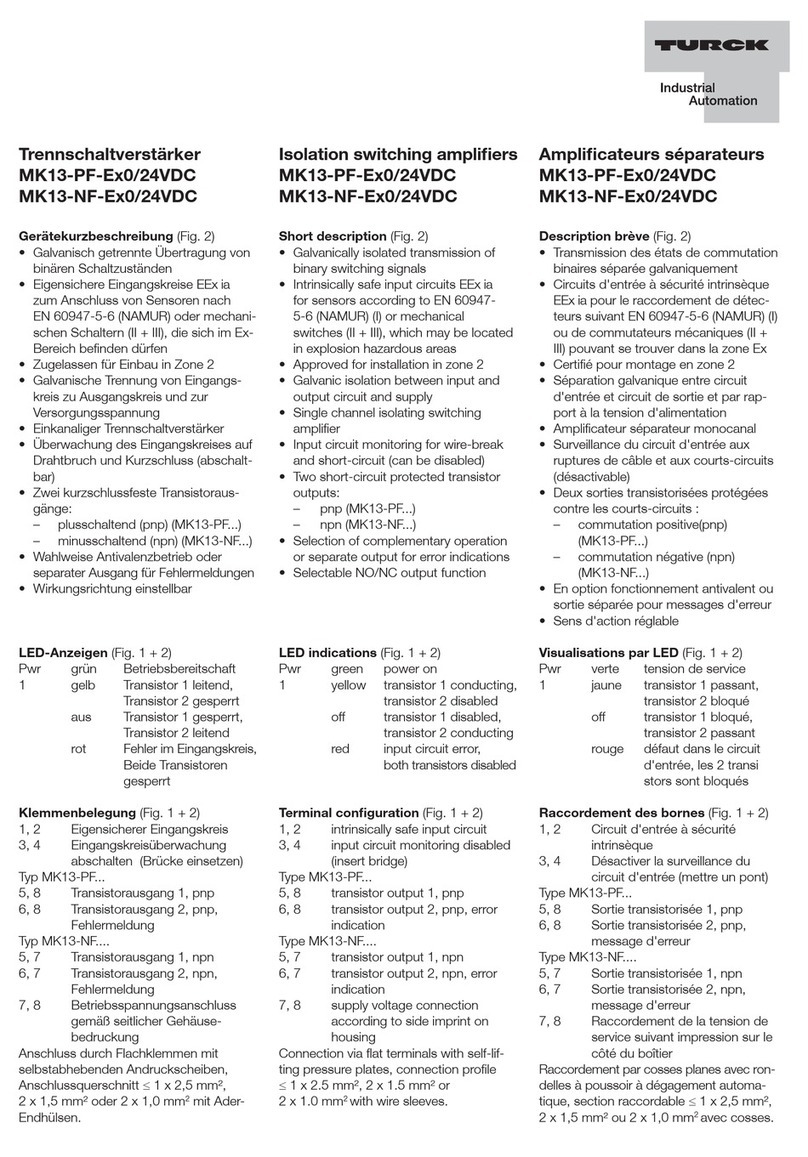
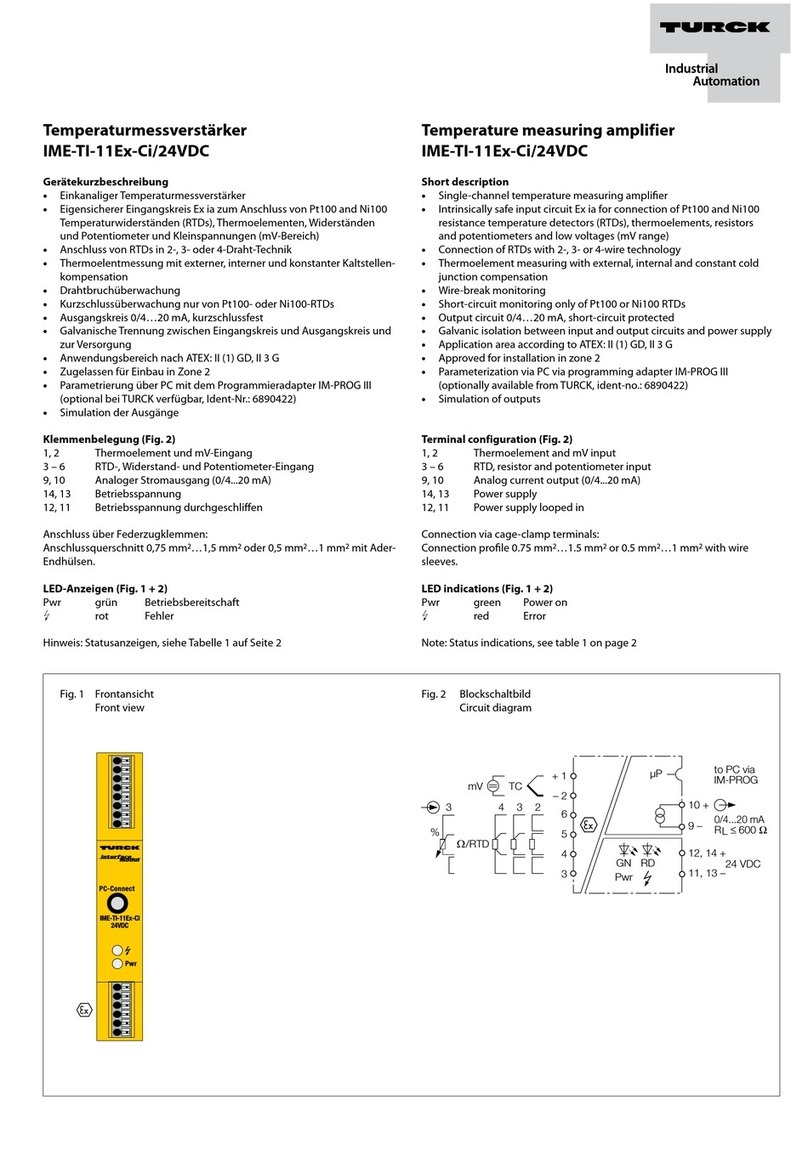
Gerätekurzbeschreibung
••
••
• Galvanisch getrennte Übertragung
von binären Schaltzuständen
••
••
• Eigensichere Eingangskreise
(nur IM1-451Ex-...),
siehe Hinweise auf den Seiten 5 + 6
••
••
• Anschluss von Sensoren nach
EN 60947-5-6 (NAMUR) (I) oder
mechanischen Schaltern (II + III),
siehe Fig. 2 + 4
••
••
• Zuschaltbare Eingangskreisüber-
wachung auf Drahtbruch und
Kurzschluss
••
••
• Einstellbare Wirkungsrichtung der
Ausgangskreise (Funktionstabelle
siehe unten)
Trennschaltverstärker
IM1-451Ex-R/IM1-451Ex-T
IM1-451-R/IM1-451-T
Amplificateur séparateur
IM1-451Ex-R/IM1-451Ex-T
IM1-451-R/IM1-451-T
Brève description de l’appareil
••
••
• Transmission d’états de commutation
binaires séparés galvaniquement
••
••
• Circuits d’entrée à sécurité intrinsèque
(seulement IM1-451Ex-...),
voir instructions aux pages 5 + 6
••
••
• Raccordement de détecteurs suivant
EN 60947-5-6 (NAMUR) (I) ou de
contacts mécaniques (II + III),
voir Fig. 2 + 4
••
••
• Surveillance du circuit d’entrée aux
ruptures de câble et aux courts-circuits
désactivable
••
••
• Fonction des circuits de sortie
ajustable (voir tableau ci-dessous)
Switching Amplifier
IM1-451Ex-R/IM1-451Ex-T
IM1-451-R/IM1-451-T
Short description
••
••
• Galvanically isolated transmission of
binary switching states
••
••
• Intrinsically safe input circuits
(only IM1-451Ex-...),
see information on pages 5 + 6
••
••
• Connection of sensors per
EN 60947-5-6 (NAMUR) (I) or
mechanical contacts (II + III),
see Fig. 2 + 4
••
••
• Selectable input circuit monitoring for
wire-break and short-circuit
••
••
• Adjustable output function mode (see
function truth table below)
Mechanische Kontakte
Beim Einsatz von mechanischen
Kontakten und aktivierter Eingangs-
kreisüberwachung muss in unmittel-
barer Nähe zum Kontakt das
anschlussfertige Widerstandsmodul
vom Typ WM1 (Ident-Nr.: 0912101)
oder eine Widerstandsbeschaltung,
wie in der Funktionstabelle angege-
ben, verwendet werden.
Funktionstabelle
Aufgeführt sind die verschiedenen Eingangs-
zustände mit den entsprechenden Aus-
gangszuständen. Zu beachten ist, dass
das Schaltverhalten von induktiven Sen-
soren nach EN 60947-5-6 (NAMUR) dem
von mechanischen Öffner-Kontakten ent-
spricht. Das Schaltverhalten von kapazi-
tiven und magnet-induktiven Sensoren
entspricht dem von Schließer-Kontakten.
Mechanical contacts
When using mechanical contacts
and activating the input circuit
monitoring function, it is required to
connect the ready-made resistor
module type WM1 (ident-no:
0912101) in direct proximity to the
contact, or to implement a resistor
circuitry as shown in the function
table.
Function table
The function table lists the various input
states together with the according output
states. Please note that the switching
performance of inductive sensors per
EN 60947-5-6 (NAMUR) accords to that
of normally-closed mechanical contacts.
The switching performance of capacitive
and magnet-inductive sensors accords to
that of normally-open contacts.
Contacts mécaniques
En cas d'utilisation de contacts
mécaniques et d'une surveillance du
circuit d'entrée activée, le module de
résistance en ordre de marche (type
WM1, no. d'identité 0912101) ou
les résistances, comme proposées
dans le tableau fonctionnel, doivent
être montés directement sur le
contact.
Tableau de fonction
Il indique les différents états d’entrée et
les états de sortie correspondants. Il est
à noter que le comportement de commu-
tation des détecteurs inductifs suivant
EN 60947-5-6 (NAMUR) correspond à
celui des contacts mécaniques à ouverture
et que celui des détecteurs capacitifs et
magnéto-inductifs correspond à celui des
contacts mécaniques à fermeture.
N.O.
N.C.
00
00
00
00
1
1
1
1
0
1
1
0
R1
R2
R1
R2
R1
R2
R1
R2
Eingang/input/circuit de commande
Wirkungsrichtung
Function mode
Sens d'action
Arbeitsstromverhalten
load current mode (N.O.)
fonction travail
Ruhestromverhalten
no load current mode (N.C.)
fonction repos
Indu tiver Sensor
inductive sensor
détecteur inductif
EN 60947-5-6
NAMUR
mechanischer Konta t
dry contact
contact mécanique
R1 = 1...2,2 W (>
1
/
4
W)
R2 = 10...22 W (>
1
/
4
W)
Ausgang/output/sortie
ein Fehler/normal/sans défaut
Schaltausgang
switching output
sortie de commutation
Störmeldeausgang
alarm output
sortie de sig. de défaut
mit Fehler/short or wire-brea /avec défaut
Schaltausgang
switching output
sortie de commutation
Störmeldeausgang
alarm output
sortie de sig. de défaut
ååå
IM1-451...-R/IM1-451...-T
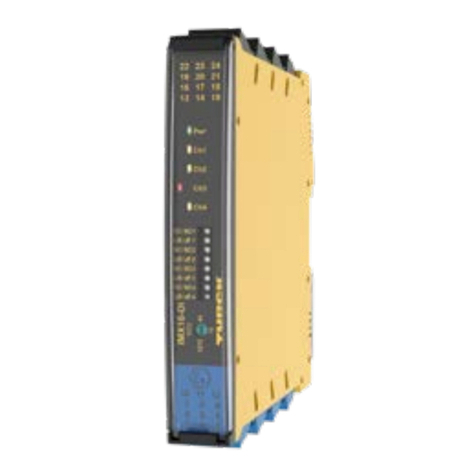
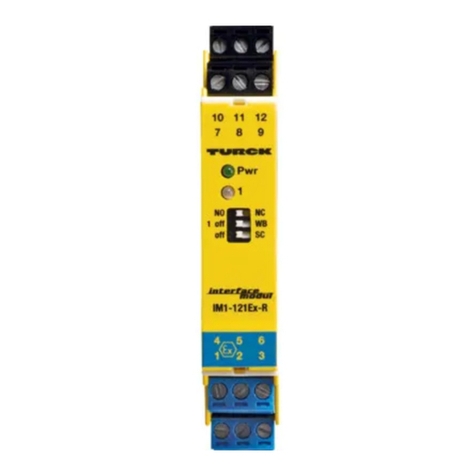
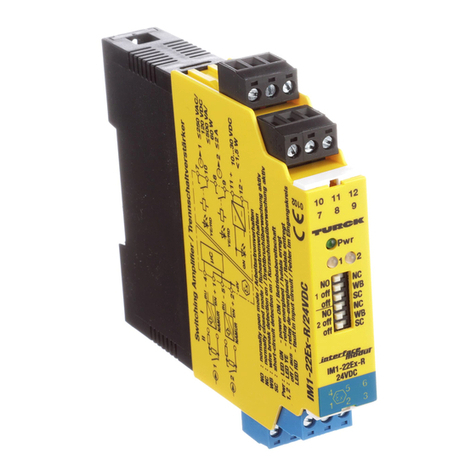
LED-Anzeigen
(Fig. 1 + 3)
Pwr grün Betriebsbereitschaft
1 – 4 Pro Kanal eine zweifarbige
Zustandsanzeige:
aus Relais entregt, Transistor
gesperrt
gelb Relais erregt, Transistor
leitend
rot Fehler im Eingangskreis
(Drahtbruch/Kurzschluss),
Relais entregt, Transistor
gesperrt
Klemmenbelegung (Fig. 2 + 4)
Eingangskreise:
IM1-451Ex-R/IM1-451Ex-T
1, 2 eigensicherer Eingangskreis
Kanal 1
4, 5 eigensicherer Eingangskreis
Kanal 2
6, 7 eigensicherer Eingangskreis
Kanal 3
9, 10 eigensicherer Eingangskreis
Kanal 4
IM1-451-R/IM1-451-T
1, 2 Eingangskreis Kanal 1
4, 5 Eingangskreis Kanal 2
6, 7 Eingangskreis Kanal 3
9, 10 Eingangskreis Kanal 4
Ausgangskreise:
IM1-451Ex-R/IM1-451-R
16, 17 Ausgangskreis Kanal 1 (Relais)
16, 18 Ausgangskreis Kanal 2 (Relais)
11, 12 Ausgangskreis Kanal 3 (Relais)
11, 13 Ausgangskreis Kanal 4 (Relais)
14, 15 Störmeldeausgang (Relais)
IM1-451Ex-T/IM1-451-T
16, 17 Ausgangskreis Kanal 1
(Transistor)
16, 18 Ausgangskreis Kanal 2
(Transistor)
11, 12 Ausgangskreis Kanal 3
(Transistor)
11, 13 Ausgangskreis Kanal 4
(Transistor)
14, 15 Störmeldeausgang
(Transistor)
Betriebsspannungsanschluss:
19, 20 Betriebsspannungsanschluss
gemäßseitlicherGehäuse-
bedruckung
Anschluss durch Flachklemmen mit selbst-
abhebendenAndruckscheiben,Anschluss-
querschnitt ≤1 x 2,5 mm², 2 x 1,5 mm²
oder 2 x 1,0 mm2mit Ader-Endhülsen.
LED indications
(Fig. 1 + 3)
Pwr green power "on“
1 – 4 dual colour LED per channel:
off relay de-energised,
transistor de-activated
yellow relay energised, transistor
conducting
red fault in input circuit (wire-
break/short-circuit), relay
de-energised, transistor
de-activated
Terminal configuration (Fig. 2 + 4)
Input circuits:
IM1-451Ex-R/IM1-451Ex-T
1, 2 intrinsically safe input circuit
channel1
4, 5 intrinsically safe input circuit
channel2
6, 7 intrinsically safe input circuit
channel3
9, 10 intrinsically safe input circuit
channel4
IM1-451-R/IM1-451-T
1, 2 input circuit channel 1
4, 5 input circuit channel 2
6, 7 input circuit channel 3
9, 10 input circuit channel 4
Output circuits:
IM1-451Ex-R/IM1-451-R
16, 17 output circuit channel 1 (relay)
16, 18 output circuit channel 2 (relay)
11, 12 output circuit channel 3 (relay)
11, 13 output circuit channel 4 (relay)
14, 15 alarm indication (relay)
IM1-451Ex-T/IM1-451-T
16, 17 output circuit channel 1
(transistor)
16, 18 output circuit channel 2
(transistor)
11, 12 output circuit channel 3
(transistor)
11, 13 output circuit channel 4
(transistor)
14, 15 alarmindication
(transistor)
Supply voltage connection:
19, 20 supply voltage connection
according to side imprint on
housing
Connection via flat terminals with self-lifting
pressure plates, connection profile
≤1 x 2.5 mm², 2 x 1.5 mm² or 2 x 1.0 mm2
with wire sleeves.
Visualisations par LED
(Fig. 1 + 3)
Pwr verte Tension de service
1 – 4 Par canal une LED bicolore
indiquant l'état:
off Relais désexcité, transistor
bloqué
jaune Relais excité, transistor
passant
rouge Défaut dans circuit d'entrée
(rupture de câble/court-
circuit), Relais désexcité,
transistor bloqué
Raccordement des bornes (Fig. 2 + 4)
Circuits d’entrée:
IM1-451Ex-R/IM1-451Ex-T
1, 2 circuit d'entrée à sécurité
intrinseque canal 1
4, 5 circuit d'entrée à sécurité
intrininseque canal 2
6, 7 circuit d'entrée à sécurité
intrinseque canal 3
9, 10 circuit d'entrée à sécurité
intrinseque canal 4
IM1-451-R/IM1-451-T
1, 2 circuit d'entrée canal 1
4, 5 circuit d'entrée canal 2
6, 7 circuit d'entrée canal 3
9, 10 circuit d'entrée canal 4
Circuits de sortie:
IM1-451Ex-R/IM1-451-R
16, 17 circuit de sortie canal 1 (relais)
16, 18 circuit de sortie canal 2 (relais)
11, 12 circuit de sortie canal 3 (relais)
11, 13 circuit de sortie canal 4 (relais)
14, 15 indication d'alarme (relais)
IM1-451Ex-T/IM1-451-T
16, 17 circuit de sortie canal 1
(transistor)
16, 18 circuit de sortie canal 2
(transistor)
11, 12 circuit de sortie canal 3
(transistor)
11, 13 circuit de sortie canal 4
(transistor)
14, 15 indicationd'alarme
(transistor)
Raccordement de la tension:
19, 20 raccordement de la tension
de service suivant l'impression
latérale sur l'appareil
Raccordement par cosses planes avec ron-
delles à poussoir à dégagement automa-
tique, section raccordable ≤1 x 2,5 mm²,
2 x 1,5 mm² ou 2 x 1,0 mm2 avec cosses.
IM1-451Ex-R
+ 8,2 V
GN
NAMUR
I
II
NAMUR
BN
+
7
BU

6
BN
+
10
BU

9
Pwr Power
20
19
R1
R2
R1
R2
NAMUR
NAMUR
BN
+
2
BU

1
BN
+
5
BU

4
R1
R2
R1
R2
III
3
4
1
2
3
4
1
2
YE/RD
YE/RD
YE/RD
YE/RD
2
1
4
3
16
17
18
11
12
13
14
15
£250 VAC/
30 VDC
£
2 A
£
500 VA
£60W
7
6
10
9
2
1
5
4
7
6
10
9
2
1
5
4
IM1-451Ex-T
GN
Pwr Power
20
19
16
17
1
+

18
2

11
12
3
+

13
4

3
4
1
2
YE/RD
YE/RD
YE/RD
YE/RD
14
15
+

£ 30 VDC
£ 50 mA
867 09
3254
86 7
IM1-451Ex-R
Pwr
209
32 54
234
1
2
3
4
NO
off
NO
off
NO
off
NO
off
NC
LM
NC
LM
NC
LM
NC
LM
867 09
3254
86 7
IM1-451Ex-T
Pwr
209
32 54
234
1
2
3
4
NO
off
NO
off
NO
off
NO
off
NC
LM
NC
LM
NC
LM
NC
LM
Fig. 1 Fig. 2
IM1-451-R
+ 8,2 V
GN
NAMUR
I
II
NAMUR
BN
+
7
BU

6
BN
+
10
BU

9
Pwr Power
20
19
R1
R2
R1
R2
NAMUR
NAMUR
BN
+
2
BU

1
BN
+
5
BU

4
R1
R2
R1
R2
III
3
4
1
2
3
4
1
2
YE/RD
YE/RD
YE/RD
YE/RD
2
1
4
3
16
17
18
11
12
13
14
15
£250 VAC/
30 VDC
£
2 A
£500 VA
£60W
7
6
10
9
2
1
5
4
7
6
10
9
2
1
5
4
IM1-451-T
GN
Pwr Power
20
19
16
17
1
+

18
2

11
12
3
+

13
4

3
4
1
2
YE/RD
YE/RD
YE/RD
YE/RD
14
15
+

£ 30 VDC
£ 50 mA
867 09
3254
86 7
IM1-451-R
Pwr
209
32 54
234
1
2
3
4
NO
off
NO
off
NO
off
NO
off
NC
LM
NC
LM
NC
LM
NC
LM
867 09
3254
86 7
IM1-451-T
Pwr
209
32 54
234
1
2
3
4
NO
off
NO
off
NO
off
NO
off
NC
LM
NC
LM
NC
LM
NC
LM
IM1-451...-R/IM1-451...-T
Fig. 3 Fig. 4
Einstellungen (Fig. 1 + 3)
Über die frontseitigen Schalter lassen sich
für jeden Kanal die Wirkungsrichtung und
die Eingangskreisüberwachung separat
einstellen.
NO: Arbeitsstromverhalten
NC: Ruhestromverhalten
LM: Eingangskreisüberwachung möglich
off: ohne Eingangskreisüberwachung
Installation und Montage (Fig. 5)
Das Gerät ist aufschnappbar auf Hut-
schiene (EN 50022) oder aufschraubbar
auf Montageplatte. Geräte gleichen Typs
können direkt aneinander gesetzt werden.
Sorgen Sie für eine ausreichende Wärme-
abfuhr.
Führen Sie die Montage und Installation
den gültigen Vorschriften entsprechend
durch. Dafür sind Sie als Betreiber verant-
wortlich.
Die abziehbaren Klemmenblöcke sind
codiert und können nur auf den vor-
gesehenen Sockel gesteckt werden.
Die Codierung darf nicht verändert oder
beschädigt werden.
Schützen Sie das Gerät ausreichend gegen
Staub, Schmutz, Feuchtigkeit und andere
Umwelteinflüsse. Auch gegen energiereiche
Strahlung, Risiken mechanischer Beschädi-
gung, unbefugter Veränderung und
zufälliger Berührung müssen Vorkehrungen
getroffen werden. Führen Sie sämtliche
Installationen EMV-gerecht durch.
Adjustments (Fig. 1 + 3)
The front panel switches serve to select
the output function and input circuit
monitoring separately for each channel.
NO: Normally open mode (N.O.)
NC: Normally closed mode (N.C.)
LM: Input circuit monitoring possible
off: Without input circuit monitoring
Mounting and installation (Fig. 5)
The device is suited for snap-on clamps for
hat rail mounting (EN 50022) or for screw
panel mounting. Devices of the same
type may be mounted directly next to
each other. It must be ensured that heat is
conducted away from the device.
Mounting and installation must be carried
out in accordance with the applicable
regulations. The operator is responsible
for compliance with the regulations.
The removable terminal blocks are coded
and may only be plugged into the
designated sockets. The coding system
may not be altered or damaged.
The device must be protected against
dust, dirt, moisture and other environmen-
tal influences as well as against strong
electro-magnetic emissions. It should also
be protected against the risks of mecha-
nical damaging, unauthorised access and
incidental contact. All installations must be
carried out observing the regulations of
EMC protection.
Réglages (Fig. 1 + 3)
Les commutateurs en face avant permet-
tent de programmer le mode d’action et
d’activer ou de désactiver la surveillance
du circuit d’entrée pour chaque canal.
NO: Fonction travail
NC: Fonction respos
LM: Surveillance du circuit de commande
possible
off: Sans surveillance du circuit de
commande
Montage et installation (Fig. 5)
L‘appareil est encliquetable sur rail
symétrique (EN 50022) ou peut être
monté sur panneaux. Les appareils du
même type peuvent être montés
directement l‘un à côté de l‘autre. Une
évacuation suffisante de la chaleur est
nécessaire.
Le montage et l’installation doivent être
effectués conformément aux prescriptions
locales valables, dont le respect est la
responsabilité de l’exploitant.
Les blocs de bornes débrochables sont
codés et peuvent seulement être enfichés
sur le socle prévu. Il n'est pas permis de
modifier ou d'endommager le codage.
L‘appareil doit être suffisamment protégé
contre les poussières, la pollution, l‘humi-
dité et les autres influences d‘environne-
ment, ainsi que contre le rayonnement fort,
les risques de dommages mécaniques, la
modification non-autorisée et les contacts
accidentels. Toutes les installations doivent
être effectuées conformément à la CEM.
35
110
27
ø 4,5
89
100
92
104
EN 50 022
Fig. 5
IM1-451...-R/IM1-451...-T
IM1-451Ex-R/IM1-451Ex-T
Wichtige Hinweise zum Einsatz von
Geräten mit eigensicheren Strom-
kreisen
Das vorliegende Gerät verfügt an den blau ge-
kennzeichneten Klemmen 1 – 10 über Stromkreise
der Zündschutzart „Eigensicherheit“ für den
Explosionsschutz gemäß EN 50020. Die eigensicheren
Stromkreise sind von autorisierten Prüfungsstellen
bescheinigt und für die Verwendung in den jeweiligen
Ländern zugelassen.
Beachten Sie für den bestimmungsgemäßen Betrieb
in explosionsgefährdeten Bereichen unbedingt die
nationalen Vorschriften und Bestimmungen und
halten Sie diese ein.
Nachfolgend geben wir einige Hinweise,
insbesondere hinsichtlich der Rahmen-Richtlinie
der Europäischen Union 94/9/EG (ATEX).
Das vorliegende Gerät ist ein zugehöriges Be-
triebsmittel, das neben eigensicheren auch über
nichteigensichere Stromkreise verfügt. Es darf nur
außerhalb des Ex-Bereiches in trockenen, sauberen
und gut überwachten Räumen installiert werden.
An die eigensicheren Anschlüsse können eigen-
sichere elektrische Betriebsmittel angeschlossen
werden.
Alle Betriebsmittel müssen die Voraussetzungen zum
Betrieb in der vorhandenen Zone des explosions-
gefährdeten Bereiches erfüllen.
Führen die eigensicheren Stromkreise in staub-
explosionsgefährdete Bereiche der Zone 20 bzw. 21,
ist sicherzustellen, dass die Geräte, die an diese
Stromkreise angeschlossen werden, die Anforderun-
gen für Kategorie 1D bzw. 2D erfüllen und entspre-
chend bescheinigt werden.
Werden die Betriebsmitteln zusammengeschaltet,
muss der „Nachweis der Eigensicherheit“ durch-
geführt werden (EN 60079-14). Bereits durch den
einmaligen Anschluss von eigensicheren Strom-
kreisen an nicht eigensichere Kreise ist eine spätere
Verwendung als Betriebsmittel mit eigensicheren
Stromkreisen nicht mehr zulässig.
Für die Errichtung eigensicherer Stromkreise, die
Montage an äußeren Anschlussteilen sowie für die
Beschaffenheit und Verlegung von Leitungen gelten
einschlägige Vorschriften. Leitungen und Klemmen
mit eigensicheren Stromkreisen müssen gekennzeich-
net werden. Sie sind von nichteigensicheren
Stromkreisen zu trennen oder müssen eine entspre-
chende Isolierung aufweisen (EN 60079-14).
Halten Sie von den eigensicheren Anschlüssen dieses
Gerätes den vorgeschriebenen Abstand zu geerdeten
Bauteilen und Anschlüssen anderer Geräte ein.
Soweit nicht ausdrücklich in der gerätespezifischen
Anleitung angegeben, erlischt die Zulassung durch
Öffnen des Gerätes, Reparaturen oder Eingriffe am
Gerät, die nicht vom Sachverständigen oder
Hersteller ausgeführt werden.
Sichtbare Veränderungen am Gerätegehäuse,
wie z. B. bräunlich-schwarze Verfärbungen durch
Wärme sowie Löcher oder Ausbeulungen, weisen auf
einen schwerwiegenden Fehler hin. Daraufhin
das Gerät unverzüglich abschalten. Bei zugehörigen
Betriebsmitteln müssen die angeschlossenen
eigensicheren Betriebsmittel ebenfalls überprüft
werden. Die Überprüfung eines Gerätes hinsichtlich
des Explosionsschutzes kann nur von einem
Sachverständigen oder vom Hersteller vorgenommen
werden.
Der Betrieb des Gerätes ist nur im Rahmen der
seitlich auf das Gehäuse gedruckten zulässigen Daten
gestattet. Vor jeder Inbetriebnahme oder nach
Änderung der Gerätezusammenschaltung ist
sicherzustellen, dass die zutreffenden Bestimmungen,
Vorschriften und Rahmenbedingungen eingehalten
werden, ein bestimmungsgemäßer Betrieb gegeben
ist und die Sicherheitsbestimmungen erfüllt sind.
Die Montage und der Anschluss des Gerätes muss
von geschultem und qualifiziertem Personal mit
Kenntnis der einschlägigen nationalen und anzu-
wendenden internationalen Vorschriften über den Ex-
Schutz durchgeführt werden.
Die wichtigsten Daten aus der EG-Baumuster-
prüfbescheinigung sind umseitig aufgeführt. Alle
gültigen nationalen und internationalen Bescheini-
gungen der TURCK-Geräte finden Sie im Internet
(www.turck.com).
Weitere Informationen zum Ex-Schutz stellen wir Ihnen
auf Anfrage gern zur Verfügung.
ìì
ìì
ìInformations importantes sur l‘utilisation
d‘appareils avec des circuits de courant à
sécurité intrinsèque
Cet appareil est équipé aux bornes bleues 1 – 10
de circuits de courant en mode de protection
„sécurité intrinsèque“ pour la protection contre les
explosions suivant EN 50020. Les circuits de courant
à sécurité intrinsèque disposent d‘un certificat
accordé par les laboratoires agréés et sont permis
pour l‘utilisation dans les pays concernés.
Son fonctionnement conformément aux dispositions
dans les atmosphères explosives implique le respect
des prescriptions et dispositions nationales.
Ci-dessous sont énumérés quelques conseils,
particulièrement concernant la directive-cadre de
l‘Union européenne 94/9/EC (ATEX 100a).
Cet appareil est du matériel électrique équipé non
seulement de circuits de courant à sécurité intrin-
sèque, mais aussi de circuits de courant non à
sécurité intrinsèque. Il ne peut être installé qu'en
dehors de la plage Ex dans des lieux secs, propres et
bien surveillés. Du matériel électrique à sécurité
intrinsèque peut être raccordé aux connexions à
sécurité intrinsèque à condition que ce matériel
électrique à sécurité intrinsèque remplisse les
exigences pour le fonctionnement dans la zone
actuelle de la zone explosible. Lorsque les circuits de
courant à sécurité intrinsèque se trouvent dans les
zones présentant des risques d'explosion de poussière
de la zone 20 ou 21, il doit être assuré que les
appareils qui seront raccordés à ces circuits de
courant, remplissent les exigences de la catégorie 1D
ou 2D et qu'ils disposent d'un certificat.
En cas d‘interconnexion de matériels électriques la
„preuve de la sécurité intrinsèque“ doit être remplie
(EN 60079-14). Même le raccordement unique de
circuits de courant à sécurité intrinsèque à des
circuits non à sécurité intrinsèque ne permet plus un
fonctionnement ultérieur comme matériel électrique à
sécurité intrinsèque.
Pour la réalisation de circuits de courant à sécurité
intrinsèque, le montage à des pièces de raccorde-
ment extérieures, ainsi que pour la qualité et le
cheminement des conducteurs les prescriptions
concernées sont à respecter. Les conducteurs et les
bornes avec des circuits de courant à sécurité
intrinsèque doivent être désignés et séparés des
circuits de courant non à sécurité intrinsèque ou
doivent être équipés d‘une isolation appropriée (EN
60079-14).
Quant aux raccordements à sécurité intrinsèque de
cet appareil, la distance prescrite entre les
composants mis à la terre et les raccordements
d‘autres appareils est à respecter. Sauf s‘il est
indiqué dans le mode d‘emploi spécifique de
l‘appareil, l‘homologation n‘est plus valable en cas
d‘ouverture de l‘appareil, ou si des réparations ou des
interventions sont effectuées à l‘appareil par des
personnes autres que des spécialistes ou que le
fabricant.
Des transformations visibles au boîtier de l‘appareil
telles que par ex les décolorations brunâtres noires
par la chaleur ainsi que des trous ou des gonflements,
indiquent un défaut grave impliquant la désactivation
immédiate de l‘appareil. Quant au matériel électrique
associé, le matériel électrique à sécurité intrinsèque
raccordé doit également être contrôlé. Le contrôle
d‘un appareil en ce qui concerne la protection contre
les explosions ne peut être effectué que par un
spécialiste ou le fabricant. Le fonctionnement de
l‘appareil doit être conforme aux données imprimées
sur le côté de l‘appareil.
Avant toute mise en service ou après modification de
l‘interconnexion des appareils, on doit veiller à ce que
les dispositions, les prescriptions et les conditions-
cadre concernées sont respectées, que le
fonctionnement est conforme aux dispostions et que
les dispositions de sécurité sont remplies. Le montage
et le raccordement de l‘appareil ne peut être effectué
que par des personnes qualifiées qui sont au courant
des prescriptions nationales et internationales sur la
protection Ex concernées.
Les données essentielles de l‘attestation d‘examen
CE figurent au verso. L‘ensemble des certificats
nationaux et internationaux des appareils TURCK
peuvent être obtenus par internet (www.turck.com).
Plus d’informations sur la protection Ex peuvent être
obtenues sur demande.
ìì
ìì
ì
Important information on use of devices
with intrinsically safe circuits
This device is equipped with circuits featuring
protection type „intrinsic safety“ for explosion
protection per EN 50020 at terminals 1– 10 which are
marked in blue. The intrinsically safe circuits are
approved by the authorised bodies for use in
those countries to which the approval applies.
For correct usage in explosion hazardous areas
please observe and follow the national regulations
and directives strictly.
Following please find some guidelines referring to the
frame-work directive of the European Union 94/9/EC
(ATEX 100a).
This device is classified as an associated apparatus
which is equipped with intrinsically safe and non-
intrinsically safe circuits. Therefore it may only be
installed in the non-explosion hazardous area in dry
clean and well monitored locations.
It is permitted to connect intrinsically safe equipment
to the intrinsically safe connections of this device.
All electrical equipment must comply with the
regulations applying to use in the respective zone of
the explosion hazardous area.
If the intrinsically safe circuits lead into explosion
hazardous areas subject to dust hazards, i.e. zone 20
or 21, it must be ensured that the devices which are
to be connected to these circuits, meet the
requirements of category 1D or 2D and feature an
according approval.
When interconnecting devices within such an
assembly it is required to keep and provide a
proof of intrinsic safety (EN 60079-14).
Once that intrinsically safe circuits have been
connected to the non-intrinsically safe circuit, it is not
permitted to use the device subsequently as
intrinsically safe equipment.
The governing regulations cover installation of
intrinsically safe circuits, mounting to external
connections, cable characteristics and cable
installation. Cables and terminals with intrinsically safe
circuits must be marked and separated from non-
intrinsically safe circuits or feature appropriate
isolation (EN 60079-14). Please observe the specified
clearances between the intrinsically safe connections
of this device and the earthed components and
connections of other devices.
The approval expires if the device is repaired, modified
or opened by a person other than the manufacturer or
an expert, unless the device-specific instruction
manual explicitly permits such interventions.
Visible damages of the device’s housing (e. g. black-
brown discolouration due to heat accumulation,
perforation or deformation) indicate a serious error
and the device must be turned off immediately. When
using associated apparatus it is required to check the
connected intrinsically safe equipment too. This
inspection may only be carried out by an expert or the
manufacturer.
Operation of the device must conform to the data
printed on the side of the housing.
Prior to initial set-up or after every alteration of the
interconnection assembly it must be assured that the
relevant regulations, directives and framework
conditions are observed, that operation is error-free
and that all safety regulations are fulfilled.
Mounting and connection of the device may only be
carried out by qualified and trained staff familiar with
the relevant national and international regulations of
explosion protection.
The most important data from the EC type
examination certificate are listed overleaf. All valid
national and international approvals covering Turck
devices are obtainable via the Internet
(www.turck.com).
Further information on explosion protection is
available on request.
ìì
ìì
ì
D201032 0905 *D201032ßß0905*
Irrtümer und Änderungen vorbehalten / Subject to change without notice / Sous réserve de modifications • © Hans Turck GmbH & Co. KG 2005
Hans Turck GmbH & Co. KG • D–45466 Mülheim/Ruhr • Tel. 0208/4952-0 • Fax 0208/4952-264 • E-Mail: [email protected] • Internet: www.turck.com
EG-Baumusterprüfbescheinigung
EC-Type examination certificate
Attestation d’examen CE de type
II (1) G D [EEx ia] IIC
Nr./No. TÜV 04 ATEX 2604
U011,3 V
I013 mA
P036 mW
L0 /C0
– [EEx ia] IIB 2/10/20 mH / 4/2,8/2,5 µF
– [EEx ia] IIC 1/5/10 mH / 0,84/0,62/0,55 µF
Ci/Li1,1nF/100µH
TU-25...+70 °C
Eingestellt/Ad-
justed/Programmé
Nr./No.:
0102
RUS
GR
NL
DK
I
S
Denna utrustning egensäkra kretsar, för
explosionsskydd enligt EN 50020. Dessa kretsar är
terminalerna 1- 10 och är blåmarkerade. Nationella
regler och bestämmelser för använding inom Ex-
område måste följas. Utrustningen klassas som
tillbehör och får ej monteras i explosionsfarliga
utrymmen. Alla nationella och internationella
certifikat kan tas hem via Internet.
P
E
Este equipamento tem circuitos de segurança intríseca
nos terminais 1-10 (azul) de acordo com as
protecções à explosão das normas EN50020.
É necessário seguir os regulamentos e directivas
nacionais para uma correcta operação nas áreas
explosivas. Este equipamento está classificado como
aparelho associado e pode não estar instalado numa
área explosiva. Todas as aprovações nacionais e
internacionais podem ser vistas na internet.
Det foreliggende apparat indeholder klemmer 1-10
(blå) med strømkredse af beskyttelsesklasse
”egensikkerhed” for eksplosionsbeskyttelse iht.
EN50020. Til den forcskrevne drift i eksplosionsfarlige
områder, skal de nationale foreskrifter og
bestemmelser ubetinget iagttages og overholdes.
Apparatet er klassificeret som et tilhørende apparat
og må ikke installeres i Ex-området. Alle nationale og
internationale godkendelser er lagt på internettet.
Dit apparaat beschikt aan de klemmen 1-10 (blauw)
over stroomkringen in de beschermingswijze „Intrinsiek
veilig“ voor de explosiebeveiliging volgens EN 50020.
Voor correct gebruik in ontploffings-gevaarlijke
atmosferen moeten de nationale voorschriften en
bepalingen onvoorwaardelijk gerespecteerd worden.
Het apparaat is bijhorend elektrisch materieel en mag
niet in de Ex-atmosfeer worden geïnstalleerd. Alle
nationale en internationale certificaten kunnen via
internet opgevraagd worden.
Questa unità dispone di circuiti a sicurezza intrinseca
tra i terminali 1-10 (azzurro) in accordo alle norme di
protezione alle esplosioni EN 50020. E‘ necessario
seguire le normative e direttive nazionali per una
corretta applicazione in aree a rischio di esplosione .
Questa unità è classificata come apparato associato e
non può essere installato in aree pericolose. Tutte le
approvazioni nazionali e internazionali possono essere
richiamate via Internet.
Este aparato incluye circuitos de seguridad intrínseca
para protección de explosiones en los terminales
1-10 (azul) según EN 50020. Se requiere seguir las
regulaciones y directivas nacionales para su correcta
operativa en las áreas de peligro de explosiones. El
aparato está clasificado como asociado y no debería
instalarse en áreas de peligro. Todas las aprobaciones
nacionales e internacionales pueden consultarse vía
Internet.
SF
Oheisen laitteen sinisellä merkatut liittimet 1-10 ovat
tarkoitettu räjähdysvaarallisessa laiteen suojaukseen
ja ne ovat suojausluokaltaan ”luonnostaan
vaarattomia” standardin EN 50020 mukaisesti.
Räjähdysvaarallisissa tiloissa toimittaessa on sääntöjen
mukaisesti ehdottomasti noudatettava ja seurattava
kansallisia direktiivejä ja säännöksiä! Tämä laite on
luokiteltu apulaitteeksi ja sitä ei saa asentaa
räjähdysvaaralliseen tilaan. Kaikki kansalliset ja
kansainväliset hyväksynnät ovat saatavilla Internet
osoitteestamme.
1-10
1-10
IM1-451Ex-R/IM1-451Ex-T
NO NC
Off LM
1
NO NC
Off LM
2
NO NC
Off LM
3
NO NC
Off LM
4
Internet: www.turck.com →→
→→
→Headquarters →→
→→
→Download

This manual suits for next models

3

Other turck Amplifier manuals

turck IM1-12 R Series User manual

turck

turck IM1-12 R Series User manual

turck IM1-22Ex-R User manual

turck

turck IM1-22Ex-R User manual

turck IME-DI-22Ex-R/24VDC User manual

turck

turck IME-DI-22Ex-R/24VDC User manual

turck IM18-DI03-4S-4T1R-S Series User manual

turck

turck IM18-DI03-4S-4T1R-S Series User manual

turck MS15-231E 0-R Series User manual

turck

turck MS15-231E 0-R Series User manual

turck IMXK12-DI Series User manual

turck

turck IMXK12-DI Series User manual

turck IM12-DI01 -2T Series User manual

turck

turck IM12-DI01 -2T Series User manual

turck IMX18-DI03-4S-5R-S Series User manual

turck

turck IMX18-DI03-4S-5R-S Series User manual

turck IM(X)18-DI03-4S-4T1R User guide

turck

turck IM(X)18-DI03-4S-4T1R User guide

turck IM12-DI-PP Series User manual

turck

turck IM12-DI-PP Series User manual

turck MK1-22P-Ex0/24VDC User manual

turck

turck MK1-22P-Ex0/24VDC User manual

turck MK13-11AEx0-R Series User manual

turck

turck MK13-11AEx0-R Series User manual

turck IM12-22Ex-R User manual

turck

turck IM12-22Ex-R User manual

turck IM12-DI03-1S-2T User manual

turck

turck IM12-DI03-1S-2T User manual

turck MK13-PF-Ex0/24VDC User manual

turck

turck MK13-PF-Ex0/24VDC User manual

turck interface modul IME-TI-11Ex-Ci/24VDC Operating and maintenance instructions

turck

turck interface modul IME-TI-11Ex-Ci/24VDC Operating and maintenance instructions

turck MK13-R-Ex0 User manual

turck

turck MK13-R-Ex0 User manual

turck IMX12-TI02-1TCURTDR-1I-PR/24VDC User guide

turck

turck IMX12-TI02-1TCURTDR-1I-PR/24VDC User guide

turck IM1-231Ex-R User manual

turck

turck IM1-231Ex-R User manual

turck IMC-DI-22Ex-PNO/24VDC User manual

turck

turck IMC-DI-22Ex-PNO/24VDC User manual

turck IM18-DI03-4S-5R-S Series User manual

turck

turck IM18-DI03-4S-5R-S Series User manual

turck IM34-11Ex-Ci/24VDC User manual

turck

turck IM34-11Ex-Ci/24VDC User manual

turck IMX18-DI03-4S-4T1R-S Series User manual

turck

turck IMX18-DI03-4S-4T1R-S Series User manual

Popular Amplifier manuals by other brands

DYNACO st416 Schematic diagram

DYNACO

DYNACO st416 Schematic diagram

Trigon Elektronik Exxceed manual

Trigon Elektronik

Trigon Elektronik Exxceed manual

NAD S100 Installation and setup instructions

NAD

NAD S100 Installation and setup instructions

Agito AGA10 Series product manual

Agito

Agito AGA10 Series product manual

Madison Divinity 12 manual

Madison

Madison Divinity 12 manual

AudioQuest DragonFly Setup guide

AudioQuest

AudioQuest DragonFly Setup guide

Ground Zero IRIDIUM SERIES owner's manual

Ground Zero

Ground Zero IRIDIUM SERIES owner's manual

Conrad 30 15 94 operating instructions

Conrad

Conrad 30 15 94 operating instructions

Eico HF 12 instruction manual

Eico

Eico HF 12 instruction manual

QSC DPA4.2 user manual

QSC

QSC DPA4.2 user manual

HumanTechnik PRO LOOP LOS Operation instructions

HumanTechnik

HumanTechnik PRO LOOP LOS Operation instructions

Advance acoustic MAT-605 owner's manual

Advance acoustic

Advance acoustic MAT-605 owner's manual

B&K AVP 2030 owner's manual

B&K

B&K AVP 2030 owner's manual

Fbt Audio Contractor MMZ 8004 S operating manual

Fbt

Fbt Audio Contractor MMZ 8004 S operating manual

Lehmannaudio Silver Cube user manual

Lehmannaudio

Lehmannaudio Silver Cube user manual

Texas Instruments TPA6204A1 user guide

Texas Instruments

Texas Instruments TPA6204A1 user guide

Ground Zero GZRA 1.2500D owner's manual

Ground Zero

Ground Zero GZRA 1.2500D owner's manual

Blaze PowerZone Connect 122 quick start guide

Blaze

Blaze PowerZone Connect 122 quick start guide

manuals.online logo
manuals.online logoBrands
  • About & Mission
  • Contact us
  • Privacy Policy
  • Terms and Conditions

Copyright 2025 Manuals.Online. All Rights Reserved.