Installation
The TYCO RAPID RESPONSE Series
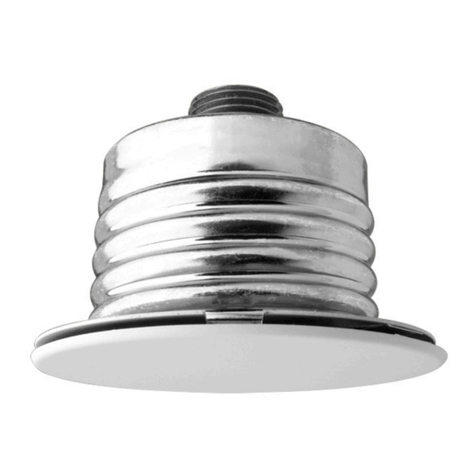
LFII Residential Flush Pendent
Sprinklers (TY2284) must be installed
in accordance with this section.
General Instructions
The Protective Cap is to remain on
the sprinkler during installation until
the ceiling installation is complete.
The Protective Cap must be removed
to place the sprinkler in service.
A leak-tight 1/2 inch NPT sprinkler
joint should be obtained by applying a
minimum-to-maximum torque of 7 to 14
ft.-lbs. (9,5 to 19,0 Nm). Higher levels
of torque can distort the sprinkler Inlet
with consequent leakage or impairment
of the sprinkler.
Do not attempt to compensate for
insufcient adjustment in the sprinkler
by under- or over-tightening the
Sprinkler/Support Cup Assembly. Re-
adjust the position of the sprinkler
tting to suit.
Each sprinkler must be inspected
before installation. Do not use any
sprinkler that exhibits any deformations
or cracks, including cracks on the
protective cap.
Step 1. The sprinkler must be installed
only in the pendent position and with
the sprinkler waterway centerline
perpendicular to the mounting surface.
Step 2. Install the sprinkler tting so
that the distance from the face of the
tting to the mounting surface will be
nominally 29/32 inches (23,0 mm) as
shown in Figure 1A.
Step 3. With pipe thread sealant
applied to the pipe threads, hand-
tighten the sprinkler into the sprinkler
tting.
Step 4. Tighten the sprinkler using only
the Sprinkler Socket or Wrench
& Socket Combination (Figure 2).
The wrench recess of the socket is to
be applied to the sprinkler wrenching
area (Figure 1A).
Step 5. Use the “ceiling level tolerance
limit” indicator on the Protective
Cap to check for proper installation
height. Relocate the sprinkler tting as
necessary. If desired, the Protective
Cap may also be used to locate the
center of the clearance hole by gently
pushing the ceiling material against the
center point of the Cap.
Step 6. After the ceiling has been
completed with the 2 inch (50
mm diameter clearance hole, use
the Protective Cap Removal Tool
(Figure 3) to remove the Protective
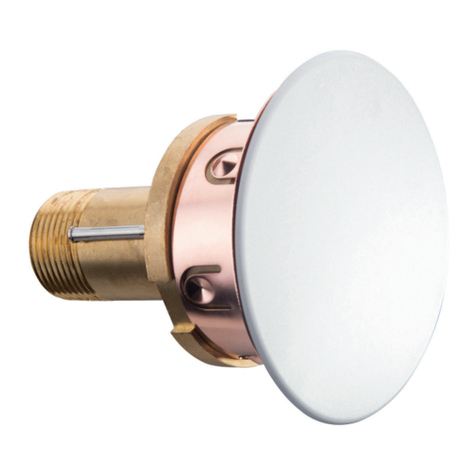
Cap and then push on the Escutcheon
until its ange just comes in contact
with the ceiling. Do not continue
to push the Escutcheon such that
it lifts a ceiling panel out of its
normal position. If the Escutcheon
cannot be engaged with the sprinkler,
or the Escutcheon cannot be engaged
sufciently to contact the ceiling,
relocate the sprinkler fitting as
necessary.
Care and
Maintenance
The TYCO RAPID RESPONSE Series
LFII Residential Flush Pendent
Sprinklers (TY2284) must be main-
tained and serviced in accordance with
this section.
Before closing a re protection system
main control valve for maintenance
work on the re protection system
that it controls, obtain permission to
shut down the affected re protection
systems from the proper authorities
and notify all personnel who may be
affected by this action.
Absence of the outer piece of an
escutcheon, which is used to cover
a clearance hole, can delay sprinkler
operation in a re situation.
The owner must assure that the sprin-
klers are not used for hanging any
objects and that the sprinklers are only
cleaned by means of gently dusting
with a feather duster; otherwise, non-
operation in the event of a re or inad-
vertent operation may result.
Sprinklers which are found to be
leaking or exhibiting visible signs of
corrosion must be replaced.
Automatic sprinklers must never be
painted, plated, coated, or otherwise
altered after leaving the factory.
Modied or overheated sprinklers must
be replaced.
Care must be exercised to avoid
damage to the sprinklers - before,
during, and after installation. Sprinklers
damaged by dropping, striking, wrench
twist/slippage, or the like, must be
replaced.
The owner is responsible for the
inspection, testing, and maintenance of
their re protection system and devices
in compliance with this document, as
well as with the applicable standards of
the National Fire Protection Association
(e.g., NFPA 25), in addition to the
standards of any authorities having
jurisdiction. Contact the installing
contractor or sprinkler manufacturer
regarding any questions.
Automatic sprinkler systems are
recommended to be inspected,
tested, and maintained by a qualied
Inspection Service in accordance with
local requirements and/or national
codes.
Ordering
Procedure
Contact your local distributor for
availability. When placing an order,
indicate the full product name and Part
Number (P/N).
Sprinkler Assembly
Specify: Series LFII (TY2284), K=4.2,
Residential Flush Pendent Sprinkler
without Escutcheon and having a
(specify) nish, P/N (specify).
Antique Brass..............P/N 51-123 -1-162
Signal White (RAL9003)......P/N 51-123-4-162
Jet Black (RAL9005) ........P/N 51-123-6-162
Chrome Plated .............P/N 51-123-9 -162
Escutcheon
Specify: Escutcheon for Series LFII
(TY2284), K=4.2, Residential Flush
Pendent Sprinkler with (specify) nish,
P/N (specify).
Antique Brass............. P/N 56-123-1- 0 01
Signal White (RAL9003).....P/N 56-123-4-001
Jet Black (RAL9005) .......P/N 56-123-6-001
Chrome..................P/N 56 -123-9-001
Accessories
Specify: Wrench and Socket for
Series LFII (TY2284) Residential Flush
Pendent Sprinkler, P/N 56-000-4-948.
Specify: Socket for Series LFII
(TY2284) Residential Flush Pendent
Sprinkler, P/N 56-000-4-947.
Specify: Protective Cap Removal
Tool for Series LFII Residential Flush
Pendent Sprinkler (TY2284), P/N
56-000-4-300.
TFP420
Page 5 of 6
