2.
Environments wherein dry sprinklers are employed can be
corrosive. For this reason, Model DH56 dry sprinklers have
a special wax llet placed in the gap between the cup that
supports the bulb and the wrenching boss. This wax will not
interfere with the operation of the sprinkler, and it prevents
contaminants from entering the internal portion of the drop
nipple. The wax must not be removed.
Application
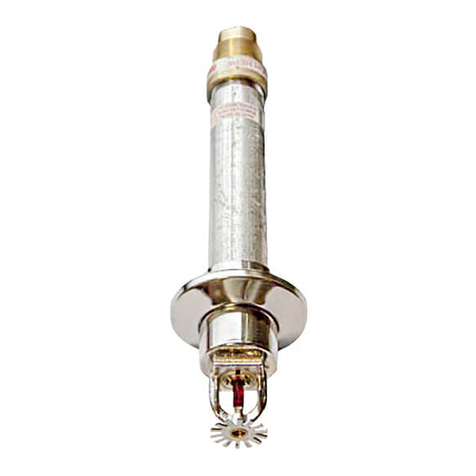
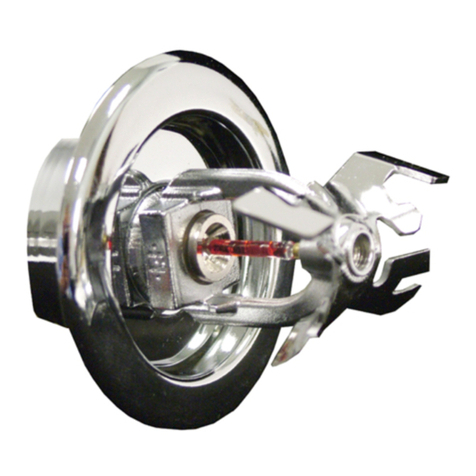
The Model DH56 is a horizontal sidewall dry sprinkler intend-
ed for installation in light hazard occupancies in accordance
with NFPA 13. These sprinklers are designed to provide re
protection in long and narrow spaces such as hallways, cor-
ridors, decks and rooms up to 28 feet (8,5m) wide and 10 feet
(3m) long. They are rated for 250 psi (17,2 bar) and can be
mounted between 4 and 12 inches (102 and 305mm) down
from the ceiling.
General Installation Instructions
Reliable Model DH56 dry sidewall sprinklers may be installed
in ductile or malleable cast iron threaded tees, or CPVC tees
and adapters upon verication that the sprinkler inlet tting
does not interfere with the interior of the tting (see Figure 9).
DO NOT install Reliable Model DH56 dry sidewall sprinklers
into elbows or couplings, welded outlets, mechanical tees, or
gasket sealed CPVC ttings.
Dry sprinklers connected to wet pipe systems must be in-
stalled as indicated in Figure 8 and as required by NFPA 13
with the Exposed Minimum Barrel Length located in a heated
area.
DH56 HSW
To install the DH56 HSW dry sprinkler cut a 21/8” diameter
hole in the wall as shown in Fig. 4. Use the Model F3R instal-
lation wrench (see Fig. 3) on the square boss to tighten the
sprinkler until it is secured in the sprinkler tting1. Apply a PTFE
based sealant to the sprinkler threads before installing in the
sprinkler. Installation is completed by removing the orange
glass bulb-protector and assembling the slip-on escutcheon to
the sprinkler’s can.
DH56 HSW/HB
To install the DH56 HSW/HB dry sprinkler cut a 2½” diam-
eter hole in the wall as shown in Fig. 5. Use the Model F3R
installation wrench (see Fig. 3) on the square boss to tighten
the sprinkler until it is secured in the sprinkler tting1. Apply a
PTFE based sealant to the sprinkler threads before installing in
the sprinkler. Installation is completed by removing the orange
glass bulb-protector and assembling the slip-on escutcheon to
the sprinkler’s can.
DH56 HSW Recessed with FP Escutcheon
To install the DH56 HSW dry sprinkler with the FP Escutch-
eon as a recessed sprinkler cut a 25/8” diameter hole in the wall
as shown in Fig. 6. Temporarily remove the plastic protective
cap, and then use the Model XLO2 wrench1(see Fig. 2) to
tighten the sprinkler until it is secured in the sprinkler tting.
Note: The Model XLO2 wrench has a notch in it to accom-
modate the deflector top. This wrench can only be inserted
one way. Care must be taken not to damage the deflector
during tightening. Apply a PTFE based sealant to the sprinkler
threads before installing in the sprinkler. It is recommended
that the sprinkler be protected during plastering and painting
operations by reinstalling the plastic protective cap. Installation
is completed by removing the protective cap and inserting the
push-on escutcheon. Turn clockwise to adjust the escutcheon
against the wall.
DH56 HSW Concealed with SWC Cover Plate
To install the DH56 HSW dry sprinkler with the SWC cover-
plate as a concealed sprinkler, cut a 21/8” diameter hole into the
wall as shown in Fig. 7. Temporarily remove the plastic protec-
tive cap, and then use the Model XLO2 wrench1(see Fig. 2)
to tighten the sprinkler until it is secured in the sprinkler tting.
Note: The Model XLO2 wrench has a notch in it to accommo-
date the deflector top. This wrench can only be inserted one
way. Care must be taken not to damage the deflector during
tightening. Apply a PTFE based sealant to the sprinkler threads
before installing in the sprinkler. It is recommended that the
sprinkler be protected during plastering and painting opera-
tions by reinstalling the plastic protective cap. Installation is
completed by removing the protective cap and inserting the
coverplate. Coverplate assemblies provide ½” (13mm) of ad-
justment. Final adjustment is made by turning the coverplate
clockwise until the skirt flange makes full contact with the wall
surface. Cover removal requires turning in the counter-clock-
wise direction.
Concealed coverplate assemblies are listed only for use with
specic sprinklers. The use of any other concealed wall sprin-
kler or the use of the SWC coverplate on any sprinkler with
which it is not specically listed will void all guarantees, warran-
ties, listings and approvals.
Note: DH56 and DH56 Recessed Sprinklers have orange
bulb protectors to minimize bulb damage during shipping, han-
dling, and installation. REMOVE THIS PROTECTION AT THE
TIME THE SPRINKLER SYSTEM IS PLACED IN SERVICE FOR
FIRE PROTECTION. Removal of the protectors before this time
may leave the bulb vulnerable to damage. RASCO wrenches
are designed to install sprinklers when covers are in place. RE-
MOVE PROTECTORS BY UNDOING THE CLASP BY HAND.
DO NOT USE TOOLS TO REMOVE THE PROTECTORS.
1Installation Wrenches:
Throughout this technical bulletin, Reliable has specied specic installation wrenches for use on each version of our sprinklers. A pipe wrench may also be used
to install a dry sprinkler provided that it only interfaces with the steel outer tube of the assembly (Item #8 on g 10). Keep in mind that a pipe wrench will incorporate
a large amount of torque into the nal assembly. This torque will have to be matched or exceeded upon the sprinkler’s removal at a later date.
